Configuration Setup
Let’s create three objects (College, Subject, and Hostel) in Salesforce with some fields before discussing the example scenarios.
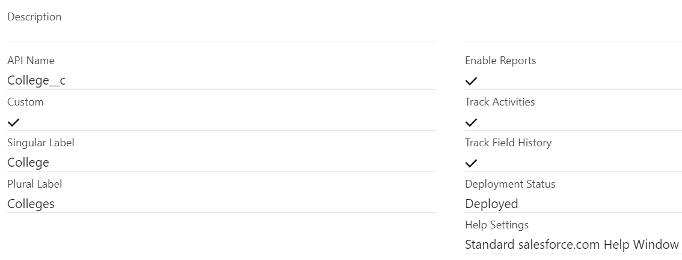
1. College
Crate an object named “College” in Salesforce (Go to Setup | Object Manager | Create | Custom Object).
Fields and Relationships:
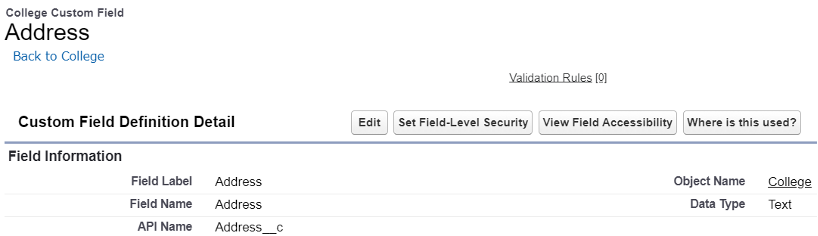
1. Address
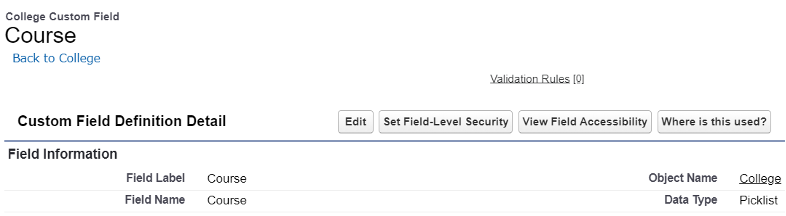
2. Course
The courses in this picklist are B.Tech, M.Tech, MBA, and MSc.
3. Speciality
This “Picklist” field is dependent on course. The picklist values are: Finance, Computer Sciences, Data Science, Electronics, Electrical, Civil, Mechanical, Chemical Engineering, Food Processing, and Information Technology.

View the field dependencies:

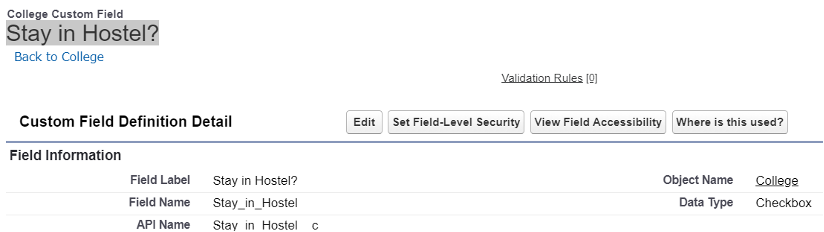
4. Stay in Hostel?
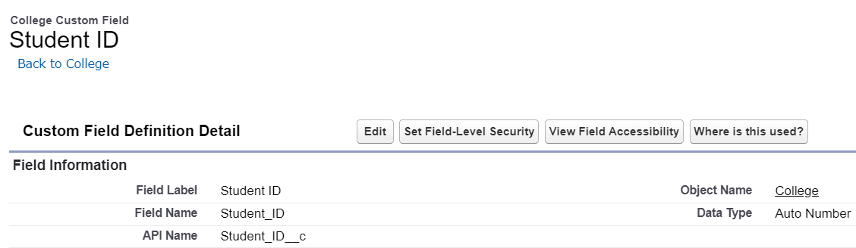
5. Student ID
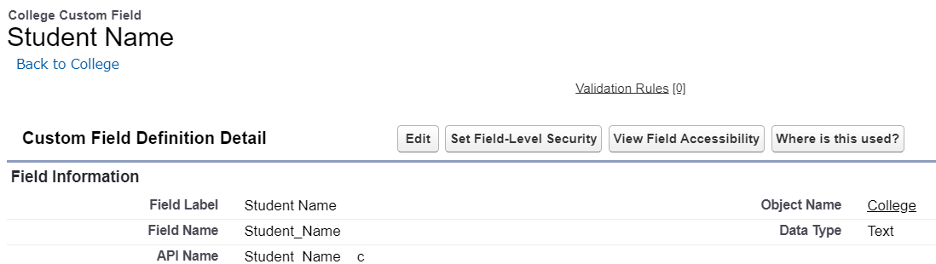
6. Student Name
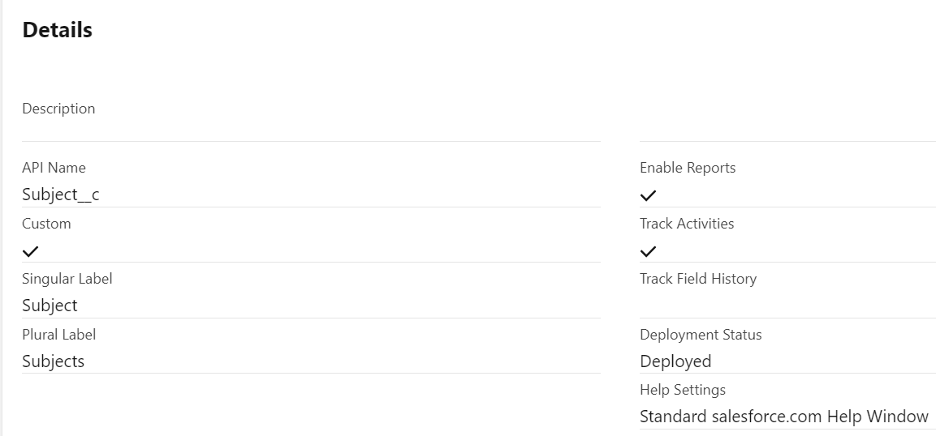
2. Subject
Fields and Relationships:
We can see here the Category (Picklist), College (Master-Detail relationship with College), and Subject Name (Text)
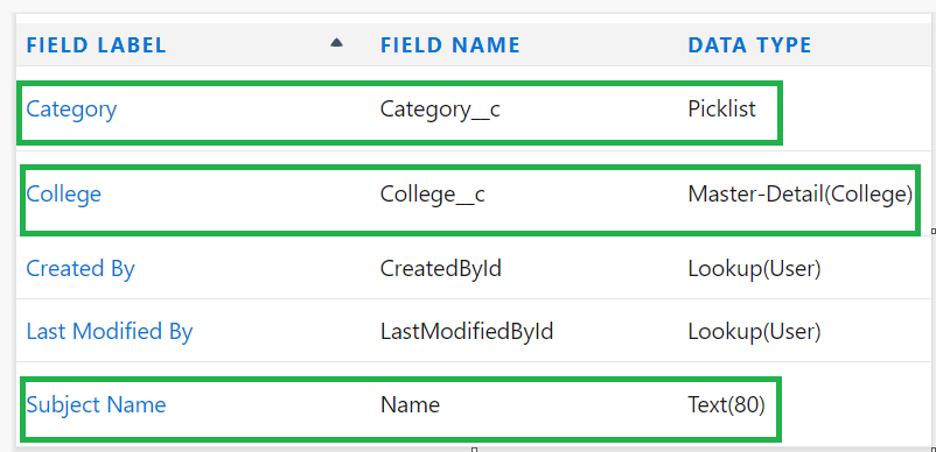
The category holds the Java, Python, PHP, Microwave engineering, Structural engineering, Robotics, Finance, and Machine Learning picklist values.
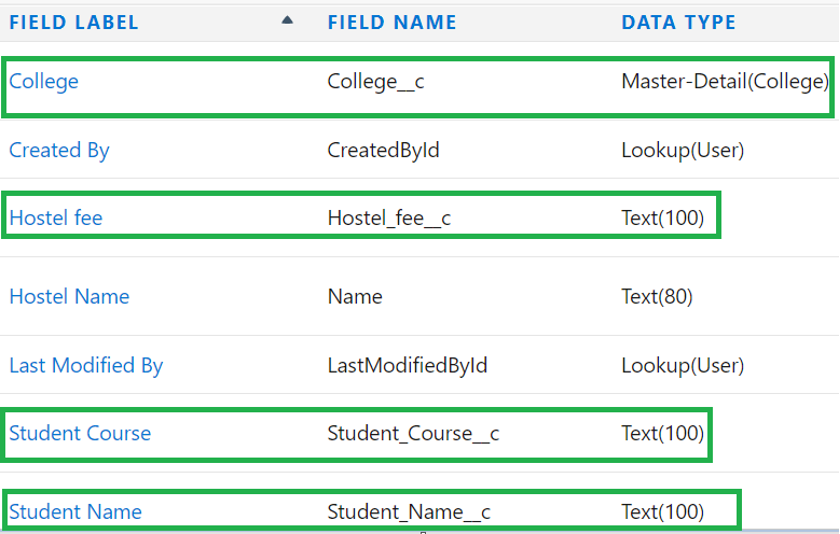
3. Hostel
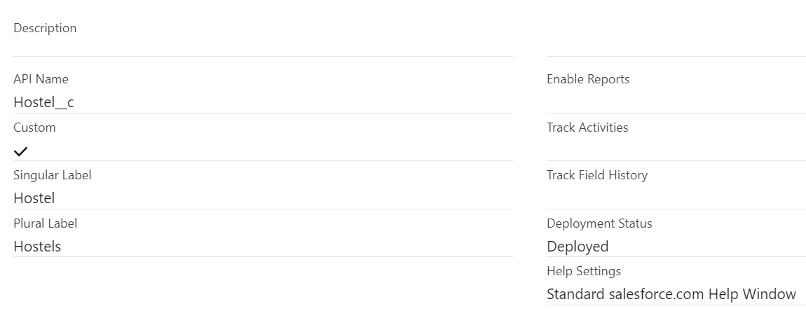
Fields and Relationships:
We can see here the College (Master-Detail relationship with College), Student Name (Text), Student Course (Text), and Hostel fee (Text).
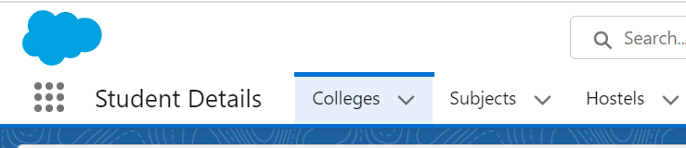
Let’s create an app named “Student Details” and add these three objects in it.
Steps:
- Go to “Quick Find” (from Setup) and search for the “App Manager”.
- Choose the “New Lightning App”.
- Enter the app name as “Student Details”.
- Select the “Standard Navigation” and choose “College, Subject, and Hostel” from the “Available Items” section and place them in the “Selected Items” section.
- Click “Save & Finish” by selecting “System Administrator” under the “Profiles” section.
Go to the App Launcher and search for “Student Details”. Now, the app holds three objects.
Example 1:
Write a trigger on the “College” object that updates the speciality based on the course. So, we create the “College_Trigger” trigger on the “College__c” object and create the “Course_Handler” Apex class with the “updateSpeciality” method which is used to handle the trigger. In this scenario, the trigger event is “Before Insert”.
- The speciality is updated to “Data Science” if the course is “B.Tech”.
- The speciality is updated to “Mechanical” if the course is “M.Tech”.
- The speciality is updated to “Food Processing” if the course is “MSc”.
- The speciality is updated to “Finance” if the course is “MBA”.
College_Trigger.apxt
if(Trigger.isUpdate){
if(Trigger.isBefore){
// Trigger handler class that will update the Speciality field
// based on the Course field, if the Speciality field is blank.
Course_Handler.updateSpeciality(Trigger.New);
}
}
}
Course_Handler.apxc
public static void updateSpeciality(List collegeList){
for(College__c college:collegeList){
if(college.Speciality__c == null && (college.Course__c == 'B.Tech')){
college.Speciality__c='Data Science';
}
else if(college.Speciality__c == null && (college.Course__c == 'M.Tech')){
college.Speciality__c='Mechanical';
}
else if(college.Speciality__c == null && (college.Course__c == 'MSc')){
college.Speciality__c='Food Processing';
}
else if(college.Speciality__c == null && (college.Course__c == 'MBA')){
college.Speciality__c='Finance';
}
}
}
}
Testing:
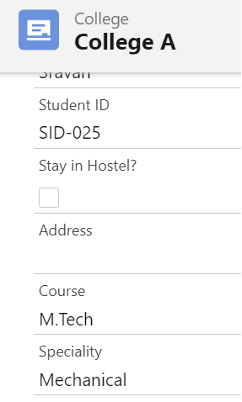
1. Consider the existing record in the “College” object that has the course as “MBA” and the speciality as “Finance”. Now, change the course to “MSc”. The speciality is “Food Processing”.
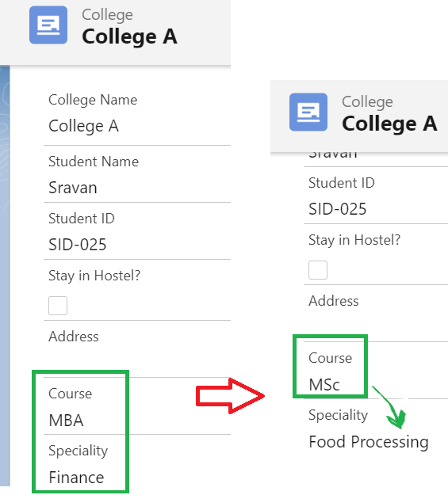
2. Let’s consider the previous record and change the course to “M.tech”. You will see that the speciality is updated to “Mechanical”.
Example 2:
If we update the “Stay in Hostel?” field to false that exists in the “College” object, the Hostel fee should be null for the related college. So, we need to write a trigger on the “College__c” object in the “after update” scenario. The “updateFee” method in the “Hostel_Handler” class handles the condition. Also, we need to query on the “Hostel__c” object that fetches the College ID from the “Trigger.New”. Lastly, we perform an update DML operation.
College_Trigger.apxt
if(Trigger.isUpdate){
if(Trigger.isAfter){
// Trigger handler class that will update Hostel Fee to null
// if Stay in Hostel? is unchecked in the College.
Hostel_Handler.updateFee(Trigger.New);
}
}
}
Hostel_handler.apxc
public static void updateFee(List collList){
// Query on Hostel object that will get the College ID from Trigger.New
List hostel_details = [select id, Hostel_fee__c from Hostel__c where College__c in : Trigger.New];
for(Hostel__c h:hostel_details){
h.Hostel_fee__c=null;
}
// Update
update hostel_details;
}
}
Testing:
We have this existing college record where “Stay in Hostel?” is true. The related “Hostel fee” is 5000.
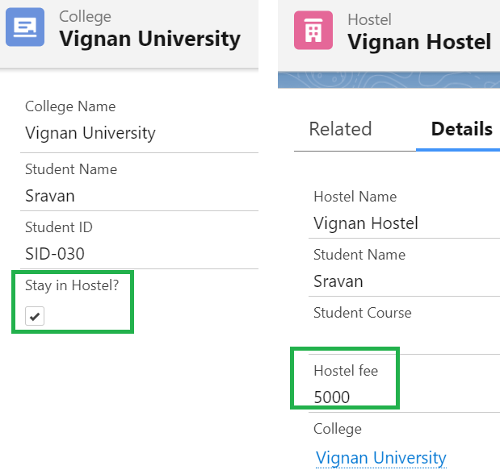
Let’s uncheck this field and you will see that the “Hostel fee” is empty.
Example 3:
Create the following field with the “Text Area” data type.

In some cases, you need to store the previous value before updating the existing value. So, we utilize the “oldMap” that gets the previous value. In this example, we write a trigger on the “Subject__c” object that updates the “Detail__c” field with the previous and current category value if the category is updated. This has to be done before the update. So, the context is “before update”.
Subject_Trigger.apxt
if(Trigger.isUpdate){
if(Trigger.isBefore){
// This Handler class will update the field - Detail__c
// with previous Category and Category
detailHandler.updateDetail(Trigger.New,Trigger.oldMap);
}
}
}
detailHandler.apxc
public static void updateDetail(List subList,Map oldMap){
for(Subject__c subj:subList){
if(subj.Category__c!=oldMap.get(subj.Id).Category__c){
subj.Detail__c='Previous Category: '+oldMap.get(subj.Id).Category__c+' - Existing Category: '+subj.Category__c;
}
}
}
}
Testing:
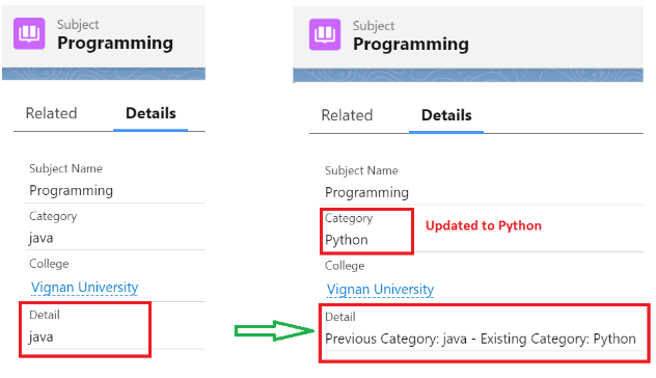
Consider the existing “Subject” record with category as “Java” with the detail. Let’s update the category to “Python” and see the detail. It is now updated from “Java” to “Previous Category: java – Existing Category: Python”.
Example 4:
Until now, we learned how to update the records. Now, we restrict the user to edit the records. The addError() is used to display the error on the page. Try to update the “Course_c” field to “B.Tech” in the “College_c” object.
College_Trigger.apxt
if(Trigger.isUpdate){
if(Trigger.isBefore){
HandlerClass.preventCollegeEdit(Trigger.new);
}
}
}
HandlerClass.apxc
public static void preventCollegeEdit(List collegeList){
for(College__c college:collegeList){
if(college.Course__c == 'B.Tech'){
college.addError('You cannot update this record to B.Tech');
}
}
}
}
Testing:
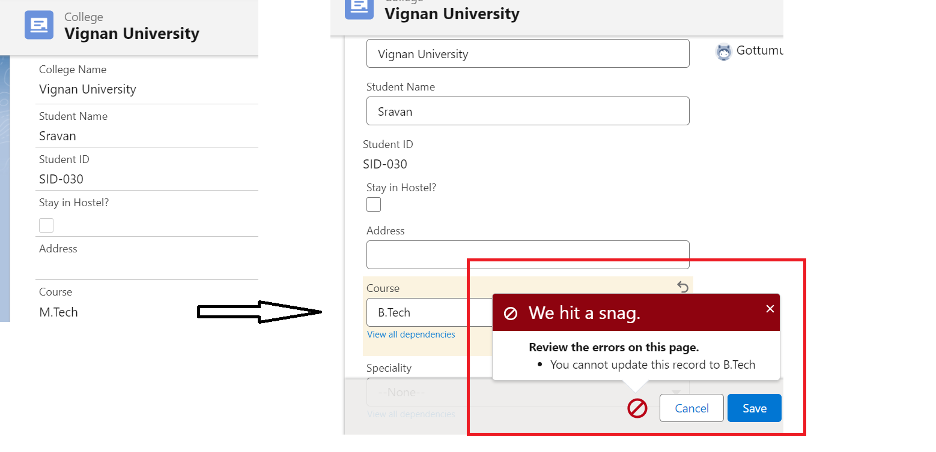
Consider the record with the “M.Tech” course. Now, try to update the “M.Tech” course to “B.Tech”. You will see an error.
Example 5:
Utilize the same example by removing the condition in the “HandlerClass” Apex and restrict the users from updating all the fields.
College_Trigger.apxt
if(Trigger.isUpdate){
if(Trigger.isBefore){
HandlerClass.preventCollegeEdit(Trigger.new);
}
}
}
HandlerClass.apxc
public static void preventCollegeEdit(List collegeList){
for(College__c college:collegeList){
college.addError('You cannot modify this record');
}
}
}
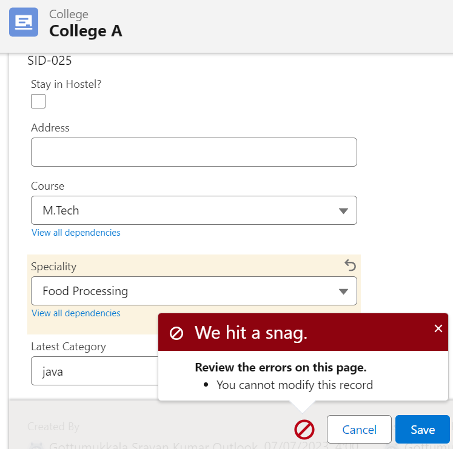
Testing:
You can see that we aren’t able to update any fields after creating this record.
Conclusion
We learned how to use the trigger in different update scenarios with examples and test cases. Each scenario is uniquely considered and tested by updating the existing records on the UI. It is good to separate the trigger criteria (in trigger) and trigger logic (in Apex class). Also, we discussed how to restrict the users to update specific fields in a record or the entire record.