Lightning Web Component (LWC) has its own LifeCycle to insert the component/s into the DOM, render it, and remove the component/s from the DOM. The connectedCallback() (in the Mounting Phase) is one of the LifeCycle methods which is fired when the component is inserted into the DOM. In this guide, we will discuss the connectioncallback() and the different scenarios that include this method with examples.
- The constructor() is the first method in the Lifecycle hook which is called when the “Component” instance is created. The component properties in this phase will not be ready. If you want to access the host element, we need to use “this.template”. As the child components in this phase won’t exist, we are unable to access the child components too. Super() is used in this method.
- The connectedcallback() is the second method (phase 2) which is called when an element is inserted into DOM. In this case, the hook flows from parent to child. The component properties in this phase will not be ready. If you want to access the host element, we need to use “this.template”. As the child components in this phase won’t exist, we are unable to access the child components too.
- render(): The ext phase is rendering. The parent component is rendered and then the child component will render if it exists. After rendering the parent, it goes to the child component (constructor, connectedcallback, render) and follows the same steps as the parent.
- renderedCallback(): When the rendering of the component is completed and you want to perform any operation after this, this method is called.
- disconnectedCallback(): In this stage, the element is removed from the DOM (opposite to the connectedcallback()).
- The errorCallback() is called when the error occurs in the LifeCycle.
Connectedcallback() Structure
Using the connectedcallback():
- Define a variable and set a property value.
- Call the Apex inside it.
- Create and dispatch the events.
- The UI API can be called.
- Navigation service inside it.
It has to be specified in the JavaScript file like the following:
// do…
}
All the examples utilize this “meta.xml” file. We will not specify this in each example. The LWC components can be added to your Record Page, App Page, and Home Page.
<LightningComponentBundle xmlns="http://soap.sforce.com/2006/04/metadata">
<apiVersion>57.0</apiVersion>
<isExposed>true</isExposed>
<targets>
<target>lightning__RecordPage</target>
<target>lightning__AppPage</target>
<target>lightning__HomePage</target>
</targets>
</LightningComponentBundle>
Example 1:
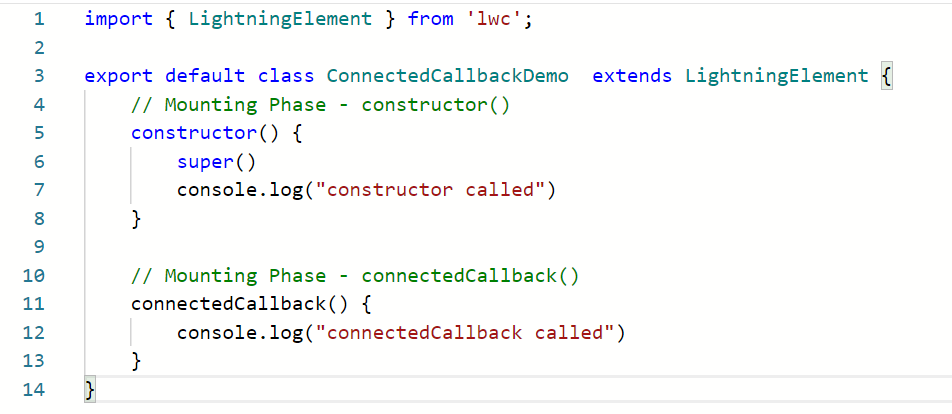
We will demonstrate the constructor() and the connectedcallback() phase when the component is loaded on the UI.
connectedCallBack.html
<lightning-card title="Connectedcallback">
</lightning-card>
</template>
connectedCallBack.js
constructor() {
super()
console.log("constructor called")
}
// Mounting Phase - connectedCallback()
connectedCallback() {
console.log("connectedCallback called")
}
It looks like the following:
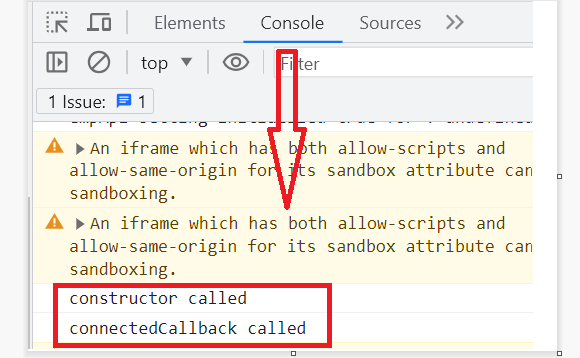
Output:
Add this component to the “Record” page of any object.

Inspect the page (click left and select “Inspect”). Then, go to the “Console” tab.
Example 2:
In this example, we will create a fruit with a track decorator and set the property value to “Mango” inside the connectedcallback() method. This is displayed on the UI.
firstExample.html
firstExample.js
export default class FirstExample extends LightningElement {
@track fruit;
connectedCallback(){
// Setting the property value to Mango
this.fruit = "Mango";
}
}
Output:
Add this component to the “Record” page of any object. Here we add it to the “Account Record” page. You will see that the fruit is “Mango”.

Example 3:
Utilize the previous code and modify some statements in the “js” and “html” file.
Create a new variable which is “number” with 500 in the “js” file. Set the fruit to “greater than 500” if the number is greater than 500. Otherwise, set the fruit as “equal to 500”.
firstExample.html
firstExample.js
connectedCallback(){
let number = 500;
if (number > 500) {
this.fruit = "greater than 500";
}
else{
this.fruit = "equal to 500";
}
}
Output:
The number is 500. So, the fruit holds the result as “equal to 500”.

Example 4:
In this scenario, we return the account records (Account object) using the connectedcallback() method.
- First, we write an Apex class that returns the list of the first 10 accounts with the Id, Name, Industry, and Rating fields
- Next, we track the accounts and return them in the connectedcallback() method by calling the method from the Apex class.
- In the HTML file, we use it for each directive that iterates the accounts and returns the Name and Industry.
AccountData.apxc
@AuraEnabled(cacheable=true)
public static List<Account> returnAcc(){
List<Account> accountList = [SELECT Id, Name,Industry,Rating FROM Account limit 10];
return accountList;
}
}
secondExample.html
<lightning-card title="Display list of Accounts">
<div class="slds-var-m-around_medium">
<template if:true={accounts}>
<template for:each={accounts} for:item="account_rec">
<p key={account_rec.Id}><b>Account:</b> {account_rec.Name} <b>Industry:</b> {account_rec.Industry}</p>
</template>
</template>
</div>
</lightning-card>
</template>
secondExample.js
import returnAcc from '@salesforce/apex/AccountData.returnAcc';
Write this code within the “js” class:
@track accounts;
@track error;
connectedCallback(){
returnAcc()
// Return the accounts
.then(result => {
this.accounts = result;
this.error = undefined;
})
.catch(error => {
this.error = error;
this.accounts = undefined;
});
}
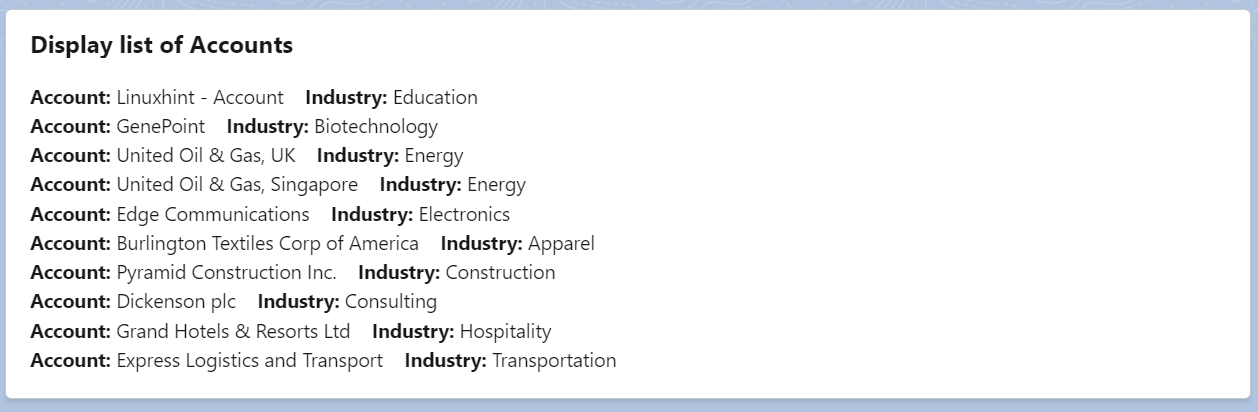
Output:
The first 10 account records are returned with the Account Name and Industry.
Conclusion
Now, you can use the connectedcallback() method in most cases while working with Apex data in LWC. In this guide, we discussed how to set the property value using connectedcallback() and included Apex in it. For better understanding, we first provided an example that showed the constructor() and connectedcallback() methods. You need to inspect your webpage and view it in the console.