QuerySelector()
Basically, querySelector() is used with “this.template” that fetches the elements that are present in a particular template. If there are multiple elements, it will consider only the first element. Null is returned if the specified element does not exist in the template. It takes the selector as a parameter. This can be the classname tag. The ID won’t be supported. In some cases, you are having the same classes but different values. In this scenario, we need to use the data-recid that gets the elements based on the value.
Syntax:
Let’s see how to specify the selector inside the querySelector().
- this.template.querySelector(selector)
- this.template.querySelector(‘[data-recid=”value”]’)
For example: if the selector is h1 tag, you should specify it as “h1”.
1. All the examples utilize this “meta.xml” file. We will not specify this in each example. The LWC components can be added to your Record Page, App Page, or Home Page.
<LightningComponentBundle xmlns="http://soap.sforce.com/2006/04/metadata">
<apiVersion>57.0</apiVersion>
<isExposed>true</isExposed>
<targets>
<target>lightning__RecordPage</target>
<target>lightning__AppPage</target>
<target>lightning__HomePage</target>
</targets>
</LightningComponentBundle>
2. In all the examples that we are going to discuss in this guide, Logic is provided as the “js” code. After that, we specify the screenshot that includes the entire “js” code.
Example 1:
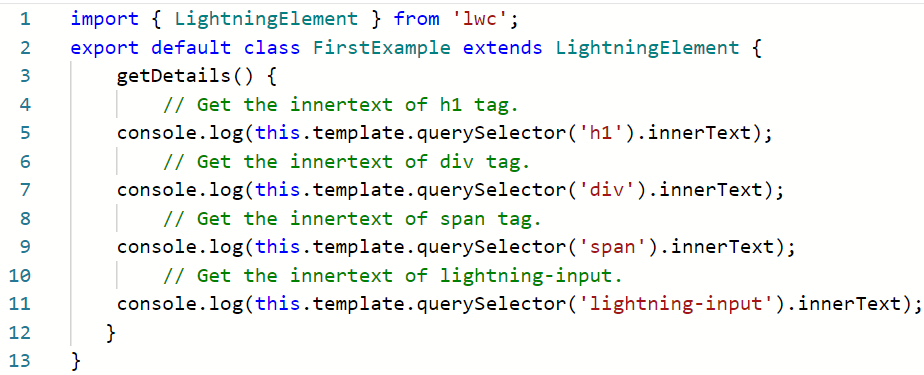
First, we create the h1, div, span, and lightning-button tags with some text in the HTML file. Also, we create a button that gets the previous elements when it is clicked. In the “js” file, we return the innerText of all these four elements through this.template.querySelector().
firstExample.html
<lightning-card variant="Narrow" title="Hello" icon-name="standard:account">
<h1>Hello LinuxHint. I am in h1</h1>
<div>Hello LinuxHint. I am in div</div>
<span>Hello LinuxHint. I am in span</span>
<lightning-input type="text" variant="standard" name="name" label="text input">
Hello LinuxHint. I am in lightning-input</lightning-input>
<lightning-button variant="base" label="Get Details" onclick={getDetails}></lightning-button>
</lightning-card>
</template>
firstExample.js
// Get the innertext of h1 tag.
console.log(this.template.querySelector('h1').innerText);
// Get the innertext of the div tag.
console.log(this.template.querySelector('div').innerText);
// Get the innertext of the span tag.
console.log(this.template.querySelector('span').innerText);
// Get the innertext of lightning-input.
console.log(this.template.querySelector('lightning-input').innerText);
}
Entire Code:
Output:
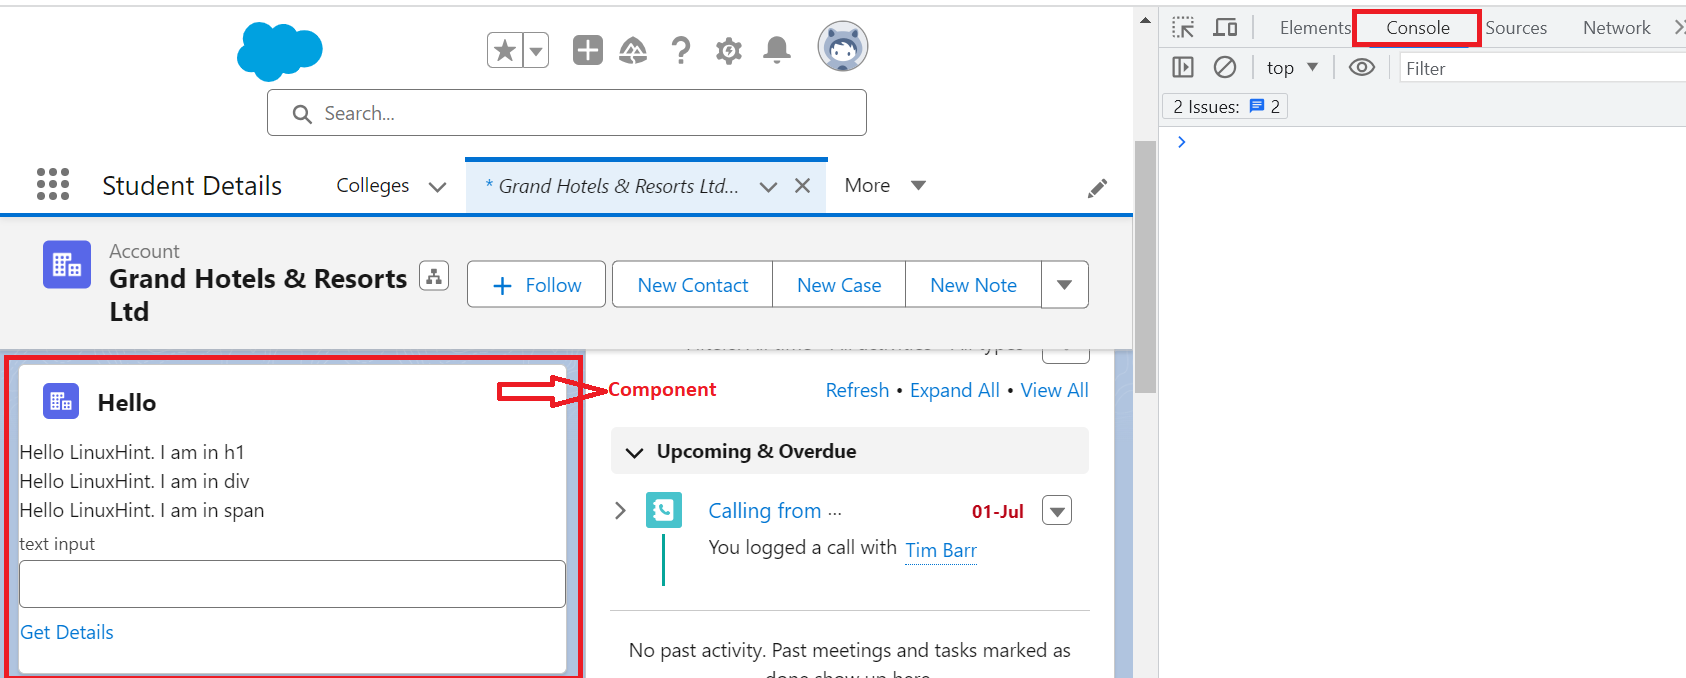
Add this component to the “Record” page of any object (we added it to the account Record page). Inspect this window and go to the “Console” tab.
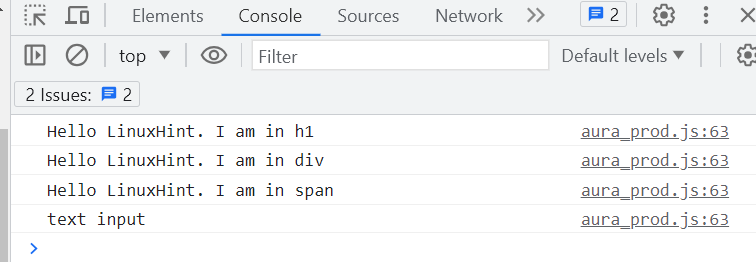
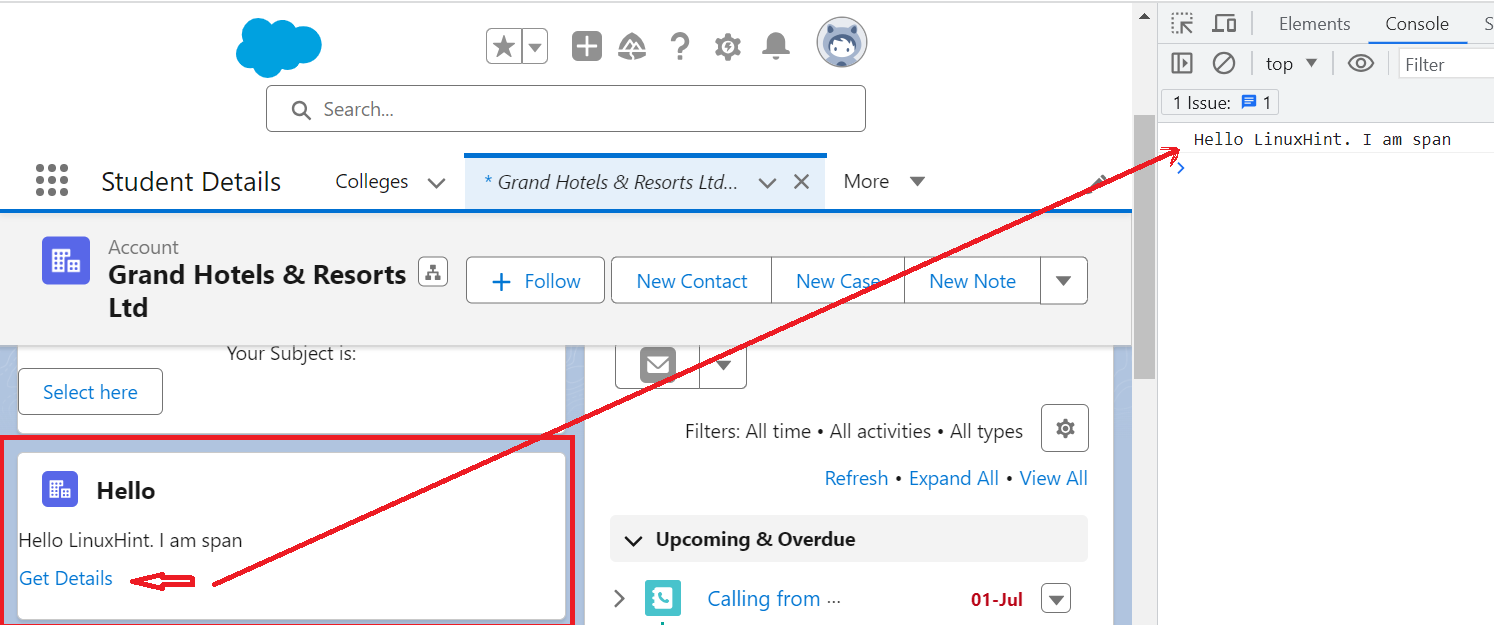
Now, click the “Get Details” button. After that, you will see that the innerText is displayed on the console for all the elements.
Example 2:
Utilize the component that is discussed in Example 1. Specify the two elements with the “h1” tag in the HTML component and use the querySelector() in the “js” file to get the innerText of “h1”.
firstExample.html
firstExample.js
// Get the innertext of h1 tag.
console.log(this.template.querySelector('h1').innerText);
}
Entire Code:
Output:
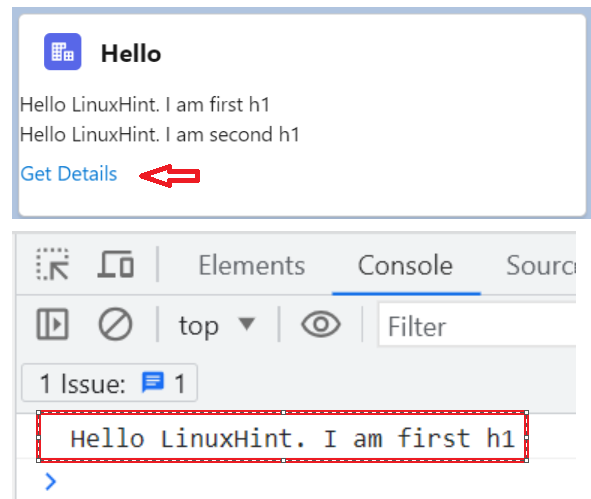
There are two elements with the same tag. So, the querySelector() selects only the first element. When you click the “Get Details” button, you will see the first “h1” and the innertext is returned in the console.
Example 3:
We can also store the querySelector() in a variable and use this variable to get the innerText. Let’s create a span tag with some text and return the innerText on the console by storing this in a variable.
firstExample.html
firstExample.js
// Get the innertext of the span tag.
let ele=this.template.querySelector('span').innerText
console.log(ele);
}
Entire Code:
Output:
Example 4:
In this example, we create a button and input text (lightning-input) that will take the subject as string. We pass the “lightning-input” as the selector to the querySelector() method. It is assigned to the “computer_related’ variable. In the on click of this button, the value that is present in this variable is displayed.
secondExample.html
<lightning-card title="Subject">
<center>
<lightning-input label="Enter Subject" value={computer_related}></lightning-input>
<p> Your Subject is: <b>{computer_related}</b> </p>
</center>
<lightning-button label="Select here" onclick={handleSubject}></lightning-button>
</lightning-card>
</template>
secondExample.js
handleSubject(event){
this.computer_related=this.template.querySelector("lightning-input").value;
}
Entire Code:
Output:
Example 5:
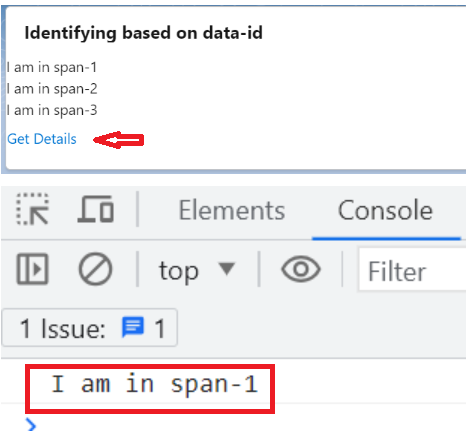
Here, we utilize the data-recid. Let’s create a button with three span tags with recid as “Span1”, “Span2”, and “Span3” in the HTML file. Select the first span by passing “Span1” to the data-recid in the querySelector().
thirdExample.html
<lightning-card title="Identifying based on data-id">
<span data-recid="Span1">I am in span-1</span><br>
<span data-recid="Span2">I am in span-2</span><br>
<span data-recid="Span3">I am in span-3</span><br>
<lightning-button variant="base" label="Get Details" onclick={getDetails}></lightning-button>
</lightning-card>
</template>
thirdExample.js
// Get the innerText of Span1
console.log(this.template.querySelector('[data-recid="Span1"]').innerText);
}
Entire Code:
Output:
Conclusion
We learned how to utilize the querySelector() to access the DOM elements. The querySelector() used “this.template” to select the elements in the current template. It can be possible to store this in a variable or use it directly. Both these are mentioned with examples. Also, we provided an example that includes multiple elements. In this case, the querySelector() returns the first element.


