This article focuses on comprehending the concept of WebSockets in Node.js to establish a gateway for real-time two-way communication.
WebSockets
Websockets are a type of communication channel that creates two-way channels for information over a single and long-lasting communication. It is not like the usual two-way communication on the internet, it allows both the user and server to send messages whenever they want. The technique used is WebSocket handshake, a process that establishes a smooth connection between the server and the user, which enables them to share information back and forth without any trouble.
Let’s look at some of the perks of WebSockets before we dive into establishing one of our own.
Advantages of WebSockets
The WebSockets offers multiple advantages over traditional HTTP:
Faster Speed
When the user has set up the WebSocket the connection remains open all the time and there is no need for starting or stopping the connection, which makes things faster without any delay.
Efficient Resource Usage
WebSockets use the resources of computers efficiently. As there is no time wasted in starting or stopping the connection for each request, the computer works more optimally.
Instant Updates
If the user is making an application that needs to immediately transfer information in real-time like chatting, sports scores, etc. WebSockets ensure that the information travels fast.
Now that we have a better understanding of what we are trying to establish, let us build a WebSocket of our own in Node.js.
How to Establish and Use a WebSocket in Node.js?
Follow the steps below to set up a WebSocket successfully on your device:
Step 1: Set Up the Development Environment
Before establishing a WebSocket there are some prerequisite packages and modules that are to be installed.
Install the below packages on your device:
npm install ws
The functioning of these command lines is as follows:
- “npm init -y” initializes a new Node.js project. The “-y” command means yes which can be dictated as true in computer language. It also ensures that it will use all the packages and modules in the json file. The package.json file contains all information about the Node.js project like dependencies, modules, and other settings.
- After the project has been initialized user can run the second command to install the “ws” package. It provides a base API that creates a Websocket for servers and clients.
These two commands set up a development environment to establish WebSocket and communicate information in real time.
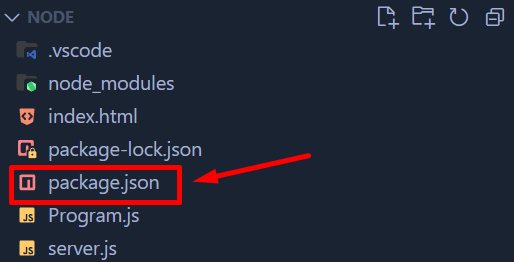
package.json file in Node.js
A pakackge.json file has all the supporting functionalities for the Node.js project.
The contents of the package.json file will be like this:
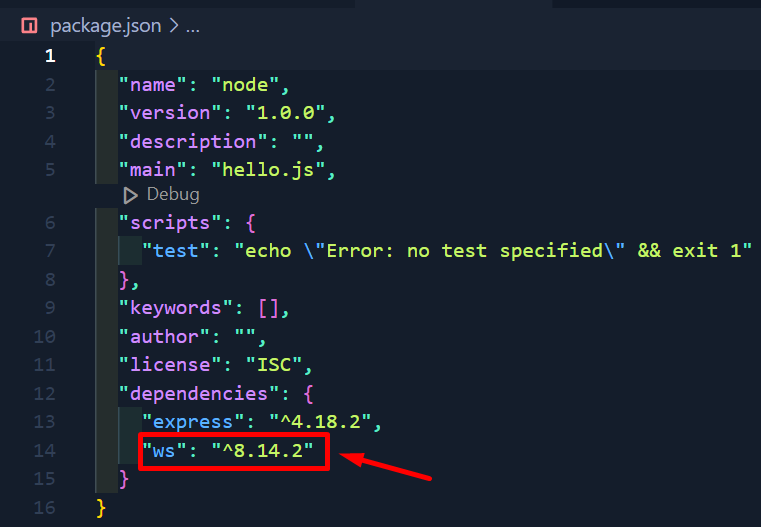
The red color box in the above picture shows the version of your ws(WebSocket) library installed.
After setting up the development environment, proceed to create a WebSocket.
Step 2: Creating WebSocket Server
To create a WebSocket server create a file in your code editor with .js extension and any desirable name.
Below is the code for the server file:
const http = require('http');
const server = http.createServer();
const wss = new WebSocket.Server({ server });
wss.on('connection', (ws) => {
console.log('Client connected');
ws.on('message', (message) => {
console.log(`Received: ${message}`);
wss.clients.forEach((client) => {
if (client !== ws && client.readyState === WebSocket.OPEN) {
client.send(message);
}
});
});
ws.on('close', () => {
console.log('Client disconnected');
});
});
server.listen(3000, () => {
console.log('Server listening on http://localhost:3000');
});
The functions performed by the above code are:
- “const WebSocket = require(‘ws’)” and “const http = require(‘http’)” imports the required built-in modules for handling HTTP requests.
- “const server = http.createServer()” creates a basic server in Node.js.
- “const wss = new WebSocket.Server({ server })” creates a WebSocket on the HTTP server created. To listen to the WebSocket incoming messages, it sets up a web socket server.
- “on(‘connection’, (ws) => { … })” is executed when a client establishes a WebSocket connection. An instance “ws” is created which represents the connection.
- “on(‘message’, (message) => { … })” This code is executed when a message(from the connected client) is received to the server. It logs the received message and then broadcasts it to all connected clients.
- “clients.forEach((client) => { … })” loops over all the connected clients and sends a message to each client if the WebSocket connection is open.
- The “on(‘close’, () => { … })” code is executed when the client has disconnected from the WebSocket connection and sends a message to the server indicating that the client has disconnected.
- “listen(3000, () => { … })” starts the HTTP server to listen on port 3000. Once the server is running it indicates a message that the server is now listening on “http://localhost:3000/”. Users can have some other port that is listening to the connections.
Now that our WebSocket has been created, let’s test it from the client’s end.
Step 3: Create a Client to test the Created WebSocket
Now create a basic HTML file that runs on the webpage to test the WebSocket. Create an index.html file and use the code below:
<html lang="en">
<head>
<meta charset="UTF-8">
<meta name="viewport" content="width=device-width, initial-scale=1.0">
<title>WebSocket Chat</title>
</head>
<body>
<input type="text" id="messageInput" placeholder="Type a message...">
<button onclick="sendMessage()">Send</button>
<ul id="chatMessages"></ul>
<script>
const ws = new WebSocket('ws://localhost:3000');
ws.addEventListener('open', (event) => {
console.log('Connected to the server');
});
ws.addEventListener('message', (event) => {
const chatMessages = document.getElementById('chatMessages');
const messageItem = document.createElement('li');
messageItem.textContent = event.data;
chatMessages.appendChild(messageItem);
});
function sendMessage() {
const messageInput = document.getElementById('messageInput');
const message = messageInput.value;
if (message) {
ws.send(message);
messageInput.value = '';
}
}
</script>
</body>
</html>
The functioning of the above code is as follows:
- The basic code format for HTML is written.
- “<input type=”text” id=”messageInput” placeholder=”Type a message…”>” creates an input box on the HTML webpage with the placeholder indicating a message for the user to type a message.
- “<button onclick=”sendMessage()”>Send</button>” sends the typed message from the user to the server.
- “<ul id=”chatMessages”></ul>” creates a list to show the messages to the server.
- “<script> const ws = new WebSocket(‘ws://localhost:3000’)” establishes a Websocket connection at “ws://localhost:3000”. The connection is started when the code is executed.
- Listening Messges from Websocket:
console.log('Connected to the server');
});
ws.addEventListener('message', (event) => {
const chatMessages = document.getElementById('chatMessages');
const messageItem = document.createElement('li');
messageItem.textContent = event.data;
chatMessages.appendChild(messageItem);
});
These event listeners respond to the WebSocket connection being opened (‘open’ event) and receive a message from the server (‘message’ event). When connected, it logs a message, and when a message is received, it creates a new list item (li) and appends it to the list of chat messages.
Sending messages:
const messageInput = document.getElementById('messageInput');
const message = messageInput.value;
if (message) {
ws.send(message);
messageInput.value = '';
}
}
The “sendmessage()” function is triggered when the user clicks on the send button after typing the message. The message is sent via the WebSocket connection and the input box is cleared after the message has been sent.
Step 4: Run the server.js file
The user can run the server.js file using the following command in the terminal:
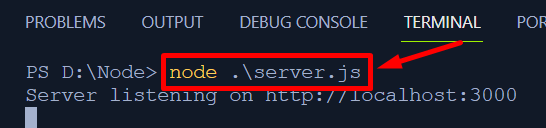
After pressing enter the “http://localhost:host:3000” indicates that the server is listening on this port
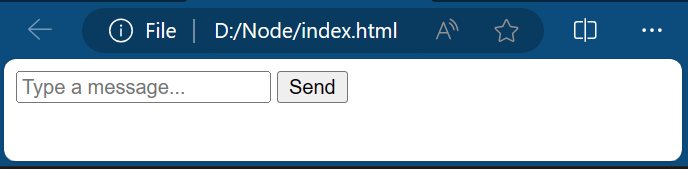
Step 5: Open the index.html file
Users can open the index.html file using the live server which will open us as:
Step 6: Test by Sending some messages
Users can send some messages by typing the message in the box and clicking on the send button as:
Step 7: Verify the message in the terminal
After sending the message verification can be done by the output received in the terminal:
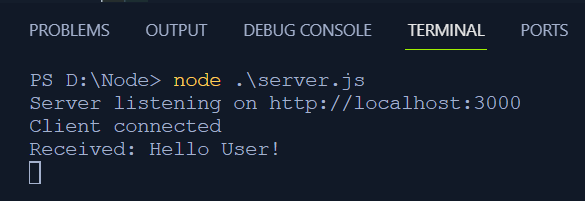
“Client connected” indicates that a client has established a connection with the created Websocket.
Additional Websocket Concepts
Rooms and namespaces
Rooms and namespaces are like private chat groups. Observing the dynamics of the world people prefer to meet in chatrooms over the internet joining with desired namespaces where they want to talk. This helps organize conversations. For example, you might have different chatrooms with different namespaces like “Work” for office purposes and “Friends” for a bunch of friends to interact with.
Scaling WebSocket Applications
WebSockets are extensively used due to their ability to handle a lot of people and respond efficiently to their requests. Scaling WebSockets applications involves using optimal strategies to manage multiple users, dividing the work among multiple servers so that servers do not overload, and handling real-time messaging effectively so that there is no delay.
Security Considerations
The security considerations are to be fulfilled to effectively manage people in the chat and nobody is violating the security protocols or community guidelines. In the case of WebSockets, it means validating only the information which is safe and only selective people can join a conversation.
That’s all about the WebSockets functioning and how to set it up in Node.js.
Conclusion
This write-up has effectively explained the functionalities associated with the WebSockets in Node.js like setting up a WebSocket server, the advantages of using it, and additional concepts for it. The choice to opt for WebSockets instead of conventional HTTP server. It has also explained the significance of real-time communication using the WebSocket handshake strategy.