Before jumping to the concept of promise directly let us first understand what are callbacks and how they work in Node.js.
Callbacks in Node.js
Callback functions are utilized in handling asynchronous events in JavaScript. It is preferred to use callbacks whenever an asynchronous event has to take place. To have an understanding of the callback functions let’s look at a simple demonstration to calculate the area and perimeter of the square by adding callback functionality in the code script:
if (sideLength <= 0) {
setTimeout(() =>
callback(new Error("Side length should be greater than zero: sideLength = " + sideLength), null), 2000);
} else {
setTimeout(() =>
callback(null, {
perimeter: () => (4 * sideLength),
area: () => (sideLength * sideLength)
}), 2000);
}
};
In this code:
- “module.exports = (sideLength, callback)” takes two parameters, one is the sideLength for the square and the second is the callback function to handle the rest of the functionalities.
- The side length is checked and if it is less than zero the callback function is executed with an error with a delay of two seconds using the “setTimeout()” method.
- If the sideLength is greater than zero then it simply calculates the perimeter and area of the square with a delay of two seconds.
Now that a simple code script is written to test the callback function, create another file in the same directory and use the below code to implement the above functionality:
squareModule(5, (error, result) => {
if (error) {
console.error(error.message);
} else {
console.log('Perimeter:', result.perimeter());
console.log('Area:', result.area());
}
});
In this code:
- “const squareModule = require(‘./callback’)” fetches the functionality from the above code script which is stored in the “callback” file.
- “squareModule(5, (error, result) => {“ imported module is given two parameter ‘5’ representing the sideLength of square and “(error, result) => {…}” which is the callback function will be executed at the end.
- The if-else block is used to check for errors if an error occurs it prints an error message using “error.message” otherwise it prints the perimeter and area stored in the result.
Execute the code script using the following command in the terminal:
Replace the filename with an appropriate file in your directory.
Output
The output of the code would appear as:

What are promises in Node.js?
In Node.js, an improvised version of callbacks to handle all the asynchronous operations is called a promise. It shows the result of the code script execution which would be either completed or declined. The promise is resolved when it is fulfilled otherwise it is rejected. The functionality that differentiates it from typical callbacks is that promises can be chained.
Before starting to learn about promises make sure that your development environment is suitable.
Prerequisites
To understand, make sure the following things are present in your development environment:
- Node.js and npm modules are installed.
- Beginner-level understanding of JavaScript.
- The desired IDE is installed and set up.
The functionality of promises in Node.js
The promises state in javascript can be:
- Pending
- Resolved
- Rejected
The pending state refers to the starting stage when the callback function is invoked. While it is under process the calling function runs numerous times until the completion of the promise and returning the desired result to the calling function.
After the completion of the promise, there can be two possible states it can either be resolved or rejected.
If the resolved state is the result then it means the promise was successful and the returned data is passed to the “.then()” function.
The last case is if the state is rejected, it shows that the promise has been denied and the error is passed to the “.catch()” block.
Let’s discuss the possible methods to implement the promises in Node.js.
How to Create a Custom Promise in Node.js?
Typically, you create a promise by calling a promise generator that takes a single callback function as input. Once the promise is created, the callback function, also called the executor function, starts working. References to the resolve and delete functions are callbacks that are part of the executor function. The arguments accepted by the require() and throw() functions include strings, integers, logical values, objects, and arrays.
Let’s implement the functioning to create a custom promise in Node.js by adding the code below in the script.js file:
const customizedPromise = new Promise((resolve, reject) => {
const addition = num1 + num2;
if(addition <= 5){
resolve("Success")
} else {
reject(new Error('Failed'))
}
})
return customizedPromise
}
EvaluateSum(2, 3)
.then((message) => {
console.log('Success:', message);
})
.catch((error) => {
console.error('Error:', error.message);
});
In the above code:
- “function EvaluateSum(num1, num2) {” takes two parameters “num1” and “num2” to evaluate sum.
- “const customizedPromise = new Promise((resolve, reject) =>” creates a promise using the Promise constructor in which there is an executor or callback function that takes two parameters “resolve” and “reject” that are outcomes of some operation.
- “const addition = num1 + num2” the addition of two numbers is done and stored.
- If the value in the addition variable is greater than 5 then the resolve function is called with the “Success” message otherwise, the reject function is called with a new Error and message “Failed”.
- The promise is returned using “return customizedPromise”
- The EvaluateSum function is tested and it handles the outcome of the promise.
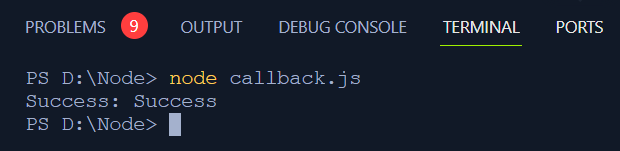
Output
When the above code script is executed the following output can be seen in the terminal:
Now that we have learned about the basic promise function, let’s develop a stronger understanding by chaining the promises.
How to chain Promises in Node.js?
A sequence of asynchronous tasks can be sequentially executed using promises. One way to save yourself from having to write complex nested functions(which can lead to a callback hell) is to chain multiple the() Promise outcomes.
To understand refactor the above code as:
function EvaluateSum(num1, num2) {
const customizedPromise = new Promise((resolve, reject) => {
const addition = num1 + num2;
if(addition < 7){
resolve(addition)
} else {
reject(new Error('Error! The number is less than 7'))
}
})
return customizedPromise
}
EvaluateSum(4, 0)
.then(data => {
console.log("Value Before Modification: " + data)
value = data + 1
return value
})
.then(newData => {
console.log("Value After Modification: " + newData)
})
.catch(err => {
console.log(err)
})
In this code:
- The EvaluateSum function is used with arguments 4 and 0. The resolved Promise is then handled by chaining the .then() methods:
- The “Value Before Modification” is logged by the first .then(), which also increases the value by 1. After that, the modified value is returned.
- The modified value is recorded in the “Value After Modification” log by the second .then(). The error message is logged by the .catch() method if there is a problem (assuming the sum is greater than or equal to 7).
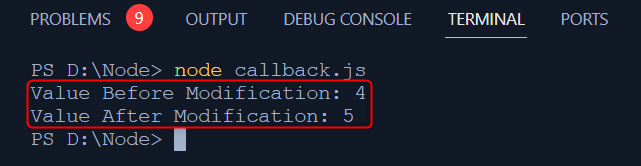
Output
Now run the command below to execute your file:
Running this command would give the following output in the terminal:
Now let’s have a look at how to use the promisify() function in Node.js.
How to use the promisify() function in Node.js?
A transformation is also called promisification. It involves changing a function that accepts callbacks into one that returns promises. Maintaining consistency and code reliability while working with callback-based APIs is made easier with promisification.
To create flexible promise functions in Javascript, there is a built-in utility in Node.js util.promisify(). The callback function is contained in a single parameter that is required by util.promisify().
Now let us look at how can we use this in our code script in Node.js. First, create two files promisifyTesting.js and PromiseText.txt. Add some suitable text in the text file and save it.
Add the following text in the text file:
“A transformation is referred to as promisification. It involves changing a function that accepts callbacks into one that returns promises. Maintaining code consistency while working with callback-based APIs is made easier with promisification.”
The code script for the promisifyTesting.js is:
const util = require('util');
const readFile = util.promisify(fs.readFile);
readFile('./PromiseText.txt', 'utf8')
.then((text) => {
console.log(text);
})
.catch((err) => {
console.log('Error', err);
});
The operations performed by the above code are:
- “const fs = require(‘fs’)” imports the fs module.
- “const util = require(‘util’)” imports the util module.
- “const readFile = util.promisify(fs.readFile)” is an asynchronous function and use callbacks. The “util.promisify” method is used to convert it into a promise-based function.
- “readFile(‘./PromiseText.txt’, ‘utf8’)” reads the content of the file using the “utf8” encoding which is used for reading text files.
- Further, the processes are handled efficiently.
Output
Run the following command in the terminal with the desired filename and a .js extension:
After running this command the content of the text file will be read and show up in the terminal:

How to handle Ajax requests using Promises?
An Ajax request can be used to send a request from the client side. Ajax is a specific type of asynchronous function that is used to handle the tasks on websites without making them stop or reload.
It can be understood more simply that when you make a request on the server the browser doesn’t show the information received from the server but it continues to make requests on the server. As soon as the information is ready from the server side it sends the information to the browser which shows the asked information. In this way, the website functions smoothly and doesn’t halt at any point. Ajax can also be used with a regular callback method if needed.
let url = "https://api.github.com/users/kodecheff";
function makeAJAXCall(methodType, url, callback) {
const options = {
method: methodType,
headers: {
'User-Agent': 'Mozilla/5.0',
},
};
const req = https.request(url, options, (res) => {
let data = '';
res.on('data', (chunk) => {
data += chunk;
});
res.on('end', () => {
callback(data);
});
});
req.on('error', (error) => {
console.error('Error:', error);
});
req.end();
console.log("Request sent to the server");
}
function logUser(data) {
console.log(data);
}
makeAJAXCall("GET", url, logUser);
The operations of the above code are:
- “const https = require(‘https’)” imports the https built-in module in Node.js.
- The “https://api.github.com/users/kodecheff” GitHub API endpoint is used for fetching information about the user “kodecheff” and stores the link in the url variable.
- The function “makeAJAXCall” is made with three parameters methodtype, url, and callback, and creates a request on the link using the https protocol.
- The “logUser” function is a callback function and displays the data received.
- Finally, an AJAX call is made using “makeAJAXCall(“GET”, url, logUser)” using the GET methodtype.
Output
Run the above file with the desired filename in the terminal which in our case is ajaxRequest.js:
It will take 3-4 seconds to generate the request and process the information which would show up as:

Promises are an effective way to manage tasks that take place at different times. They keep a record trace of each task and also store the result. Promises are easier to use when doing multiple tasks one after the other without going into complications.
On the other hand, AJAX handles tasks by nested statements, complicating the code flow. The primary advantage of promises is that users can put some other promise in which means finishing a task and proceeding to the next. The last thing to note is AJAX can run with multiple technologies and while promises work in Javascript.
How to Make Nested Promised in Node.js?
Sometimes nested promises are used in Node.js. It simply means that the “.then()” statement is invoked one after the other. Each “.then()” statement has a return value and when dealing with promises that depend on each other for execution it becomes quite complicated.
An example case is mentioned below that uses multiple .then() statements but it is not considered a good practice to use it:
.then((client) => {
const db = client.db(database_name);
return database
.insertDocument(db, { name: "Test", description: "Chill Out! It's just a test program!" }, "test")
.then((result) => database.findDocuments(db, "test"))
.then((documents) => {
console.log("Found Documents:\n", documents);
return database.updateDocument(db, { name: "Test" }, { description: "Updated Test" }, "test");
})
.then((result) => {
console.log("Updated Documents Found:\n", result.result);
return database.findDocuments(db, "test");
})
.then((docs) => {
console.log("The Updated Documents are:\n", docs);
return db.dropCollection("test");
})
.then(() => client.close())
.catch((err) => console.error(err));
})
.catch((err) => console.error(err));
The operations of the above code are:
- “MongoClient.connect(url)” sets up the connection to the MongoDB server and desired database.
- “.then((client) => {…})” is executed when a connection has been established successfully and receives a client object to interact with the database.
- Inside the “.then()” block the db variable is used to access the database from the client.
- The necessary functionalities are added like inserting, finding, updating, and finding updated documents.
- “client.close()” is used to close the connection.
How to convert a pre-existing callback API into a Promise in Node.js?
Promises are a better option to use instead of callbacks in Node.js applications. Callbacks are still commonly used by Node.js APIs and they are usually passed as final arguments to the functions as shown in the following examples:
Simple API callback code
Let us consider a simple example in which it is checked whether the number is a perfect square or not.
const isPerfectSquare = Number.isInteger(Math.sqrt(number));
if (!isPerfectSquare) {
return callback(`${number} is NOT a perfect square`);
}
callback(`${number} is a perfect square`);
}
function handleResult(data) {
console.log(data);
}
checkPerfectSquare(25, handleResult);
The operations performed by the above code are:
- The “checkPerfectSquare()” method is used to check whether the given number is a perfect square or not.
- The “isInteger()” method checks whether the number is an integer or float datatype.
- Then the square root is evaluated using the “Math.sqrt()” function in which the number is passed as a parameter.
- The boolean condition is used to verify whether the number is a perfect square or not and it logs the appropriate message accordingly.
Output
Run the following code in the terminal to execute the file:
where callbackAPI is the filename with the .js extension.
The output of the above code will log in the terminal as:

Now let’s refactor the code using promises instead of the callback function.
Using the Promise API to handle callbacks
The above code can be refactored with small changes and adding the “promise” functionality:
return new Promise(function (resolve, reject) {
const isPerfectSquare = Number.isInteger(Math.sqrt(number));
if (!isPerfectSquare) {
return reject(new Error(`Oops! ${number} is NOT a perfect square`));
}
resolve(`Hooray! ${number} is a perfect square`);
});
}
checkPerfectSquare(25)
.then(result => {
console.log(result);
})
.catch(error => {
console.error(error.message);
});
The change in this code is that it returns a promise instead of a callback. If the promise is rejected then the “Failed” message is logged in the terminal and if the promise is fulfilled then it logs the successful message.
That’s all about promises in Node.js.
Conclusion
The article explained the two ways to manage the asynchronous tasks in Node.js: promises and callbacks. In the example of calculating the square of a number, it could be done easily using callbacks if the user does not have any concern with reliability. But, promises provide a more streamlined and readable approach. It has deeply covered the creation, chaining, and callback conversions. It also indicated the benefits of using promises in Node.js for an error-free code script.