This post will cover:
- What is Node.js?
- How Does Node.js Work?
- How to install Node.js on Windows?
- How to install Node.js on Mac?
- How to install Node.js on Linux?
- How to Write the First Node.js Program? (Hello World)
- How to Import Node Core Modules?
- How to Install NPM Packages?
- How to get started with Express JS?
- How to Render Static Files in Express?
- How to Render Dynamic Files in Express?
- Conclusion
What is Node.js?
The most frequently searched query on Google’s search engine is What is Node.js? The most popular questions are Is Node.js a programming language? Is it a framework? Is it a library? To simplify, Node.js can be defined as a runtime environment supported by a JS library.
One well-known, open-source, cross-platform Javascript runtime environment is Node.js. Because of its adaptability, it can used in any project or application. What sets it apart is the use of the V8 engine, the same engine that powers Google Chrome. This makes Node.js an optimal choice for scripting on the server side and executing code scripts outside the development environment.
Node.js is quite different from other server-side programming languages. It is to be noted that it is not a backend server or a web server. Solo it cannot do anything but a collection of modules helps in making a scalable project. It runs on a single server and does not generate additional threads for every single request. Furthermore, non-blocking paradigms are used to write the majority of NodeJS libraries, so blocking behavior is the exception instead of the rule. Asynchronous I/O primitives are a feature of the standard library of Node.js that keep JavaScript code from blocking.
When Node.js performs an I/O operation, like performing crud operations over the network, it will not block the thread and waste CPU cycles waiting to respond; instead, it will resume the operations after the response is received.
Node.js Simple Example
A simple example to understand the concept of Node.js is to create a web server and write some text. Since it’s an introduction to Node.js, so let’s add the intro line to a web port:
const serverPort = 3000;
const server = http.createServer((req, res) => {
res.statusCode = 200;
res.setHeader('Content-Type', 'text/plain');
res.end('Beginners Guide to Getting Started with Node.js!\n');
});
server.listen(serverPort, () => {
console.log(`Server running at http://localhost:${serverPort}/`);
});
In this code:
- “const http = require(‘http’)” imports the http module which helps to create HTTP servers and handle the functionalities associated with it.
- “const serverPort = 3000” defines the port the server will operate on.
- “const server = http.createServer((req, res) => {})“ uses the create server method of the http module to create a server with a callback function taking two arguments one is the request and the other is the response that will be generated for the request.
- Inside the callback function, the HTTPS status code is set to 200, and the response content type is set to plain text. In addition, the web server displays a message titled “Beginners Guide to Getting Started with Node.js”.
- “server.listen(serverPort, () =>{})” is called to start the server and listen to all the incoming requests on the server. The callback function is called after the starting of the server and displays a message in the terminal to show the port on which the server is started.
Output
Use the line below for the execution:
Where App.js is the application name.
The output in the terminal is:
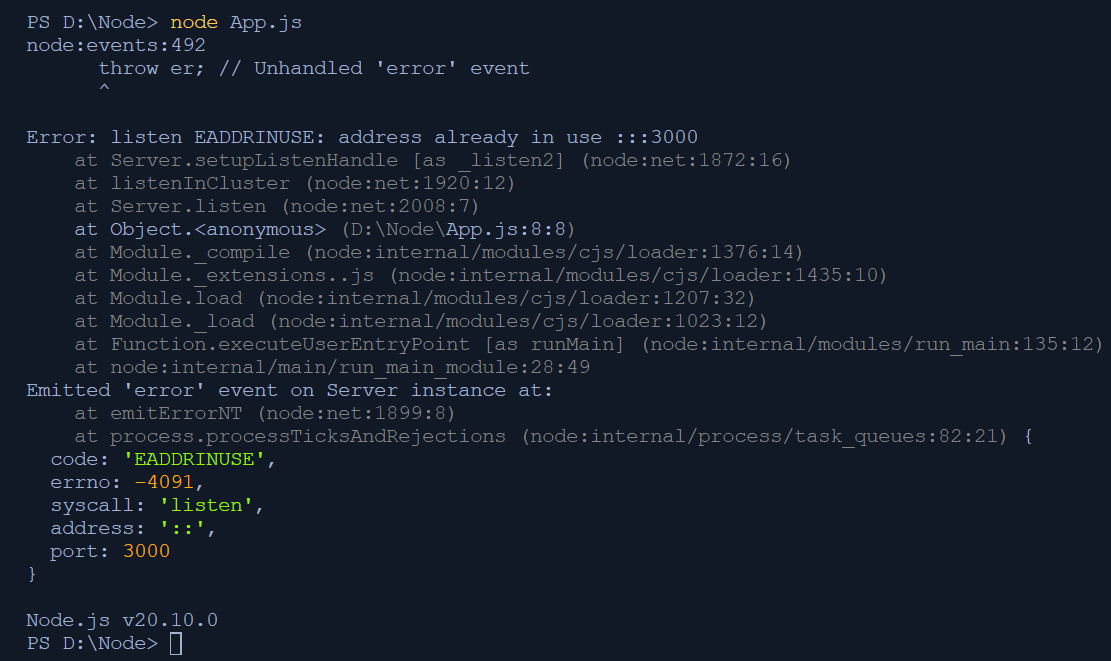
This indicates that the server has started and is listening to the incoming requests. To check the response on the server use the following link “http://localhost:3000/”.
The output on the server side would show up as:

How Does Node.js Work?
Node.js is a platform that helps servers deal with many requests simultaneously. Although it uses only one thread to handle requests, it effectively manages input and output operations through the use of threads. Threads are a group of instructions that perform tasks at the same time. Node.js works with an event loop that controls tasks without stopping until one is done before starting the next.
Node.js event loop is a continuous and semi-infinite loop. This loop manages the synchronous and non-synchronous events in Node.js.As soon as the Node.js project is launched, the execution is triggered, which seamlessly transfers the difficult tasks to the system. This allows other tasks on the main thread to run smoothly.
To understand and grasp the detailed concept of Event loops in Node.js, we have written a dedicated article on this topic.
Node.js Merits
Some major merits of Node.js are:
- Scalability: Simplifies growth of apps bidirectionally: horizontally and vertically.
- Real-time Web Apps: best for tasks requiring fast synchronization and preventing too much load on HTTP.
- Speed: Perform tasks quickly, like putting data into or taking out from databases, linking with networks, or dealing with files.
- Ease of learning: Node.js is easy to learn for beginners because it uses Javascript.
- Caching Benefit: Stores only one part, so there is no need to run code again when asked, cache is a fast memory and saves additional loading time.
- Data Streaming: Handles HTTP requests and responses as different events thus enhancing performance.
- Hosting: Easy to put on websites like PaaS and Heroku.
- Corporate Support: Used by big businesses like Netflix, SpaceX, Walmart, etc.
How to install Node.js on Windows?
Since we are starting to develop Node.js applications, if we have a Windows environment, the Node.js environment has to be set up. Follow the step-wise guideline below to set up the Node.js environment in a Windows operating system.
Step 1: Download the Node.js installer package
Go to the official website of Node.js Node.js Official Website and ensure you download the latest version of Node.js. Also, check if the npm package manager is installed with it because it plays a crucial role in scaling Node.js applications.

Just click on Windows Installer and the downloading will start. The downloaded version will be 64-bit and the LTS(Long Term Support) version is recommended. Run the installer packager to install Node.js.
Step 2: Install Node.js and NPM module on your Computer
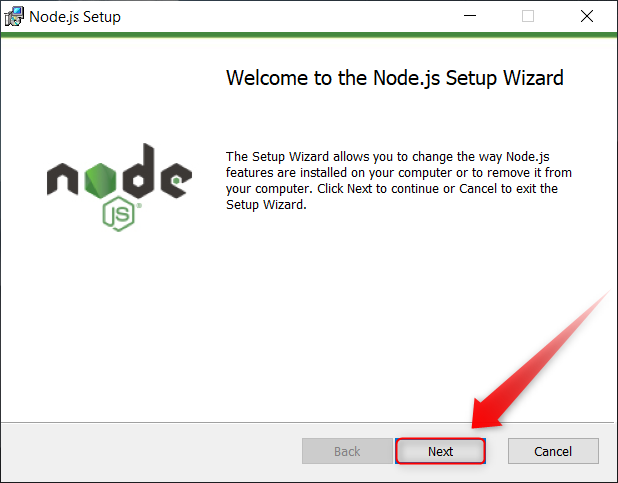
The following screen will appear so click on the Next button:
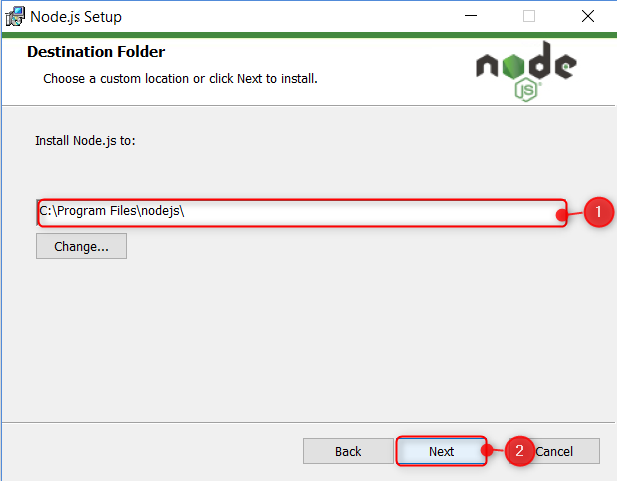
After clicking on Next, a new window will appear where the user will be asked to enter the path where it is intended to download the Node.js msi libraries.
Now in the window below select the desired path and click on the next button:
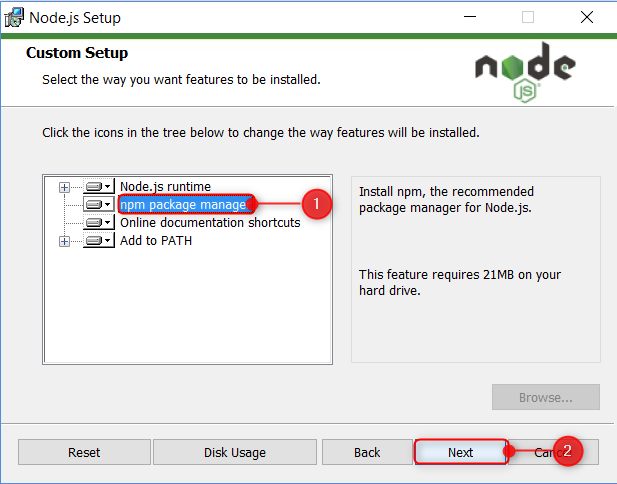
After clicking on this next button you will get a window of custom setup where you will be asked to select the package you want to install. From this window select the npm package manager by default the Node.js runtime is selected. In the npm package manager, both Node.js and the npm package are installed.
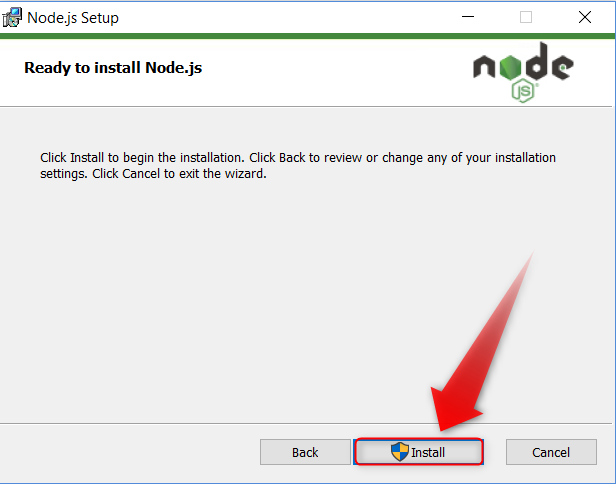
Finally, click on the Install button to get started with the journey.
Step 3: Verify the Versions installed
Getting to know which version is installed is crucial so to check it, go to the search bar of Windows and type in Command Prompt:

After the command prompt window opens, type in two commands for verification.
Version of Node.js
The Node.js version can be checked by using the following command in the command prompt:
The version installed would show up

NPM Version
For the npm version check, use the following command:
The version for npm would appear in the terminal.

That’s it now you can start developing applications with the setup of the Node.js environment.
All the users are not using Windows so it is desirable to meet the needs of everyone. Below is the process for installing Node.js on Mac.
How to install Node.js on Mac?
For users using Mac, the installation is quite the same for Windows. Go to the official site of Node.js and download the package for Mac.
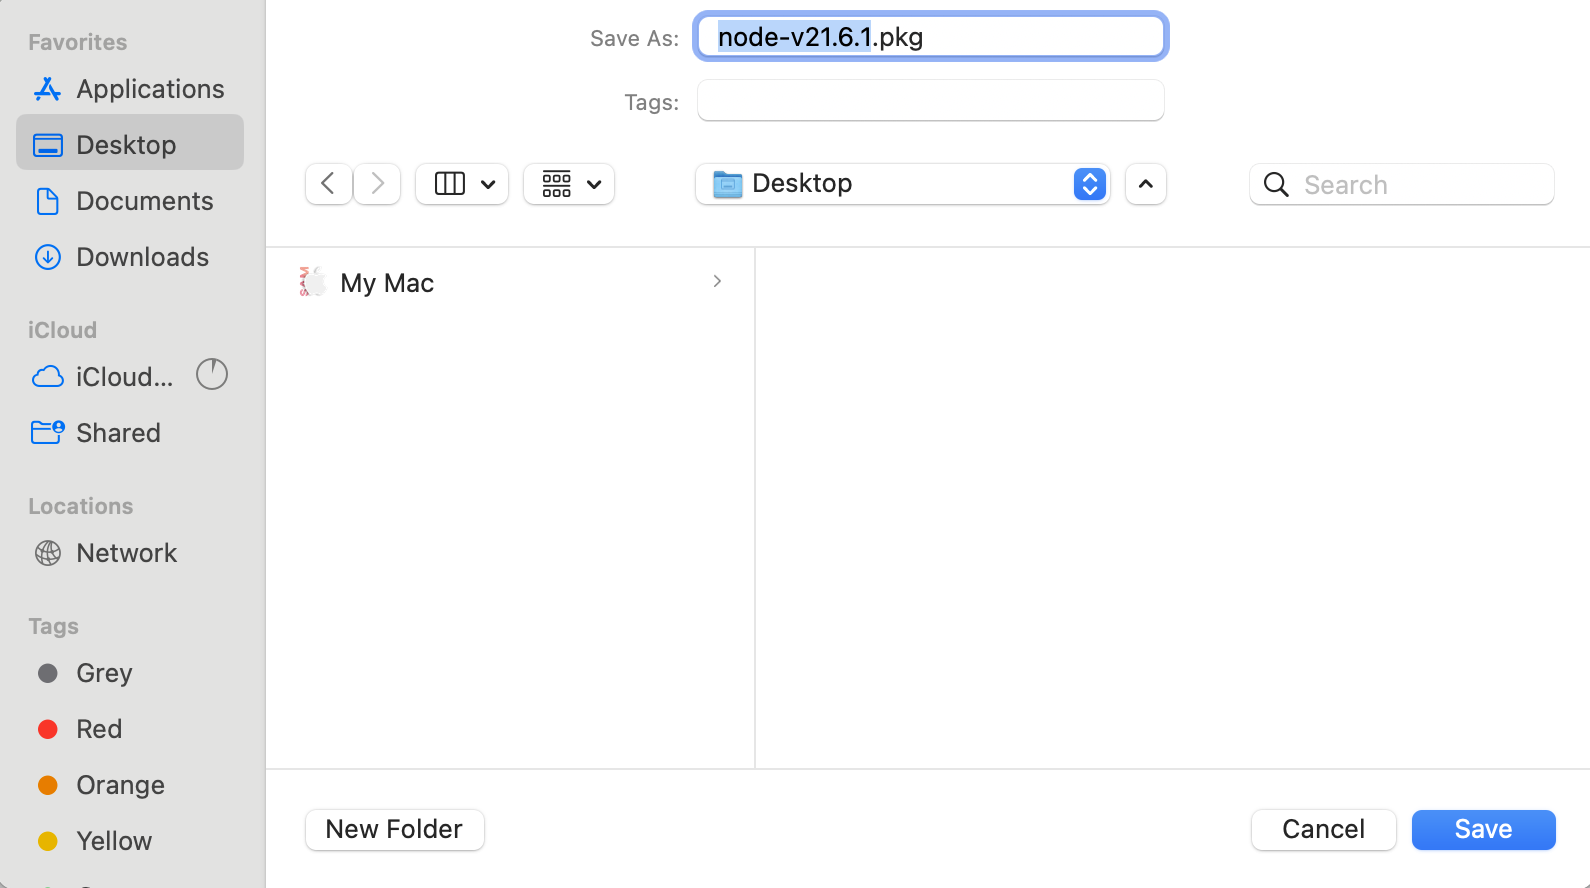
Step 1: Download the Package Manager for Mac
Visit the official website of Node and download the MacOSInstaller of NodeJS:
https://nodejs.org/en/download/current

Click on the specified button in the above screen to begin the downloading.
Users can specify the location where it is to be installed.
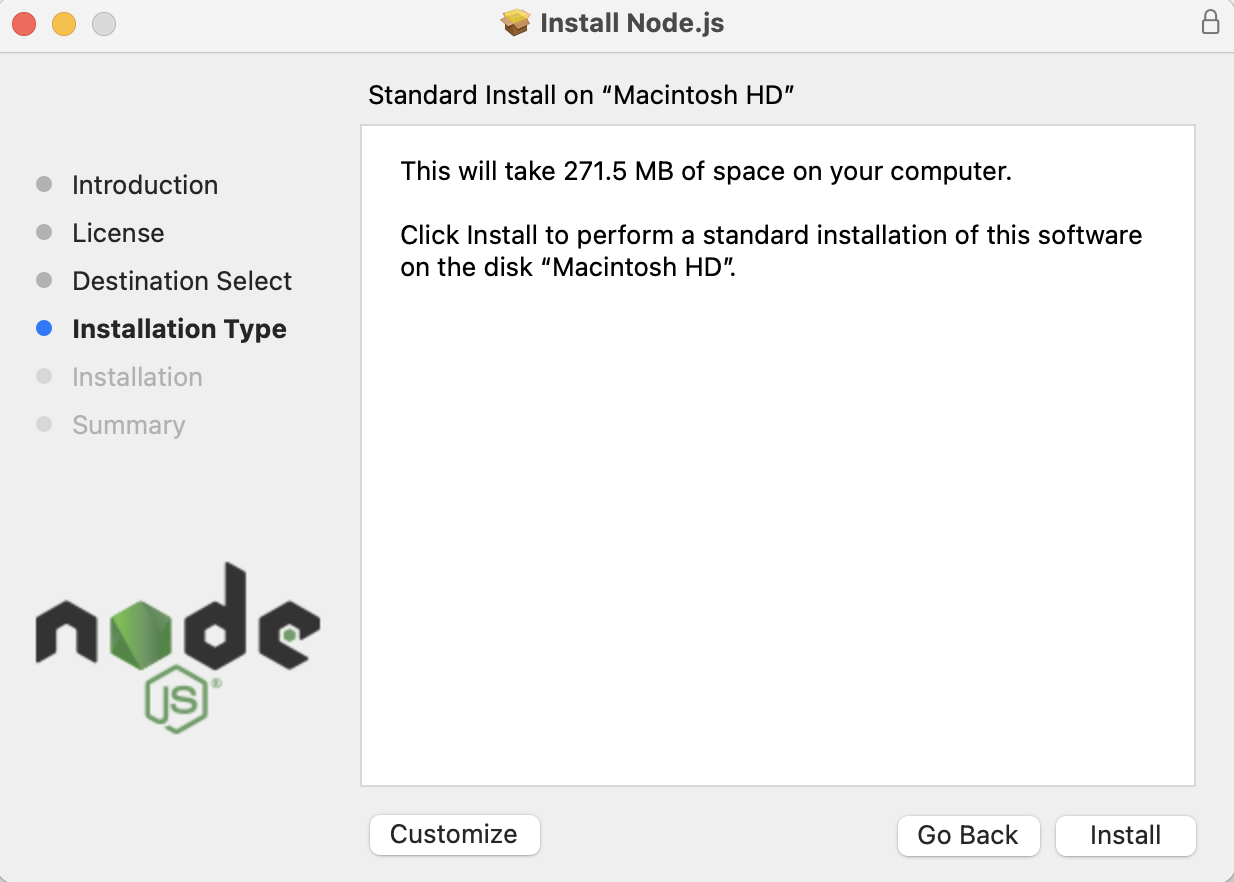
Step 2: Install the Node.js .pkg file
Run the installer file and follow the installation guide:

Click the “Install” button, and installation of Node.js will begin.
After completion of the NodeJS installation, it will show up the summary:

Click the “Close” button to finish the installation.
Step 3: Verify the Node.js Installation and Versions
For verification that Node.js has been installed and to check its version, use the following command:

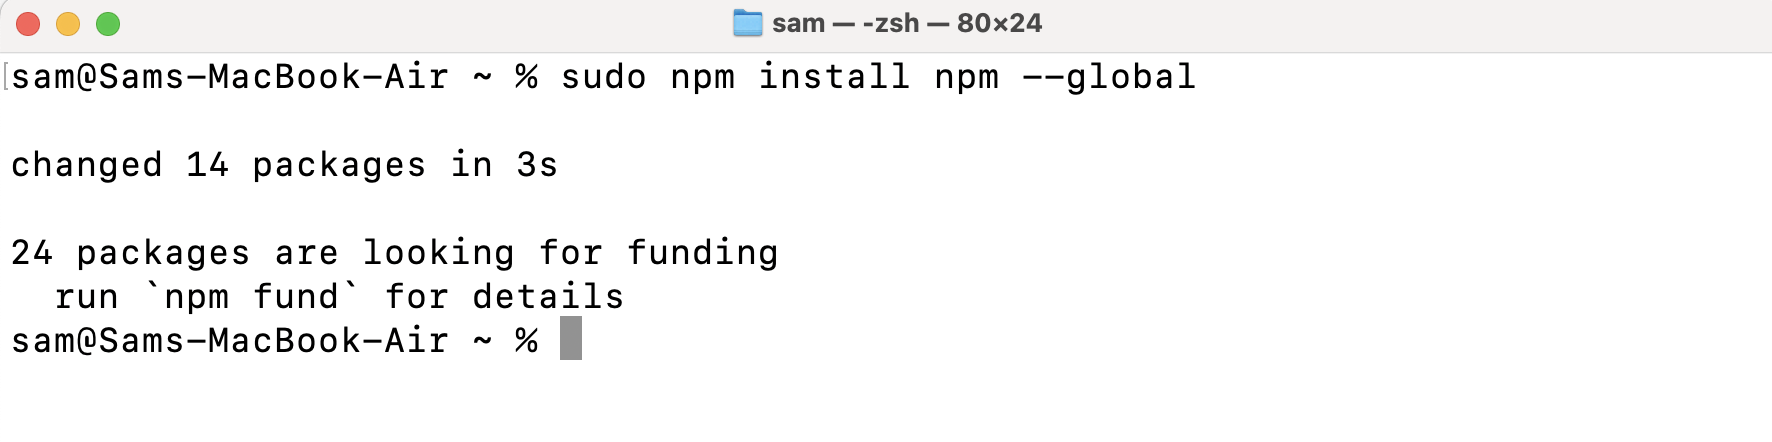
Step 4: Upgrade NPM Globally
Execute the command typed below to upgrade NPM for all the system users using the “–global” flag:
Step 5: Set the Node Path to $PATH Variable
Run the following command to set the PATH Variable for NodeJS:
Note: In the above command, the “/usr/local/bin” is the location where NodeJS is installed by default.
Step 6: Update PATH details in the “.bash\_profile”
Add the path details to the “~/.bash\_profile” using the command given below:
Step 7: Update the ~/.bashrc
To make it available for all the users, execute the command given below:
That’s it about installing NodeJS and setting up the PATH variable in MacOS for NodeJS.
How to install Node.js on Linux?
To install Node.js on any Debian-based Linux Operating system, follow the step-by-step procedure given below:
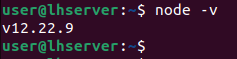
Step 1: Open up the terminal
First, fire up the terminal using the “CTRL+ALT+T” keyboard shortcut key:
Step 2: Update and upgrade the system
Execute the command typed below to update and upgrade the system’s repository:

Step 3: Install Node using the apt package manager
After updating the system’s repository, install the Node.js from the official APT package manager using the command:

Step 4: Verify Node Installation
Once it is installed, verify the installation by checking the version of Node.js using the given command below:
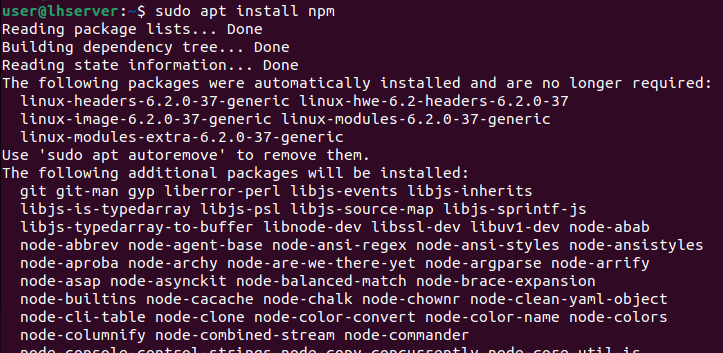
Step 5: Install NPM
It is a good practice to install NPM along with NodeJS as it is required most of the time. NPM is also available in the official APT repository and can be installed using the given command:
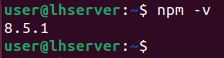
Step 6: Verify NPM installation
Check the NPM Version as well to verify the installation of NPM using the following command:
This is how you can install Node and NPM on Debian-based Linux Operating systems.
How to Write First Node.js Program? (Hello World)
All has been set to start on our way to develop applications in Node.js. Let’s create our first program that is quite common. Whenever anyone starts learning a new language or framework the first program is usually to print “Hello World”. To say Hello to everyone in a different way is quite a feeling and telling them about the start of our new journey. Below is the code to get started:
console.log("Hello World!");
To execute this code script use the following command:
Output
The statement Hello World will be logged to the terminal:

How to Import Node Core Modules?
Users have to use the “require()” function to use the desired module to work on in their code script. For example, if the “fs” (File System) module is to be used the import code line will be:
This would import all the functionalities of that module and store it in the fs variable which is a constant variable that means its content can’t be changed on the runtime. Then by using the “fs” variable user can implement the desired functionalities.
Now let’s create a simple code example in which a module is imported and its functionality is used in the code script.
Example: Using the HTTP module
// Simple HTTP server
const httpServer = http.createServer((req, res) => {
res.writeHead(200, { 'Content-Type': 'text/html' });
res.write('<!DOCTYPE html>');
res.write('<html lang="en">');
res.write('<head>');
res.write('<meta charset="UTF-8">');
res.write('<meta name="viewport" content="width=device-width, initial-scale=1.0">');
res.write('<title>Hello World!</title>');
res.write('</head>');
res.write('<body>');
res.write('<h1>Hello, World!</h1>');
res.write('</body>');
res.write('</html>');
res.end();
});
// Listening on port 3000
httpServer.listen(3000, () => {
console.log('Server listening on port 3000');
});
In this code:
- “const http = require(‘http’)” imports the content of the http module and stores it in a constant variable “http”.
- “const httpServer = http.createServer((req, res) =>” creates a simple HTTP server and adds the text Hello World along with some basic HTML. the createServer method creates a server with two arguments one is the request on the server and the second is the response that is generated for that request.
- “httpServer.listen(3000, () =>” specifies the port 3000 on the local host and logs a message to the terminal that the server is active and is listening on port 3000.
To run the Node App, execute the JS file with the node command as shown below:
Where App.js is the file name.
Output
The message in the terminal upon running this code would be:

Now we have to verify the output on the server side and check whether the message “Hello World” is printed there or not:

The message has been successfully printed on the server and the font has been adjusted by using some basic HTML.
Node.js: Core Modules
Some modules of Node.js are:
- http: it allows making an HTTP server in Node.js
- assert: a collection of assert functions helps primarily in testing
- fs: it allows handling file operations
- path: a set of methods that deal with file paths
- process: it gives information and controls about the current Node.js process
- os: it provides information regarding the operating system
- querystring: a tool used for parsing and formatting URL query strings
- url: this module provides tools for URL resolution and parsing
How to Install NPM Packages?
NPM (Node Package Manager) helps in managing and using third-party libraries or tools in the Node.js project. Follow the steps below to install NPM packages.
Step 1: Install the Desired Package
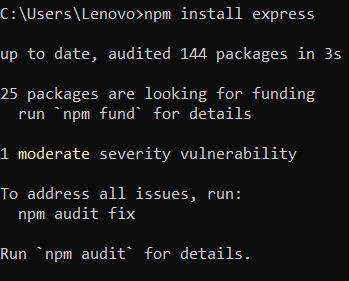
Let’s install the express module which is quite common for developing web applications in Node.js. To install express use the command:
This command line will install the express module in your project folder.

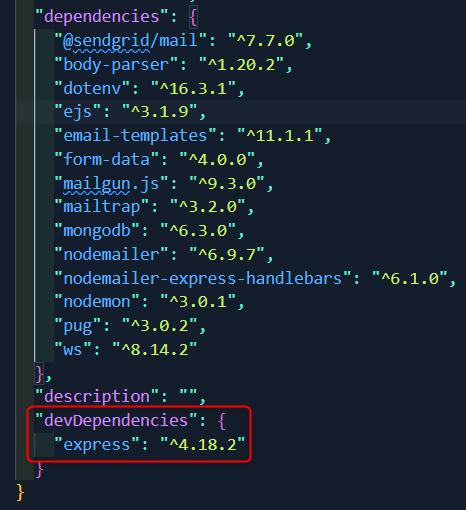
Step 2: Save the module to Package.json
NPM automatically updates the package.json file with the new dependency. If you want to save it explicitly as a development of project dependency, use the –save-dev or –save flags.
npm install express --save # Save as a production dependency

Why NPM packages are important?
The NPM packages are very important in the Node.js development environment. Below are the possible reasons:
- Code Reusability: NPM packages keep a record of the code which can be used again. They save the time of developers by offering optimized ready-made methods.
- Dependency Management: NPM makes it easier to handle the project requirements. The list of project requirements is in the package.json file which makes it easier to use and share the project requirements.
- Community Contribution: NPM helps build a big group of developers who share their work for others to use in many free software packages. This collective contribution speeds up the application development period.
- Version Control: NPM lets you write down the package version for your project. This ensures smooth working and handling of required changes.
- Efficiency and Consistency: Using efficient packages enhances the project efficiency and allows to maintenance of code consistency across the development team.
Thats it. Not only you have learned how to install the desired packages but also have an understanding of why these packages are required in your Node.js development environment.
How to get started with Express JS?
To make efficient web applications the Express.js framework is used. The “express” module is great for building web applications in Node.js. Below is the procedure for how to get started with this package.
Step 1: Installing Express
To install Express use the following command in the terminal:
The express module will be installed if it is already installed then this command will update the module
Step 2: Testing the express module in an Application
The above step will install express in the package folder and the user can use the module by importing it in the code script by using the “require” module as
Let’s test a simple code script that uses the functionality of the express module:
const app = express();
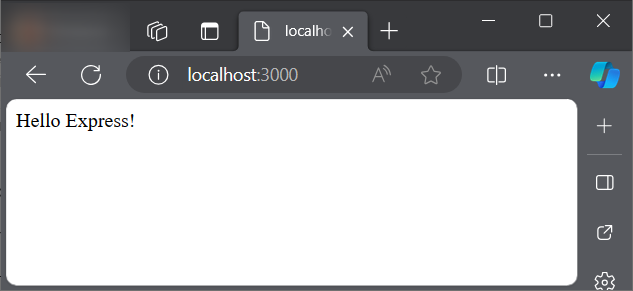
app.get('/', (req, res) => {
res.send('Hello Express!');
});
const port = 3000;
app.listen(port, () => {
console.log(`Server listening on port ${port}`);
});
In the above code:
- “const express = require(‘express’)” imports the express module and stores it in a constant variable “express”, by which we can use the functions associated with this library.
- “const app = express()” is used to define an express application.
- “app.get(‘/’, (req, res) =>” defines the route for the express application to send a response “Hello Express” to the express application.
- The port 3000 is specified in the constant variable named “port” on the local host.
- “app.listen(port, () =>” creates a listener on port 3000 and logs a message on the terminal that the server is listening on the specified port.
Output
For running this application use the command below:
The output in the terminal would appear as

So the server is active and listening on port 3000 of the local host. Accessing that link in the browser would show the output as
That’s all about the express module of how we can install it, create an application, and start a server port.
How to Render Static Files in Express?
In Express the express.static() function is used for the rendering of static files like HTML, CSS, images, etc. Below is the process to render static files in Express.
Step 1: Create a Project
Before starting ensure that express is installed if not then you can run the following command:
This command will install the express module locally in the node_modules folder and update it in the package.json file.
Step 2: Create a File for Static files
Secondly, create a folder in the working directory. Create a folder named public to store the static files that are to be rendered. Place all the HTML and CSS static files in this directory to render them.

Step 3: Setting up Express to render the Static Files
Use the express.static() method to specify the directory for the static files the user wants to render.
The file rendering uses two code scripts one for the back end that takes the HTML code placed in the public folder. The HTML code is kept simple as our main emphasis is on the backend.
Node.js Script
const app = express();
app.use(express.static('public'));
const port = 3000;
app.listen(port, () => {
console.log(`Server listening on port ${port}`);
});
In this code:
- “const express = require(‘express’)” imports the express module in the script to use its functionality.
- “const app = express()” starts the application
- “app.use(express.static(‘public’))” specifies the directory to fetch the files and provide them the express application to use them and render them.
- The port 3000 is specified for the express application.
- “:app.listen(port, () =>” indicates that the server is active and is listening at the specified port by logging the message.
HTML script
<html lang="en">
<head>
<meta charset="UTF-8">
<meta name="viewport" content="width=device-width, initial-scale=1.0">
<title>Static Rendering Example</title>
</head>
<body>
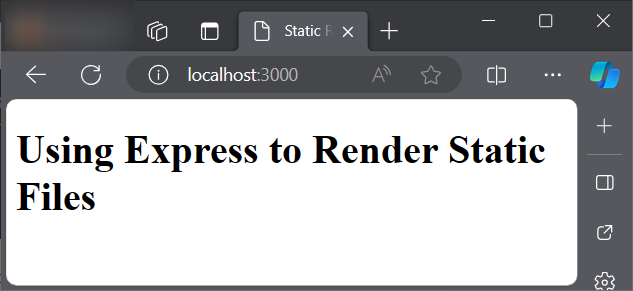
<h1>Using Express to Render Static Files</h1>
</body>
</html>
In this code, just a heading is made as the focus is on the backend not the front end, but additional functionalities can be added as per need.
Output
Now run the Node.js script by the following code:
The following message will be logged in the terminal which indicates that the server is ready and is listening on the port 3000.

Open the local host port 3000 on the browser to see the HTML code script rendered by the express module
That’s all to render static files in the express. Now let’s have a look at how to render dynamic files.
How to Render Dynamic Files in Express?
Users can render the dynamic files in Express using a template engine to generate HTML dynamically based on data. The template used below is EJS (Embedded Javascript) which is quite popular to render dynamic files.
Step 1: Install EJS
Use the following command to install the EJS in your project folder
Step 2: Set up Express with EJS
Set up the EJS template as a view engine in your Node.js file.
const express = require('express');
const app = express();
const PORT = 3000;
app.set('view engine', 'ejs');
app.use(express.static('public'));
app.get('/user/:id', (req, res) => {
const userId = req.params.id;
const userData = {
id: userId,
username: `user${userId}`,
email: `user${userId}@example.com`,
};
res.render('user', { user: userData });
});
app.listen(PORT, () => {
console.log(`Server is running on http://localhost:${PORT}`);
});
The operations performed by the above code are:
- “const express = require(‘express’)” imports the express module from the node modules.
- “const app = express()” creates an instance for the express application.
- “app.set(‘view engine’, ‘ejs’)” configures express with ejs template to render the files dynamically.
- “app.use(express.static(‘public’))” enables the serving of static files stored in the public folder of the Node project.
- “app.get(‘/user/:id’, (req, res) => {…})” defines ar quotes that listen for requests.
- “res.render(‘user’, { user: userData })” renders the EJS template files.
- “app.listen(PORT, () => {…})” starts the server on port 3000 and the user can type “http://localhost:3000/user/123” in the browser.
Step 3: EJS Template
A directory named “views” is created in the project directory and inside this folder create an EJS template file “user.ejs”. This file will hold the dynamic content the user wants to render. Paste the following code in this file
<html lang="en">
<head>
<meta charset="UTF-8">
<meta name="viewport" content="width=device-width, initial-scale=1.0">
<title>User Profile</title>
</head>
<body>
<h1>User Profile</h1>
<p>User ID: <%= user.id %></p>
<p>Username: <%= user.username %></p>
<p>Email: <%= user.email %></p>
</body>
</html>
As the main goal is to render the file content dynamically so only the necessary front code has been used.
Step 4: Start the Server
User can now start the express application by using the following code snippet:
Where App.js is the name of the file in the directory. After running this code the terminal will indicate the following message

Now the user can use the link http://localhost:3000/user/123 in the browser and the content will be rendered dynamically as

That’s all to render the file content dynamically using the express module in Node.js.
Conclusion
The article explains Node.js from start to end, showing how it works with its non-stop and event-based JavaScript time for numerous events. It looks at Express, a well-known web-building tool, and also mentions NPM, and how to show static or dynamic information on a website. Even though the article discusses everything in detail, it’s a good beginner guide to learning about Node.js.