This article explains the different possible ways to send emails using Node.js.
Methods to Send an Email using Node.js
As Node.js is a server operational tool, it can help in sending emails using multiple methods:
Consider the below methods to send an email using Node.js.
Method 1: Send Email using Node.js and SMTP Server
SMTP which is the abbreviation for Simple Mail Transfer Protocol, is the most common technology used to send emails across multiple networks.
The process is similar to below:
- Users have to use an email client(Gmail, Outlook, etc.) to send the email by using the outgoing SMTP server.
- Email has to be processed through multiple authentication stages, after which the file is picked up by the SMTP server and sent to the desired recipient.
The server between the sender and receiver follows the SMTP protocols which determines that the information is sent to the right recipient.
Merits of using SMTP Server
The priority merit that makes the SMTP server an optimal choice is its easy-to-set-up environment and easy integration with the web application. For other email service providers users may have to rely on third-party integration and tools. Using an SMTP server makes you the boss and you can manage every aspect of the email sending procedure.
Demerits of using SMTP servers
The major disadvantage of using SMTP servers is the weak security system. It is insecure and can be subject to hacking. They can be victims of DDoS attacks, phishing, and information breach. If the user uses their own SMTP server it means that they have the responsibility for the maintenance and security, which needs a lot of effort.
Process of Sending Mail using Nodemailer
The most popular email package used for sending emails in Node.js is Nodemailer. It can be used to send multiple format-type emails like HTML or plain text emails, some attachments along with the email, and using different transport methods. The Node.js 6.0 or higher version is required for Nodemailer configuration.
Step 1: Install the Nodemailer module
Open the terminal of your IDE and type in the nodemailer installation command:
By running this command line all the dependencies for the nodemailer module will be set in the package.json file.
The package.json file will appear as:

The above picture shows the version installed and sets the dependencies and users can use the desired modules by importing the required ones.
Note: In this tutorial, we use the SMTP server as the transport method so the user needs to define the host, port, and credential passwords generated for accessing the SMTP host server.
Step 2: Setting up the MailTrap as an SMTP server
For the host server, an SMTP server is required. Users can use MailTrap or some similar service to deploy a fake SMTP server for testing purposes. Setting up a fake server can help avoid stuffing the real account with multiple tests to see how the email buttons behave and how it appears to the recipient.
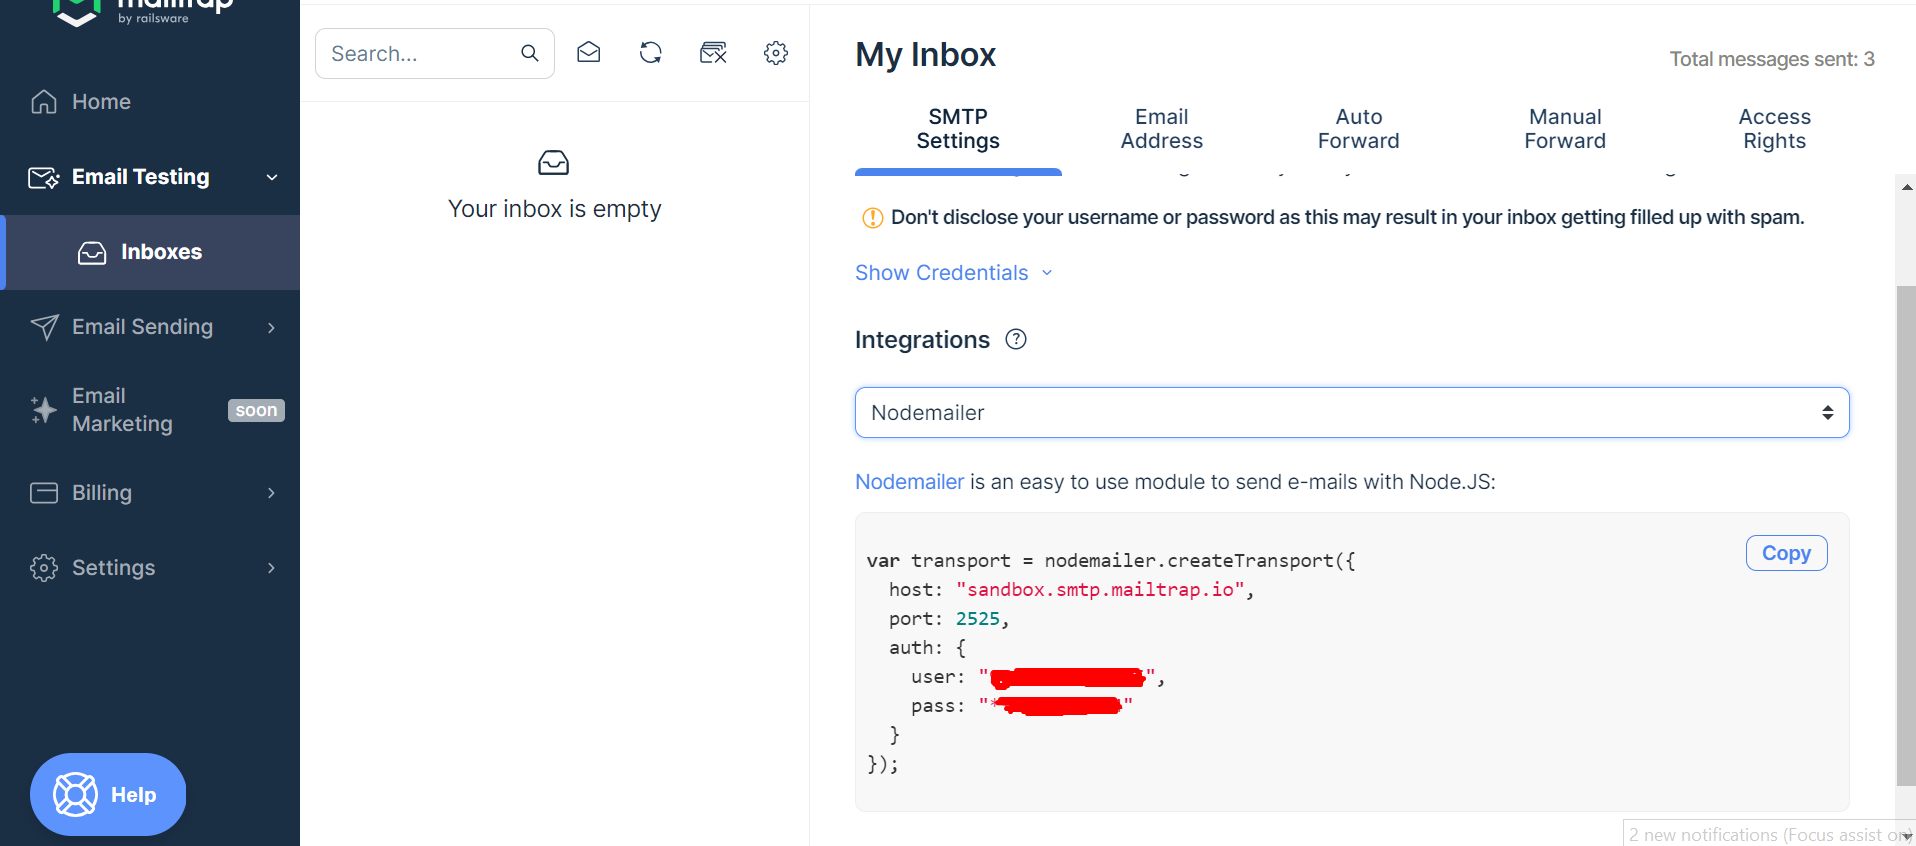
Create an account on MailTrap and select the Nodemailer in the Integrations dropdown in the dashboard section, then copy the credentials.
Step 3: Create a Node.js file
Create a file in the working directory in the below case email.js is created. Then copy the credentials in the above step and paste them into the created file as:
const transporter = nodemailer.createTransport({
host: "sandbox.smtp.mailtrap.io",
port: 2525,
auth: {
user: "<Username>",
pass: "<Password>"
}
});
The functioning of the above code is:
- “const nodemailer = require(“nodemailer”)” imports the “Nodemailer” library which is used for sending emails.
- The “createTransport” method fetches the details of the created SMTP server which is to be used for sending mails.
- “host” sets the IP address in the above case which is the Mailtrap server where the mail is being sent.
- “port” specifies the port number for the “Mailtrap” server. The port 2525 is used for non-encrypted connections.
- “auth” contains the credentials obtained from the Mailtrap configuration.
- The “transporter” object contains the settings obtained from Mailtrap and can now send the desired mail.
Step 4: Add the code for Sending Mail
After all the configuration is done, the user can add the below code to compose a simple mail message in the same file:
from: "[email protected]",
to: "[email protected]",
subject: "SMTP server email testing",
text: "The Email is sent using Nodemailer and SMTP server for testing"
};
transporter.sendMail(message, function(err, info) {
if (err) {
console.log(err);
} else {
console.log(info);
}
});
The operations performed by the above code are:
- The content for the email is composed in the “message” variable.
- The “transporter” object created in the previous step is used to send mail using the sub-function “sendMail” with the message composed above and an additional function to handle the error if any occurs.
Now that we have implemented all the functions let’s test it by sending the email on the SMTP server.
Step 5: Sending the Mail
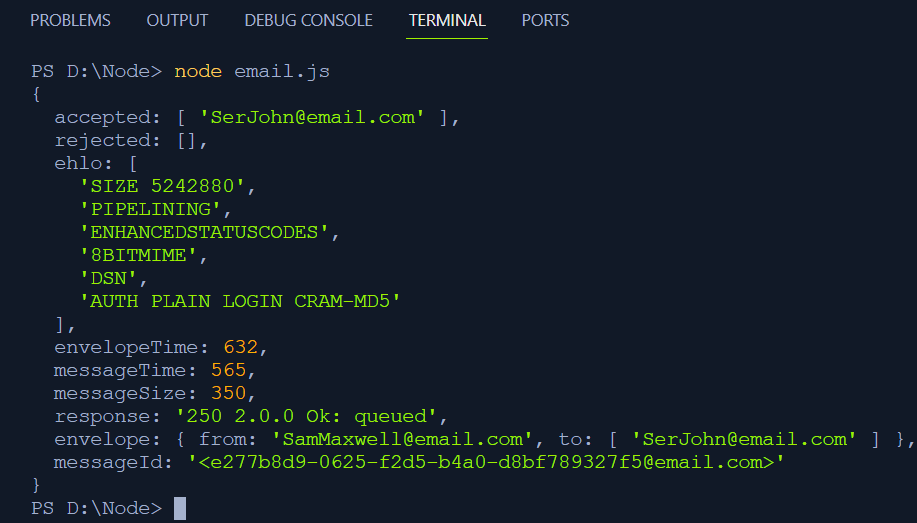
Simply go to the terminal of your IDE and run the file using the command:
The terminal will show the appropriate details for the mail which are:
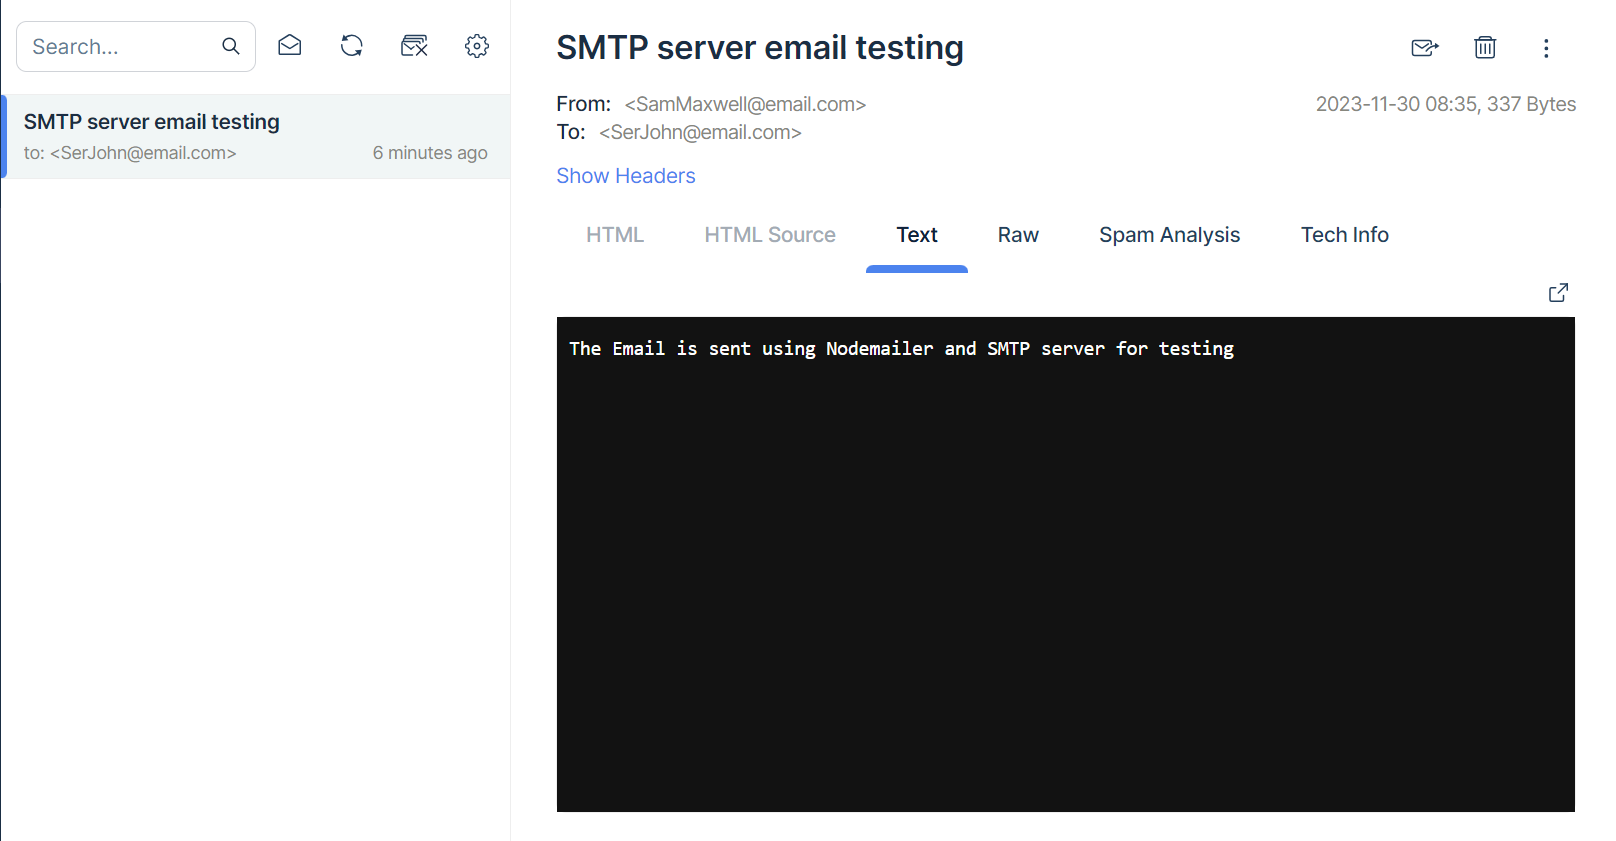
Step 6: Verify the Mail In Mailtrap dashboard
Check the mail which will show up in the Mailtrap dashboard and contains the content that was fed into the message variable:
That’s all to send the mail using the Nodemailer module in Node.js.
Now let’s look at the tutorial to send the mail using some mail application API in Node.js
Method 2: Send Mail using the API of an Email Service
Users can also send mail using a hosted API of some email service. This saves the effort of managing the email server from the user side. The user just has to handle message content, sending, and deliverability of the mail. The API key offers many functionalities and is a reliable service for sending mail in bulk.
From various email services, users can use the API of the desirable email service. Some of the popular email services are:
- Amazon SES
- Mailgun
- Mailchimp
- Postmark
- Sparkpost
Most are paid but some of them offer some basic functionalities for a lower cost.
Merits of Using Email Service API
The prime merit of using the API of an email service is that it can be configured easily with the code script. They are more reliable than using an SMTP server as the API key provides more security and saves much effort and cost which would have been spent for the maintenance of a server.
Demerits of Using Email Service API
The prime concern while using a mail service API is that the user has to rely on a third party to send the mail. Also if the user wants to send emails in bulk then it would be cost ineffective.
If the user has made an application that is supposed to send in-app notifications, the user has to make extra effort to configure the notification service. Lastly, when using an email service API user has to depend on the availability of the service provider’s server.
Practical Implementation of Sending Mail Using API
There are many email service providers and APIs to send emails like Mailgun and SendGrid. The service used for this tutorial is SendGrid which allows you to send 100 emails in a month free of cost.
After understanding of what service we’ll be using, let’s begin the journey.
Step 1: Signup for SendGrid
Set up a new account on SendGrip by visiting the following link:
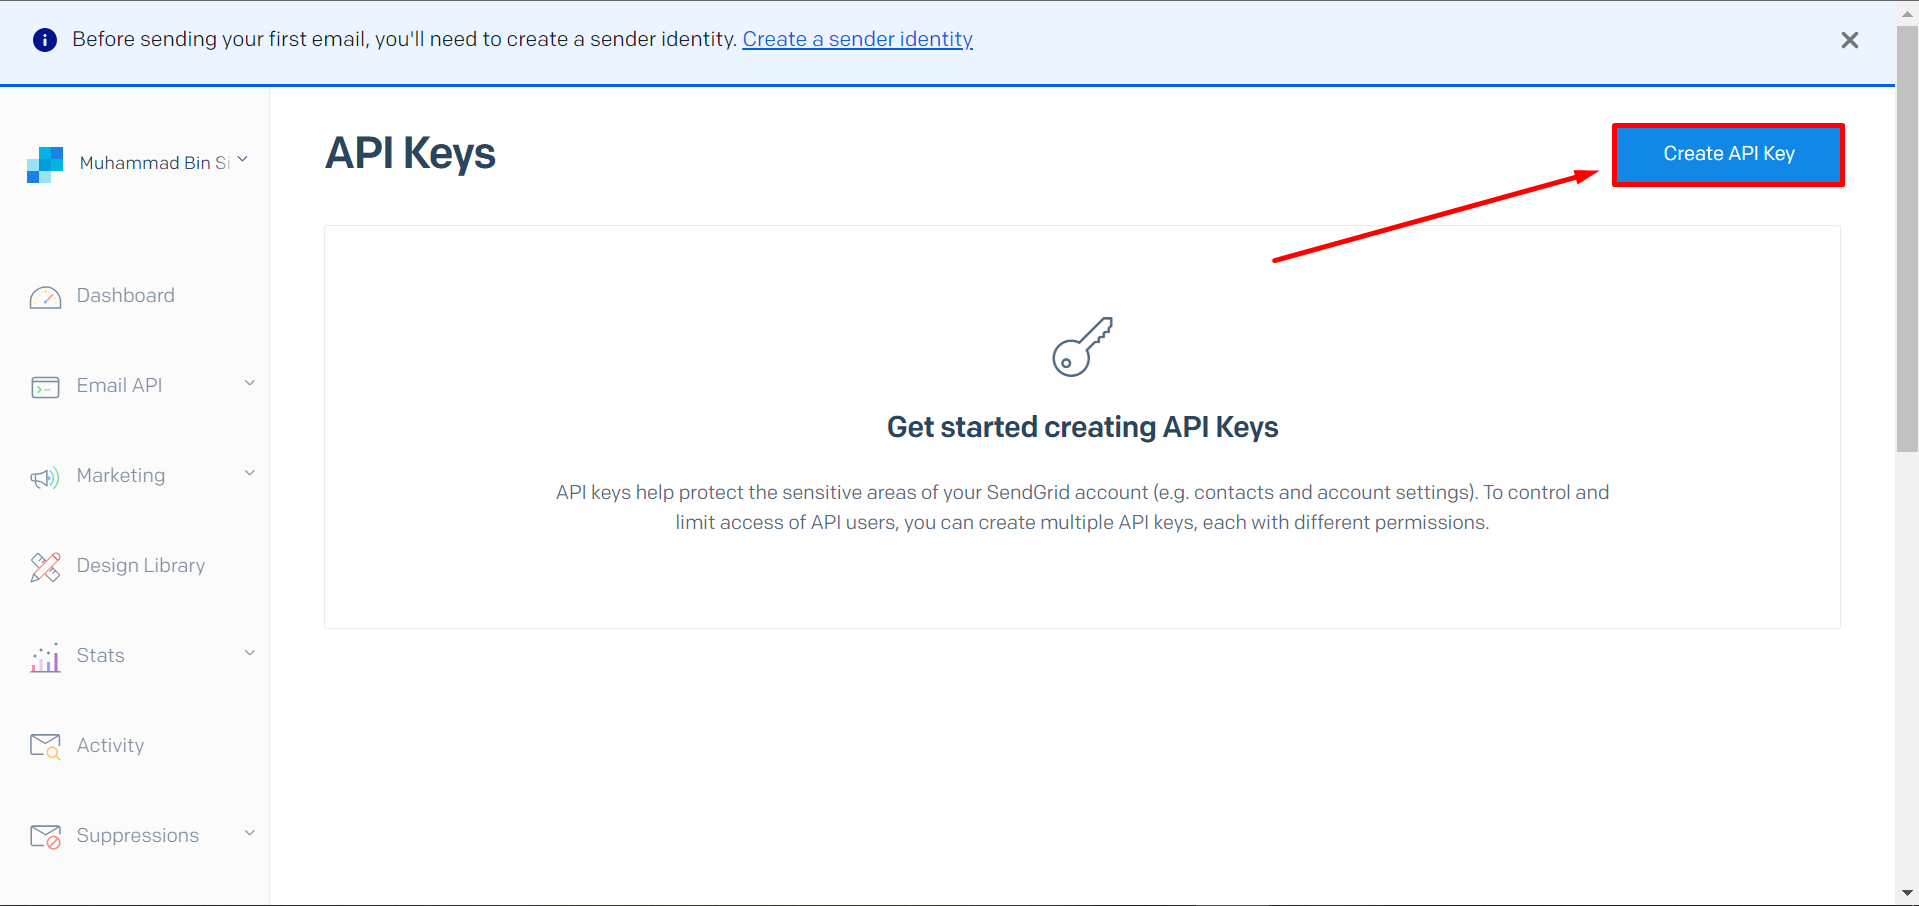
For the API key generation click on the settings option in the SendGrid dashboard. There click on the API keys.

After that click on the Create API key button in the top right corner.
A menu would appear to ask for the API key Permissions. Select the full access and click on Create & View for API key generation.

Copy the API key generated.
After setting the settings for the API, now we need to implement it in the code script.
Step 2: Install the SendGrid module
It is necessary to install the SendGrid module to use its functionalities in the code. Run the following command in the terminal of your respective IDE to install the module:
This command will install the module and set the dependencies in the package.json file from where you can import it into the code file to use.
Now let us create a code script to use the functionality of the above steps.
Step 3: Create a file
The next step is the creation of a file to implement the functionality in the code script. In the below case, create the sendgrid.js file and add the following code in it:
const API_KEY = "<ADD YOUR API HERE>"
sendgridobject.setApiKey(API_KEY)
const msg = {
to: '[email protected]',
from: '[email protected]',
subject: 'Using SendGrid API to send Email',
text: 'Using an API of an Email service provider makes it much easier to send mails using the code script',
html: 'and easy to do anywhere, even with Node.js',
}
sendgridobject
.send(msg)
.then((resp) => {
console.log('Email sent\n', resp)
})
.catch((error) => {
console.error(error)
})
In the above code script:
- The “sendgridobject” configures the setting with the API key and integrates it with the “sendgrid” module from the package.json file.
- “msg” contains the content of the email that the user wants to send.
- The “sendgridobject” uses a subfunction “send” to send the mail after which “.then” is triggered which would print “Email sent” in the terminal and the necessary info about server, host, ports, etc.
Step 4: Add and Verify the Sender Email
The user has to add and verify an email address through which the emails will be sent. For this purpose go to Settings and click on Sender Authentication. After that click on Verify a Single Sender:

After that, a window will open up in which the user has to fill in the credentials.
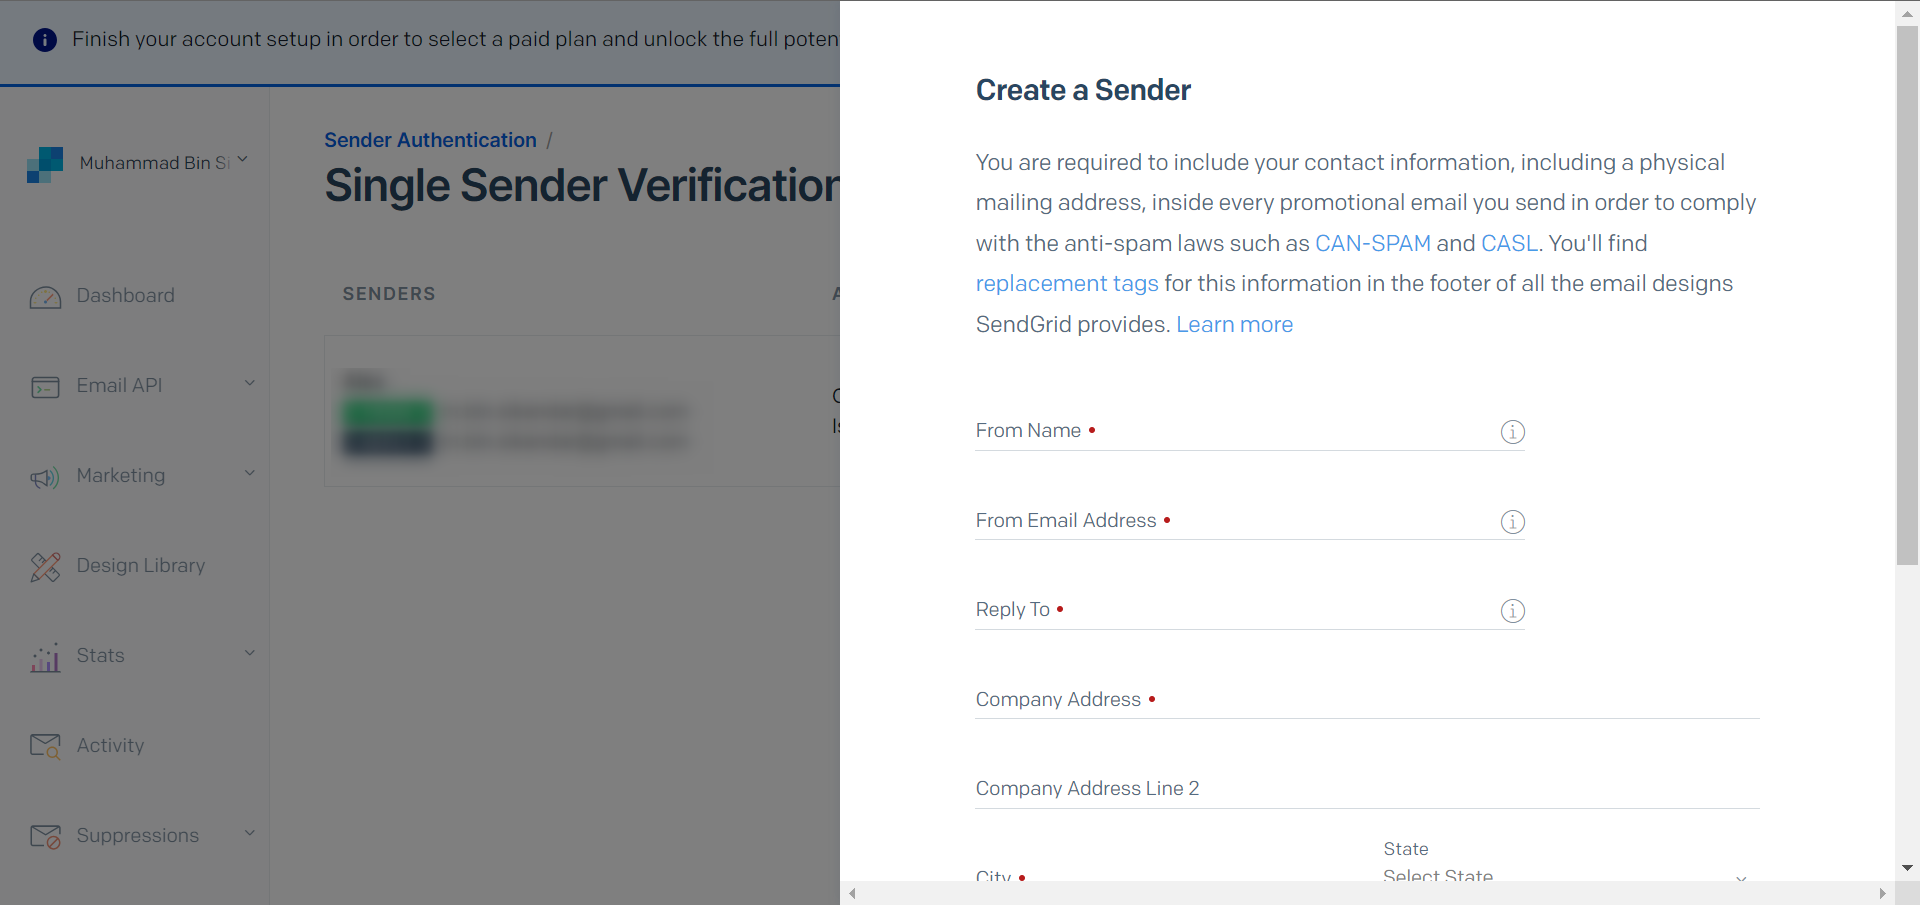
After providing the credentials click on the Create button. A verification email will be sent to your entered email address.
After configuring settings, let’s test by sending an email.
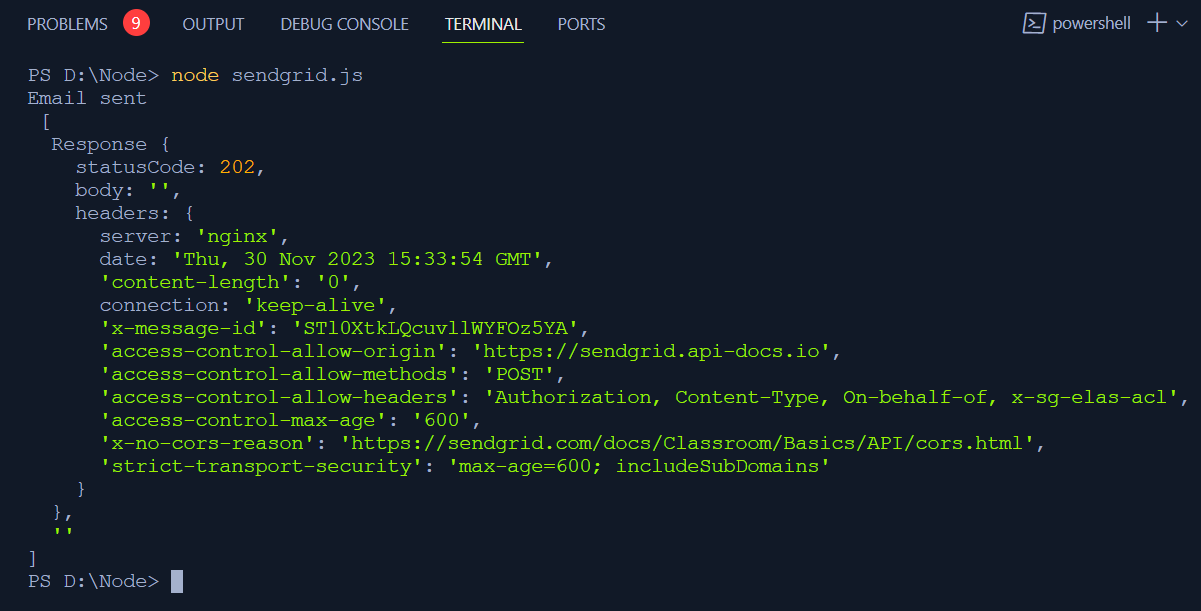
Step 5: Send the Email
The last step is to replace the sender and receiver email with the desired ones and run the following command in the terminal:
This command will execute the code in the file and the following will appear in the terminal which indicates that the email has been sent successfully:
Puff… that was a hectic task to implement. Still, there is one last step and I guarantee you this is the last one.
Check the inbox of the recipient.
Step 6: Verify from the Receiver End
Finally, check the receiver’s mailbox to see if the mail has been received.
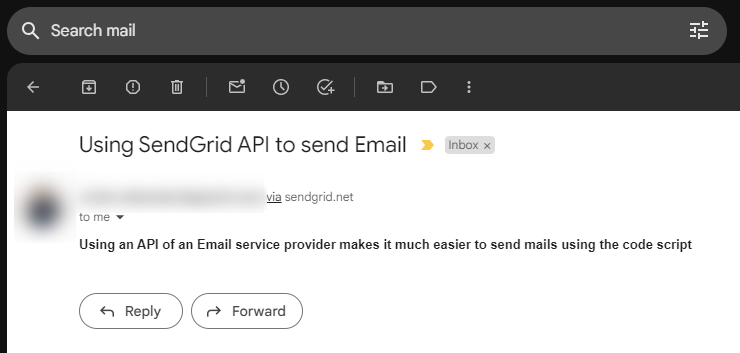
That’s all to send an email using the API of an email service in Node.js.
Conclusion
There are multiple ways to send mail using Node.js and the most common are using an SMTP server or using the API of an email service provider. Both have some advantages and disadvantages which are stated clearly so the user can select the suited one to send the email.