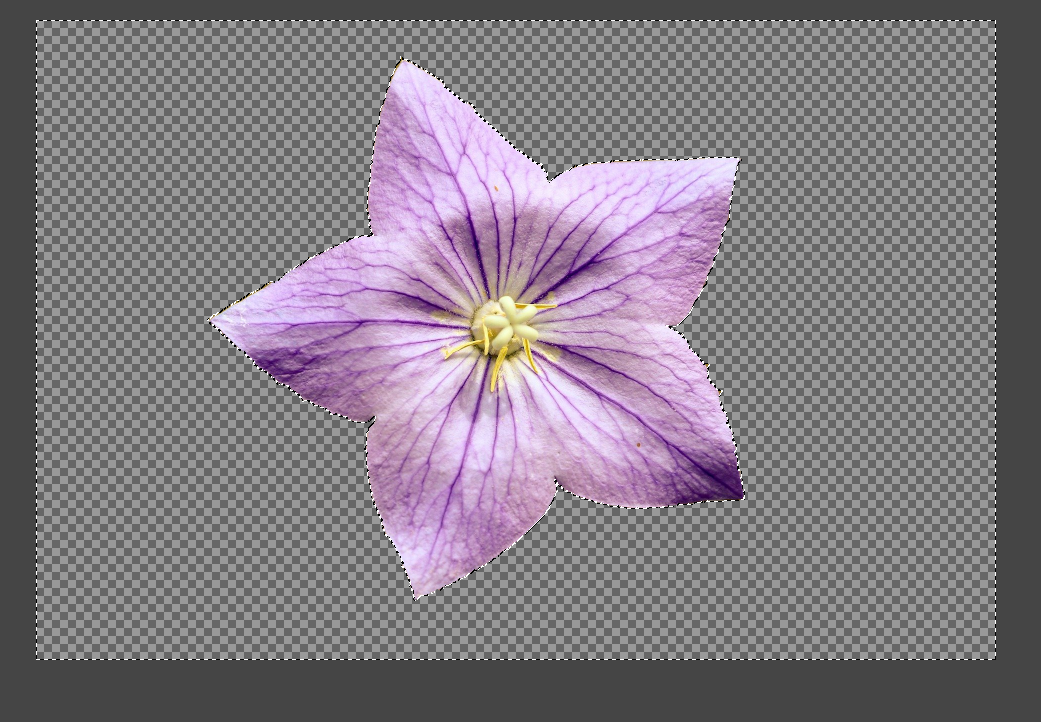
This tool is designed to detect the edges of objects using the points placed around them, allowing you to delete unwanted parts of a picture or copy the selected object into a new layer or document. However, GIMP’s ability to detect edges depends on how much contrast there is between the object and its background. If the object’s edges are blurred, or there’s very little contrast between the object and its background, GIMP’s edge detection will be less than ideal, and you’ll need to place more points around the object to achieve a better outcome.
For best results, in any case, it is important that you place your points as close to the edges of the object as possible, and to do this, you may need to magnify the picture to get a clear view of the edges.
See the step-by-step guide below.
Step 1:Activate the ‘Scissor select tool’
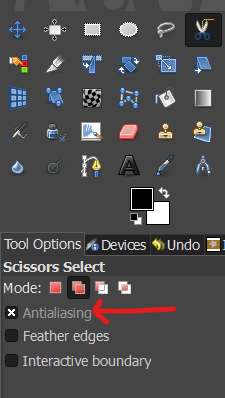
Step 2:Ensure ‘antialiasing’ is selected in the scissor toolbox for smooth edges.
Step 3:Increase zoom for a clear view of object edges.
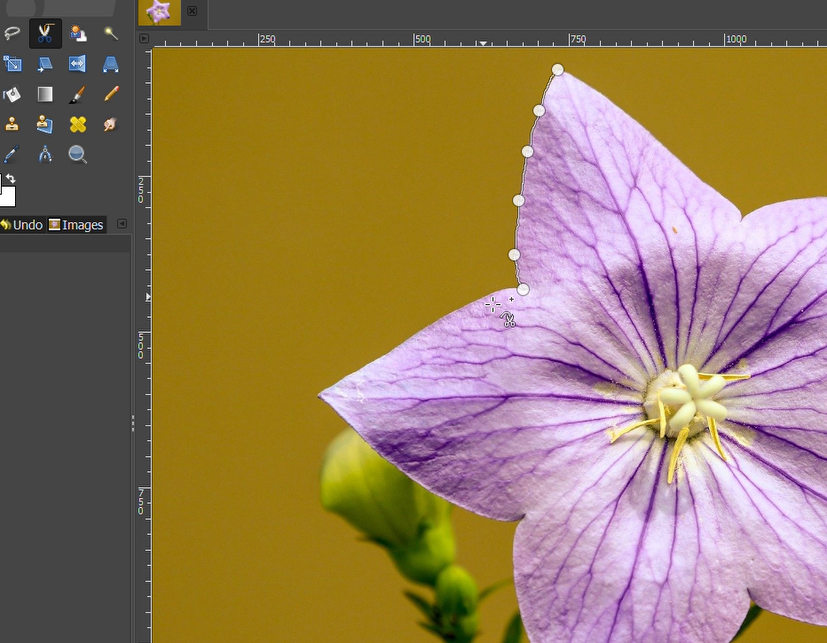
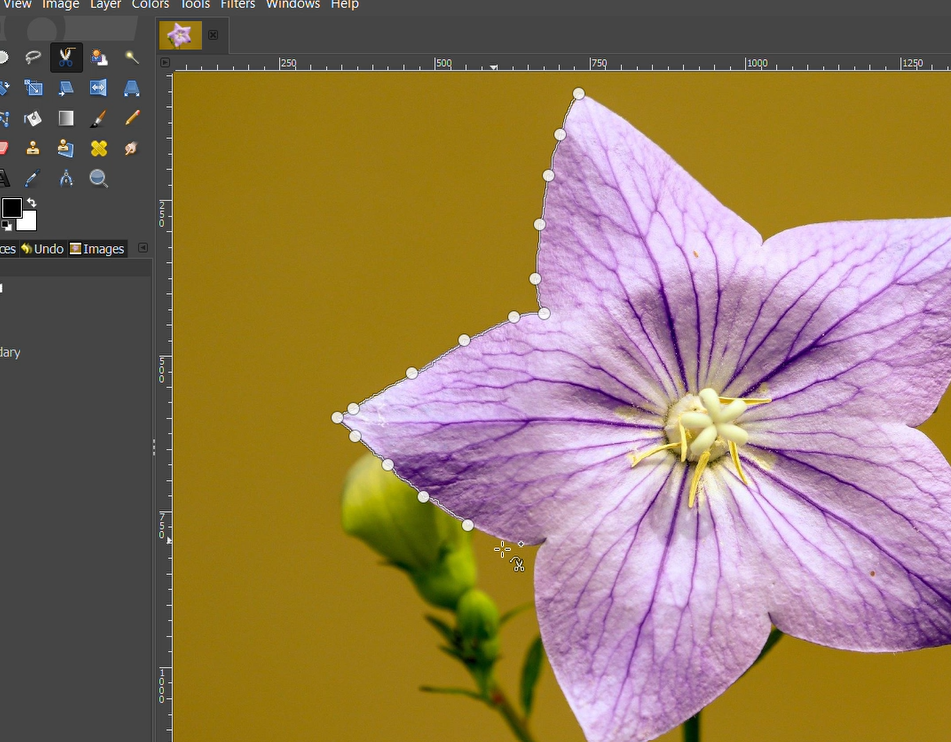
Step 4:Add points around the object you want to select to create a shape around it.
The beauty of this tool is that you don’t necessarily need to add too many points. When the contrast between the object and its background is high, you’ll only need to add a few points and watch GIMP detect the real edges of the object.
Step 5:To close the shape, connect the last point to the first by double-clicking on the first point. You can still adjust any of the points to improve the quality of your selection.
Step 6:Press ‘Enter’ to activate the selection. You’ll notice moving dotted lines around the object.
Step 7:To select more than one object, activate the ‘add to current selection’ option in the scissor toolbox. Then press the ‘Shift’ key to begin adding a new selection and press ‘Enter’ to add a new selection.
Step 8:Click ‘Ctrl + C’ to copy the object.
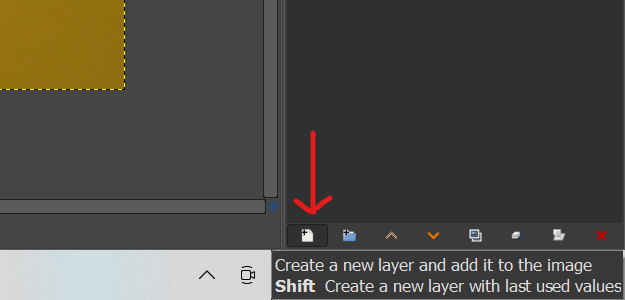
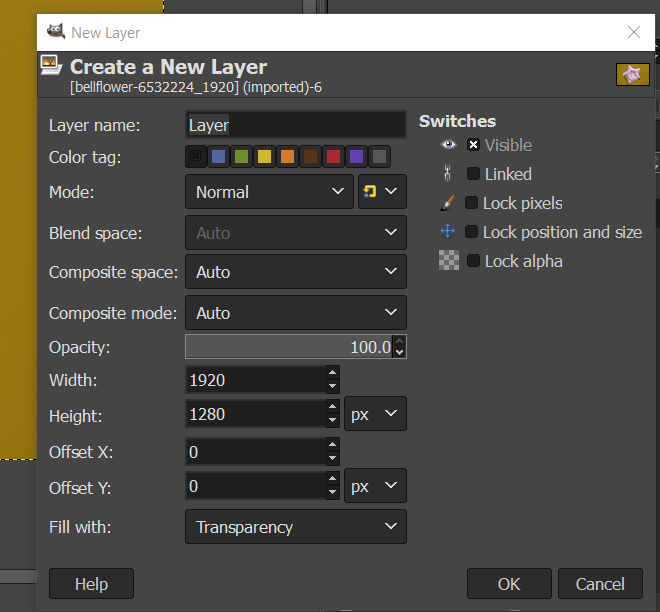
Step 9:Go to the layers panel (on the right side) and create a new layer with transparent background.
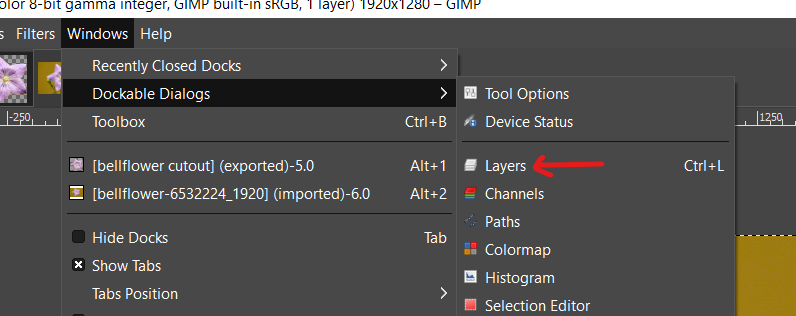
If the layers panel is not visible, go to ‘Windows’, ‘Dockable Dialogs’ and select ‘Layers’.
Step 10: Click ‘Ctrl + V’ to paste copied object into the layer. You’ll notice a new ‘floating selection layer’ in the layers panel.
Right-click on the ‘floating selection’ layer and select the ‘Anchor layer’ option. This will paste the object into the new layer we created in Step 9.
Step 11: Delete the original layer.
Step 12:Go to ‘Image’, ‘Crop to content’ to ensure the picture is sized to the selected object
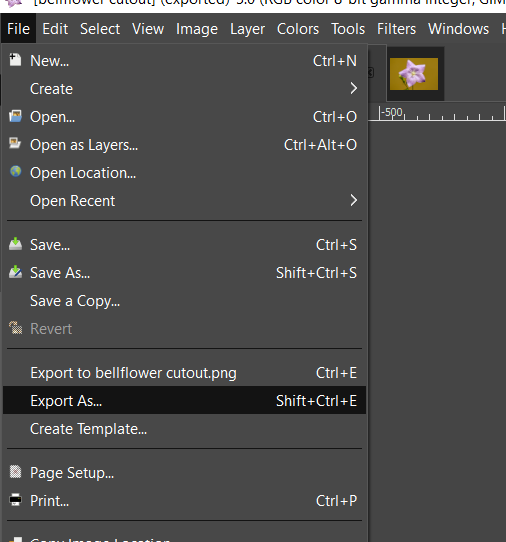
Step 13:Go to ‘File’, ‘Export as’, and save the object as PNG to retain transparent background.
HOW TO DELETE THE BACKGROUND AFTER THE OBJECT HAS BEEN SELECTED
Follow steps 1 – 7
Step 8:From the layers panel, right-click the picture layer and select ‘add alpha channel’. This will ensure that you’ll be left with a transparent background when you delete the unwanted parts of the picture.
Step 9:Click ‘Ctrl + I’ to invert selection
Step 10:Then press ‘Delete’ to remove background. This should leave you with a transparent background.
Step 11: Go to ‘Image’, ‘Crop to content’ to ensure the picture is sized to object.
Step 12: Go to ‘File’, ‘Export as’, and save the object as PNG to retain transparent background.
CONCLUSION
The scissor tool can be really handy for different photo manipulation and graphic design projects. However, you do need to pay attention to how well GIMP finds edges. This tool works best when there is good contrast between the object you want to select and its background.
When contrast is poor, you may have to place your points more closely together while working at high zoom levels, as high as 300 – 500%, to lay the points perfectly along the edges.
Also, know that you can adjust points before your selection becomes active. To do this, simply click on the pointand drag it to adjust the line drawn around your edge. If this does not improve the quality of your selection, you may have to undo the point by pressing ‘Ctrl + Z’. Finally, if edge detection does not improve after several attempts, you may need to restart the process from scratch and work at a higher zoom level to lay the points on the edge of the object as accurately as possible.
