This article will talk about the process of adding and using Discord’s OBS Streamkit Overlay.
How to Use Discord’s OBS Streamkit Overlay?
Users can set up Discord’s OBS Streamkit overlay in three steps:
- Installing and authorizing the Streamkit Overlay
- Customizing the Overlay
- Implementing the Overlay in OBS
Step 1: Installing and Authorizing the Streamkit Overlay
First, visit the Discord Streamkit Overlay official website on your preferred browser, and click on the Install for OBS button:

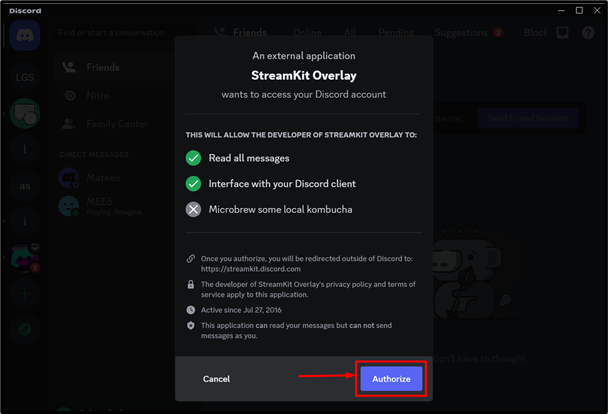
Next, grant all the required permissions to the Streamkit overlay, and press the Authorize button:
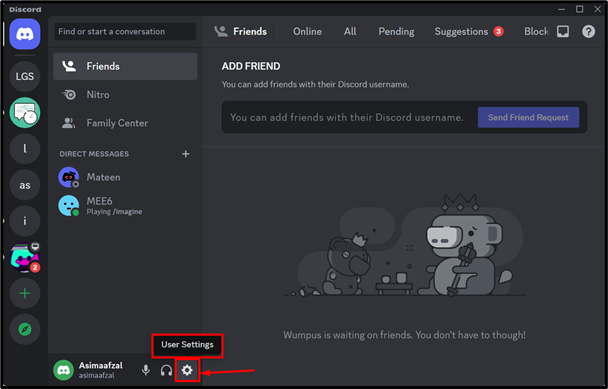
As a result, your Discord application will open up, here you need to click on the Gear icon to access the User Settings:
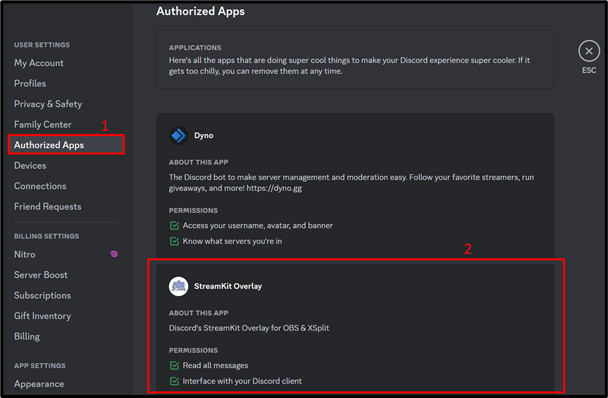
On the left-hand side of the screen, hit the Authorized Apps option inside the User Settings to view that Streamkit Overly successfully installed in your Discord:
Step 2: Customizing the Overlay
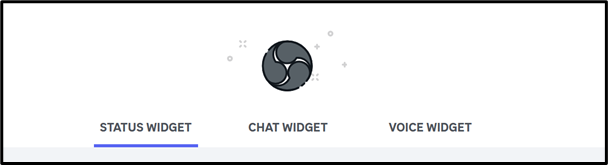
After authorizing the overlay in the client, move toward the Discord Streamkit Overlay page to customize the overlay settings. There are three options under the OBS logo to customize the widgets, such as:
- STATUS WIDGET
- CHAT WIDGET
- VOICE WIDGET:
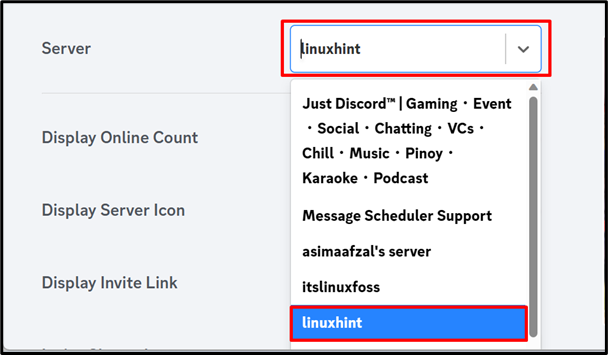
Now, choose the Server from the drop-down menu in which you want to show the overlay:
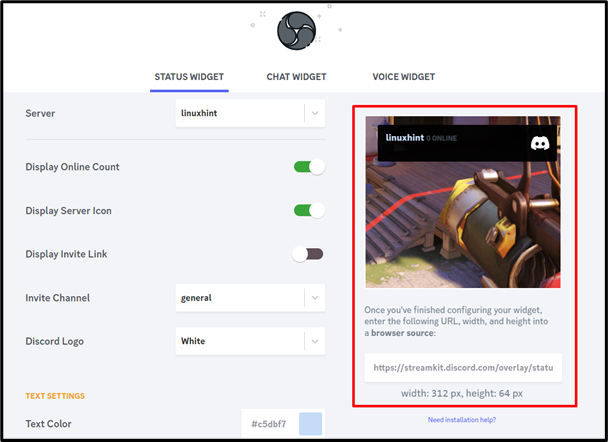
Each separate widget is customized in different ways but used at the same time. Users can also adjust the text color, size, shadow size, and icon visibility. According to these changes, live preview of that widget will be displayed on the preview window:
Step 3: Implementing the Overlay in OBS
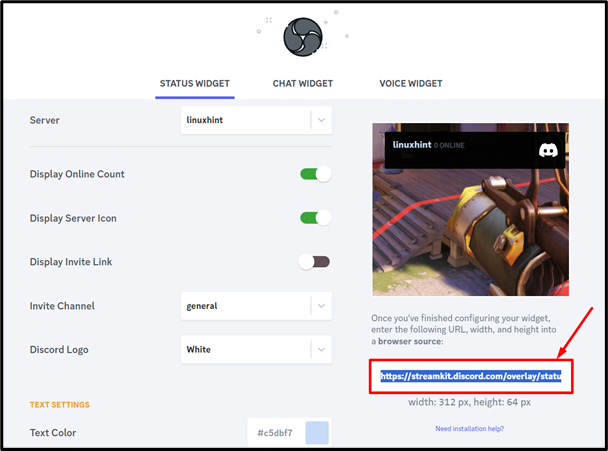
After completing all the customization of your overlay, implement it in the OBS app. For that purpose, copy the link from the customization panel:
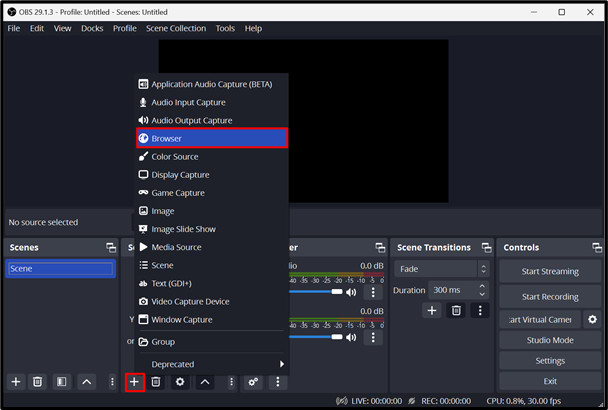
Then, go to the OBS app, and click on the Add Source icon (+) at the bottom of the source section, then select Browser from the pop-up menu:
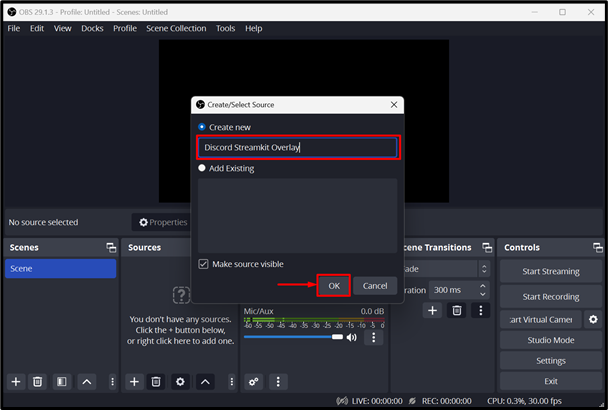
As a result, a new window will appear, rename the newly created browser, and press the OK button. In our case, we have typed the Discord Streamkit Overlay:
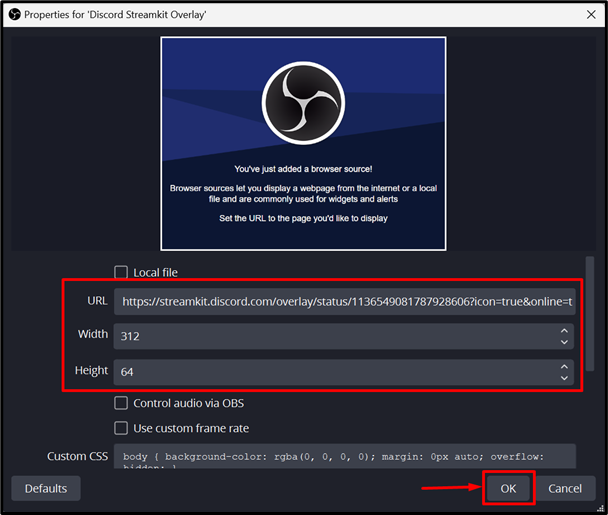
Now, paste the copied link into the URL box, adjust the Width and Height same as shown in the customization panel under the installation link, and click on the OK button:
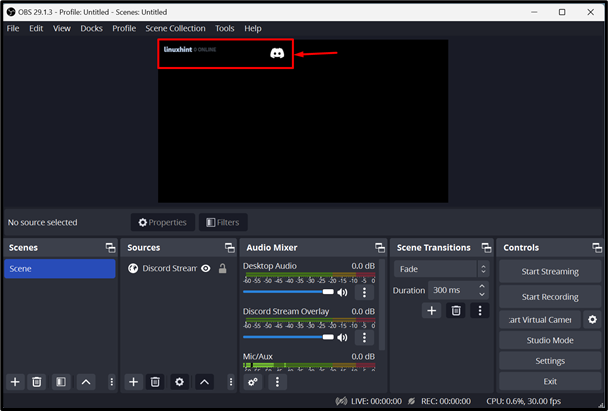
Finally, you should be able to see the live Discord Overlay on OBS. Here, you can drag and adjust it to meet your needs:
That’s it! We have described the OBS Streamkit Overlay in Discord.
Conclusion
Streamkit overlay is a powerful feature of Discord that enables users to chat with their friends on both text and voice while streaming their game to Twitch. Installing Discord Streamkit and adding it as a browser source to OBS or Streamlabs will allow users to add the OBS Streamkit Overlay, which allows viewers to see who is speaking in the Discord Chat. This blog has illustrated the easiest way to use the OBS Streamkit overlay on Discord.