This article described the step-by-step process of scheduling messages on Discord.
- How to Invite Message Scheduler Bot on Discord?
- How to Create a Server Channel and Add a Message Schedule on Discord?
How to Invite Message Scheduler Bot on Discord?
Follow the below-mentioned steps to schedule messages on Discord.
Step 1: Visit Message Scheduler Bot’s Page
First, visit the Top.gg website and search for the Message Scheduler bot:
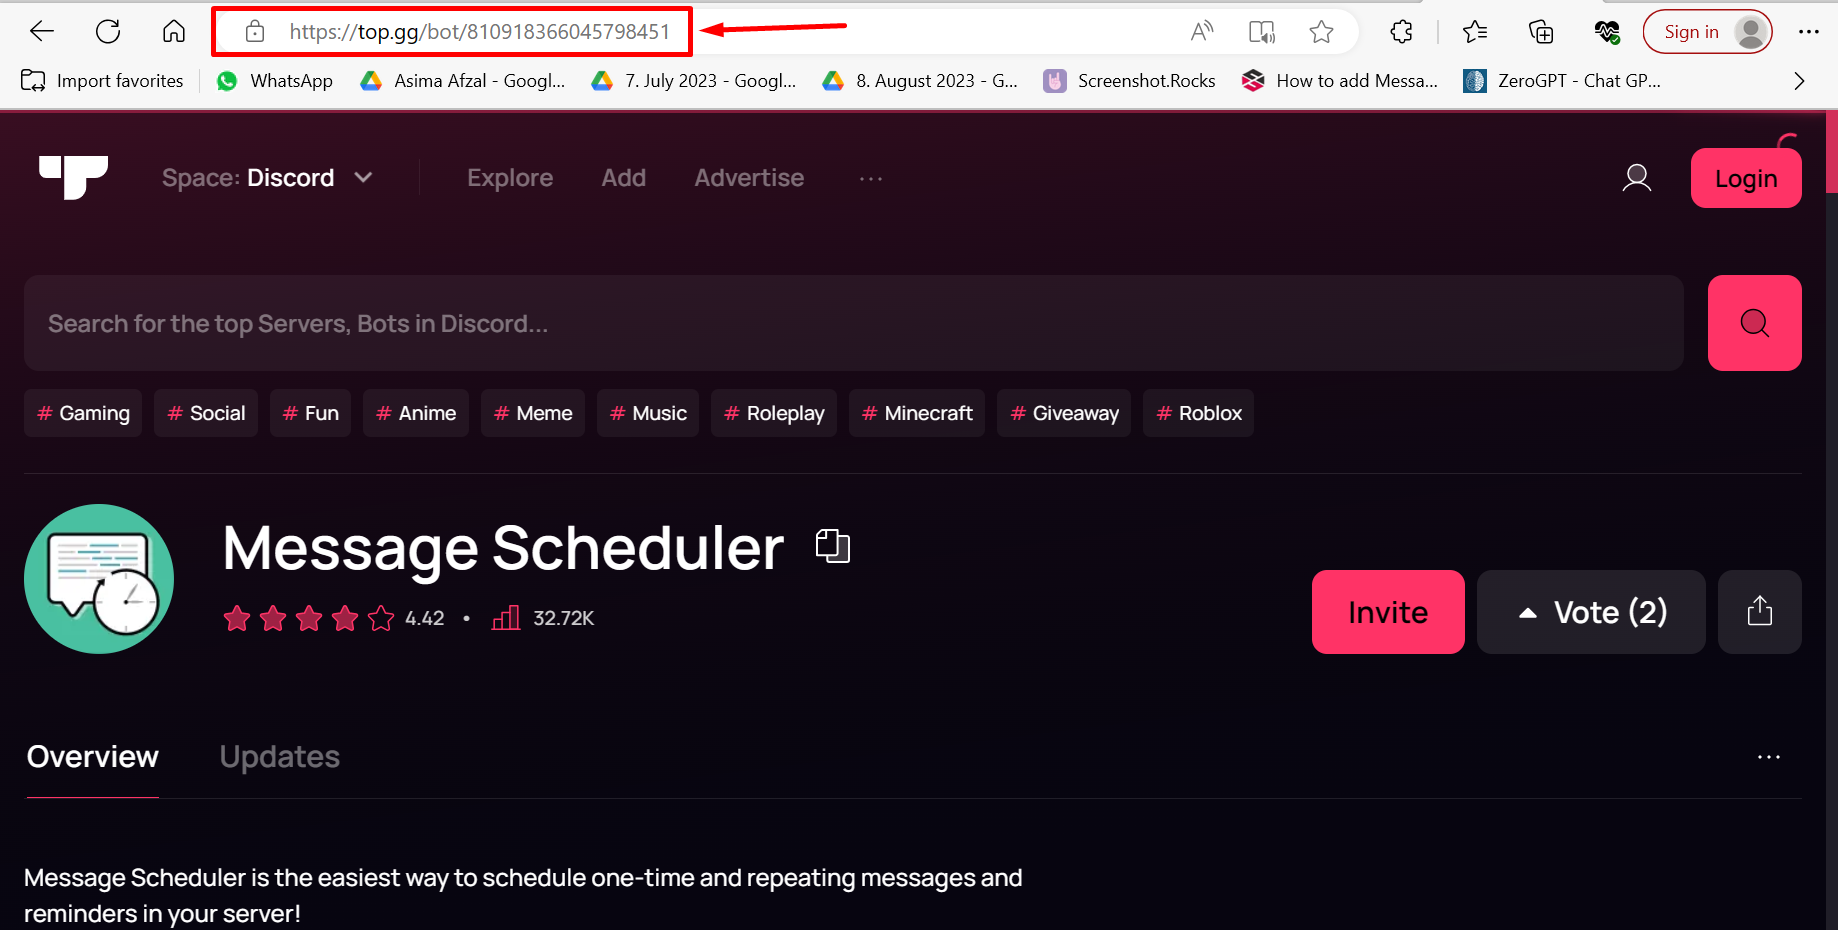
Step 2: Invite Message Scheduler Bot on Server
Next, invite this particular bot on the server by clicking on the Invite button as shown in the provided screenshot:

Step 3: Select Discord Server
After inviting the bot, select any Discord server from the available list where you want to add a bot. Then, press the Continue button. In our case, we have selected the linuxhint server and hit the Continue button for further processing:

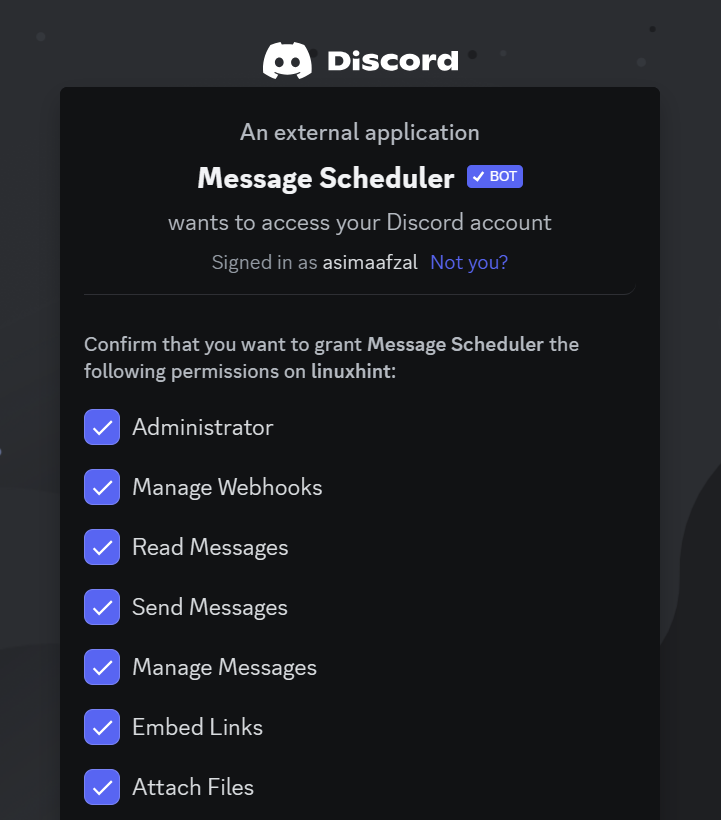
Step 4: Authorize Access
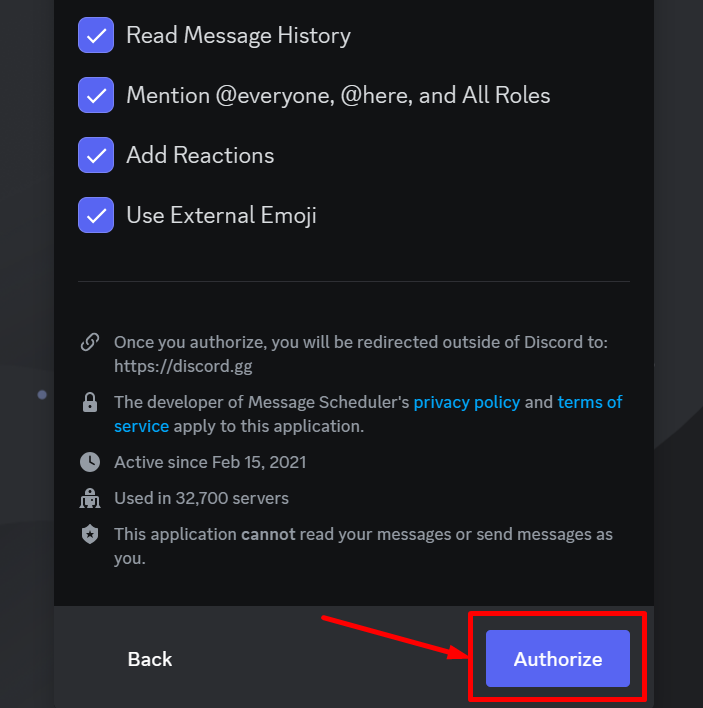
To access the server, you will be asked for some permissions by the bot. Don’t worry about these because later you can change these permissions:
Scroll down the window and click on the Authorize button. After doing so, the bot will receive your confirmation of the premises:
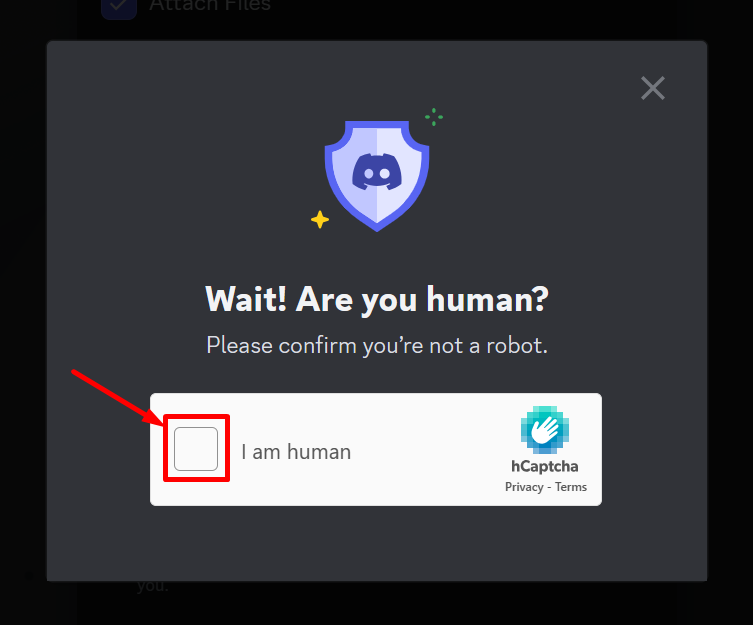
Step 5: Mark Captcha Box
Confirm your identity by marking the captcha box:
Step 6: Message Scheduler Bot Successfully Invited
As you can see, the bot successfully invited into the server. Here, it will ask you to join the support server or not based on your choice. If you need to ask for some help then click on the Join Message Scheduler Support option:
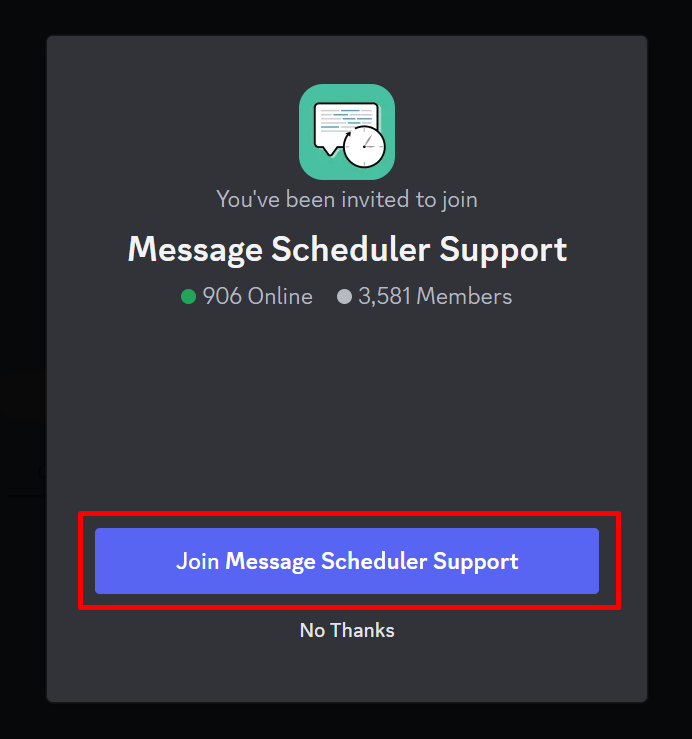
Otherwise, you can manually join their support Server.
How to Create a Server Channel and Add Message Schedule on Discord?
After adding the Message Scheduler bot on the Discord server, create a channel and then add a message schedule on Discord. For that purpose, try out the following procedure.
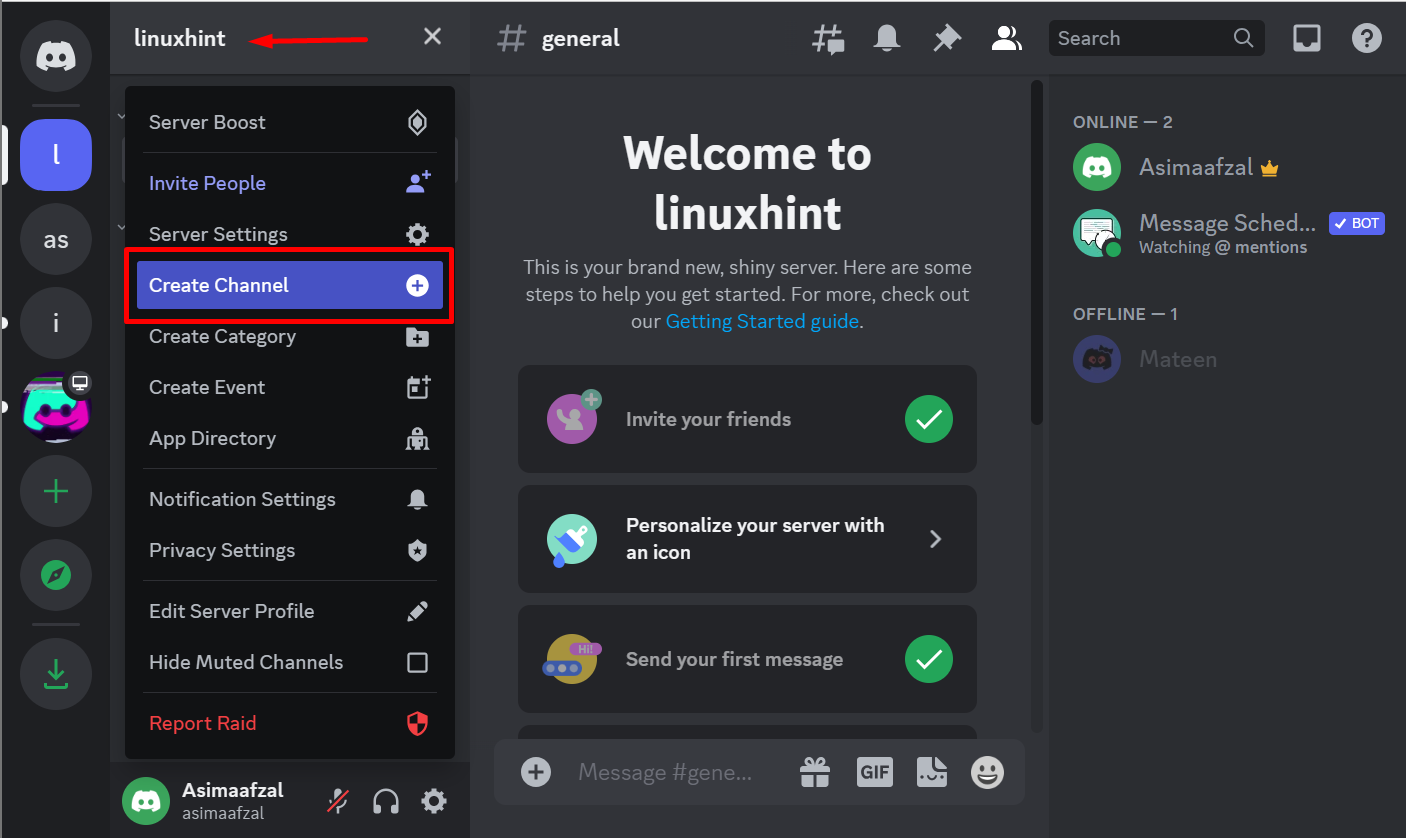
Step 1: Open Discord Server
First, open the Discord application. Then,
- Click on the server to which you invited the message scheduler bot.
- Hit the server name and choose Create Channel from the drop-down menu:
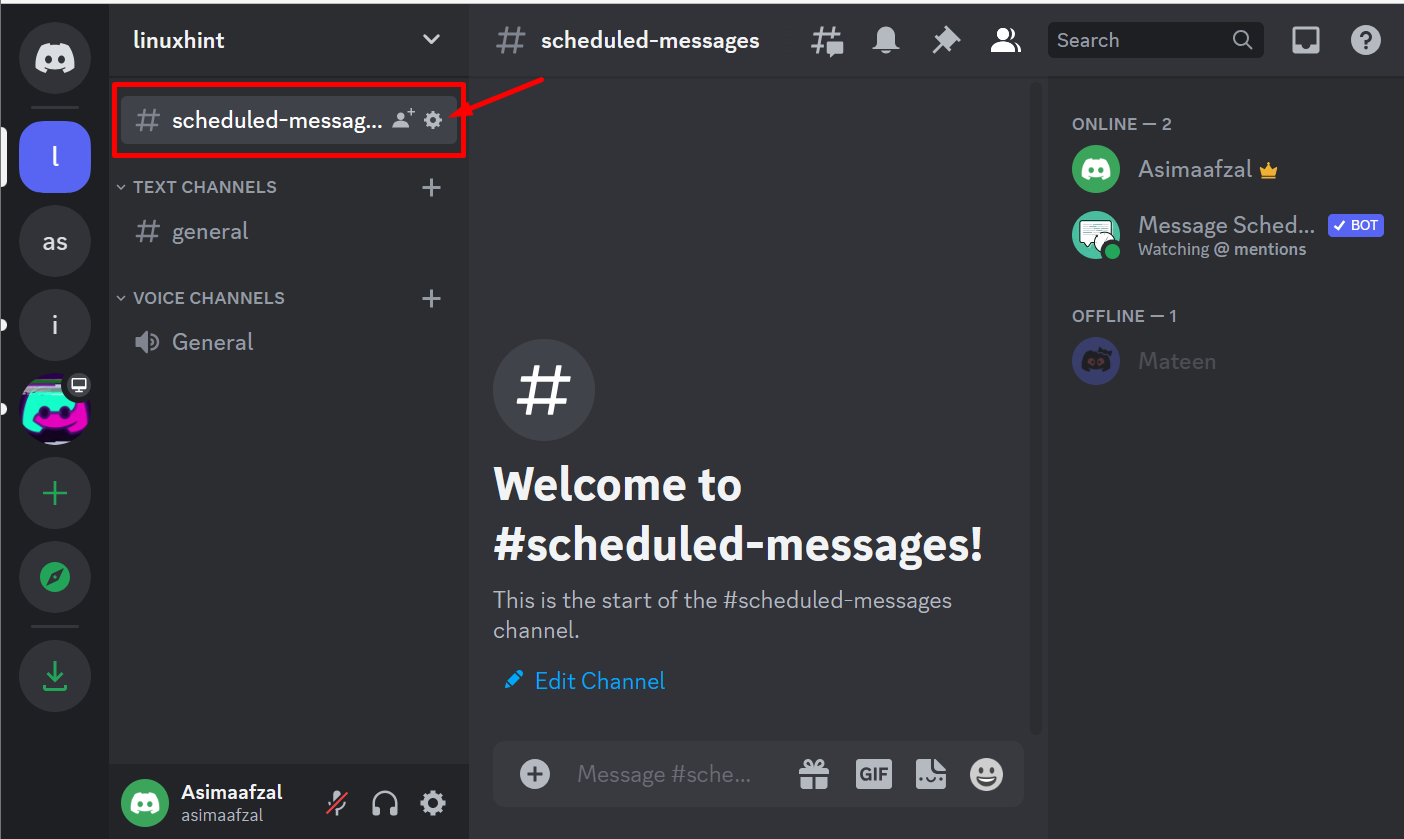
Step 2: Create Channel in Server
Next, type the name of the channel in the text box according to your choice, and then click on the Create Channel button. As in the below screenshot, we named our channel as scheduled-messages:

Step 3: Go to Settings of Server Channel
Afterward, press the Gear icon beside the channel name:
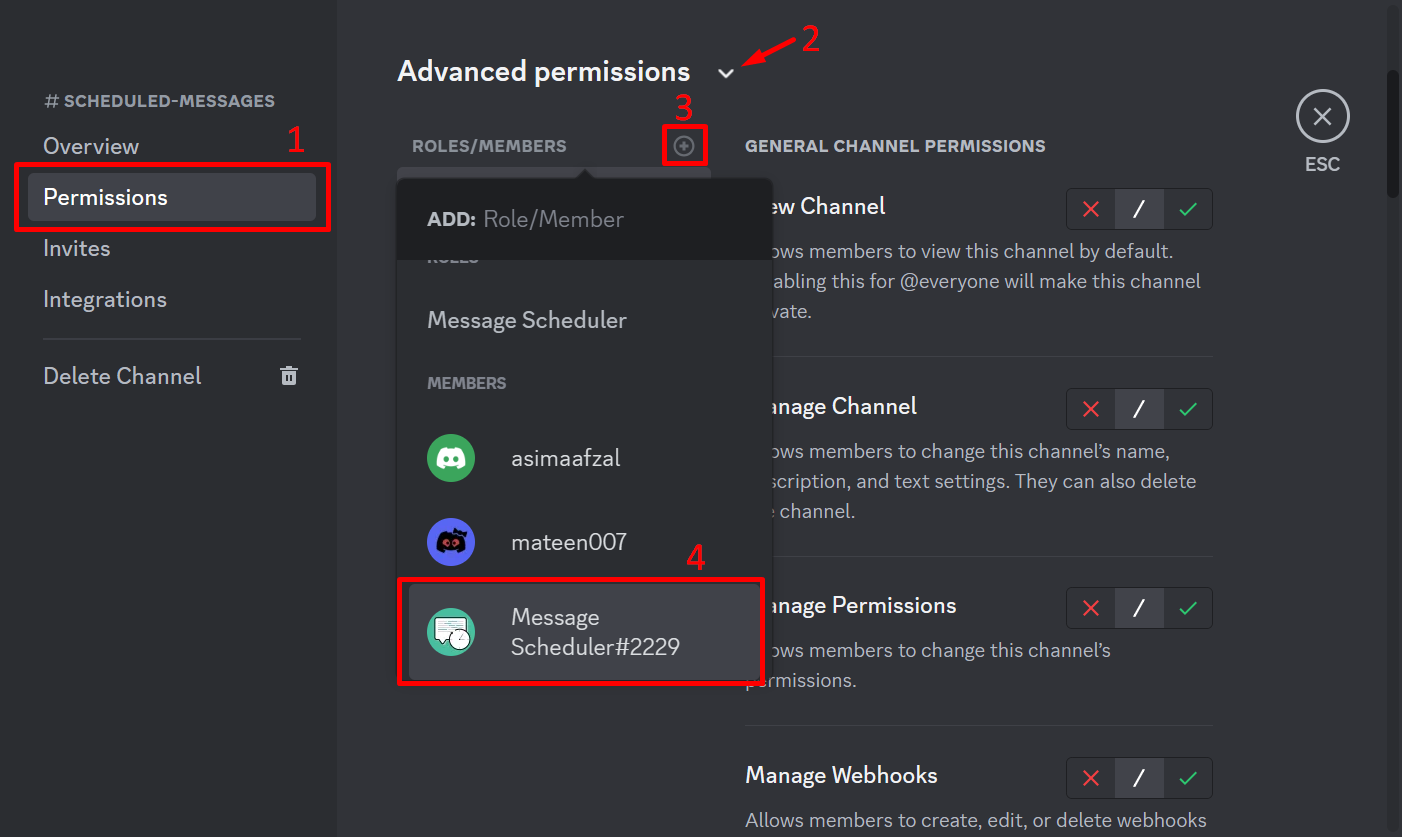
Step 4: Add Message Scheduler in the Server Channel
Now, click on the Permissions category to access the Advanced permissions window, then add the Message Scheduler from the drop-down list by clicking on the highlighted icon:
Step 5: Enable or Disable the Permissions
To enable the permissions, select the Tick icon. On the other hand, choose the Cross icons to disable the permission. Lastly, press the Save Changes button:

Step 6: Send a Message to the Server
Now, type any message in the server message box, and then press Enter Key to send the message:
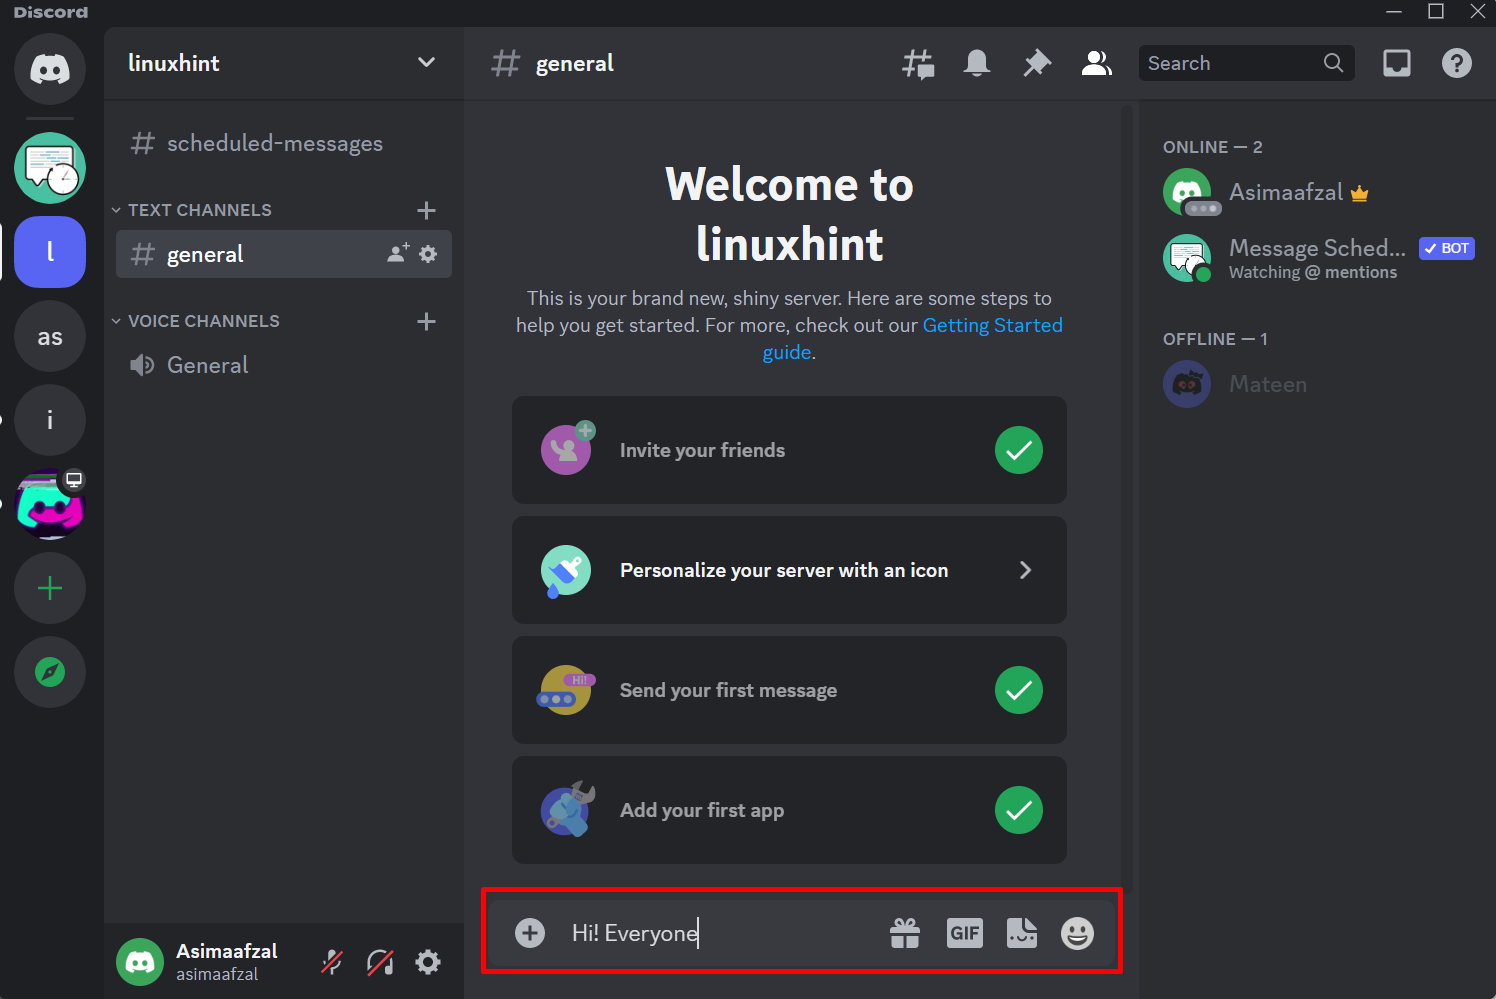
Step 7: Message is Scheduled
As you can see that message has been successfully scheduled:

Conclusion
To schedule messages in Discord, first, invite the Message Scheduler bot by visiting the top.gg website. Then, create a channel in the server and add a Message Scheduler in this newly created channel to schedule your messages. This article provided the complete method for scheduling messages on Discord.