Three Ways to Upload Code to Arduino
You can upload code to your Arduino by using any of these below methods:
-
- PC or Laptop
- Smartphone
- Any other Arduino
1: Uploading Code to Arduino using PC or Laptop
One of the most popular and easiest ways of uploading a sketch into an Arduino is by using PC or laptop. Following are some requirements if you are looking to upload code using PC:
-
- Laptop or PC
- Arduino Board (UNO)
- USB B cable
- Arduino IDE (Software)
Follow these steps to Upload code using laptop:
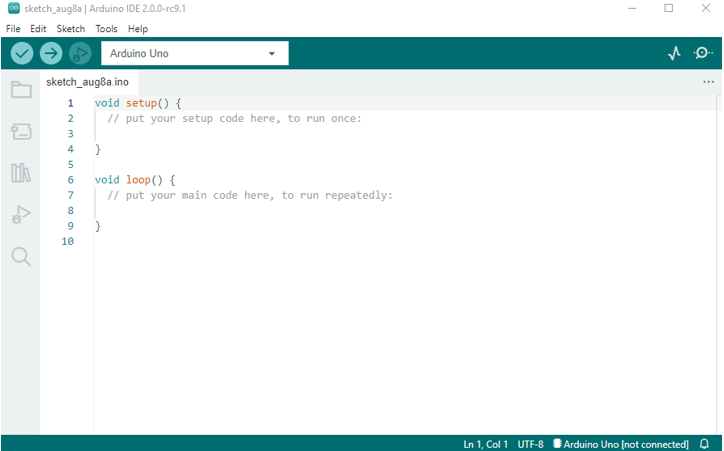
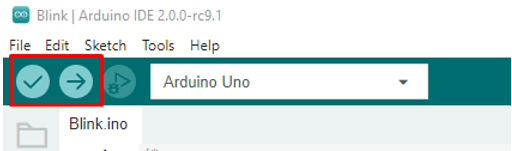
Step 1: Open Arduino IDE.
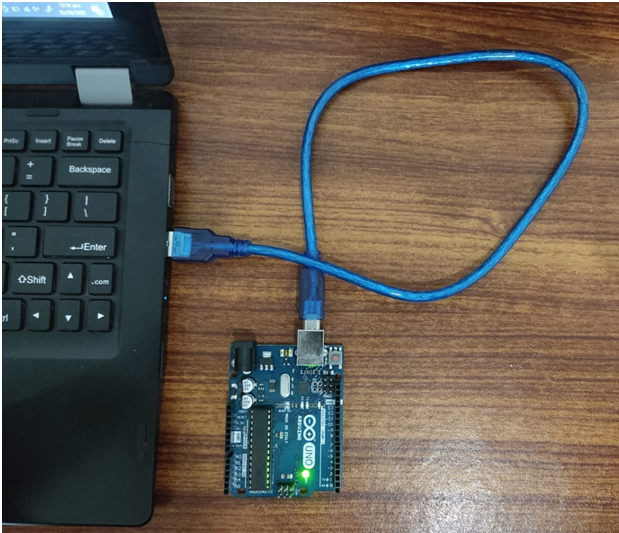
Step 2: Connect Arduino with PC using USB B cable.
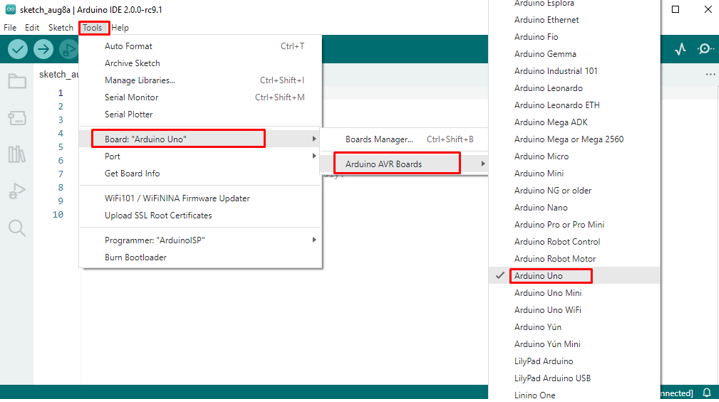
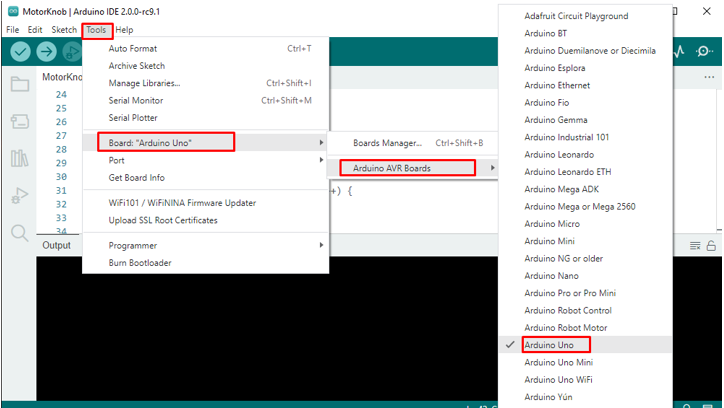
Step 3: Select your board type by going to Tools>Board>Arduino UNO.
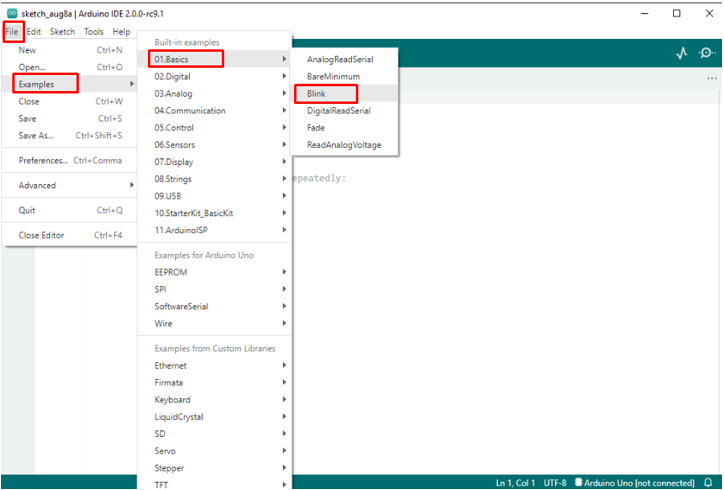
Step 4: Open any example program by following these steps – Files>Examples>01.Basics>Led.
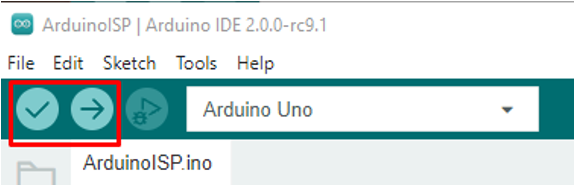
Step 5: Compile and upload your sketch.
2: Uploading Code to Arduino using Smartphone
Smartphones are another way for uploading sketches to Arduino. Yes, you heard it right! You can use plenty of different apps available on Play Store to program your Arduino. Smartphone is a life saver when it comes to uploading code in Arduino, because you can carry it anywhere and if you don’t have enough time to open the laptop or forgot your laptop at home this will help you.
For uploading code using smartphone you need following things:
-
- Arduino Board (UNO)
- USB B cable
- OTG cable or converter
- Smartphone
- Any open-source Android IDE application
Following are some steps to upload code using a smartphone:
Step 1: In order to program we need an IDE so open Play Store in your smartphone, search Arduino IDE install any IDE of your choice.
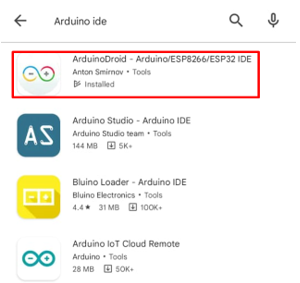
Step 2: Once you have installed the application follow these steps to burn your code, i am downloading ArduinoDroid.
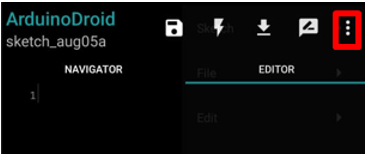
Open app and click three dots a drop-down menu will open then go to – Sketch>Examples>01.Basics>Blink:
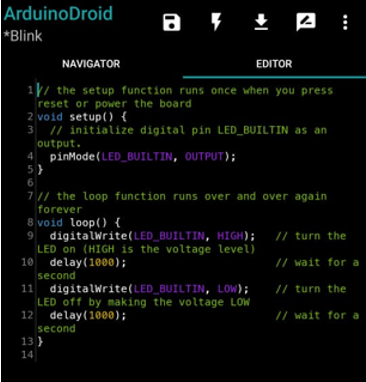
Step 3: A new sketch will open which shows us our LED blinking code:
Step 4: After that follow these instructions to Upload your code in the Arduino board. Make sure the smartphone is connected with your Arduino board through an OTG connector.
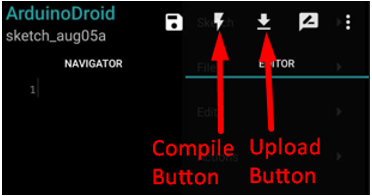
Step 5: You will see the compilation finished message, click on the upload icon to upload the sketch.
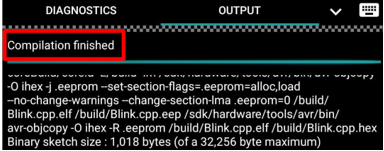
We have finished uploading our code using Application now we will move toward our last method.
3: Uploading Code to Arduino using any other Arduino
Last method which we cover today for uploading code in Arduino is by using any other Arduino. You can do this by using the ArduinoISP function available in IDE. ArduinoISP is a built-in system programmer that is used for programming any AVR based microcontrollers. You can use ArduinoISP for uploading code into any Arduino boards that use AVR based microcontrollers.
To upload sketch using this method you need following materials:
-
- Arduino Board
- Arduino Board which is to be programmed
- Jumper wires
- Laptop/IDE
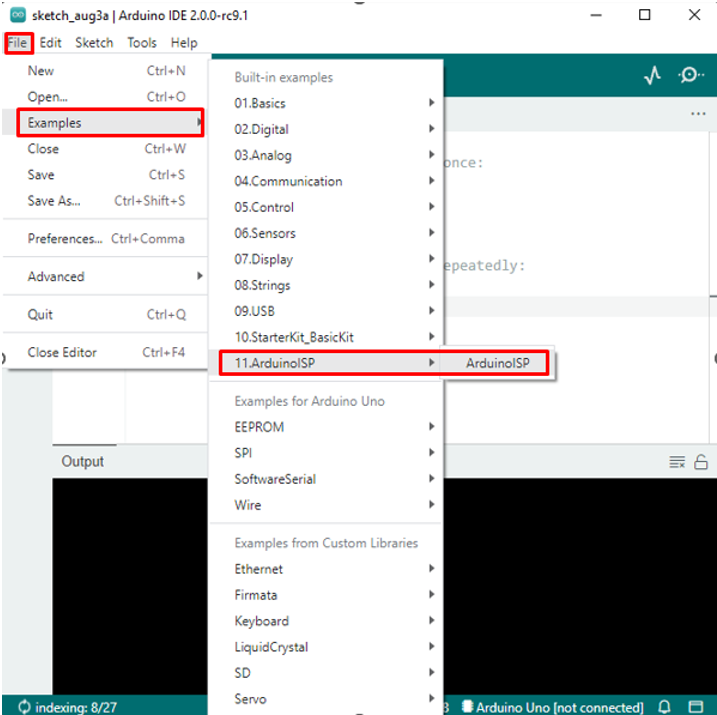
Whole process is managed by Arduino IDE. It provides us with a specific example named ArduinoISP. Among the programmers ArduinoISP is the most practical and easiest way of burning the bootloader on any other Arduino board using Atmega microcontroller.
You can enable this option by following these steps, go to Files>Examples>ArduinoISP.
This process uses Vcc, GND, and 4 data pins. Three of these pins connect MISO, MOSI and SCK of programming Arduino to the targeted Arduino which is to be programmed and the fourth pin from the first Arduino goes to the Reset pin of targeted Arduino.
On some Arduino boards like in UNO pins MOSI, MISO and SCK work the same as the digital pins 11, 12, 13 respectively. So instead of using ICSP1 pins we will stick to digital pins 11,12,13.
MOSI, MISO and SCK pins are present on Arduino mentioned as ICSP1 pins. If you want to know further about ICSP1 click here.
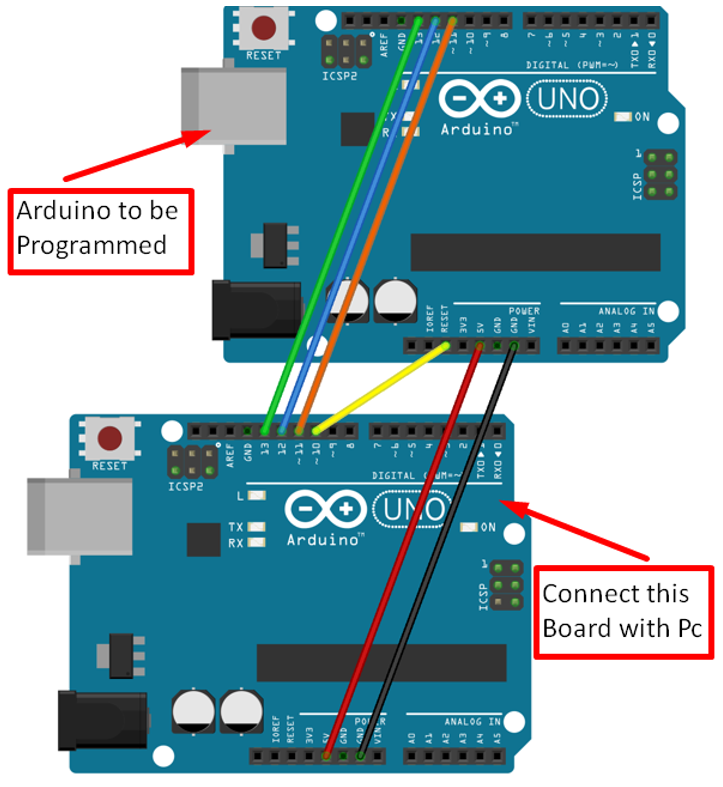
In the picture above we have connected two UNO boards with the help of digital pins. Pin 10 is connected to the Reset pin of the targeted board.
Red and black color wires show 5v Vcc and GND respectively, both of these are needed to Power the targeted Arduino board. Connect the bottom board to your PC using USB B cable.
After setting up your hardware follow these steps to upload you code
Step 1: Select your Board by going to Tools>Board.

Step 2: Then go to – File>Examples>ArduinoISP, open the ArduinoISP code.

Step 3: Upload your sketch.
Step 4: Now select the board which is to be programmed as did in Step 2.
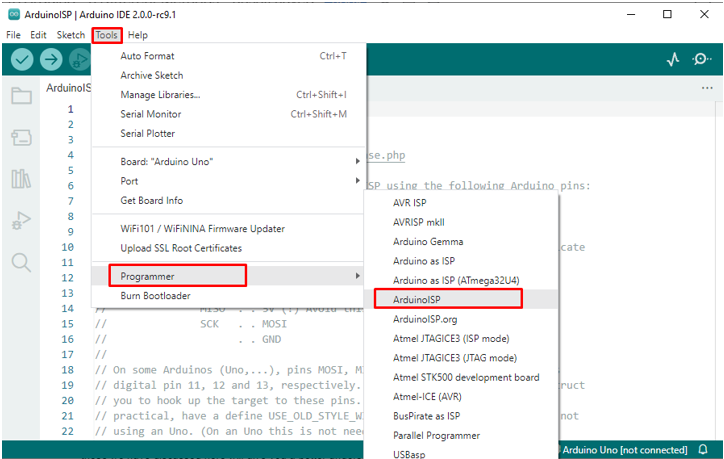
Step 5: Go to Tools>Programmer>ArduinoISP.
Step 6: Now go to Sketch and select the option Upload using Programmer.
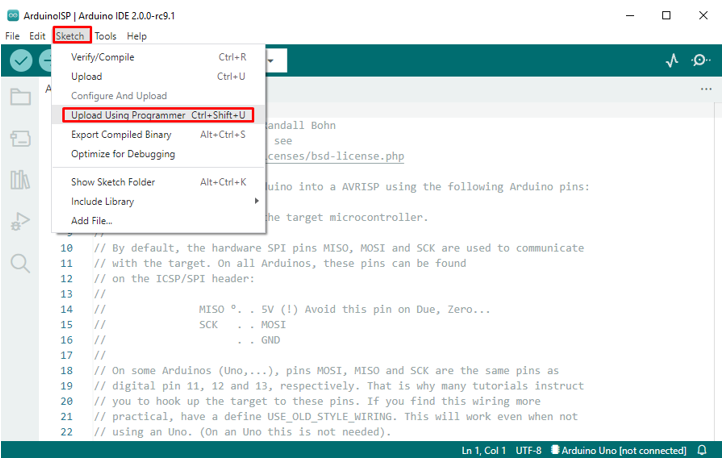
Your sketch has now been uploaded to the targeted Arduino.
Conclusion
The flexibility and ease of use of Arduino allows us to interact with hardware in multiple ways. There are multiple options available through which we can compile and upload our code to Arduino. Some of these we have discussed here will give you a better understanding of Arduino and enhance your programming experience.