ESP32 board is a low-cost and low-powered microcontroller with integrated Wi-Fi and Bluetooth modules. People use this device to develop IoT devices, wearable electronics and other embedded devices. ESP32 board has a non-volatile flash memory that is used to store programs and data in electronic devices. The non-volatile nature of this device means that it retains its content even after powering off the device. If somehow you want to erase the flash memory on ESP32, you can read this guide, where you will find:
- Why is it Useful to Erase Flash Memory on ESP32
- Prerequisites Required to Erase Flash Memory on ESP32
- How to Erase Flash Memory on ESP32 on Windows, Mac or Linux
- Bonus Method: How to Erase Flash Memory on ESP32 by Cloning the GitHub Source File
- How to Fix “A fatal error occurred: Could not connect to an Espressif device”
- Why is it Useful to Erase Flash Memory on ESP32
Erasing flash memory on ESP32 can help you:
- Reset the board if it is not working properly.
- Remove unwanted software or applications installed on the board.
- Restore the default settings of the ESP32 board.
Prerequisites Required to Erase Flash Memory on ESP32
To erase flash memory on ESP32, you will need:
- ESP32
- Type A to Micro-USB Cable for Connecting ESP32 to System
- Computer (PC or MacBook)
How to Erase Flash Memory on ESP32 on Windows, Mac or Linux
The method to erase flash memory on Windows, Mac or Linux is similar and can be done easily through the following steps:
Step 1: Connect ESP32 to Windows, Mac or Linux
First, you have to connect your ESP32 board to your system on either Windows, Mac or Linux using the USB cable. The Micro-USB end must be inserted into the ESP32 board, while the USB Type A end is inserted into the system.
Step 2: Install Python on Windows, Mac or Linux
By default, Python is not installed on Windows systems, but it can be installed easily from the Microsoft Store.
If you are using Mac or Linux, you don’t need to install Python since it is preinstalled in the system. However, if you have accidentally deleted it, you can re-install it from here.
Step 3: Install ESP Tool on Windows, Mac or Linux
After installing Python, you can use the following command to install ESP Tool on the system:

Note: The commands provided in the article are tested on Mac, you can use the same command and steps to perform them on your Windows or Mac system.
Step 4: Install Setup Tools on Windows, Mac or Linux
You should also install setup tools on your system, which is required for the erase flash memory process, this can be done from the following command:

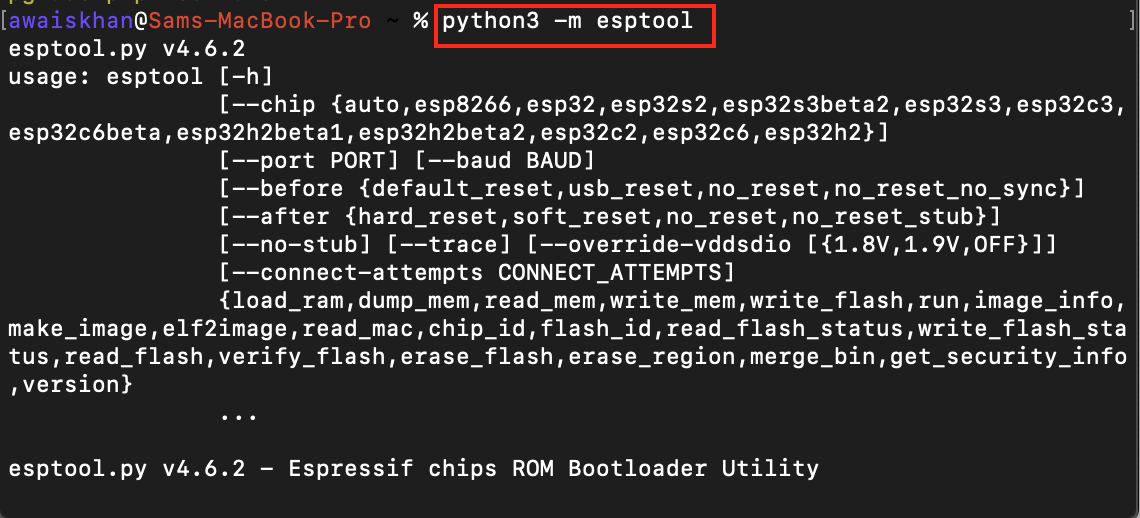
Step 5: Ensure ESP Tool is Installed on System
Ensure ESP Tool is installed on your system, this can be done using the following command:
Step 6: Erase Flash Memory on ESP32
To erase flash memory on ESP32, hold the Boot button, and enter the following command:

Bonus Method: How to Erase Flash Memory on ESP32 by Cloning the GitHub Source File
You can also download the GitHub source file on your system and run the python file with the erase_flash command to successfully erase flash memory on ESP32. The steps to perform erase process through this method is as follows:
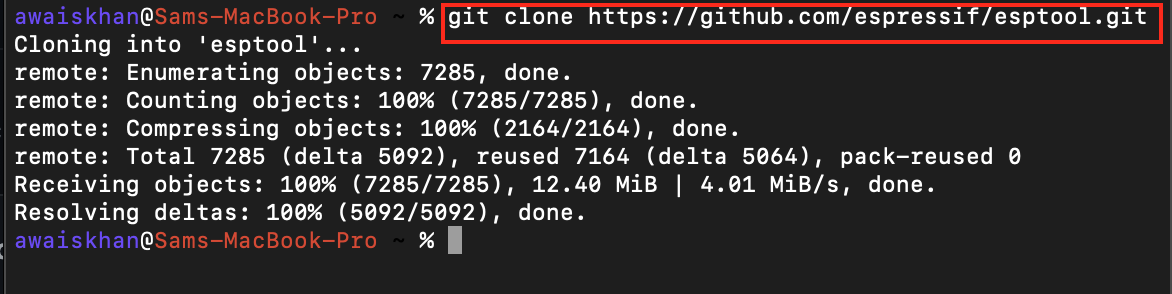
Step 1: Download ESP Tool Source File
Open your terminal either Windows, Mac or Linux and run the following command to download the ESP Tool GitHub source file on the system:
Step 2: Navigate to ESP Tool Source Directory
After downloading the source directory, you can navigate to it using the following command:
Step 3: Run the Python File
Inside the directory, you will find an esptool.py file, which you have to run with the erase_flash command to perform the reset process. While entering the following command, you must ensure holding the Boot button of the ESP32 board to successfully erase the flash memory:

Note: If you are using Windows system, you must ensure Python is downloaded on your system. If it’s not, go to Step 2 of the Method 1 to install Python on Windows first.
How to Fix “A fatal error occurred: Could not connect to an Espressif device”
While resetting the ESP32 if you encounter a “A fatal error occurred: Could not connect to an Espressif device” error, as shown below:

You can fix this error through the following fixes:
1: Check for the Cable
Ensure the USB cable connecting your ESP32 board to your system is compatible. Sometimes the damage in the cable will create this type of error.
2: Close Arduino IDE
You may encounter this type of error if your Arduino IDE is opened on your system. The reason is you have connected your ESP32 board with your Arduino IDE through a port. If the process finds the port busy, it will not be able to perform the reset process. Thus, you should close Arduino IDE before erasing the flash memory on ESP32.
3: Install Drivers
If you are still encountering the same problem, you can try installing the USB to UART driver of your system from here. After installing the driver, restart your system and perform the reset process again.
Conclusion
Erasing flash memory (factory reset) on ESP32 is a simple task and can be done easily by installing the ESP Tool and Python on your system. After that, you only need connect the ESP32 board to your computer and run the esptool to erase flash memory on ESP32. While erasing the flash memory, don’t forget to hold the Boot button on ESP32 board.