This guide will cover:
- What is Pushsafer
- Supported Platforms for Pushsafer
- How to Send Notification from ESP32 Using Pushsafer
- Conclusion
What is Pushsafer
Pushsafer is a notification service that allows ESP32 users to send notifications to other devices via the Internet. It is a fast and effective choice for the users who want to send notifications from ESP32 to multiple devices like mobile phones, tablets, Windows systems and more.
Supported Platforms for Pushsafer
Pushsafer is supported on the following platforms:
- Windows 10 (Desktop, Phone & Tablet)
- Android (Phone, Tablet, TV Box, Car Radio > nearly every device)
- iOS (iPhone, iPad, iPod Touch)
- Browser (Chrome and Firefox)
How to Send Notification from ESP32 Using Pushsafer
To send notification from ESP32 using Pushsafer, you can follow the below-given steps:
Step 1: Open Pushsafer Website
First, navigate to Pushsafer website and create an account there.
Step 2: Save the Private Key
After creating an account on the Pushsafer website, you will be provided with the private key, you can save this key in a separate file or can copy it for later use.
Step 3: Install Pushsafer on your System
Pushsafer developers provide various options to use the application, like you can install it on your system either Windows, Android, iOS. You can also download Pushsafer browser extension to get the notification from ESP32 right on your browser.
Here, I am going to install Pushsafer on Android from the Google Play Store:

Step 4: Register the Device
You have to register your device to Pushsafer by entering your email address and password, which you have already created in Step 1:

Then, enter the device name to register the device:
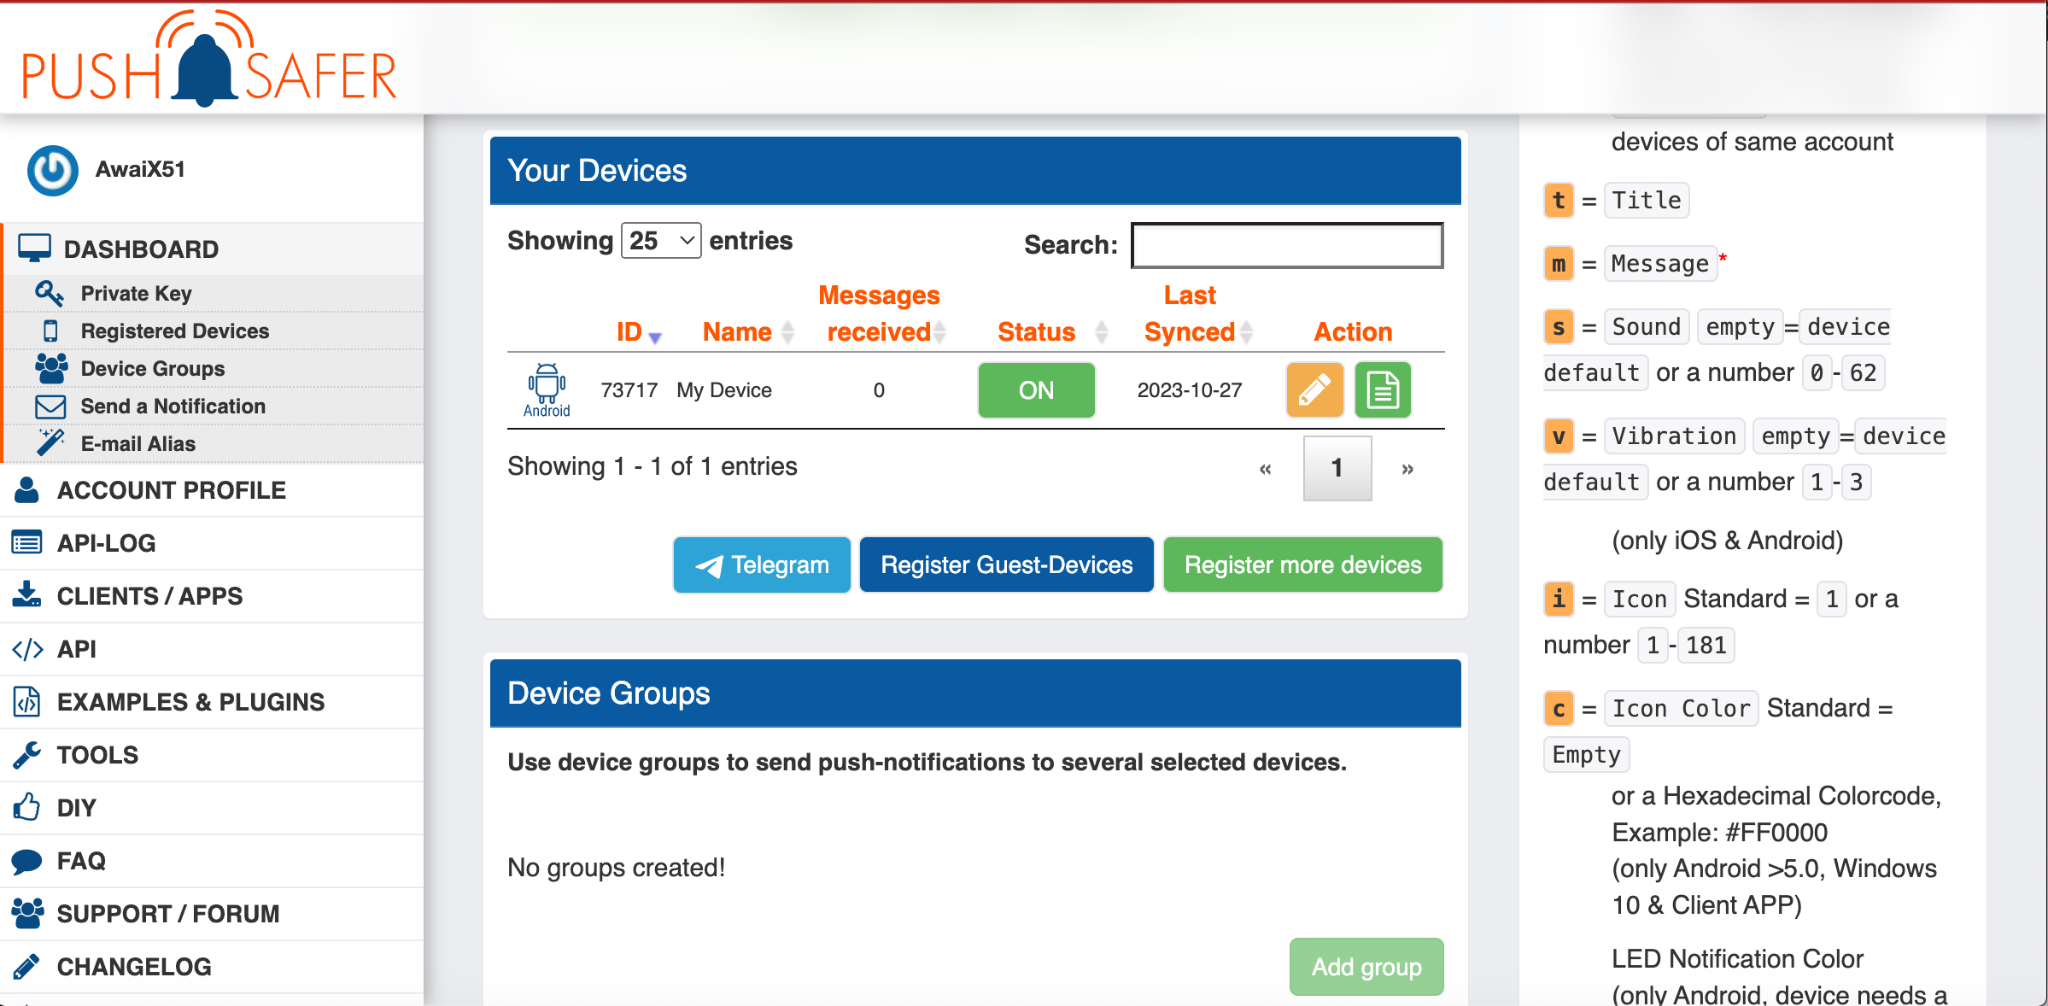
After registering the device, open the Pushsafer dashboard on the browser. You will see your Android device ID registered on Pushsafer:
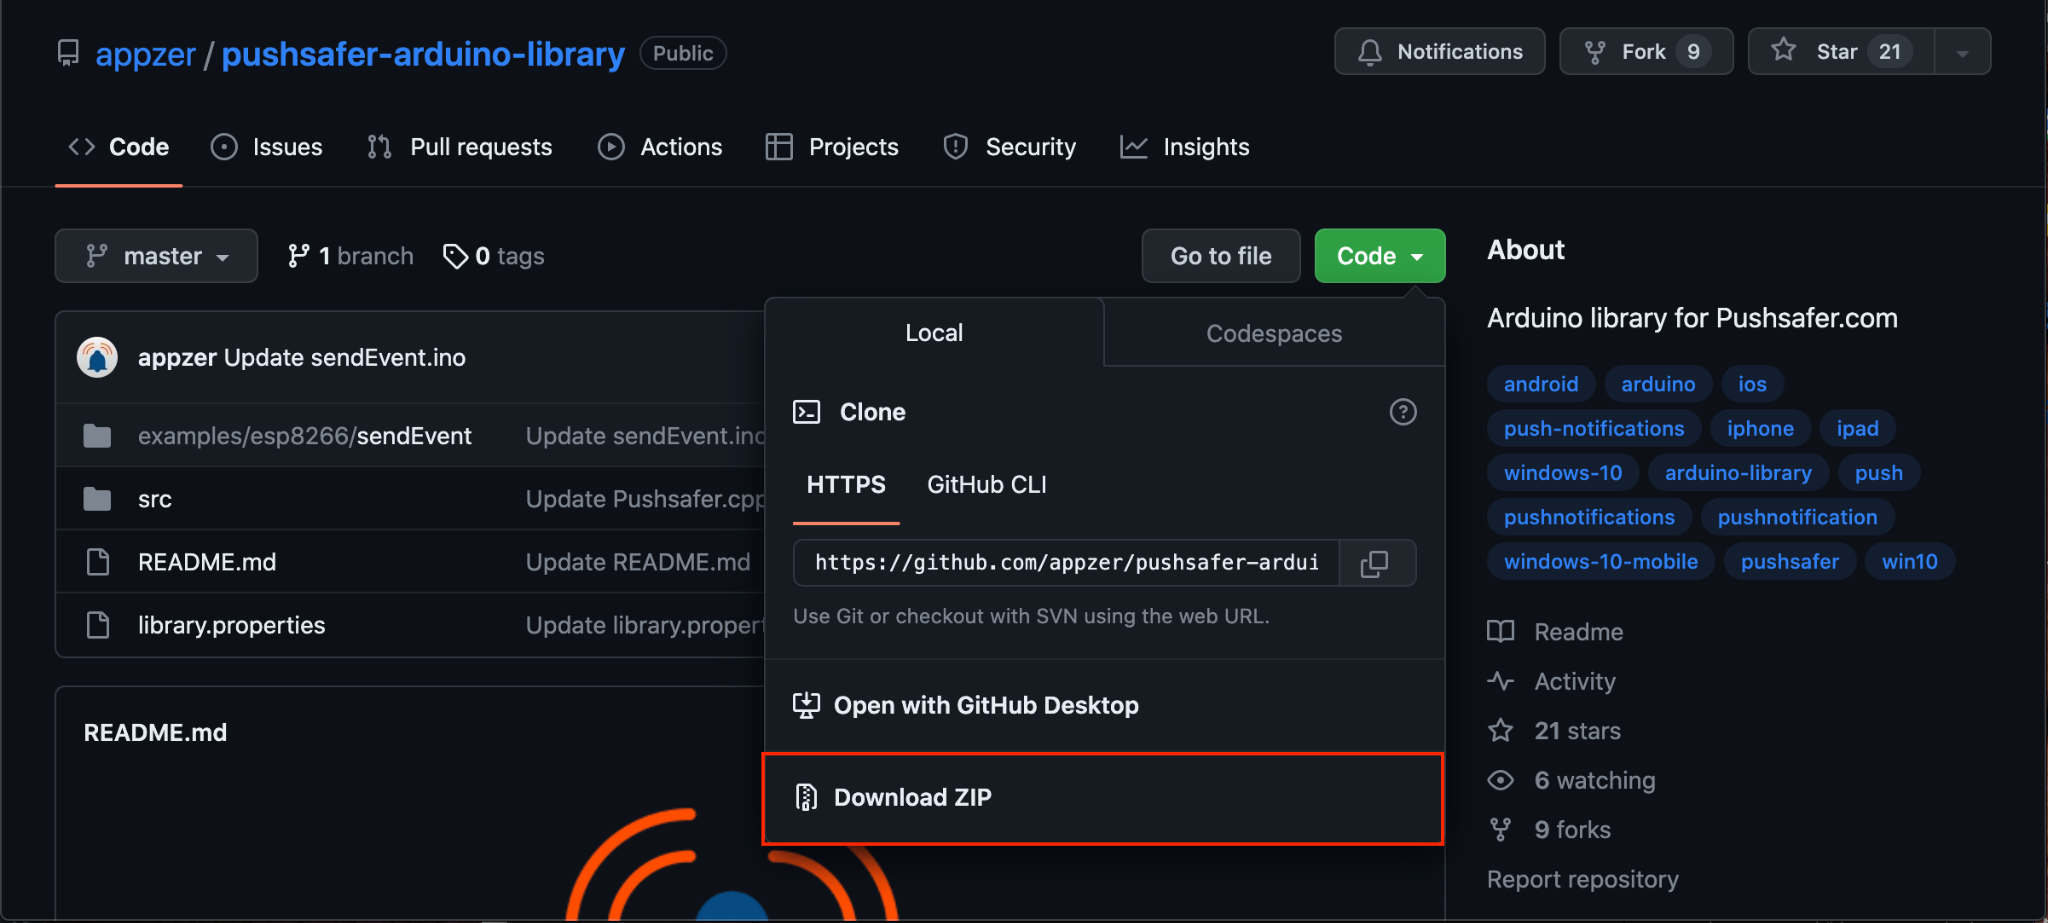
Step 5: Download Pushsafer Library
You have to download the Pushsafer library on your system from here; the file must be downloaded in zip:
Step 6: Open Arduino IDE
Now, open Arduino IDE on your system; if it is not installed, you can install it from here.
Step 7: Connect ESP32 Board
Connect your ESP32 board with your system, if you are new to ESP32 board, you can follow here.
Step 8: Add the Pushsafer Code
Paste the following code in the Arduino IDE:
#include <WiFiClient.h>
#include <Pushsafer.h>
#define PushsaferKey "Private Key"
char ssid[] = "You Wi-Fi Name";
char password[] = "Your Wi-Fi Password";
WiFiClient client;
Pushsafer pushsafer(PushsaferKey, client);
void setup()
{
WiFi.mode(WIFI_STA);
delay(100);
WiFi.begin(ssid, password);
while (WiFi.status() != WL_CONNECTED)
{
delay(500);
}
struct PushSaferInput input;
input.message = "This is a Test message from ESP32";
input.title = "Hey Linux Hint Users!";
input.sound = "6";
input.vibration = "1";
input.icon = "1";
input.iconcolor = "#00FF00";
input.priority = "1";
input.device = "your device ID";
pushsafer.sendEvent(input);
}
void loop()
{
}
In the above code, don’t forget to enter your private key, SSID, password and device IDE. You can customize your message as well according to your choice.
Step 9: Import Library
Go to Sketch section, navigate to Include Library option, select the Add .ZIP Library option and import the library into the Arduino IDE:

Step 9: Upload the Code
Now, select the Upload option to upload the code:

Step 10: Fix “fatal.error: .Arduino.Json.h:” in Arduino IDE
If you encounter the “fatal.error: .Arduino.Json.h:” in Arduino IDE while running the above code:

You can fix this error by simply installing the Arduino.Json from the Library Manager in Arduino IDE:
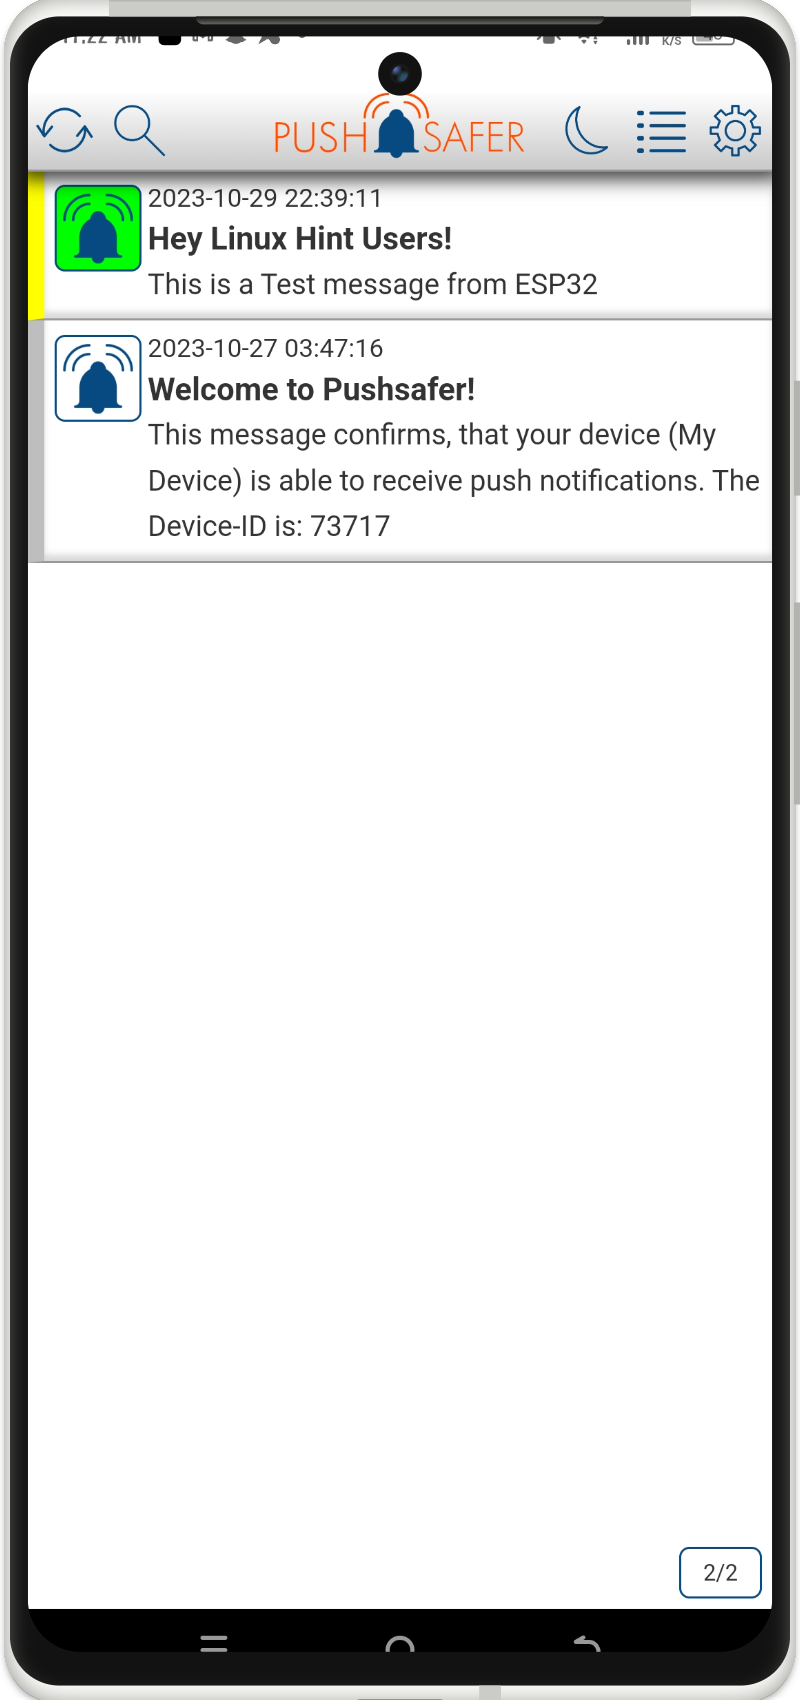
After the installation, upload the code again to fix the issue. Once you upload the code, you will see the message notification on Pushsafer installed on your other device; in my case, I have received the notification on my mobile device:
Conclusion
Pushsafer is an effective way to easily send notifications from ESP32 to other devices like Windows, iOS or Android. To perform the process, first you have to create an account on Pushsafer website and install the application on other devices. After that, you have to register the device, then add the code in the Arduino IDE by replacing the private key, SSID, password and device ID. You must also download and upload Pushsafer library in the IDE and install Arduino.Json. Once done, you can upload the code to successfully send notification from ESP32 to your other devices.