This guide covers the following outline:
Why is it Useful to Reset Arduino Board
- How to Reset Arduino Board Using Reset Button
- How to Reset Arduino Board Using Reset Pin
- How to Reset Arduino Board Using reset() Function
- How to Reset Arduino Board Using Watchdog Timer Method
- How to Reset Arduino Board By Resetting the Sketch in the Memory
- How to Reset Arduino Board By Resetting the EEPROM Memory
Why is it Useful to Reset Arduino Board
Resetting an Arduino Board is useful in various scenarios, such as:
- You can reset your Arduino Board if you are having trouble uploading your sketch.
- Sometimes the uploaded sketch is not working properly, in that case it is useful to reset the Arduino Board.
- Resetting the Arduino Board can also unlock the board if it is locked up or not responding.
How to Reset Arduino Board
You can reset Arduino Board:
- Using Reset Button
- Using Reset Pin
- Using reset() Function
- Using Watchdog Timer Method
- By Resetting the Sketch in the Memory
- By Resetting the EEPROM Memory
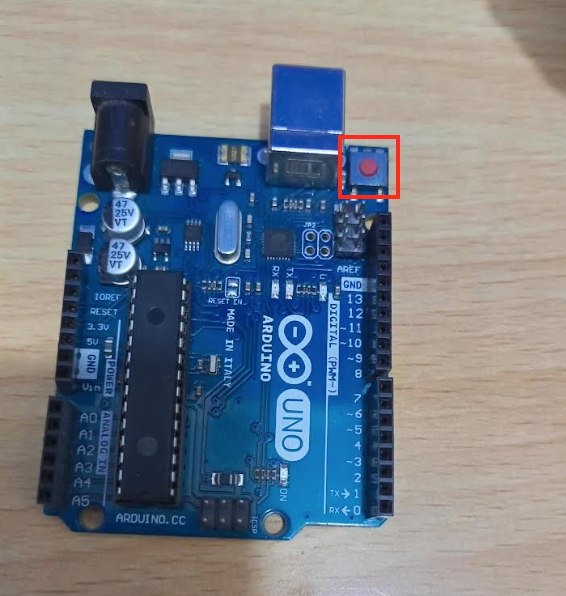
How to Reset Arduino Board Using Reset Button
Arduino Board includes a built-in Reset button that you can use to reset your board. This button is placed right before the USB port used for Power Supply. By pressing this button, every activity on this board will be stopped and it will take the execution back to the first line of the code.
How to Reset Arduino Board Using Reset Pin
If you look at the Arduino Board closely, you will notice that it also has a Reset pin, which can be programmed in such a way that it can reset the board within seconds. This can be useful in case your Reset button is not working properly. To use this Reset Pin to reset Arduino Board, you have to use the following steps:
Step 1: Download and Install Arduino IDE
First, download and install Arduino IDE on your system since we are going to use it to upload code. You can download and install Arduino IDE on your system from here.
Step 2: Connect Arduino Board with System
Now use the USB cable, insert one end of the USB type B inside the Arduino board and the other side of USB type A into your computer.
Step 3: Select Arduino Board
Open Arduino IDE, go to the Tools section and select the Arduino Board from there. You should also select Port as well after selecting the Board:

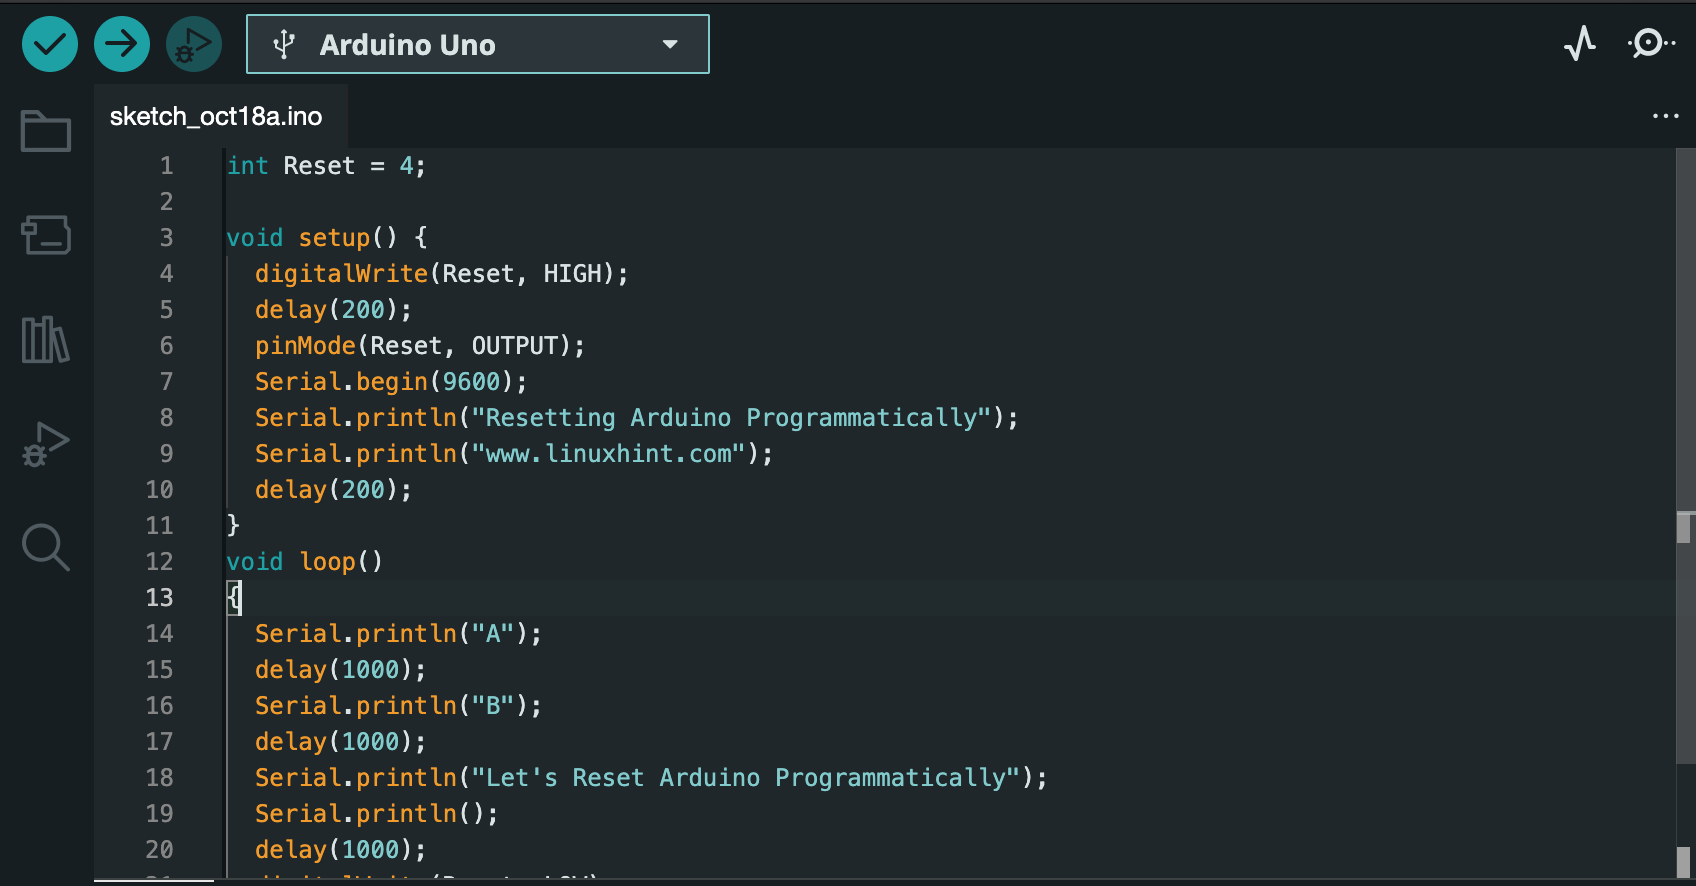
Step 4: Add Code to Arduino IDE
Now, add the following code in the Arduino IDE:
void setup() {
digitalWrite(Reset, HIGH);
delay(200);
pinMode(Reset, OUTPUT);
Serial.begin(9600);
Serial.println("Resetting Arduino Programmatically");
Serial.println("www.linuxhint.com");
delay(200);
}
void loop()
{
Serial.println("A");
delay(1000);
Serial.println("B");
delay(1000);
Serial.println("Let's Reset Arduino Programmatically");
Serial.println();
delay(1000);
digitalWrite(Reset, LOW);
Serial.println("Arduino won't reach there.");
}
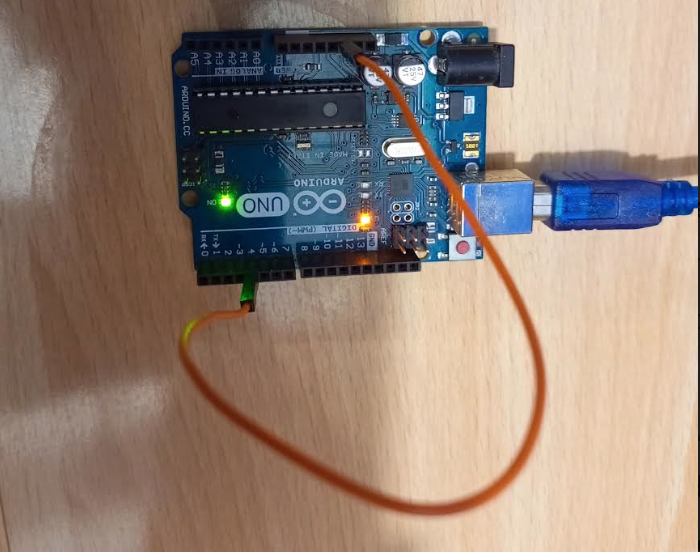
Step 5: Connect a Wire
Take a connecting wire with both ends open and connect one end of the wire to Pin 4, while another end to Reset pin on Arduino UNO, as shown below:
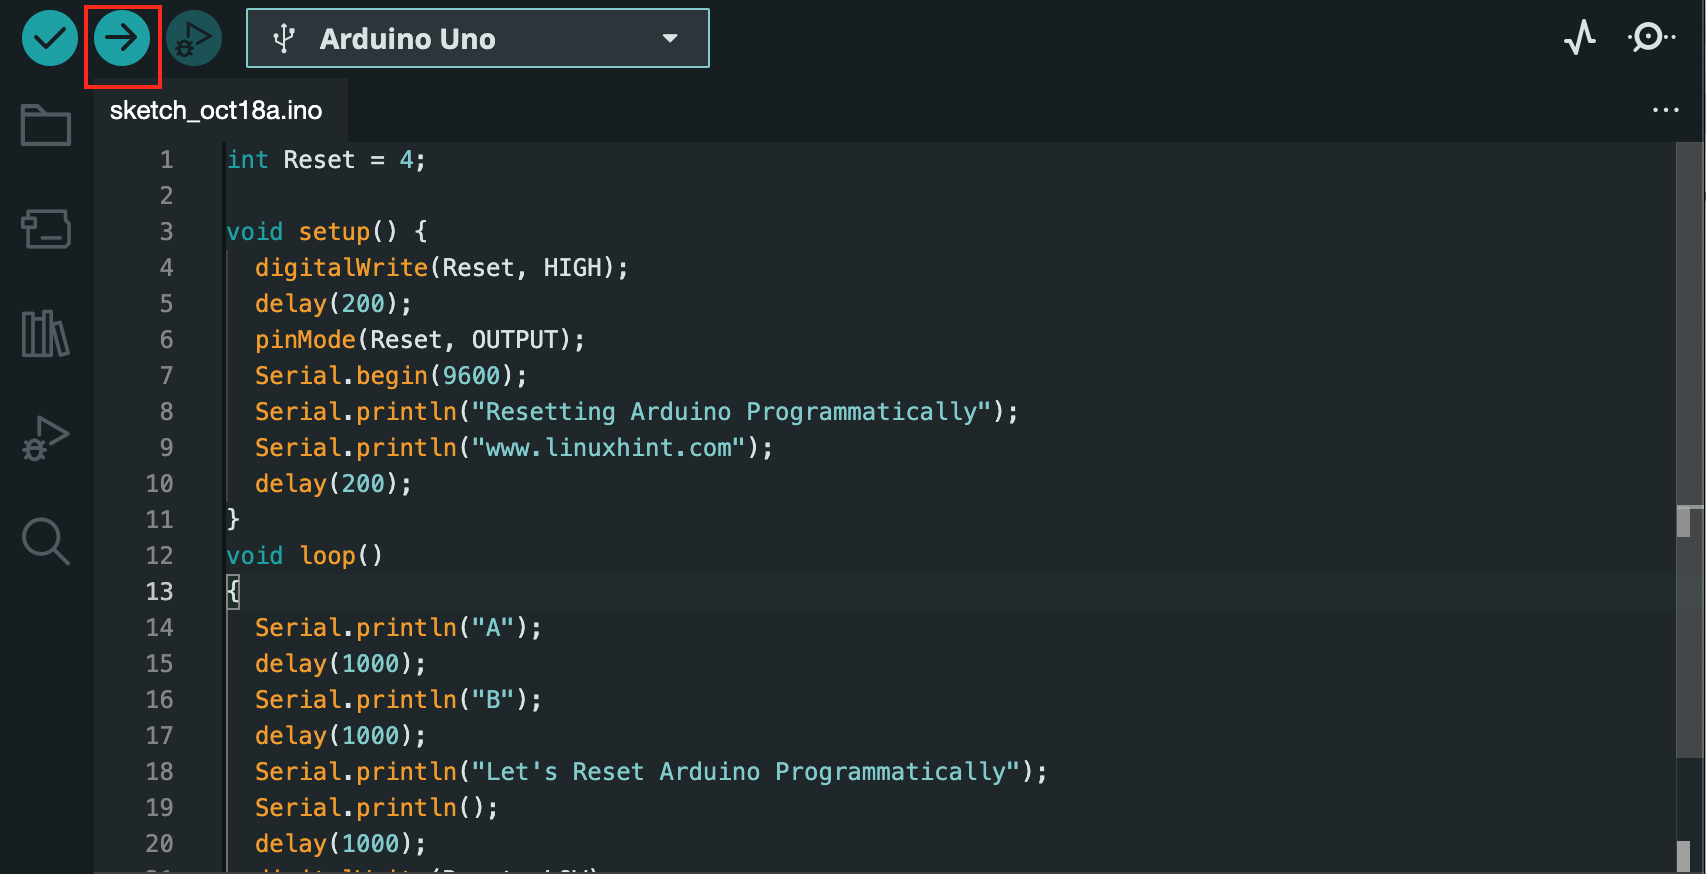
Step 6: Upload the Code
Upload the code using the Upload button:
Step 7: Open Serial Monitor
Navigate to the Serial Monitor option:
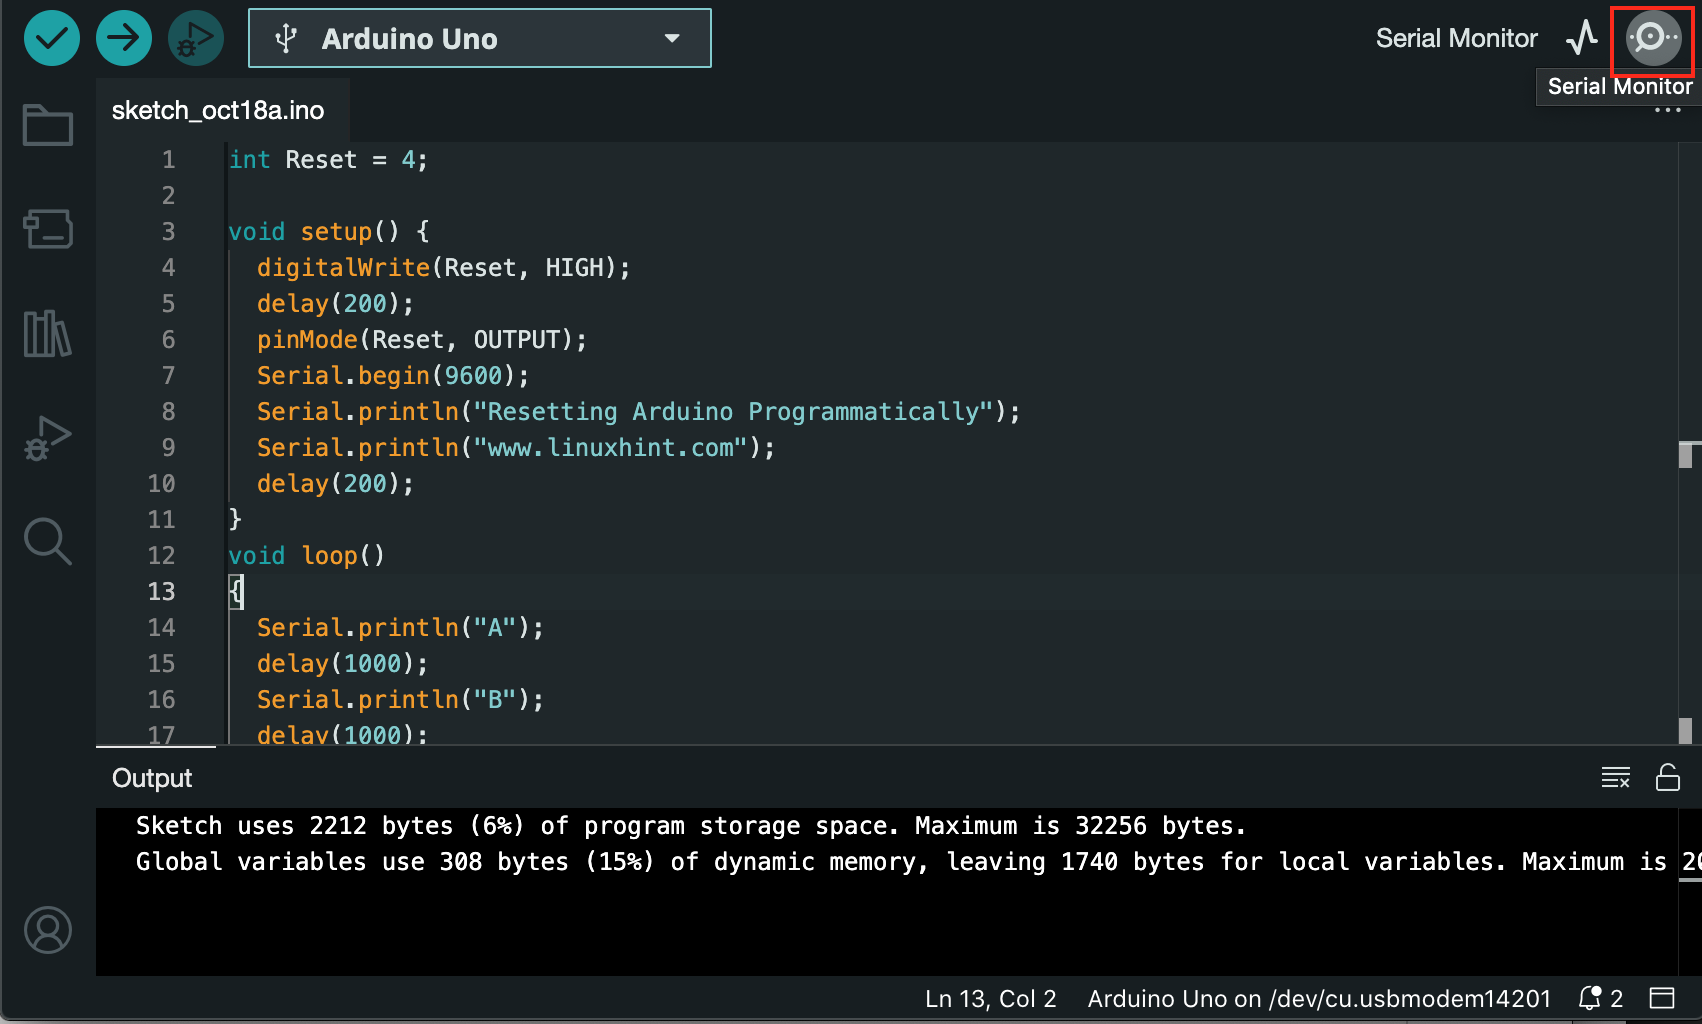
There you will be able to see the following output:
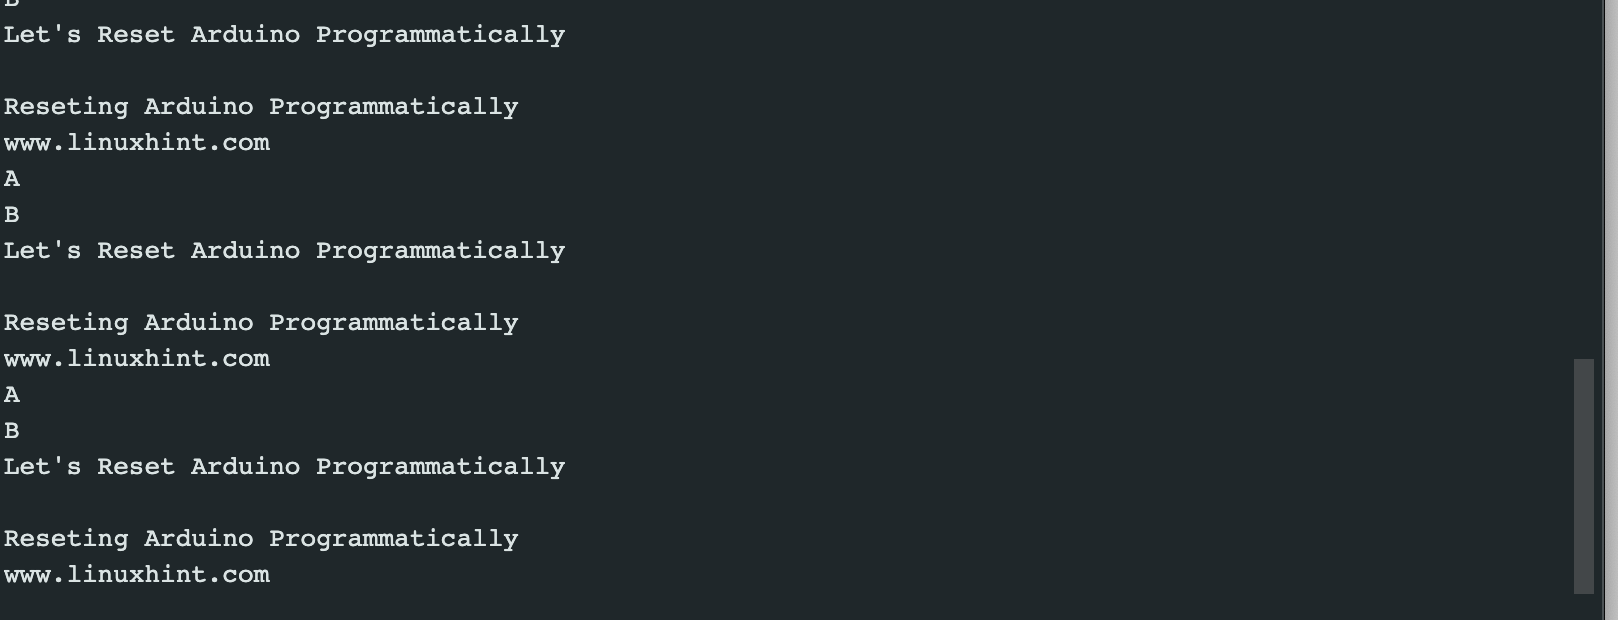
The above output shows that Arduino is not displaying the “Arduino won’t reach there” and got reset, then display the result from the start. This ensures that the method has successfully reset the Arduino Board.
How to Reset Arduino Board Using reset() Function
You can also use the reset() function in your Arduino code to reset the Arduino Board within seconds. This method is pretty straightforward since reset() function is included in the Arduino IDE libraries. You can reset Arduino Board using reset() function from the following steps:
Step 1: Open Arduino IDE and write your code. As an example, I am adding the following code:
void setup() {
Serial.begin(9600);
}
void loop()
{
Serial.println("1..");
delay(1000);
Serial.println("2..");
delay(1000);
Serial.println("3..");
delay(1000);
Serial.println("Arduino Board is now Resetting");
Serial.println();
delay(1000);
resetFunc();
Serial.println("If the reset() function worked, Arduino won't show this output!");
}
Step 2: Follow Step 4 to Step 7 (exclude Step 5) provided in the above-provided methods, which include uploading the code, then using the Serial Monitor to check the output.

The above output confirms that the Arduino Board is successfully reset using the reset() function since it got reset, then displays the result from the start.
How to Reset Arduino Board Using Watchdog Timer Method
The Watchdog Timer is another efficient way to reset the Arduino Board in your code. It allows you to reset the microprocessor after a specific interval of time. It is helpful in case your program stops during the execution and you have no other way besides resetting the board. To reset Arduino Board using the Watchdog Timer method, follow the below-given steps:
Step 1: Open Arduino IDE and paste the following code:
void setup() {
Serial.begin(9600);
wdt_disable(); //Disable the WDT
delay(2000);
wdt_enable(WDTO_2S); //Enabling WDT 2 seconds Timeout
Serial.println("WDT is Enabled");
}
void loop() {
for(int i = 0; i<5; i++)
{
Serial.println("Continuing");
delay(500);
wdt_reset(); //Resetting the watchdog
}
while(1); //Watchdog timer will trigger here
}

In the above code, we first initialize the library for the Watchdog Timer method. Then inside the code, we initialize the Serial and disable the Watchdog at the start. After some delay, we enable the Watchdog Timer of 2 seconds, which means that the Watchdog should be triggered and restart the microcontroller with a timeout of 2 seconds. The code then enters the loop and executes the statement while resetting the Watchdog Timer every second. Then it enters into an infinite while loop that triggers the Watchdog and reset the Arduino Board.
Step 2: Now repeat Step 4 to Step 6 (exclude Step 5) provided in the first method to upload the code, then use the Serial Monitor option to check the output:

The above output shows that once Watchdog Timer is enabled, it will continue the loop, then reset the Arduino Board and repeat the same steps again.
How to Reset Arduino Board By Resetting the Sketch in the Memory
The Arduino Board has two types of memory: flash memory and RAM. Flash memory retains the content when the device is powered off, while the content in the RAM is lost when the device is turned off. The sketch running on your Arduino Board is stored in the flash-memory and once you upload a new sketch, it overwrites the existing sketch in the flash memory. Thus, you can easily reset the Arduino Board by resetting the sketch in the memory, which means overwriting it with a new sketch. This can be done by using the following steps:
Step 1: First connect your Arduino Board to your system as mentioned earlier.
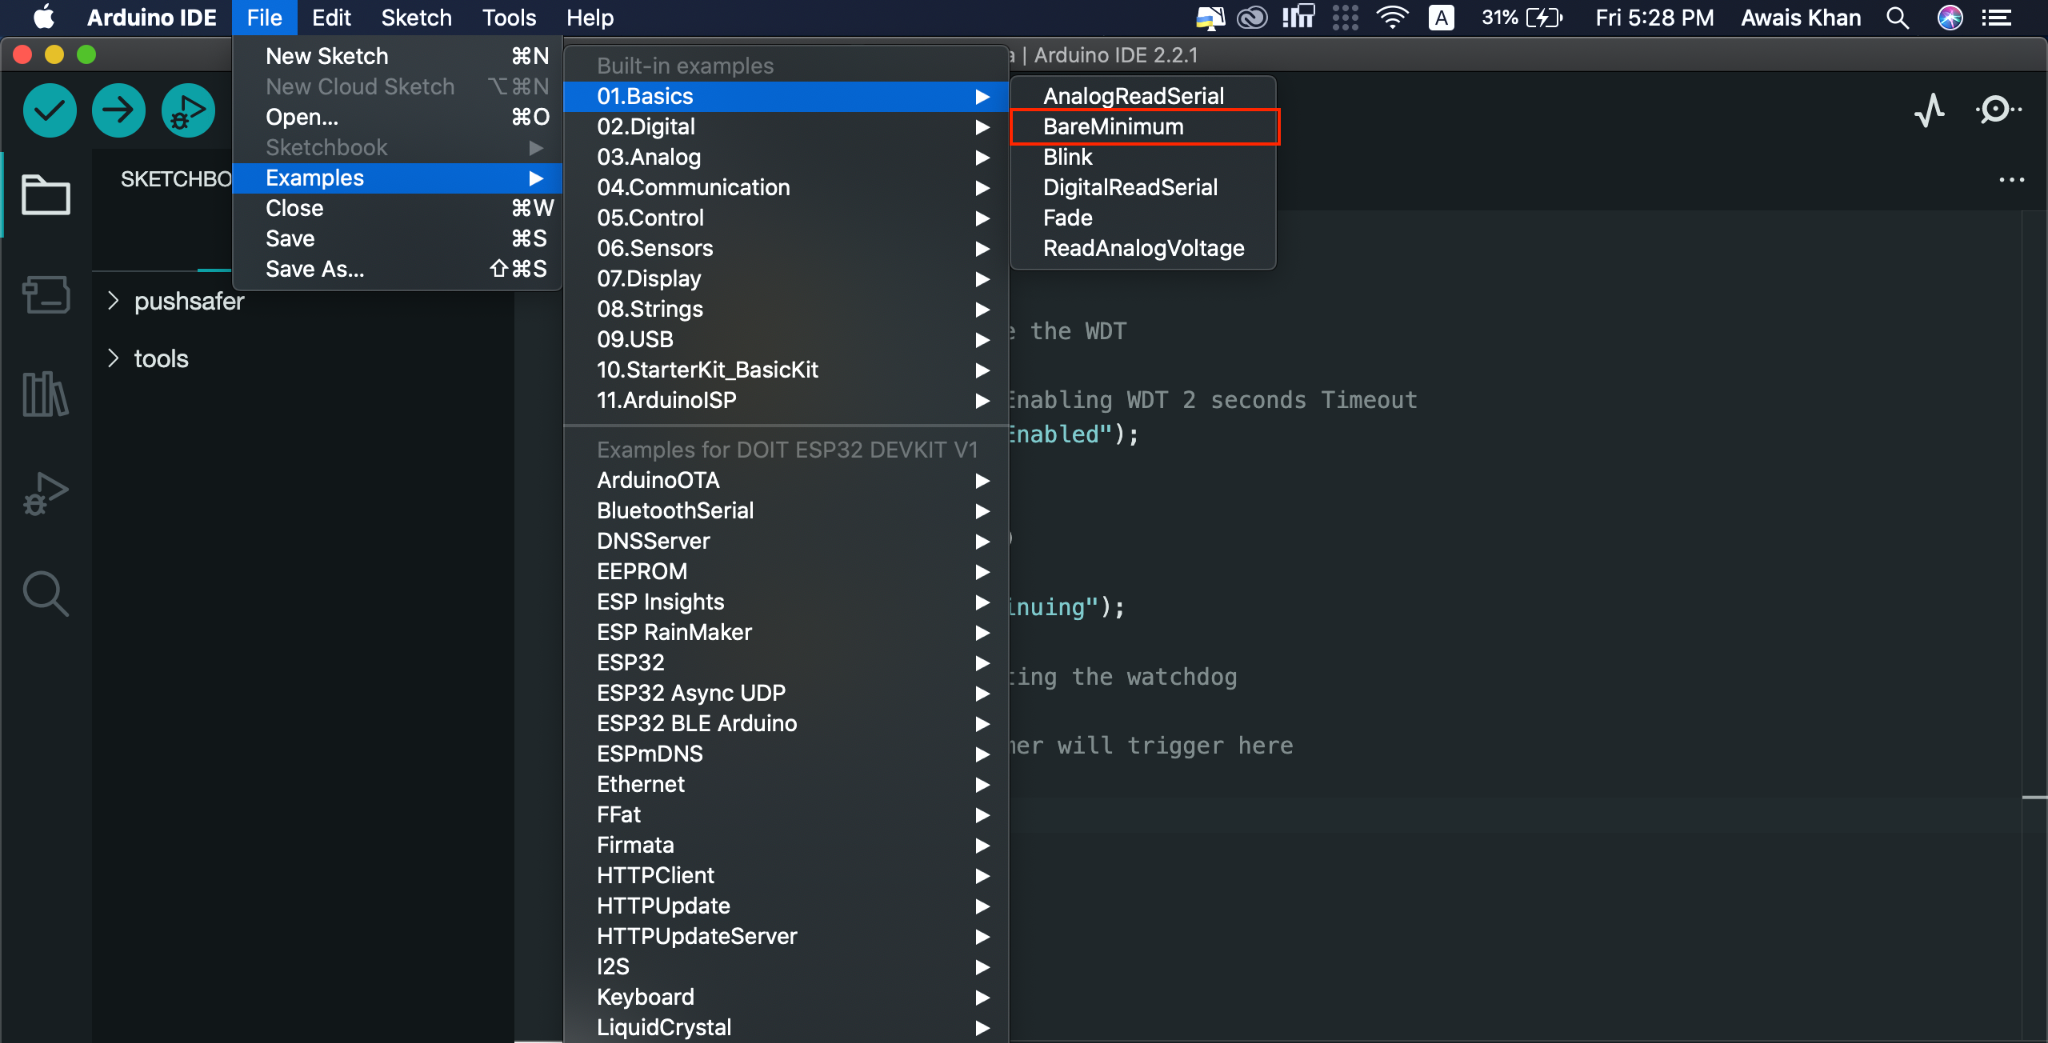
Step 2: Go to Examples from the File section, then choose BareMinimum from the Basics category:
Step 3: Ensure your Arduino Board is selected for this example, which you can confirm from the Tools>Board section:
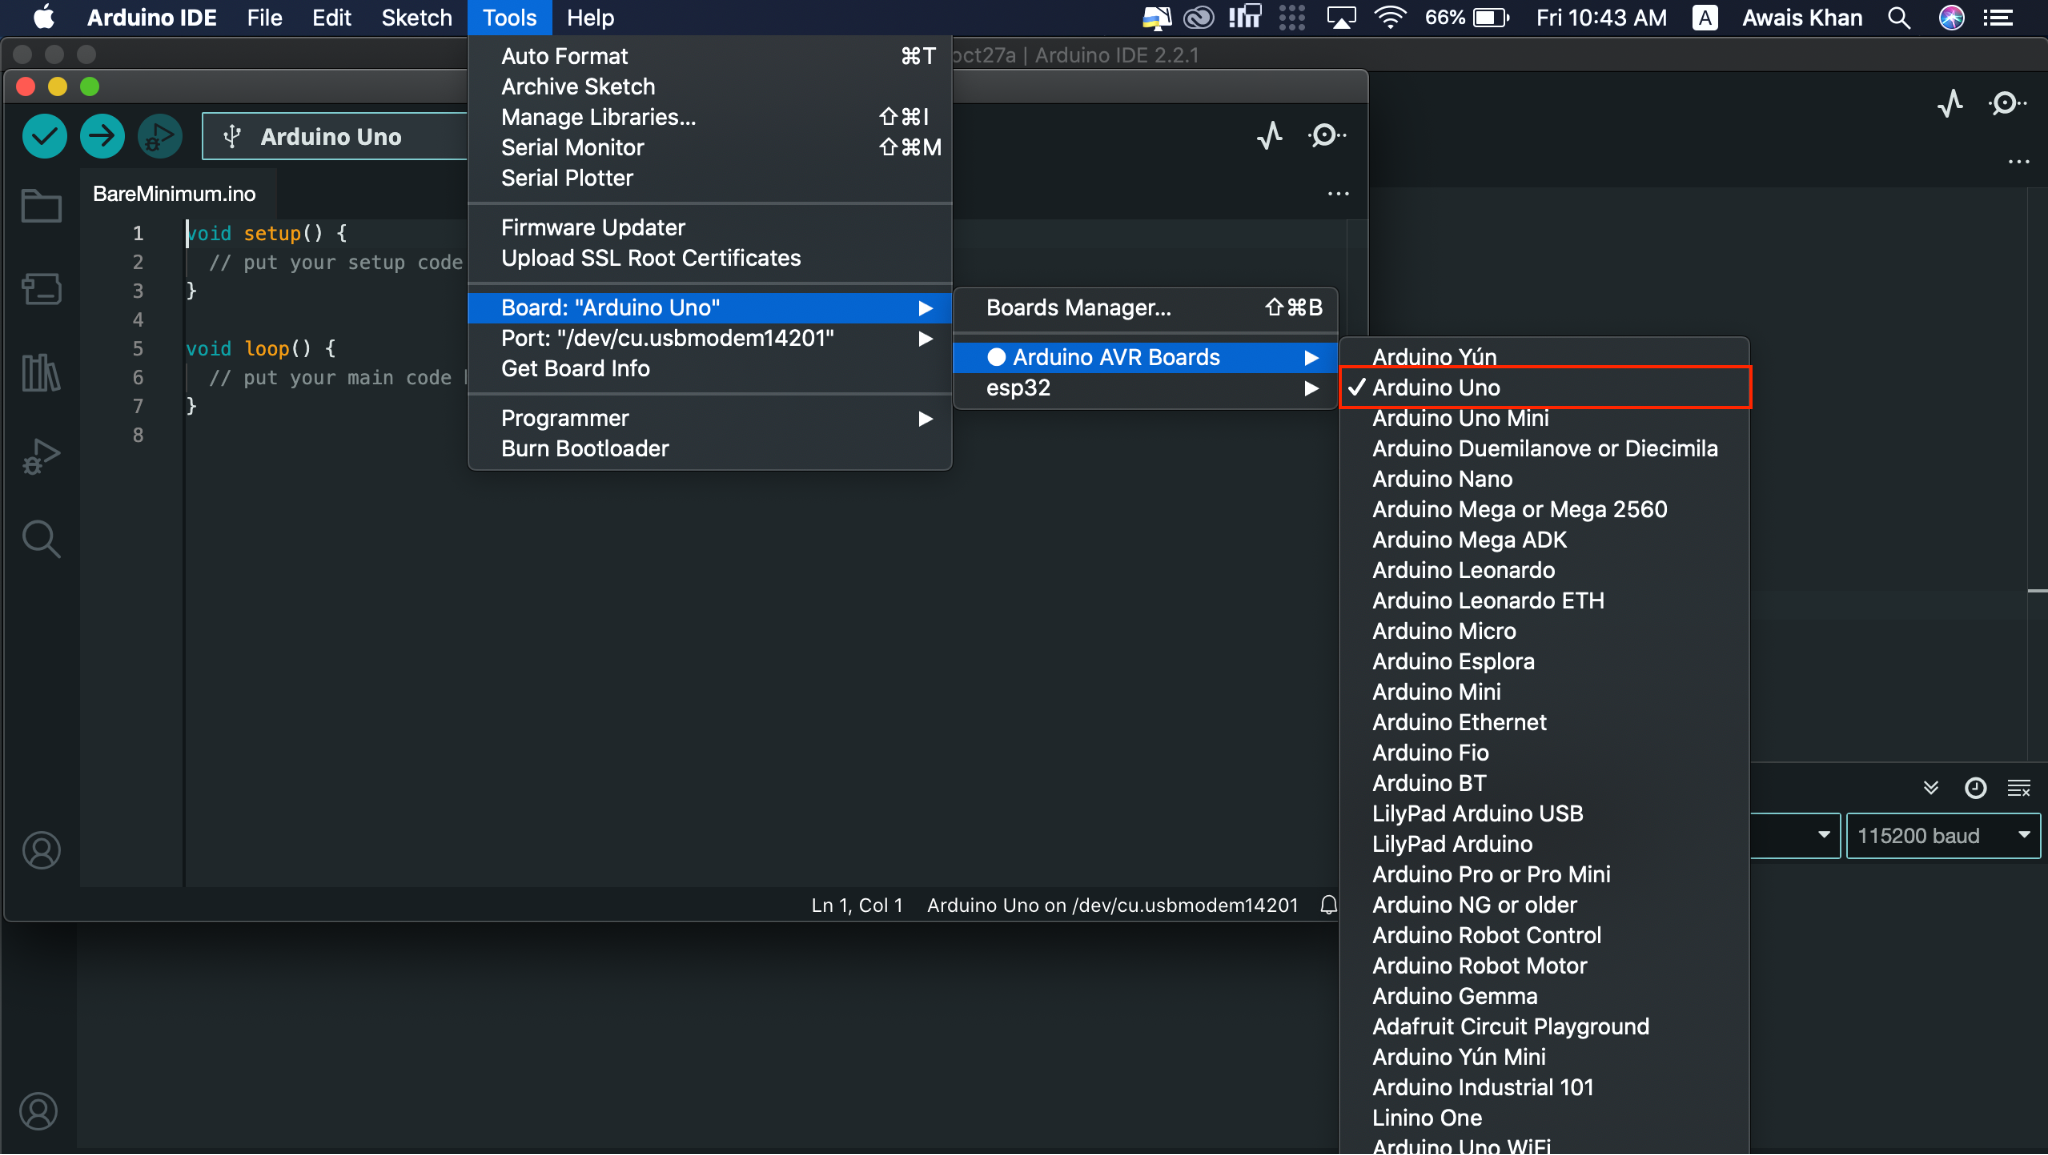
Note: You should check Port for your Arduino UNO from the Port option using the same menu.
Step 4: Now, you can use the Upload option to upload the code and reset the Arduino Board:

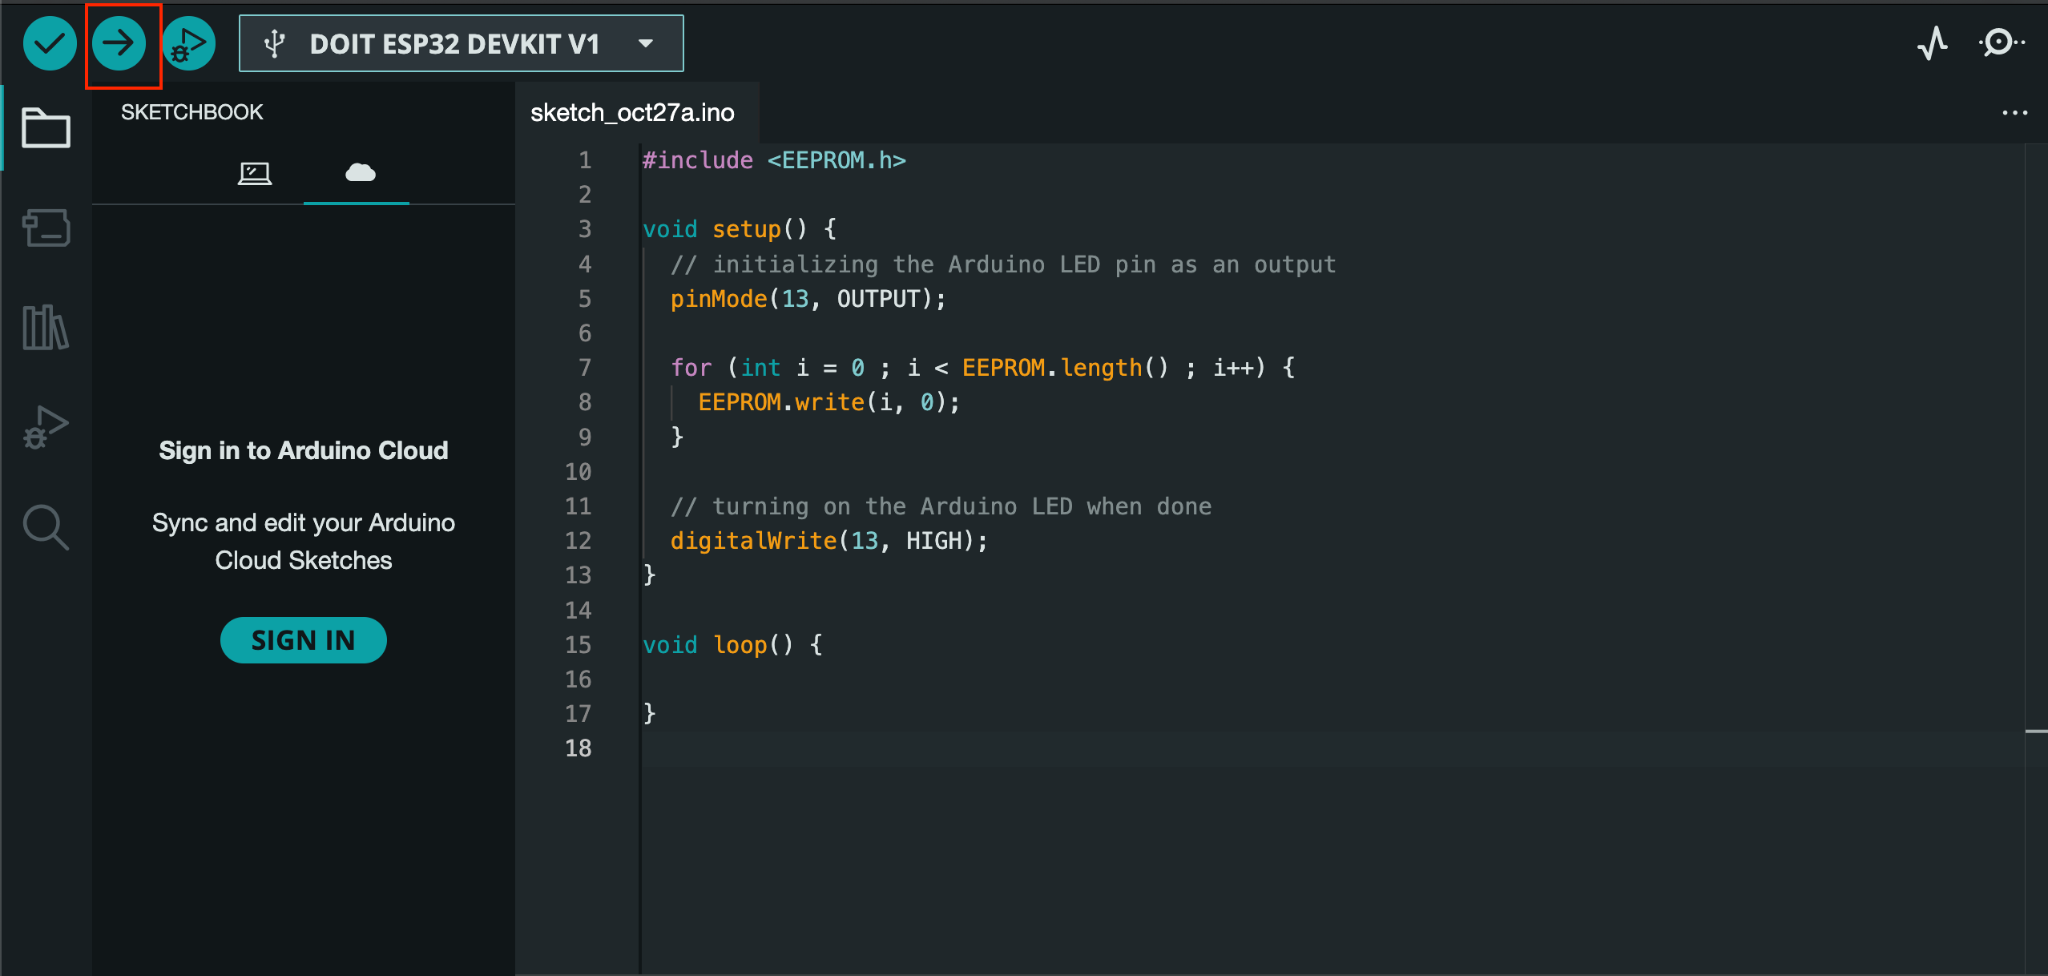
How to Reset Arduino Board By Resetting the EEPROM Memory
AVR-based boards have EEPROM, non-volatile flash memory that keeps the values even if the board is turned off. You can reset EEPROM by using the EEPROM.write() function that sets are bytes to zero, resetting the Arduino Board. The following code should be uploaded on your Arduino IDE by first connecting the Arduino UNO with your system. Then, using the Upload option to reset the Arduino Board on Arduino IDE.
void setup() {
// initializing the Arduino LED pin as an output
pinMode(13, OUTPUT);
for (int i = 0 ; i < EEPROM.length() ; i++) {
EEPROM.write(i, 0);
}
// turning on the Arduino LED when done
digitalWrite(13, HIGH);
}
void loop() {
}
Conclusion
Resetting the Arduino Board is a basic and widely used task for the users who are working on their projects. It is useful in case if their code is stuck and the only way left is to reset the board. You can reset the Arduino Board through the built-in reset button or using the reset pin. You can also reset the Arduino Board using the reset function, watchdog timer method, resetting the sketch in the memory or EEPROM memory in your code. The guide for all methods is provided in the above section of this guide, choose the method that works best for you and start coding with Arduino Board seamlessly.