While coding in JavaScript, sometimes, developers need to terminate the code at any place for specific reasons, such as “when a particular condition is met”, “for testing purposes”, or “when the script encounters an error” that it cannot handle, you may want to terminate it so that it does not continue executing and potentially cause further issues.
This article will describe the process for terminating the script in JavaScript.
How to Terminate the Script in JavaScript?
To terminate the script in JavaScript, use the following ways:
Method 1: Terminate the Script Using “return” Statement
You can use a “return” statement when a condition is met and also handle an unexpected condition where the code will return specified output and stop the script.
Example
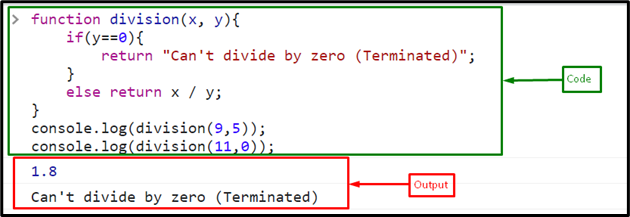
First, define a function called “division” with two parameters, “x” and “y”. Check if the “y” is equal to 0, and print the message “Can’t divide by zero (Terminated)”. Because, in the division, the denominator should always be greater than 0. If the operands “x” and “y” are non-zero, then divide both and return the resultant value to the function:
if(y==0){
return "Can't divide by zero (Terminated)";
}
else return x / y;
}
Now, call the function by passing values “9” as “x” and “5” is “y”:
Invoke the function again by passing “x” and “y” as “11” and “0”, respectively:
Output
Method 2: Terminate the Script Using the “debugger” Command
During testing or debugging, you can use the “debugger” command to stop the script at any point. It stops the program execution process and implements the debug function. It is just like breakpoints in manual debugging.
Example
In the given an example, first, we will create a form that contains two text fields with a submit button that invokes the function on the click event:
Enter your Name <input type="text" id="name"
autocomplete="off"><br><br>
Enter your Hobby <input type="text" id="hobby" autocomplete="off">
<p id="error"></p>
<input type="submit" value="submit" onclick="myFunc()">
</form>
In JavaScript file or the <script> tag, use the following code:
{
var name = document.getElementById("name").value;
var hobby = document.getElementById("hobby").value;
debugger;
if (name == ""){
document.getElementById("error").innerHTML ="Enter name";
return false;
}
if (hobby == ""){
document.getElementById("error").innerHTML ="Enter hobby";
return false;
}
}
According to the given code:
- First, define a function “myFunc()” that will trigger on the click event of the submit button.
- Get the values of the text fields using the “getElementById()” method with the “value” attribute.
- Call the “debugger” command to stop the execution of a script.
- Check if the fields are empty, and print the error message.
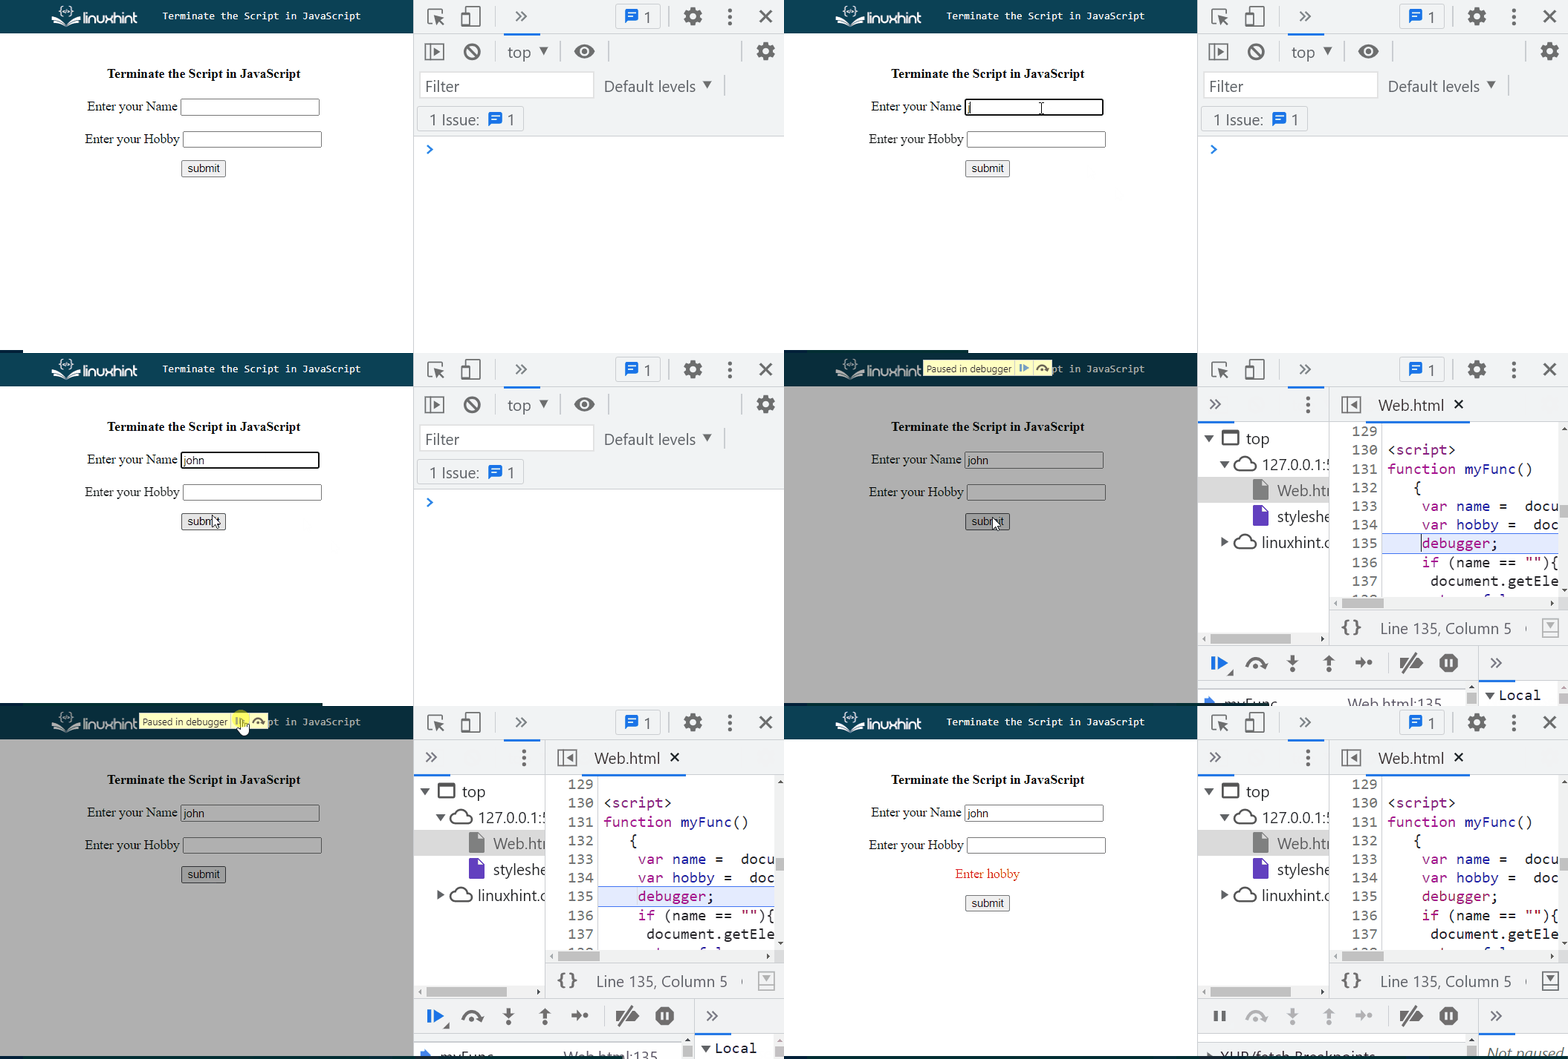
It can be observed from the output that only one field is filled, and the debugger is called that stops the script by clicking on the “submit” button. If you process further, click on the “Continue” button of the debugger:
Method 3: Terminate the Script Throwing an Error
Last but not least, you can also stop or terminate your script by “throwing an error” on the occurrence of any exception.
Example
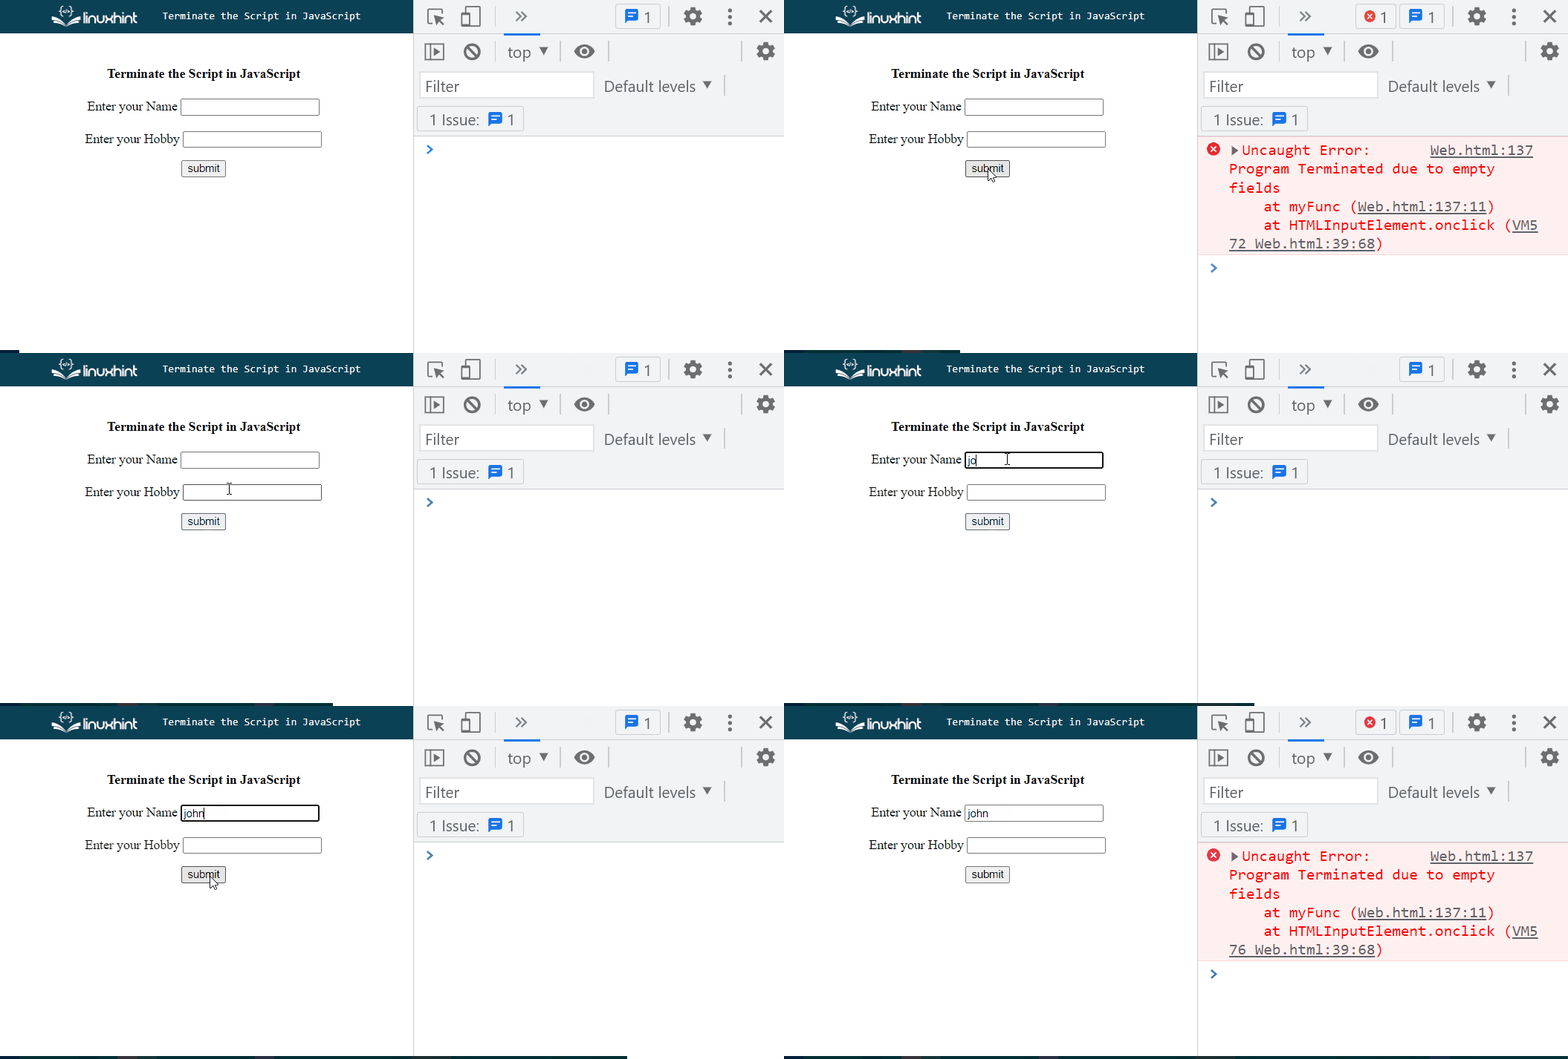
Here, in the provided example, if any text field is empty, we will throw an exception error and terminate/stop the script:
{
var name = document.getElementById("name").value;
var hobby = document.getElementById("hobby").value;
if (name == "" || hobby == ""){
throw new Error("Program Terminated due to empty fields");
}
}
The output indicates that the script is stopped when the one or both text fields are empty:
Note: For Node.js, you can use the “abort()” or “exit()” methods to terminate the script.
Conclusion
To terminate the script in JavaScript, use the “return” statement, “debugger” command, or “throw an error”. You can use any approach according to preference. However, the “debugger” command is mostly used to test the code. This article described the process for terminating the script in JavaScript.


