While executing commands in the development phase and working on various projects, compatibility issues can arise due to inappropriate versioning. In such a case scenario, the “Node Version Manager(NVM)” comes into effect enabling the developer to conveniently switch between multiple versions while retaining the globally installed packages.
Contents Overview
-
- Understanding the Node.js Versioning System
- What is Node Version Manager(NVM)?
- What is the Need For NVM?
- Prerequisites For Switching the Node Versions Using NVM
- How to Switch the Node Version Using NVM?
- Example 1: Switching to the Node “18.16.0” Version
- Example 2: Switching to the Latest Node.js Version with NVM
- Example 3: Switching to the Long-term Supported Node.js Version Using NVM
- Example 4: Uninstalling a Node Version
- Alternative Approach: Automatically Switching Node Versions
- Conclusion
Understanding the Node.js Versioning System
The Node.js versions vary with the regular updates. It is such that the newer versions often offer enhanced performance and great features, they can also come up with some major changes that can cause issues with the code. Therefore, while opting for a version, make sure to select the one that is stable and compatible with the dependencies being utilized in the application.
What is Node Version Manager(NVM)?
“Node Verison Manager” refers to a tool that assists in managing the node versions and can be used to install Node and its different versions. As “npm” and “yarn” cmdlets help to install and manage the packages, the “nvm” assists in managing the node versions.
What is the Need For NVM?
Executing “npm” or “yarn” to install the Node modules is never a good practice as doing so results in displaying the errors in the case of deprecated packages. Also, there can be scenarios where there comes a requirement to utilize an updated version of Node when a project needs an older version.
Also, there can be a scenario where the developer uses the “SPFx” application that requires the node version “Node LTS v14” but the developer is also working on another Node application i.e., “cli-Microsoft356” which functions on a higher node version. In such a situation, switching between various Node versions comes into effect which can be achieved using the Node version manager(NVM).
Prerequisites For Switching the Node Versions Using NVM
Before switching the node versions, make sure that “nvm” is installed on your system. This can be verified via the following cmdlet or using the “nvm –version” command:
The above version number implies that NVM is installed.
If not installed, it can be installed/downloaded from here by triggering “nvm-setup.exe”.
How to Switch the Node Version Using NVM?
The node versions can be switched by first installing the target “nvm” version via the “nvm install” cmdlet and then switching to it with the help of the “nvm use” command.
Example 1: Switching to the Node “18.16.0” Version
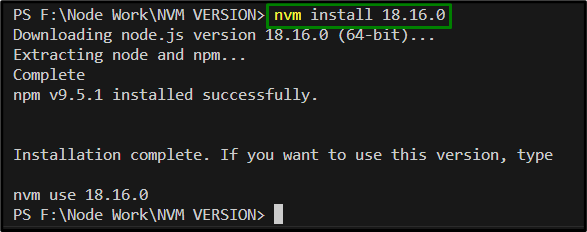
To switch to this specific version, enter the following command to first install this version:
Now, input the below-provided command to switch to this particular version:
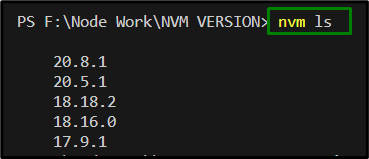
Note: To check the installed node versions, enter the following command to list all the contained node versions:
In the following scenario, the node version “20.5” is first switched without being installed that logs an error, as follows:
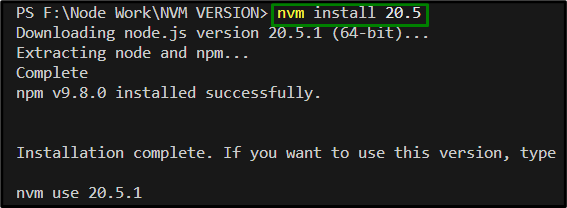
To eliminate this issue, enter the following command to install this version first:
Now again, input the discussed “nvm use” command to switch to this version:
Example 2: Switching to the Latest Node.js Version with NVM
This example demonstrates how to switch to the latest node version using the below-given command:
Here, the information about the latest node version is displayed along with its installation status on the system.
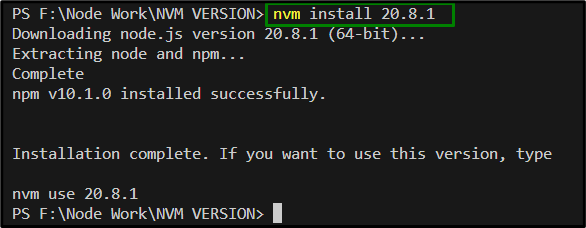
Now, specify the “nvm install” command followed by the latest node version to install this version:
Now, switch to this version via the following cmdlet:
Example 3: Switching to the Long-term Supported Node.js Version Using NVM
The “LTS” i.e., long-term supported node version corresponds to a version where the software’s release is maintained for an extended time period. This version receives regular updates with improved security features.
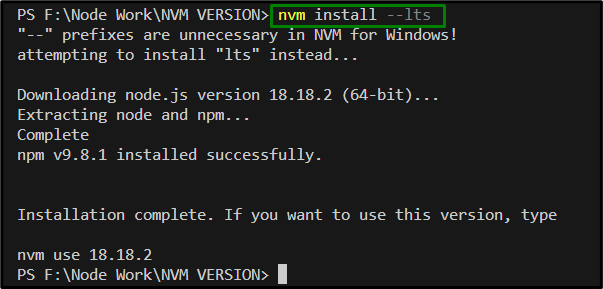
If there is a need to switch to this specific version, run the below-stated cmdlet:
Here, switch to this specific version utilizing the following cmdlet:
Example 4: Uninstalling a Node Version
This demonstration uninstalls a target node version. To do so, first, list the installed node versions using the below-provided command:
Now, uninstall the “18.16.0” node version with the help of the below command:
As seen, the target version is removed/uninstalled appropriately.
Alternative Approach: Automatically Switching Node Versions
The switching of node versions can also be automated by integrating the “.nvmrc” method with a shell script. To do so, include the below-given code lines in the shell profile:
builtin cd "$@"
[-f.nvmrc] && nvm use
}
Upon doing so, now, whenever the directories are changed using “cd” and that directory comprises a “.nvmrc”, NVM automatically switches to the target version.
Conclusion
The Node Versions can be switched by first installing the target “nvm” version via the “nvm install” cmdlet and then switching to it with the help of the “nvm use” command. The only prerequisite is to have the “nvm” installed on the system. Moreover, the switching can also be done to the latest and the long-term supported(LTS) node versions.


