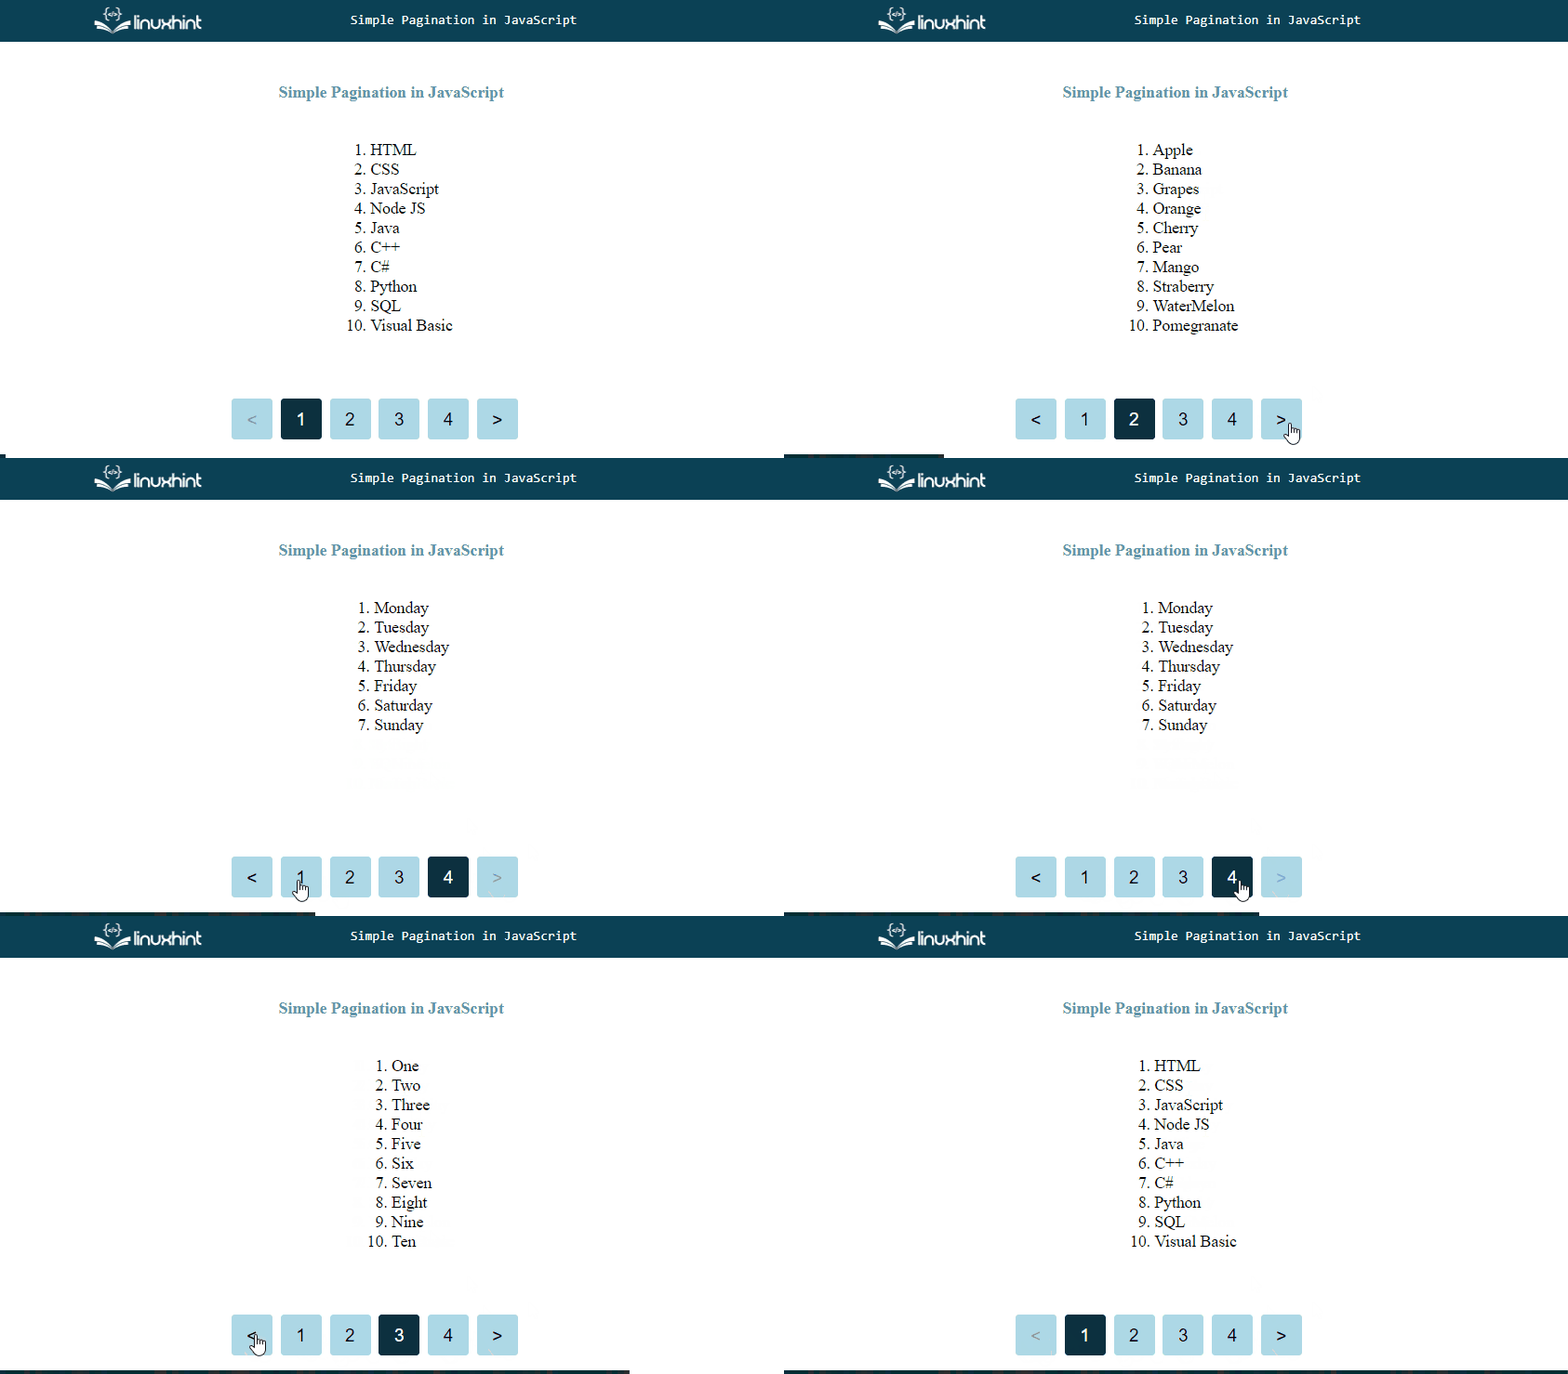
This post will describe the procedure to create pagination in JavaScript.
How to Create a Simple Pagination in JavaScript?
The JavaScript Pagination idea uses the “Next” and “Previous” buttons or links to navigate between pages. The fundamental goal of pagination is to allow users to quickly navigate through content by clicking links or buttons.
Let’s look at the example to understand the process of creating simple pagination in JavaScript. It will take three steps.
Step 1: Add the Content in HTML File
First, create the content that wants to display on the web page. Here, we will create an ordered list using an HTML “ol” tag that stores the lists of the programming languages, fruits, counting, and the days of the week. All of these lists will be printed on different pages using pagination technique:
<li>HTML</li>
<li>CSS</li>
<li>JavaScript</li>
<li>Node JS</li>
<li>Java</li>
<li>C++</li>
<li>C#</li>
<li>Python</li>
<li>SQL</li>
<li>Visual Basic</li>
<li>Apple</li>
<li>Banana</li>
<li>Grapes</li>
<li>Orange</li>
<li>Cherry</li>
<li>Pear</li>
<li>Mango</li>
<li>Strawberry</li>
<li>WaterMelon</li>
<li>Pomegranate</li>
<li>One</li>
<li>Two</li>
<li>Three</li>
<li>Four</li>
<li>Five</li>
<li>Six</li>
<li>Seven</li>
<li>Eight</li>
<li>Nine</li>
<li>Ten</li>
<li>Monday</li>
<li>Tuesday</li>
<li>Wednesday</li>
<li>Thursday</li>
<li>Friday</li>
<li>Saturday</li>
<li>Sunday</li>
</ol>
Step 2: Style the Content and Buttons Using CSS
Then, style the content, buttons and the actions performed by buttons, such as change color on the hover and so on.
The CSS class for styling the “next” (>) and “previous” (<) buttons are as follows:
width: calc(100% - 2rem);
display: flex;
align-items: center;
position: absolute;
bottom: 0;
padding: 1rem 0;
justify-content: center;
}
For styling the dynamic buttons “1, 2, 3…”, use the following CSS code:
.page-buttons{
font-size: 1.1rem;
background-color: lightblue;
border: none;
margin: 0.25rem 0.25rem;
cursor: pointer;
height: 2.5rem;
width: 2.5rem;
border-radius: .2rem;
}
For changing the color on the hover of the buttons, use the given class:
.page-buttons:not(.disabled):hover {
background: lightblue;
}
For the active buttons, set the different colors of the button using the below CSS properties:
color: #fff;
background: #0c313f;
}
This CSS class is used for styling the list to display on the web page:
display: inline-block;
text-align: left;
}
When there is need to hide any button or any content use the below CSS class:
display: none;
}
Step 3: Create Simple Pagination Using JavaScript
Now, in JavaScript file, use the following code to create a container for pagination:
<button class="page-buttons" id="prev-button"><</button>
<div id="page-numbers"></div>
<button class="page-buttons" id="next-button">></button>
</div>
In the following above snippet:
- First, create a container for the pagination buttons using the “div” element and assign a CSS class “pagination” for styling the buttons.
- Create two buttons (“Next” and “Previous”) as arrow buttons using the “<” and “>”.
- Create a div for the dynamic buttons based on the content distribution.
Here, we declare some variables to set the pagination content:
const pageCount = Math.ceil(listItems.length / paginationLimit);
let currentPage = 1;
- First, divide the data or content into pages. You can do this by limiting the number of items per page. Here, we set the page’s limit to “10”, meaning only 10 items will be displayed on every page.
- Divide the total number of items “listItems.length” by the “paginationLimit” and round to the highest whole number utilizing the “Math.ceil()” method to get the pageCount.
- Set the current page as “1”.
Now, create some variable that gets the references of the page numbers, buttons, and content list using their assigned ids:
const nextButton = document.getElementById("next-button");
const prevButton = document.getElementById("prev-button");
const paginatedList = document.getElementById("list");
const listItems = paginatedList.querySelectorAll("li");
Define a function for disabling the button when the list is at the start or the end. This means disabling the “next (>)” button when the last page is opened, similarly, disabling the “previous (<)” button when the first page is opened:
button.classList.add("disabled");
button.setAttribute("disabled", true);
};
Likewise, disabling the button, for enabling the pagination buttons, use the below function:
button.classList.remove("disabled");
button.removeAttribute("disabled");
};
Here, we will handle the status of the page buttons, when they will be enabled or when disabled:
if (currentPage === 1) {
disableButton(prevButton);
} else {
enableButton(prevButton);
}
if (pageCount === currentPage) {
disableButton(nextButton);
} else {
enableButton(nextButton);
}
};
Create dynamic buttons according to the content’s length and add them into a pagination container:
const pageNumber = document.createElement("button");
pageNumber.className = "pagination-number";
pageNumber.innerHTML = index;
pageNumber.setAttribute("page-index", index);
paginationNumbers.appendChild(pageNumber);
};
const getPaginationNumbers = () => {
for (let i = 1; i {
document.querySelectorAll(".pagination-number").forEach((button) => {
button.classList.remove("active");
const pageIndex = Number(button.getAttribute("page-index"));
if (pageIndex == currentPage) {
button.classList.add("active");
}
});
};
Add the above code to the given function so that each time a new page is set, the active page number is updated:
currentPage = pageNum;
handleActivePageNumber();
handlePageButtonsStatus();
const prevRange = (pageNum - 1) * paginationLimit;
const currRange = pageNum * paginationLimit;
listItems.forEach((item, index) => {
item.classList.add("hidden");
if (index >= prevRange && index < currRange) {
item.classList.remove("hidden");
}
});
};
When the page number button is clicked, use the click event listener, to call the “setCurrentPage” function. For clicking the previous button, move the previous page by subtracting the “1” from the “currentPage”, and for clicking the next button, move to the next page by adding “1” in the currentPage”:
getPaginationNumbers();
setCurrentPage(1);
prevButton.addEventListener("click", () => {
setCurrentPage(currentPage - 1);
});
nextButton.addEventListener("click", () => {
setCurrentPage(currentPage + 1);
});
document.querySelectorAll(".pagination-number").forEach((button) => {
const pageIndex = Number(button.getAttribute("page-index"));
if (pageIndex) {
button.addEventListener("click", () => {
setCurrentPage(pageIndex);
});
}
});
});
Output
That’s all about the pagination in JavaScript.
Conclusion
For creating simple pagination in JavaScript, first, create a container for the pagination element and the list of items to be paginated. Divide the list of items into smaller groups, or “pages”, based on the desired number of items per page. Create buttons or links to navigate between the pages and add them to the pagination container. Add event listeners to the buttons to update the displayed items when clicked. Use JavaScript to hide the items that are not on the currently displayed page and to show the items that are. Style the pagination element and buttons as desired. This post described the procedure for creating pagination in JavaScript.

