Without the Nitro subscription, Discord provides some basic features for its users in the free versions, such as users can only change banner color and profile pictures. However, as a Nitro subscriber, you can avail and utilize all additional features and customize the background image’s color, and add animated Profile pictures(pfps). For that purpose, it is necessary to purchase the Nitro by selecting a plan.
This post demonstrated the procedure about:
Let’s get started!
Note: If you are already a nitro subscriber, you must skip the first section.
How to Unlock Nitro on Discord?
For the purpose of unlocking the Discord Nitro, try out the mentioned steps.
Step 1: Open Discord
First, open the Discord application on your device by utilizing the Startup menu:
Step 2: Launch User Settings
Next, launch “User Settings” by clicking on the highlighted icon:
Step 3: Unlock Nitro
To unlock Nitro, open “Nitro” settings from the “BILLING SETTINGS” category and click on “Subscribe”:
Step 4: Select a Plan
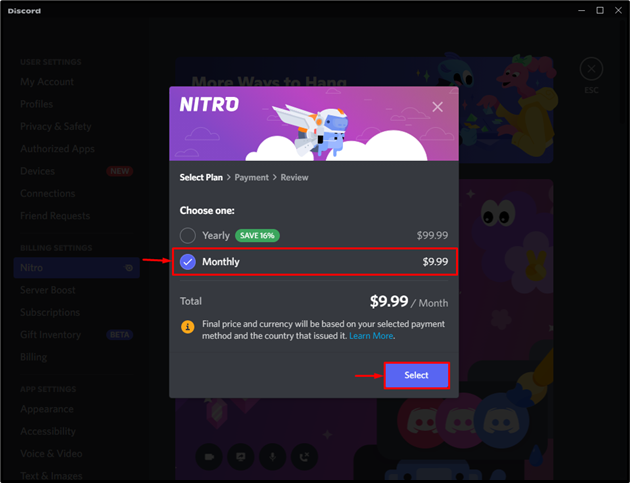
Choose a plan from the available options as we have selected “Monthly” and press the “Next” button:
Step 5: Select Payment Method
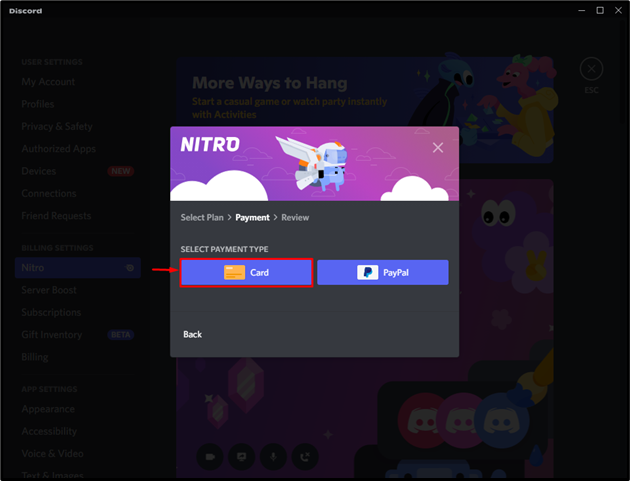
Select whether you want to pay with a “Card” or a “PayPal”. In our scenario, we will select the “Card” option:
Step 6: Add Credentials
Enter the required credentials, including the card number, expiry date, CVC, and name on the card:
After adding the required information, click on the “Next” button for further processing:
Step 7: Add Additional Information
Specify the additional information, such as Country Name, First Address, Second Address, Region, City, and Postal code. Then, hit the “Next” button:
Step 8: Mark Checkbox
Mark the given checkboxes to agree with the Discord terms and conditions. After that, click the “Get Nitro Monthly” button to purchase a Discord Nitro membership:
As you can see, Nitro has been activated successfully on your Discord account. Click the “Sweet” button to finish the process:
How to Set Up Profile Banner in Discord Nitro?
To set up a profile banner in Discord Nitro, try out the following procedure.
Step 1: Open User Profile
First, open Discord. Then, move to “User Settings > User Profiles”, as mentioned in the previous section:
Step 2: Upload Profile Banner
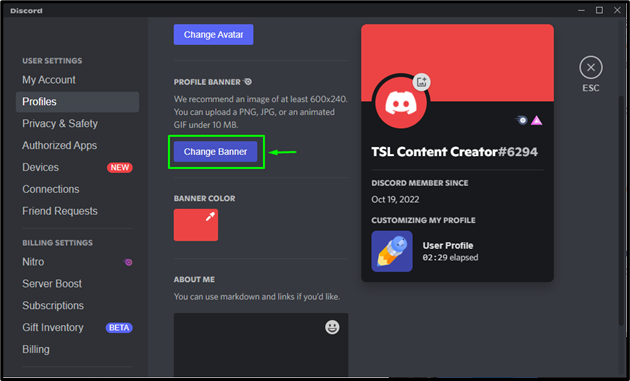
After unlocking Nitro, the “Change Banner” button will appear in the user profile. Click on it to change the user profile banner:
Step 3: Upload Banner
Here, click on the “Upload image” option to select the image:
Step 4: Select Image
Next, select an image from any folder of your local system. For this purpose, we will choose from the “Pictures” folder and click “Open”:
Step 5: Edit Image
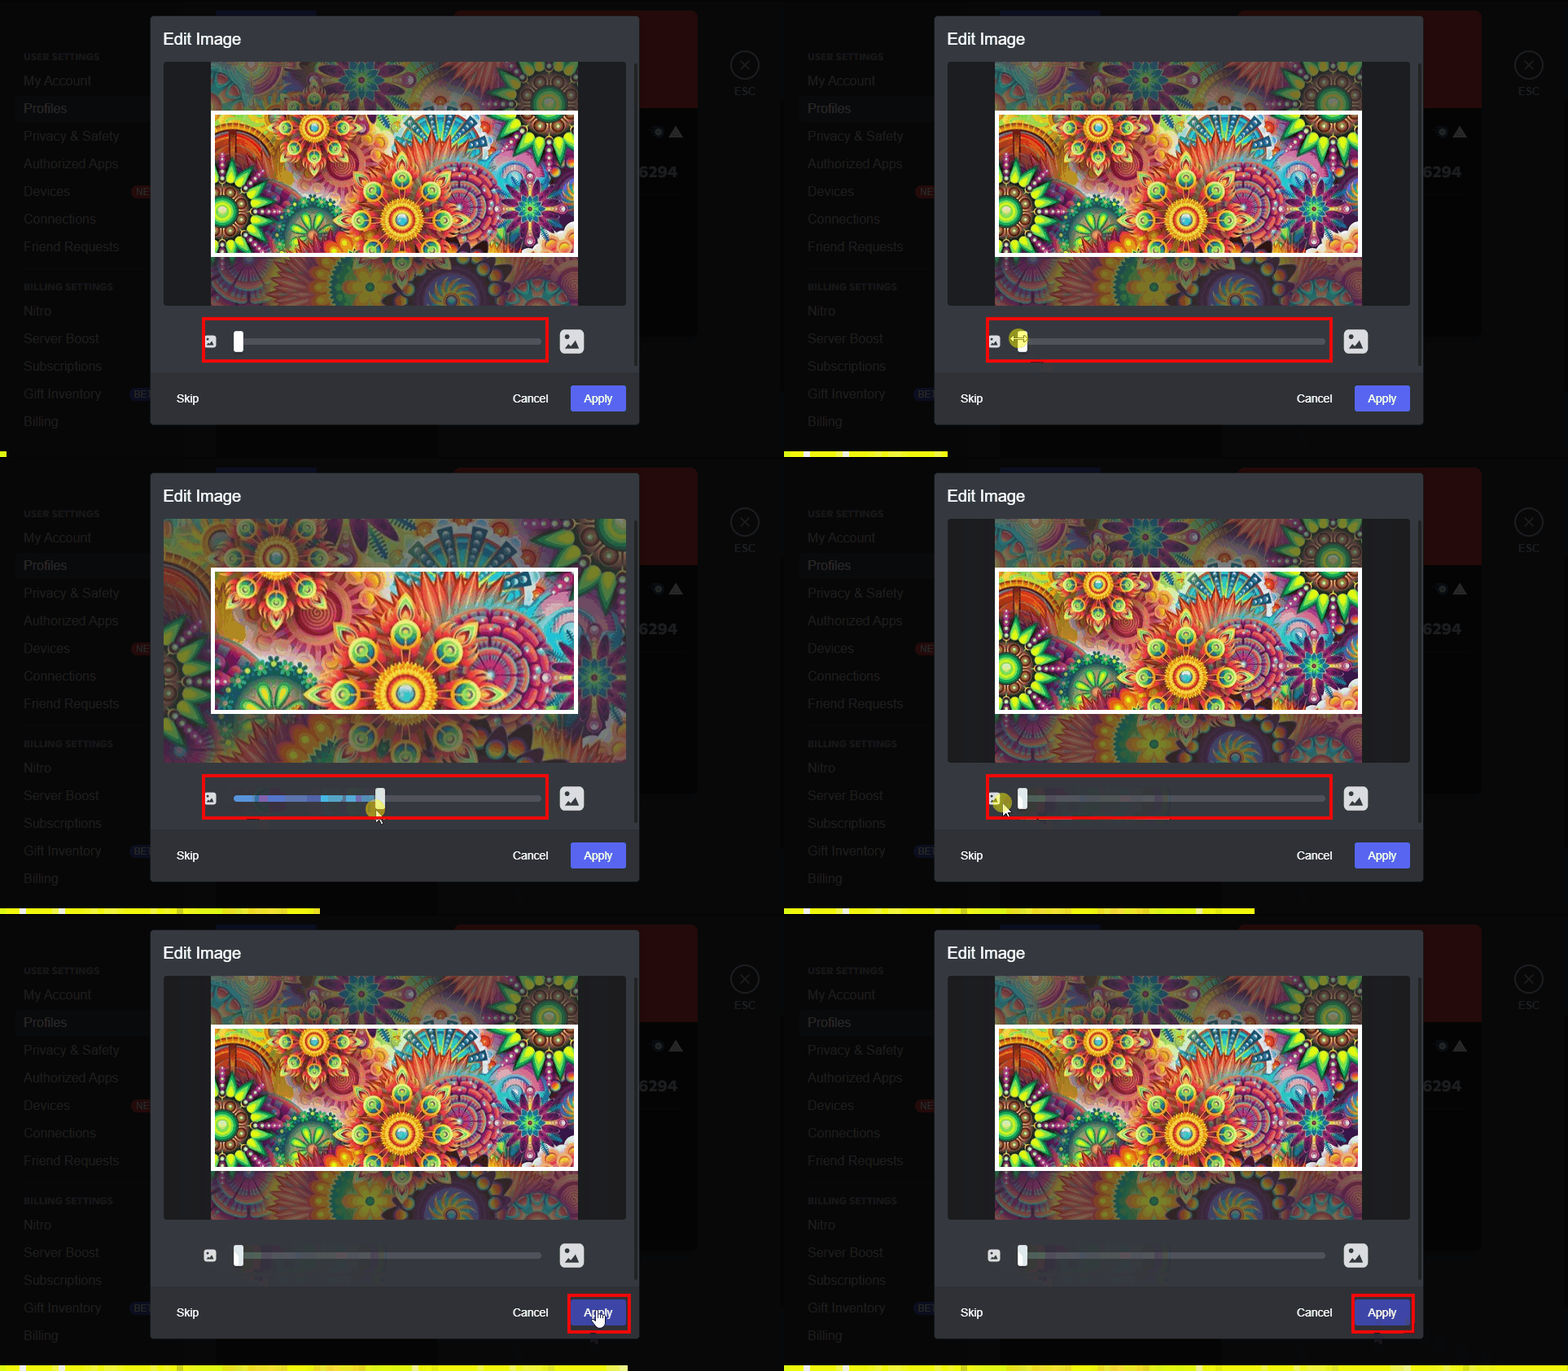
Users can also zoom out of the image using the slider. Then, click “Apply” to upload the image as a profile banner:
Step 6: Save Changes
Press the “Save Changes” button from the bottom right side of the window:
It can be seen that the profile banner has been set successfully:
We have learned about the procedure for setting up the profile banner in Discord Nitro.
Conclusion
To set up a profile banner in Discord Nitro, first, unlock Nitro by subscribing to it. Then, access “User Settings” and click on the “Change Banner” button. Upload an image from your local system and click on the “Save Changes” button. This post demonstrated the method for purchasing Nitro on a Discord account and setting up the profile banner.


