Discord provides the facility to set the user profile with basic features. However, if you want to customize your server for a specific purpose, it is only possible with the Discord Nitro subscription, as it offers advanced features to its user, such as adding a server avatar and banner, changing the server name, and adding a short description about the server.
This write-up will state about:
- How to add a server in Discord Nitro?
- How to change server name in Discord Nitro?
- How to change Server Avatar in Discord Nitro?
- How to add/change About me in Discord Nitro?
So, let’s discuss the points mentioned one by one!
How to Add a Server in Discord Nitro?
To customize the server profiles, make sure you have a server created in your Discord account. If not, then add a server by following the procedure below.
Step 1: Launch Discord
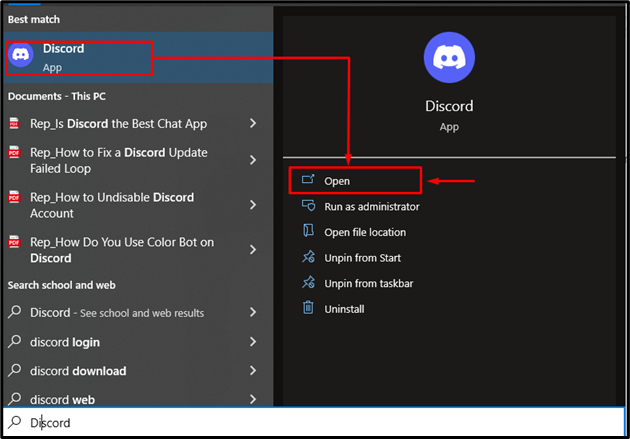
First, open the “Discord” app on your device from the start menu:
Step 2: Add Discord Server
Next, click on the “+” icon that is available on the left side of the screen:
Select a template if you want to create the server according to the provided template, or click on the “Create My Own” server option:
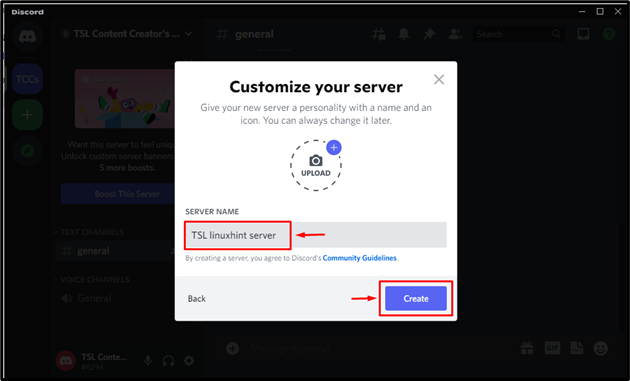
To customize the server, enter a unique name in the input field. For instance, we have entered the name “TSL linuxhint server” and pressed the “Create” button:
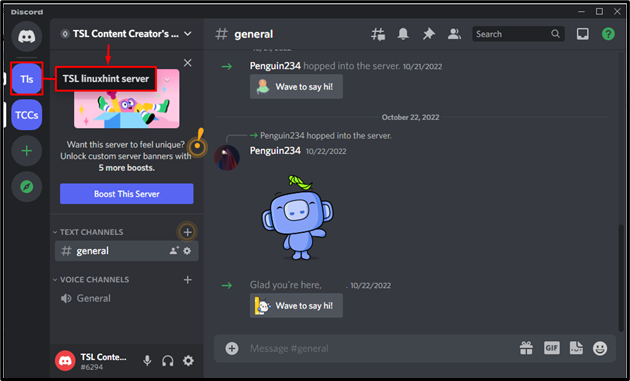
As a result, the created server will be displayed on the Discord main page.
How to Change Server Name in Discord Nitro?
In Discord, you can change the server name as per your choice. To do so, try out the steps given below.
Step 1: Select Discord Server
Select a Discord server from the available list on the leftmost side of the Discord window. For this purpose, we will select “TSL linuxhint Server”:
Step 2: Open Server Settings
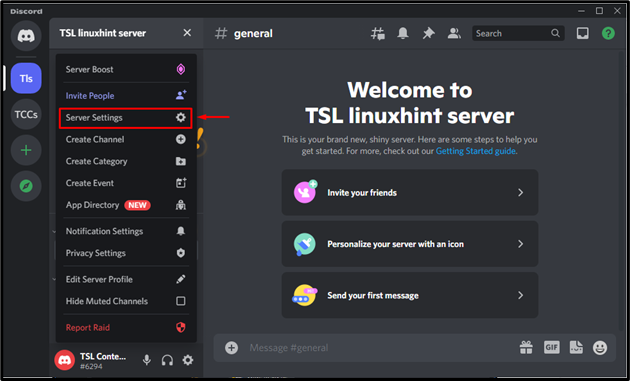
Now, open the server drop-down menu and click on “Server Settings” from the available options:
Step 3: Change Server Name
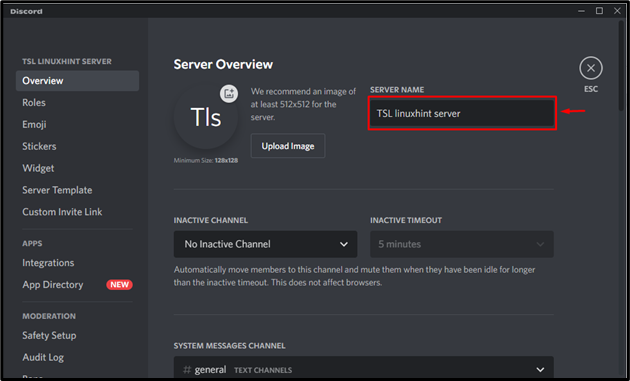
Change the server name by clicking on the highlighted area:
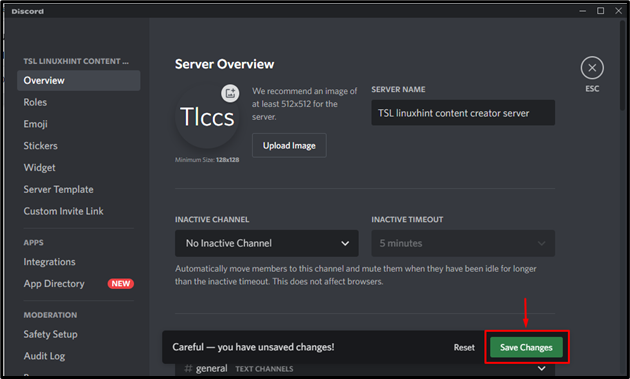
Add a new name as we have changed our server name to “TSL linuxhint content creator server”:
Step 4: Save Changes
After changing the server name, press the “Save Changes” button:
How to Change Server Avatar in Discord Nitro?
To change the server avatar, you have to follow the given mentioned procedure.
Step 1: Edit Server Profile
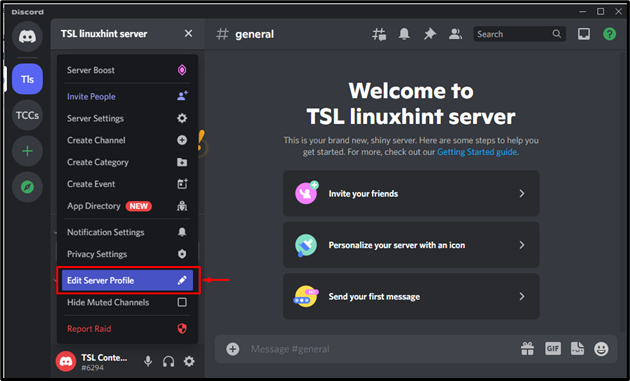
First, navigate to “Server > Menu > Edit Server Profile” on your Discord application:
Step 2: Change Avatar
Click on the “Change Avatar” button for changing the server avatar:
Step 3: Select an Image
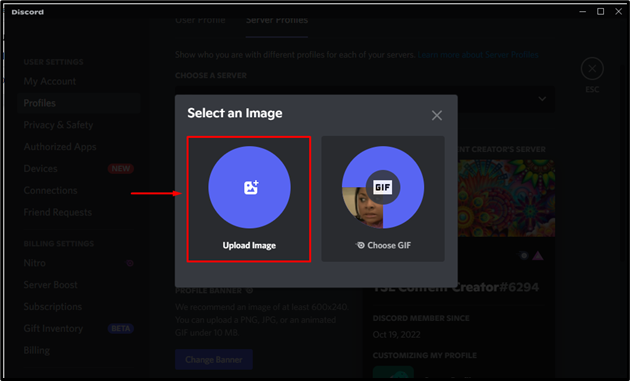
Upload an image or a GIF to set the avatar. To do so, we will click on the “Upload Image” option:
You can select the image from any folder of your device. In our case, we have selected the image from the “Pictures” folder and clicked “Open”:
Note: You can customize the image by using any online tool. In our scenario, we have used the fotor tool to make the avatar for our server.
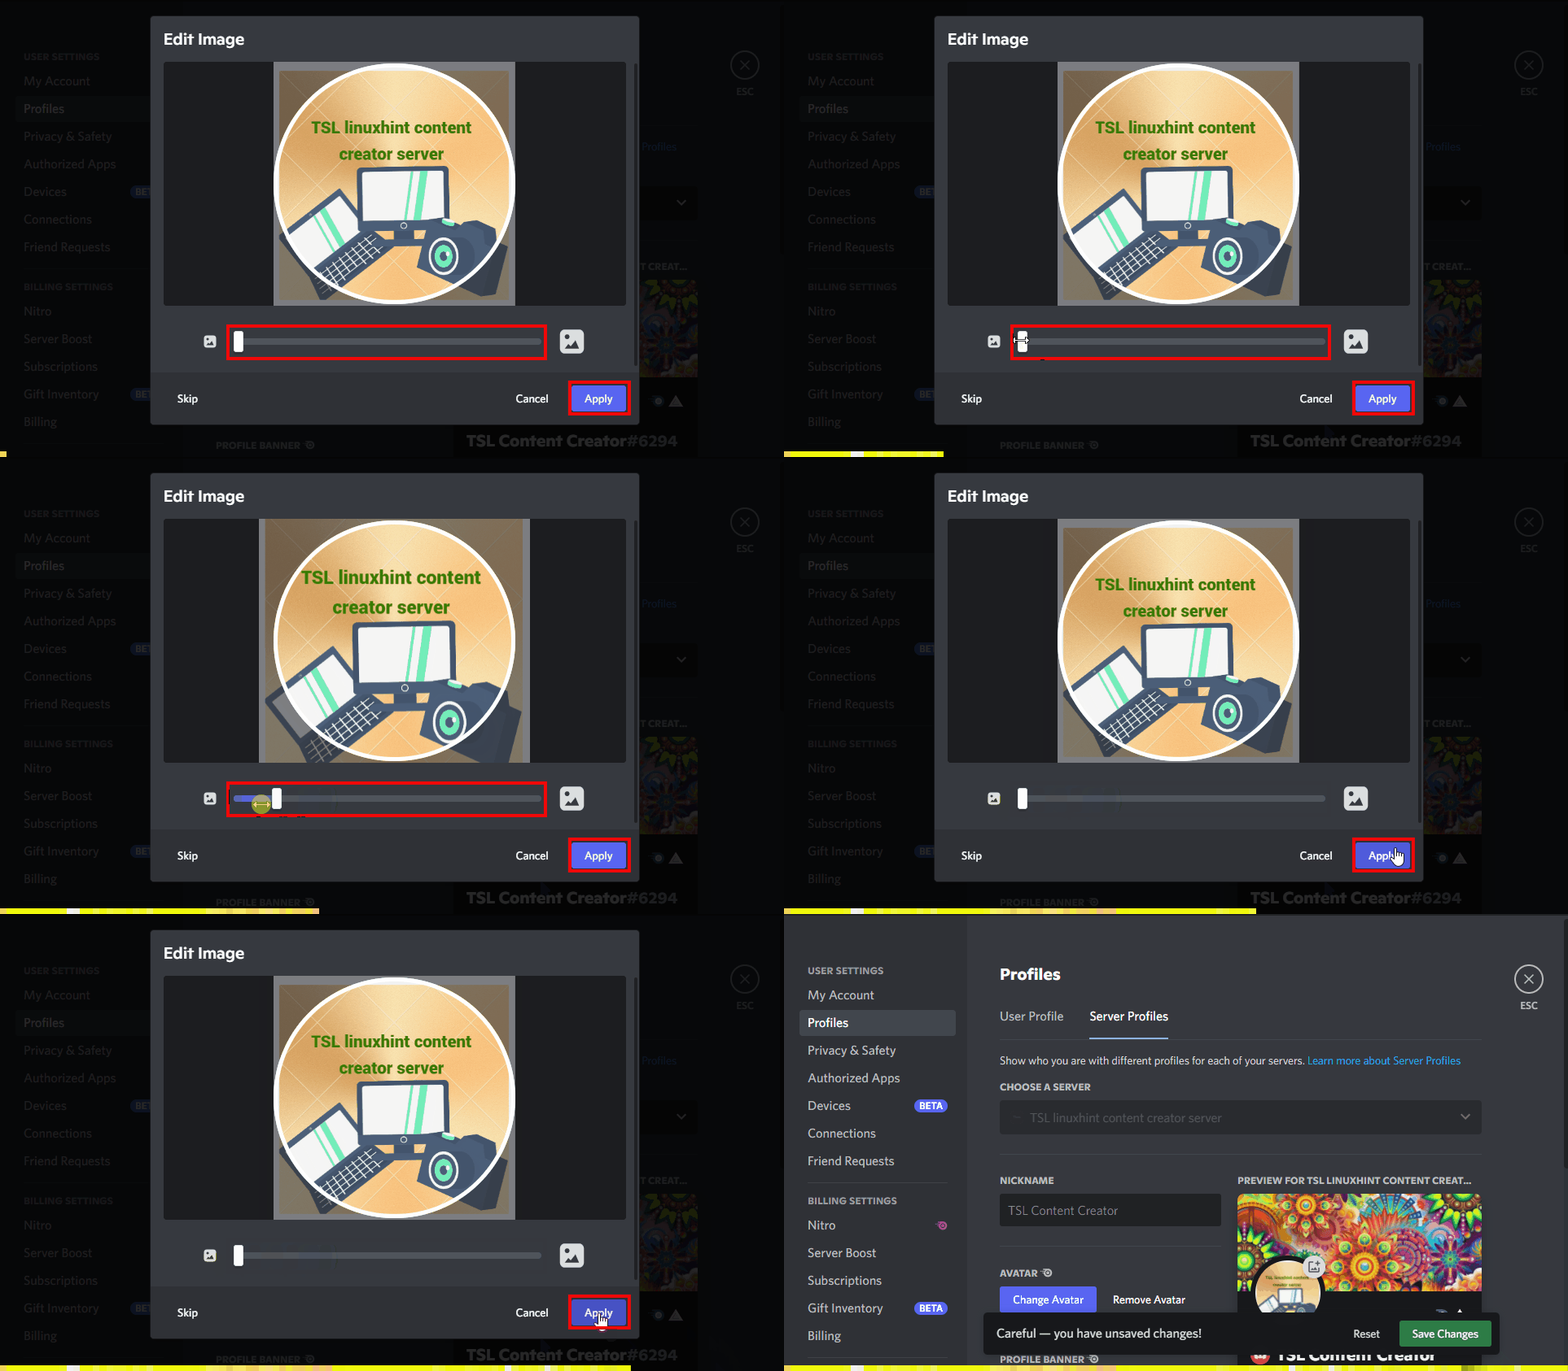
After selecting the image from the device gallery, scale the image using the slider and click on the “Apply” button:
Step 4: Save Changes
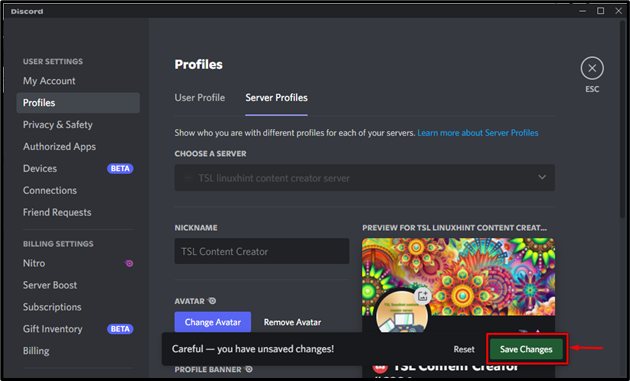
After uploading the image successfully, press the “Save Changes” button” button to save all changes:
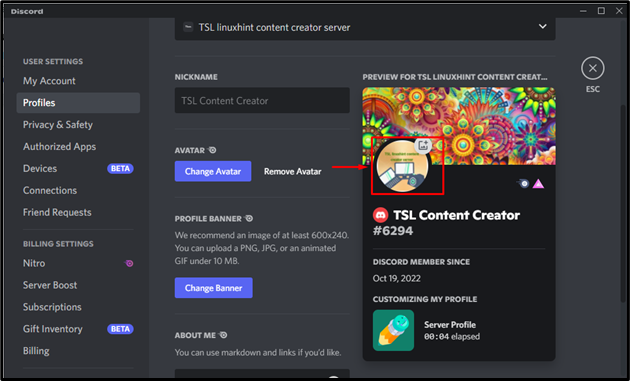
Here, you can see the image is successfully set as a server avatar:
Note: To make a Discord profile picture(pfp) or avatar and set it, follow our dedicated article.
How to Add/Change About me in Discord Nitro?
In Discord Nitro, users can also customize an about me in the Server profile. To do so, follow the mentioned procedure.
Step 1: Add About Me
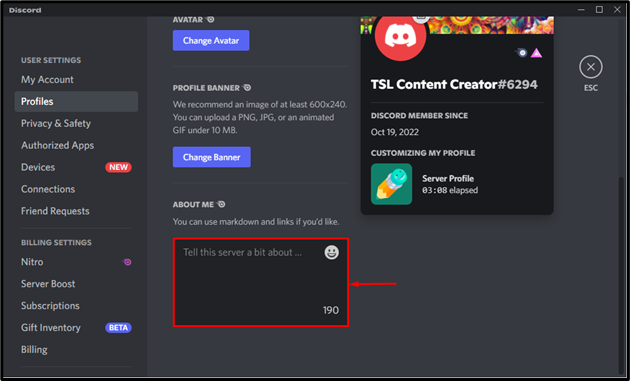
For adding about me, click in the description area and write anything related to your server:
Step 2: Save Changes
After adding the description about the server, click on the “Save Changes” button to save the description:
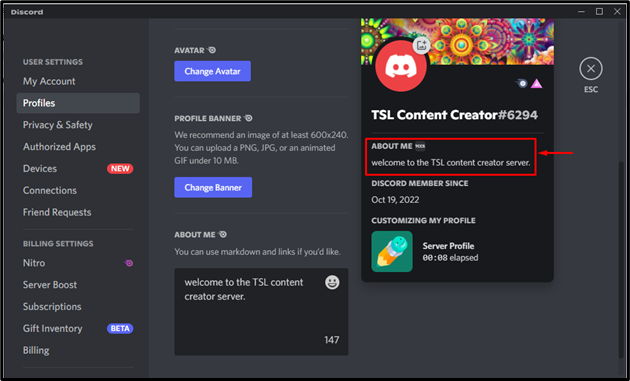
As you can see that, the added description in “About Me” is successfully saved:
We have stated the method for customizing the server profiles by adding servers in Discord Nitro, changing the server name, avatar, and About me.
Conclusion
To set up the customer server profiles, first, create a server and give a specific name by following the sequence, “Server > Menu > Edit Server Profile”, add an avatar by clicking on “Change Avatar” for the server and add a description in “About Me”. Lastly, to save all changes, press the “Save” button. This guide demonstrated the method for customizing the server profiles in Discord Nitro.

