Install Arduino IDE
To start programming ESP32 with Arduino IDE, first we must set up the IDE. Follow the steps to complete IDE installation.
Step 1: Download the IDE by going to the official site or click here. Download IDE according to your OS.

Step 2: Once the download is completed, install Arduino IDE. Use default settings for IDE installation.

As IDE installation is completed now, we will move towards setting up ESP32 drivers on the Windows operating system.
Install ESP32 Drivers
To begin communication between ESP32 and PC we need to install drivers so our PC can configure ESP32 at COM port. Before moving further connect ESP32 board with PC COM port using USB micro cable.
Step 1: Download the latest driver from silicon labs site. To download USB to UART driver for ESP32 click here.
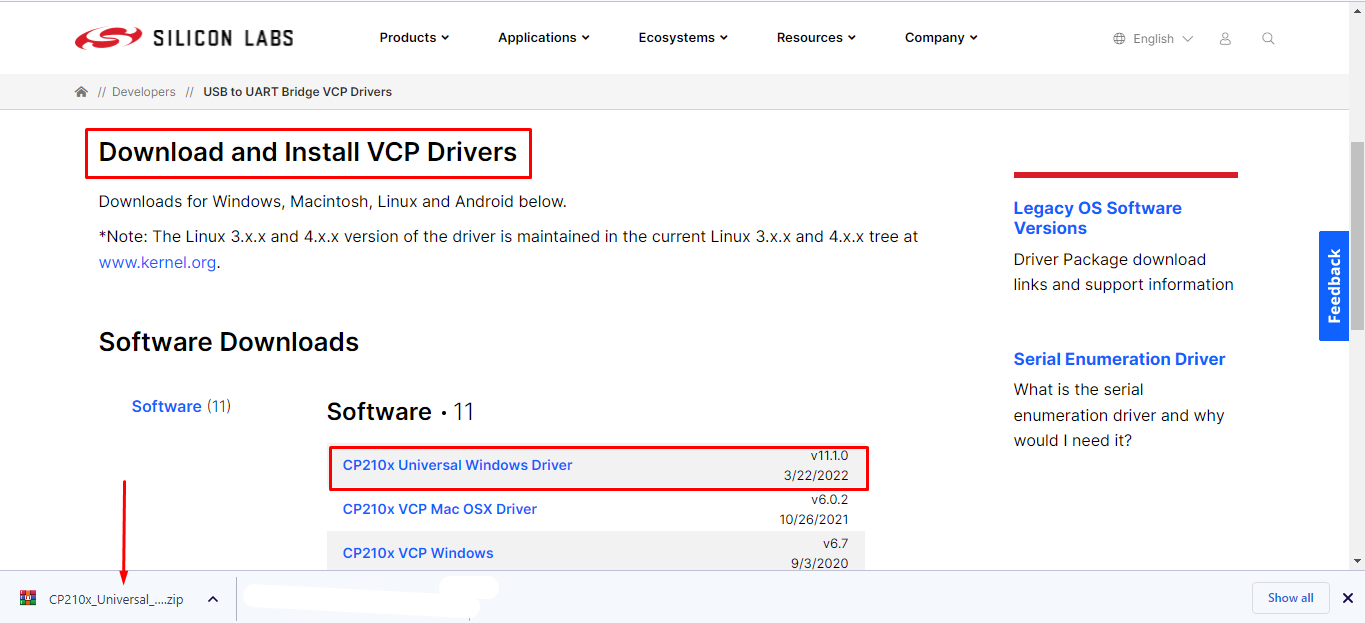
Step 2: Once the download is completed a zip folder will be created inside the Download directory. Extract the file.

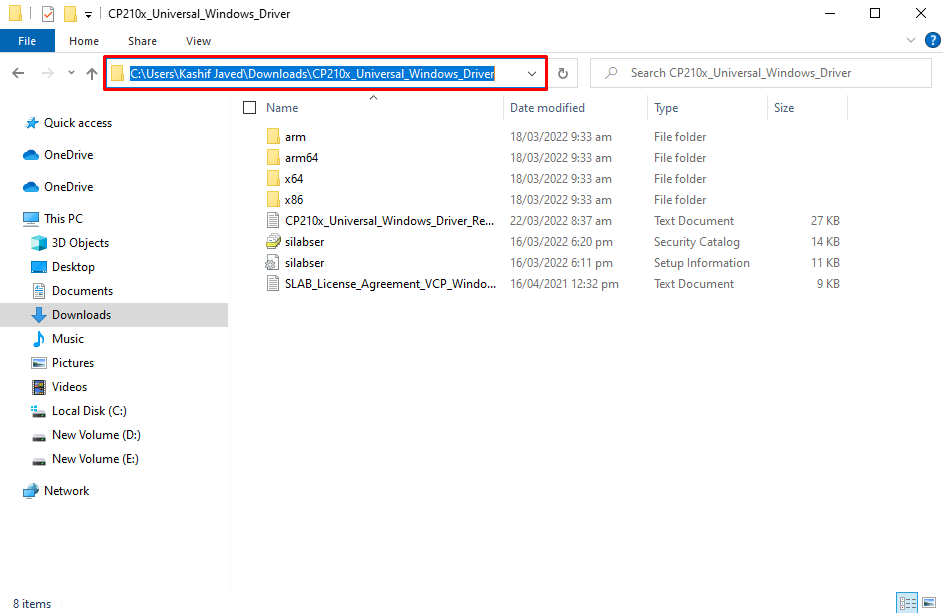
Step 3: Open the extracted folder and copy the path of that folder.
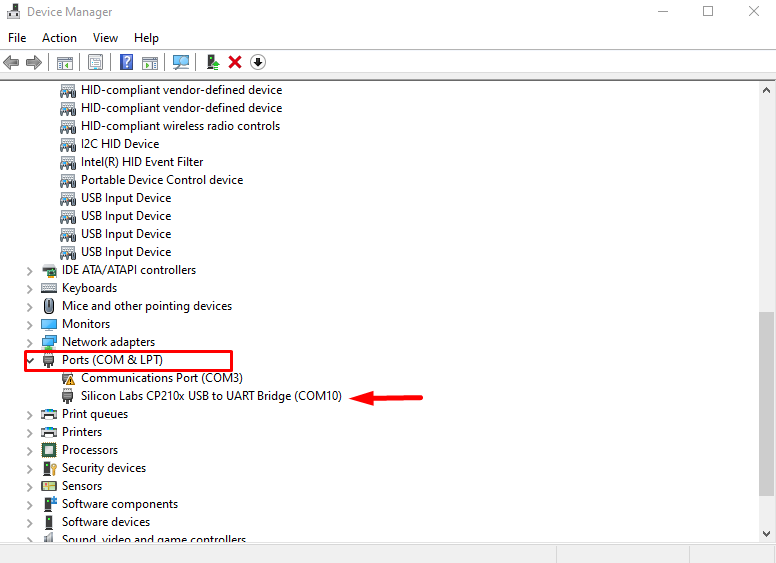
Step 4: Open Device Manager. Here under the COM & LPT section a new device with ESP32 name will be shown. A yellow label with the driver’s name will be shown which indicates the driver needs to be updated. Here our drivers are already installed.
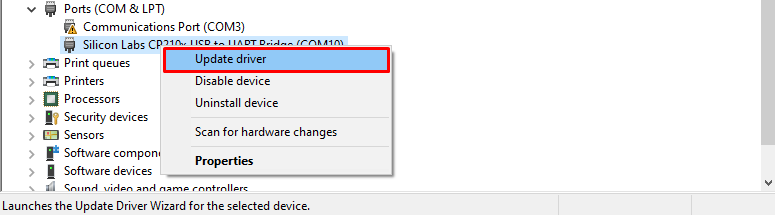
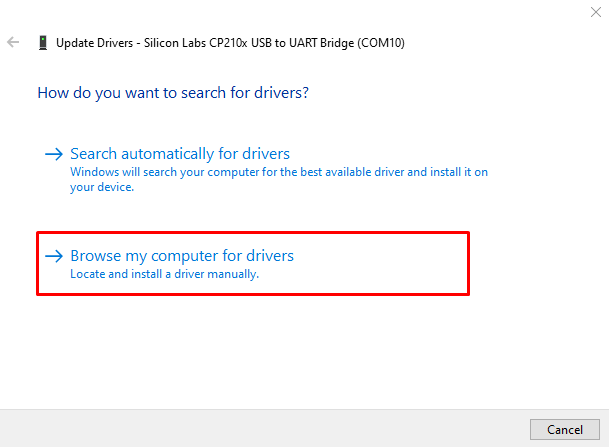
Step 5: Right click over the driver and select the Update driver.
Step 6: A new window will open and select browse from the computer option.
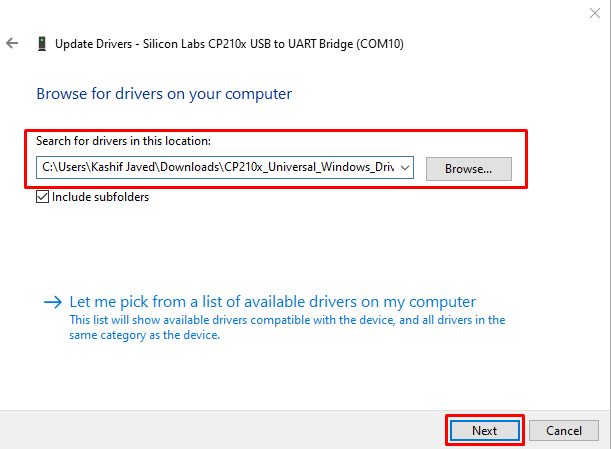
Step 7: Paste the path to the driver folder copied earlier and click next.
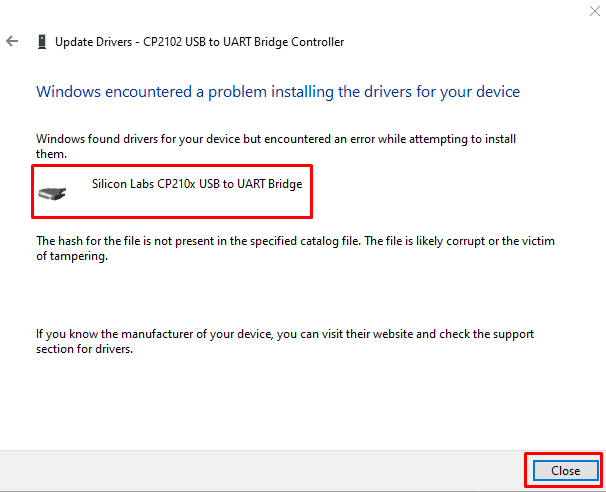
Step 8: Once the driver is installed successfully click Close. Now ESP32 is ready for serial communication with PCs.
Setting up ESP32 in Arduino IDE
As ESP32 board drivers are installed now we can add ESP32 in Arduino IDE to upload our first code.
Following steps below to add ESP32 in Arduino.
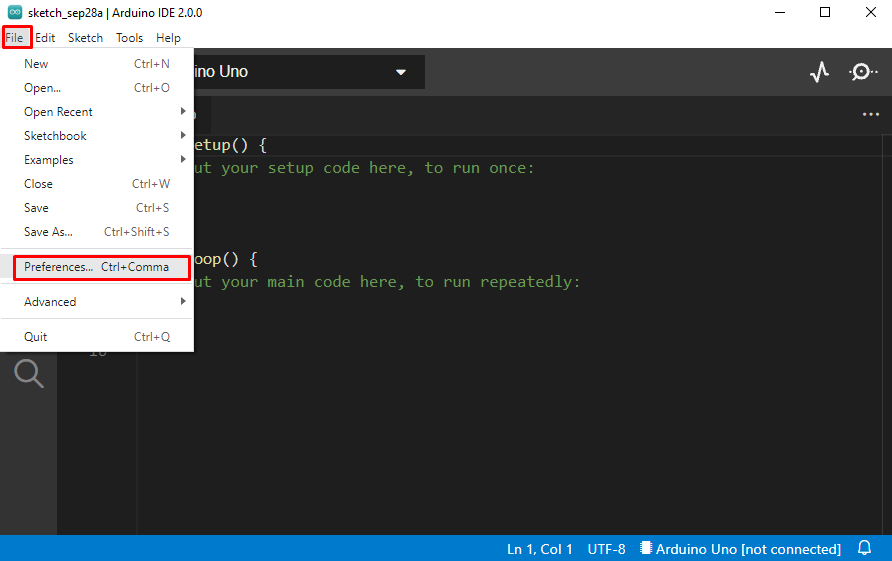
Step 1: Open IDE. Go to Files>Preferences or press shortcut Ctrl+comma.
Step 2: A new window will open which shows Arduino preferences. Type the below mentioned URL in Additional boards manager section and click OK.
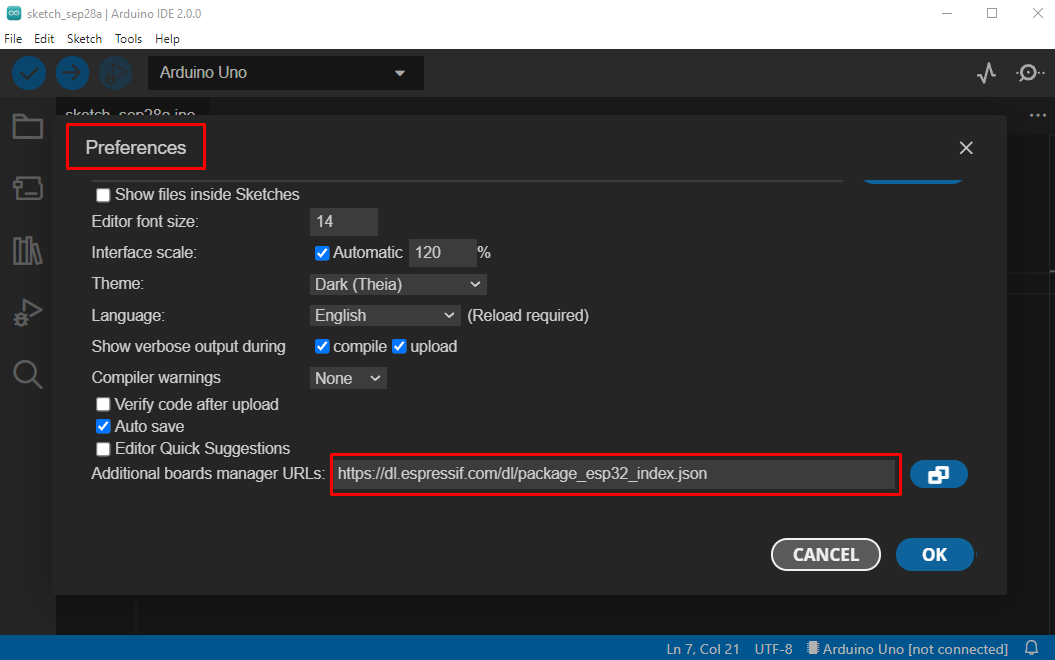
Note: If you have already added any other board like ESP8266 then separate both boards URLs using a comma between them.
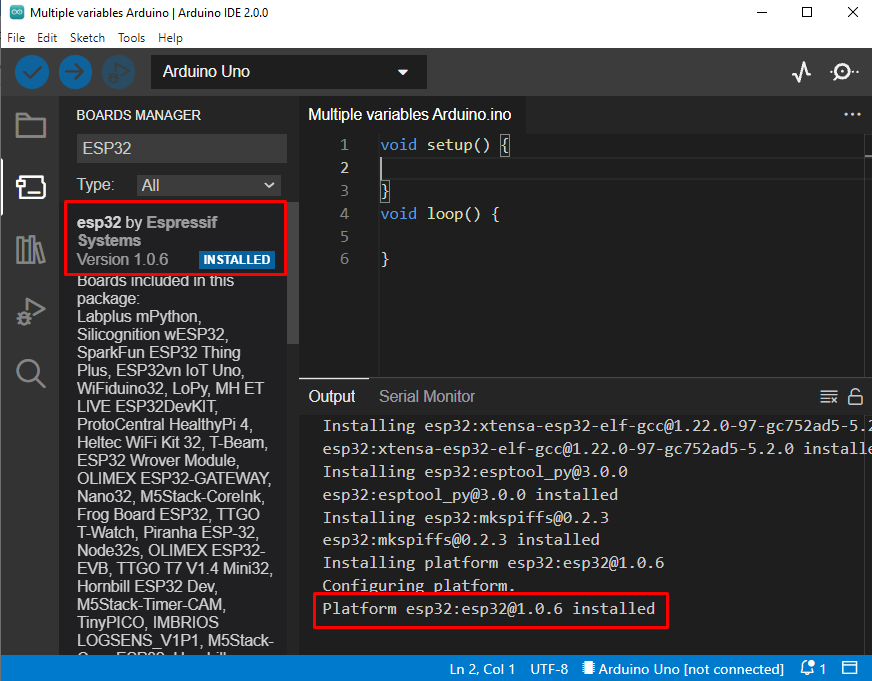
Step 3: Now go to the BOARDS MANAGER option and search for ESP32 board. Click install. New files will begin installation and wait for the files to completely download and install.
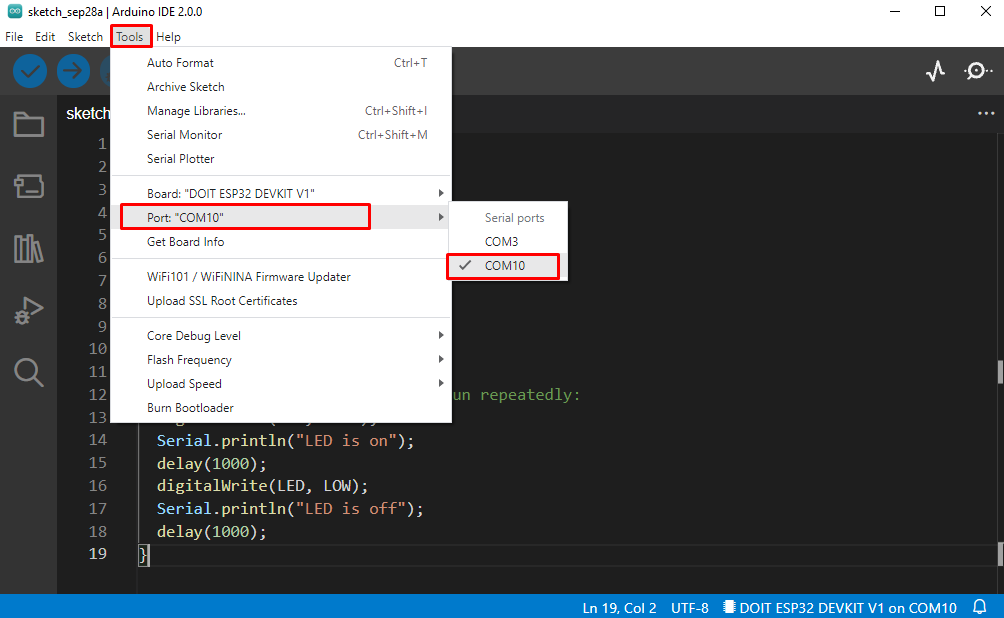
Step 4: As ESP32 is successfully added. To program it first select the type of board you are using. Normally the ESP32 model is written on the back side of the board. Here we are using ESP32 DEVKIT V1.
Go to: Tools>Boards>esp32>Board Type.

Step 5: Last step before we code ESP is to select the COM port at which it is connected. Check com port from device manager under COM & LPT section.

Select COM port, go to: Tools>Port>COMX:
Upload LED Blink Program in ESP32
We have successfully integrated ESP32 board with Arduino IDE. To test installation, we will upload a Led blink program.
Code
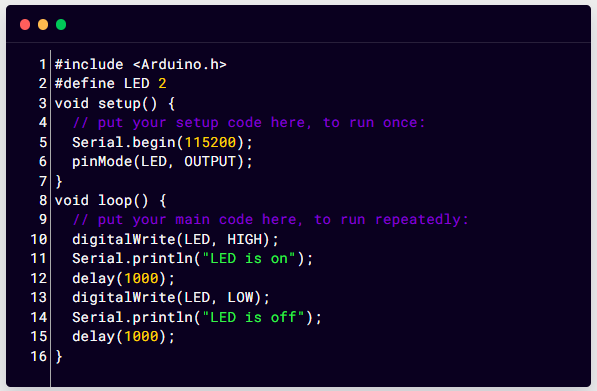
#define LED 2
void setup() {
Serial.begin(115200);
pinMode(LED, OUTPUT);
}
void loop() {
digitalWrite(LED, HIGH);
Serial.println("LED on");
delay(1000);
digitalWrite(LED, LOW);
Serial.println("LED off");
delay(1000);
}
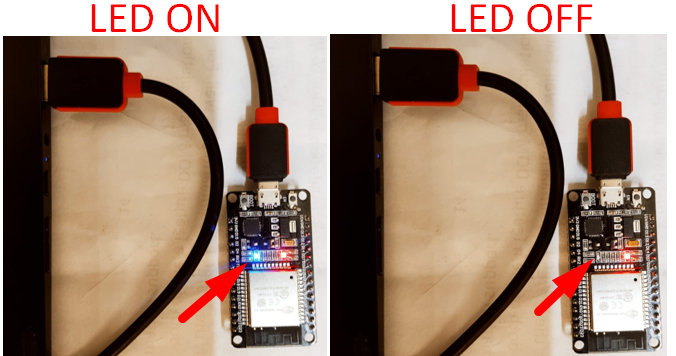
Above code will begin blinking of LED over ESP32 board. The LED will begin to blink with a delay of 1000 milliseconds.
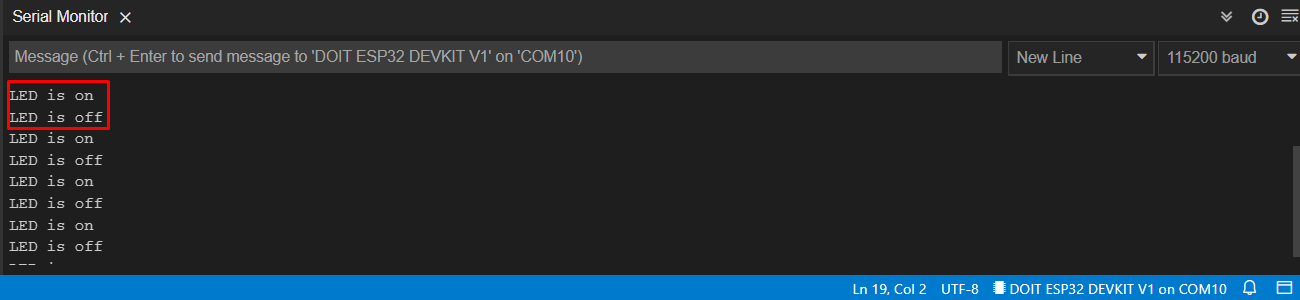
Output
Output of Led status will be shown on the serial monitor.
Conclusion
ESP32 is an IoT based microcontroller board. ESP32 can also be programmed using Arduino IDE. The way it is programmed is much like an Arduino board. Here in this guide, we covered how to install IDE and setup ESP32 drivers. Once the ESP32 driver was added we completed installation by adding our board using an additional board manager. Using this guide ESP32 model can be configured in Arduino IDE.