jQuery is basically a lightweight version of JavaScript as it can perform the same function as JavaScript while consuming fewer lines of code. It has its own methods and selectors which help in generating complex and better performance outputs. Just like JavaScript methods, jQuery can also be used to play the specific audio file on the user’s interaction.
This guide will explain the process to play an audio file when a button gets clicked in jQuery.
How to Play an Audio File Using jQuery on Button Click?
The “on()” method is used to add the event listener that handles the button click events. This will play an audio file with the help of the jQuery “play()” method. Let’s have a look over a couple of examples to play an audio file with the help of jQuery.
Example: Using Pure jQuery
In this case, the audio file is inserted on the webpage along two buttons which has a function to play and pause the selected audio file. To use jQuery in your project it must be imported via CDN. To do so, traverse through official documentation via this link and import jQuery and place the CDN inside the “<head>” portion of the main HTML file:
<script src="https://code.jquery.com/jquery-3.7.0.js"></script>
</head>
<body>
<audio id="file" src="testAudio.mp3" controls></audio>
<button id="trigger1" type="button">Press the Button to Play Audio</button>
<button id="trigger2" type="button">Press the Button to Stop Audio</button>
<script>
$("#trigger1").on("click", function() {
var selAudio = $("#file")[0];
selAudio.play();
console.log("Audio is Playing");
});
$("#trigger2").on("click", function() {
var selAudio = $("#file")[0];
selAudio.pause();
console.log("Audio is Stopped");
});
</script>
</body>
Explanation of the above code:
-
- First, the audio is inserted into the webpage by utilizing the “<audio>” tag and setting the path of the audio file as a value for the “src” attribute. To make this audio element accessible, assign it a unique ID of “audio”.
- Next, create two “<button>” tags having IDs of “trigger1” and “trigger2”. These buttons were later on modified to play and pause the audio.
- Then, the “on()” jQuery method is applied to the “trigger1” element, and it attaches the “click” event listener. This invokes the anonymous callback function which stores the reference of the audio element by accessing its ID “file”.
- The reference is stored in a variable “selAudio” and the “play()” method is assigned to it to play the audio file.
- After that, attach the click event listener with the HTML element having an ID of “trigger2” using the “on()” method.
- In addition, select the audio element in the same manner by accessing its ID “file” and apply the “pause()” method to it.
Preview of the webpage after compilation:
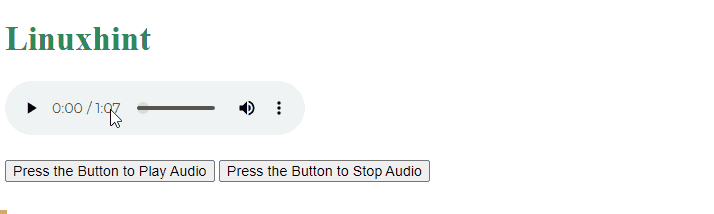
The output of the above code confirms the audio file is played and stopped by clicking on the corresponding buttons.
Bonus Tip: Using JavaScript to Play an Audio File
To play an audio file with the help of JavaScript the following code can be used:
<h1 style="color: seagreen;"> Linuxhint </h1>
<audio id="audio" src="testAudio.mp3" controls></audio>
<br><br>
<button id="trigger1" >Press the Button to Play Audio</button>
<script>
const demoFile =document.getElementById('audio');
const actionBtn = document.querySelectorAll("button");
actionBtn.forEach(btn => {
btn.addEventListener("click", () => {
demoFile.play();
});
});
</script>
Explanation of the above code snippet:
-
- First, the “<audio>” and “<button>” tags are utilized in the same manner as done in the above example.
- Next, store the reference of the “audio” element by accessing its iD of “audio”. Create a global variable of “actionBtn” that stores the references of all buttons utilized on the webpage.
- After that, apply the “forEach()” method over the “actionBtn” and attach the “click” event listener with a button.
- In the end, the callback function of the “click” event attaches the “play()” method to the variable “demoFile” which has the reference of the “audio” element.
Preview of the webpage after compilation:

The output shows the audio file that has been playing while clicking on the button.
Conclusion
To play an audio file using jQuery on button click, the “on()” and “play()” method is basically utilized. The “on()” method assigns the “click” event listener to the button to call a function. Inside the function, the “play()” method is applied to the variable storing the reference of the audio file making the audio file start playing. That’s all about the procedure to play an audio file on a button click using jQuery.