JavaScript is a very popular scripting language which is used both on the client-side as well as on the server-side. JavaScript is necessary for our web pages as it makes our web page interactive.
There are three basic requirements to become a front-end developer:
- HTML,
- CSS,
- JavaScript
HTML is shortened for Hyper text markup language that provides structure to our webpage and CSS gives style to our pages. Finally, JavaScript as mentioned earlier makes our webpage interactive. JavaScript also helps in altering Html and CSS.
Now a question arises that how can we link/connect JavaScript with HTML. Today in this article we will explore almost all the ways we can link JavaScript to HTML.
What is a script tag?
Before going into the solution of how to link JavaScript to HTML, let’s look at the script tag.
The <Script> tag is used to embed client-side scripts which are JavaScript. This tag has either scripting elements or references to another script file using the src attribute.
Syntax
This is a script tag with an src attribute in which we can provide a file name we want to reference.
Using JavaScript within HTML file
We can link JavaScript to HTML by adding all the JavaScript code inside the HTML file. We achieve this using the script tag which was explained earlier. We can put the <script></script> tag either inside the head of the HTML or at the end of the body. It is totally up to us where we want to put it and when we want JavaScript to load. Programmers usually call the script tag whenever they want to generate content or apply some action. So by looking at the following code, it is a good practice to load javaScript after the HTML body.
Let’s look at an example:
Example
In this example, first, we created a button in HTML. We set an event to click. Whenever a user clicks on this button the myFunc() function will get activated. After that we put a <script> tag. All the JavaScript code went here. We put a function with the name of myFunc() where we showed an alert.
Congratulations! We have successfully linked JavaScript with HTML by adding JavaScript code inside the script tag.
This method is good for small web pages or one webpage. However, as your web app grows bigger the script code will also get bigger and it will become really difficult to handle as well as to read. The solution is to write JavaScript in a dedicated separate javaScript file and provide the reference of the JavaScript file in the HTML file.
Using JavaScript in an external file
Using an external file for larger scripts is beneficial as we can divide our code into different JavaScript pages as well as in different files. It is achieved by referencing the JavaScript file name in the “src” attribute of the script tag in the HTML file.
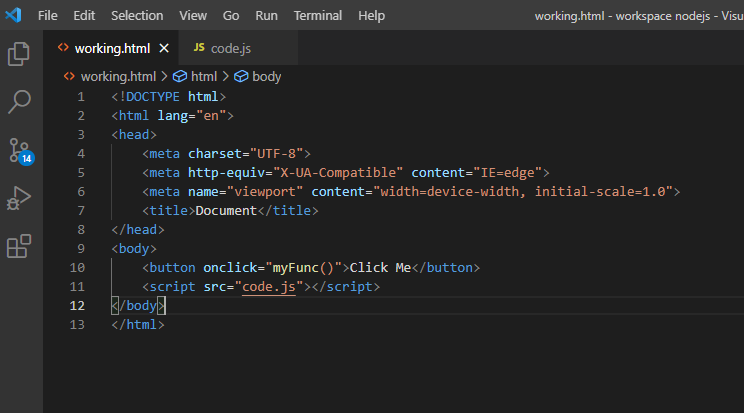
Let us change the previous example a little. The code will remain the same. We will make another JavaScript file by the name of “code.js”. We will put all JavaScript code in the “code.js” file and provide the “code.js” reference in the HTML file.
For Example
<script src="code.js"></script>
We referenced the “code.js” file using the src attribute of <script> tag.
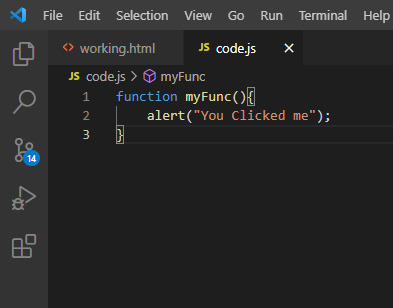
Now the code.js file:
alert("You Clicked me");
}
The result will be the same as the previous example i-e.
External JavaScript File Advantages
Let us formally state some of the advantages after discussing the external javaScript file:
- It separates our HTML code and JavaScript code
- JavaScript code becomes readable as well as maintainable.
- Another advantage is that cached JavaScript files act in speeding up page loading.
JavaScript Selectors
In the previous examples, we took the help of an event. Suppose, we don’t want to add an event and we want to select an element from the html file. JavaScript helps us by providing different options for this which are called JavaScript Selectors.
JavaScript Selectors main function is to select an HTML element and perform different actions on it according to our needs. JavaScript provides different options for this, one of them is the id.
We can give an element an id attribute in Html and then access it in JavaScript. We access in JavaScript by:
Id is unique and used for only one element.
JavaScript also gives us the option of selecting an element using a class attribute. We can use the class name for different elements. The Syntax is:
Another option JavaScript gives us is accessing JavaScript elements using tag names. Syntax for accessing tag names:
Example:
HTML
<button id="btn">Click Me</button>
<script src="code.js"></script>
</body>
JavaScript
btn.addEventListener("click", function(){
alert("You clicked me");
})
In this example we accessed the button element using getElementById(). After that we put an event that whenever a user clicks on the button an alert should be shown.
We can achieve the same output if we use:
It should be kept in mind that we have to set the class attribute in the button element.
Conclusion
Linking JS with HTML makes your website dynamic and interactive. In this post, we taught you how to link JavaScript to HTML. We discussed the two main ways of achieving this task.
The first was using JavaScript within the HTML file. The second was using JavaScript outside the HTML file using a JavaScript file. To be a front-end developer it is necessary to work in both HTML and JavaScript and this article showed you how to link both these.


