MySQL Workbench offers cross-platform support and can be installed on various Linux distributions as well. In this post, a detailed guide is provided that addresses the following objectives:
– Installing MySQL Workbench on Manjaro
– Using MySQL Workbench on Manjaro
How to install MySQL Workbench on Manjaro Linux
In this guide, several methods and their respective steps are provided that direct you to the installation of MySQL Workbench. There are two methods to get MySQL Workbench on Manjaro and are mentioned below:
– Using Graphical User Interface
– Using Command Line Interface
Both methods are described briefly in the upcoming sections.
Method 1: How to install MySQL Workbench using GUI on Manjaro Linux
To get MySQL workbench in Manjaro, you have to follow the steps mentioned below:
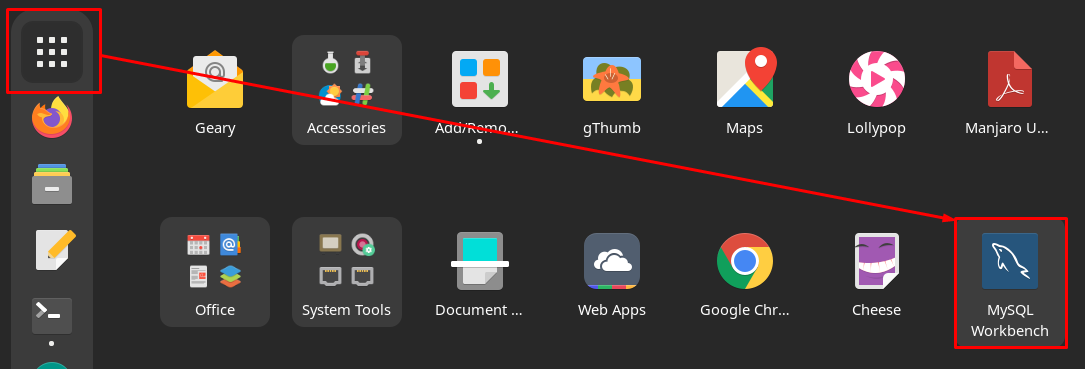
Step 1: Click on the “Show Applications” option on the desktop:

Step 2: Once the applications window is opened; click on “Add/Remove Software“.

Step 3: After that, navigate to the search icon on the top left corner of the window.
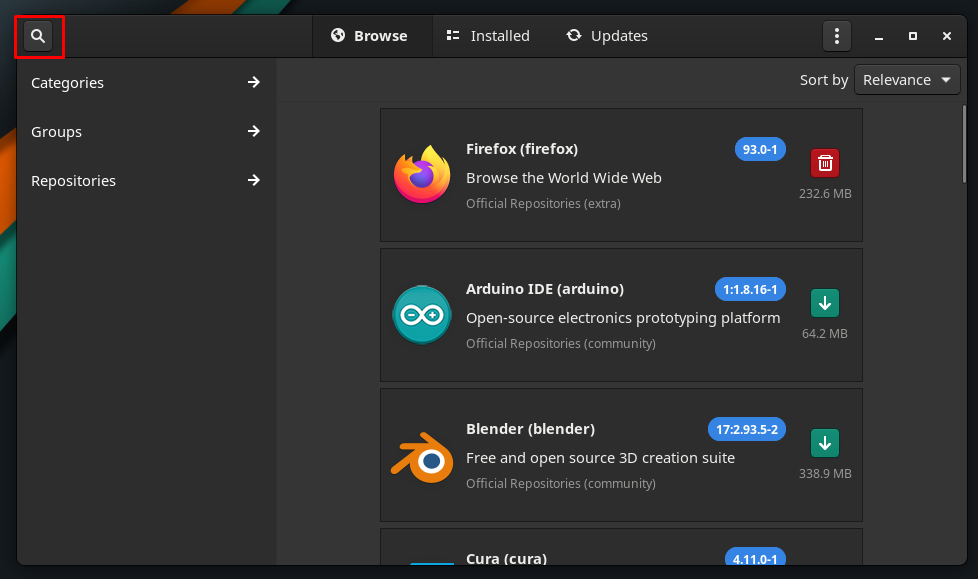
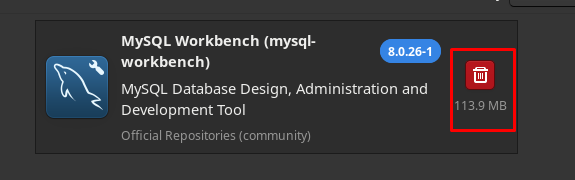
Step 4: A search bar will be displayed in the center of the menu bar. Now, write “mysql-workbench” to look for packages. After that, you will get the “MySQL Workbench” package as shown in the image below.

Step 5: After that, navigate to the install button, as soon as you click on the button it will turn to the “tick” mark and an “Apply” button will be displayed on the foot bar of the window. For further proceedings, click on “Apply“:

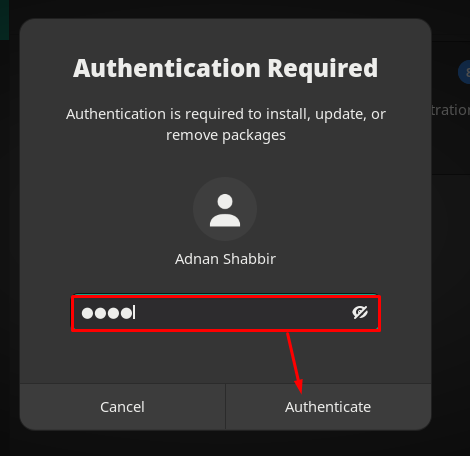
Step 6: After clicking on “Apply“, an authentication prompt will appear. You must enter your password correctly to proceed further.
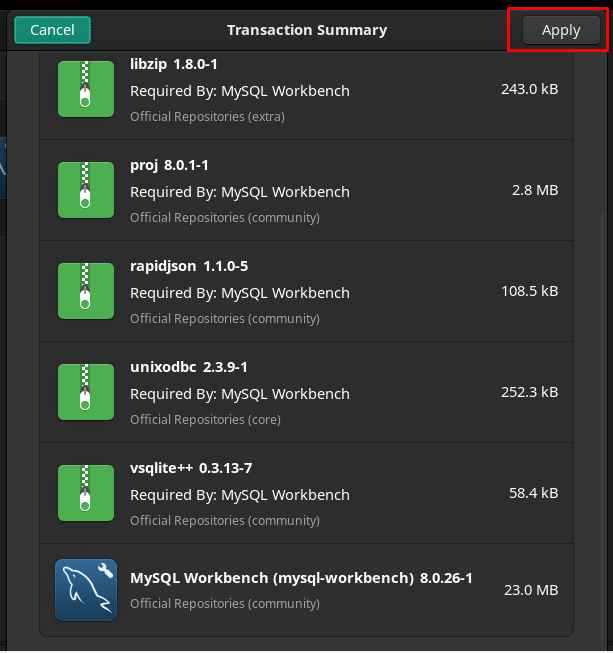
Step 7: After that, you will be prompted with a window that contains the list of additional packages that are recommended to work with MySQL Workbench. To grant permission, click on “Apply“:
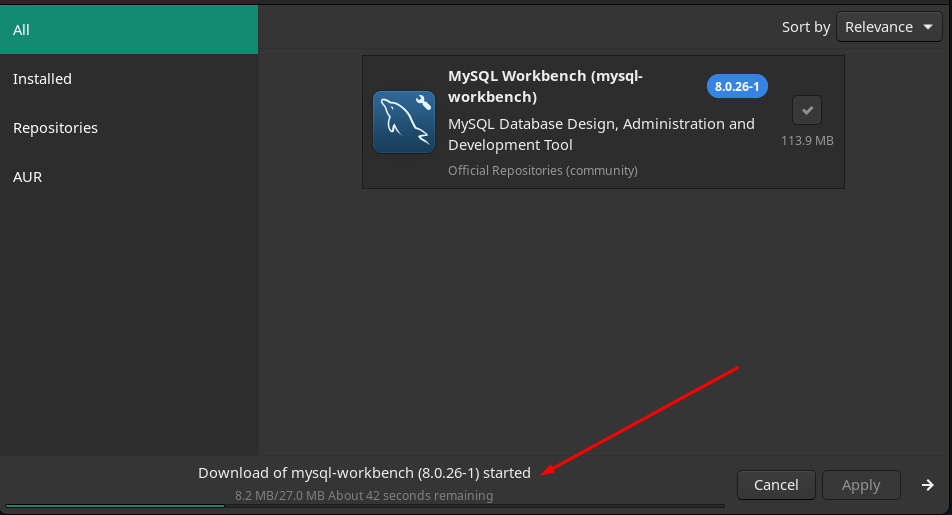
After that, the installation process will start that may take several minutes.
Once the installation is completed, the green button will turn to remove (red) button that shows the installation has successfully completed.
To locate the installed package, click on “Show Applications” icon on the desktop and you will find the newly installed “MySQL Workbench” there:
Method 2: How to install MySQL Workbench using terminal on Manjaro Linux
This method explains the MySQL Workbench installation using the terminal of Manjaro Linux. There are two ways to use command line support to get MySQL Workbench on Manjaro Linux.
- Install MySQL Workbench using yay(AUR helper)
- Installing MySQL Workbench using Pacman
Method A: Installing MySQL Workbench using yay(AUR helper)
The yay is the helper for AUR(Arch User Repository) and is used to install/uninstall packages. The below-mentioned command will install MySQL Workbench on Manjaro Linux:

You can verify the installation by executing the following command using terminal:
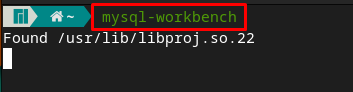
And the above command will start the MySQL Workbench application:
Method B: Installing MySQL Workbench using Pacman
Pacman is a package manager of Manjaro Linux-like apt in Debian-based distributions. One can use Pacman to install MySQL workbench on Manjaro.
Step 1: Firstly, update the package’s database by issuing the below-stated command.
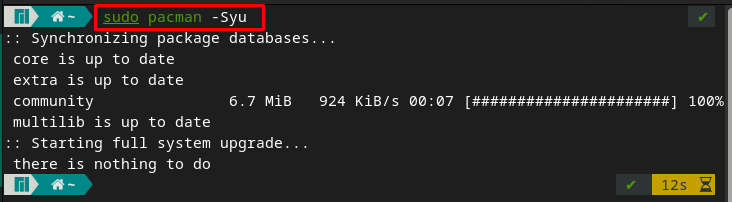
Step 2: Once you have performed the updating, you can install MySQL Workbench with the help of the given command.

Or, if you use the “-Syu” flag to install the package, then pacman updates the database and installs the package in a single command. So, you can perform that multitask by issuing commands mentioned below.
Step 3 : To verify the installation, you can run MySQL workbench on your Manjaro system from the terminal by entering the following keywords.

How to use MySQL-Workbench on Manjaro
This section contains the usage of MySQL Workbench on Manjaro, and the below-mentioned steps will lead you to uninterrupted connection and use of MySQL Workbench.
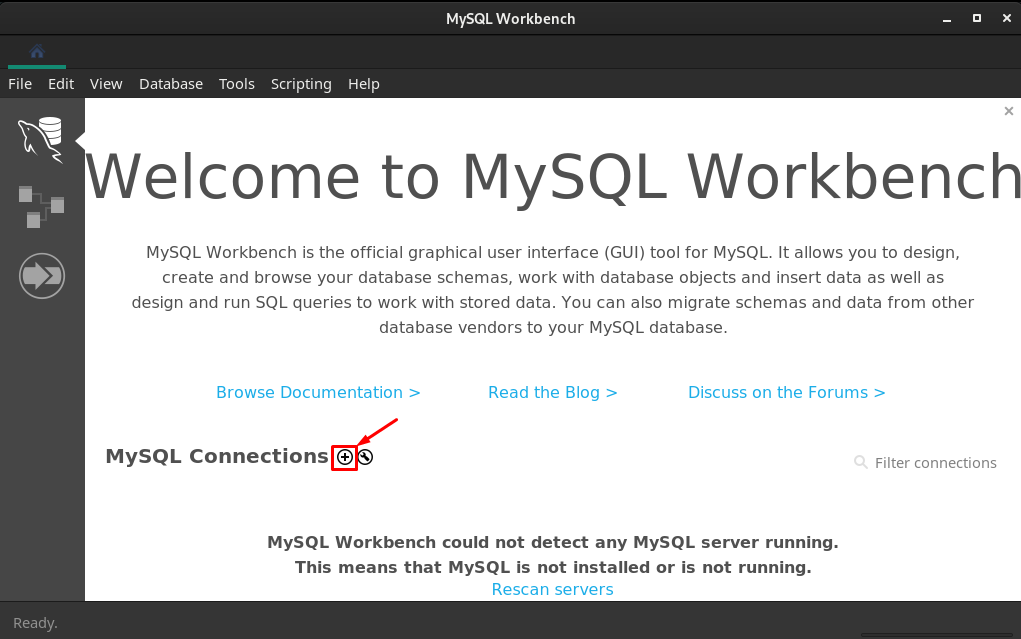
Step 1 : Create MySQL Connection
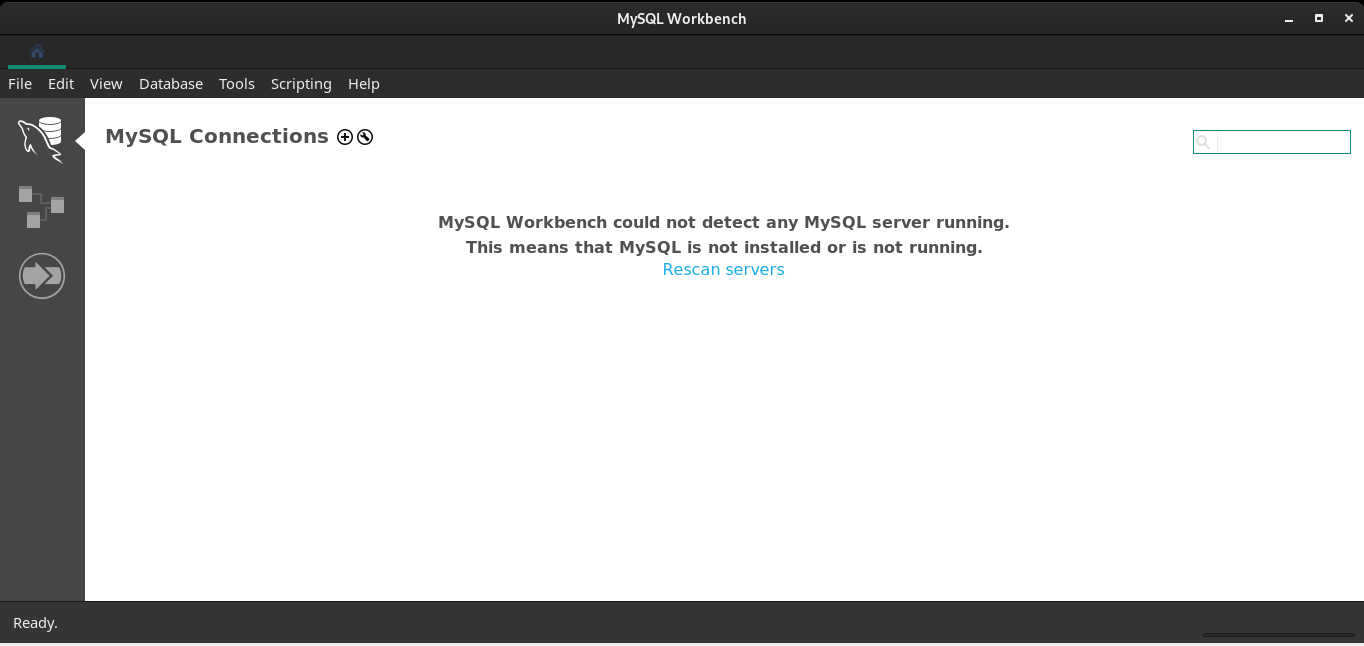
Open the MySQL Workbench and click on the “+” icon as shown below.
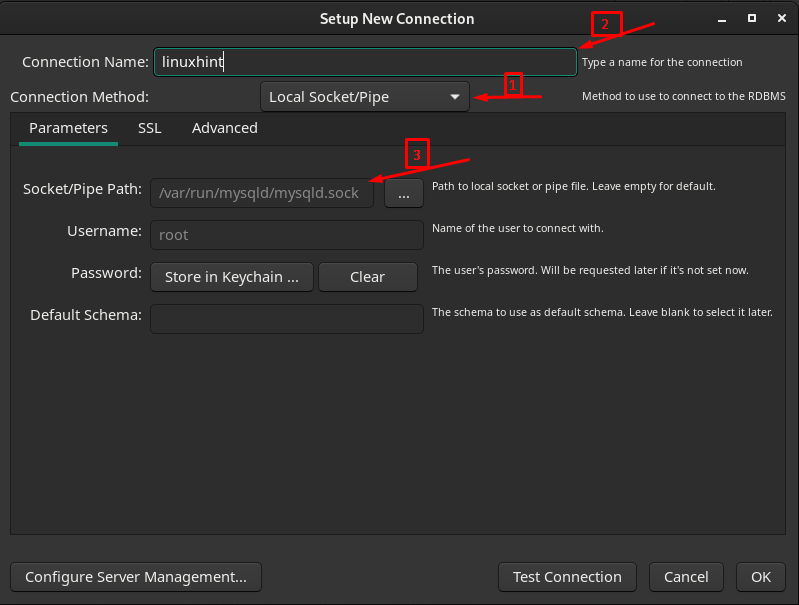
After doing so, you would get a connection interface where you have to create a new connection as follows.
– Choose the connection method “Local Socket/Pipe”
– Type a connection name, it can be any as per your wish. We have named it “linuxhint”
– Insert the Socket/Pipe Path “/var/run/mysqld/mysqld.sock“. You can do it manually by copying the right path or navigating to three horizontal dots and searching for “/var/run/mysqld/mysqld.sock”
After configuring, click on “OK” to proceed further.
The time you click on “OK“, the connection will be created and you can run it.
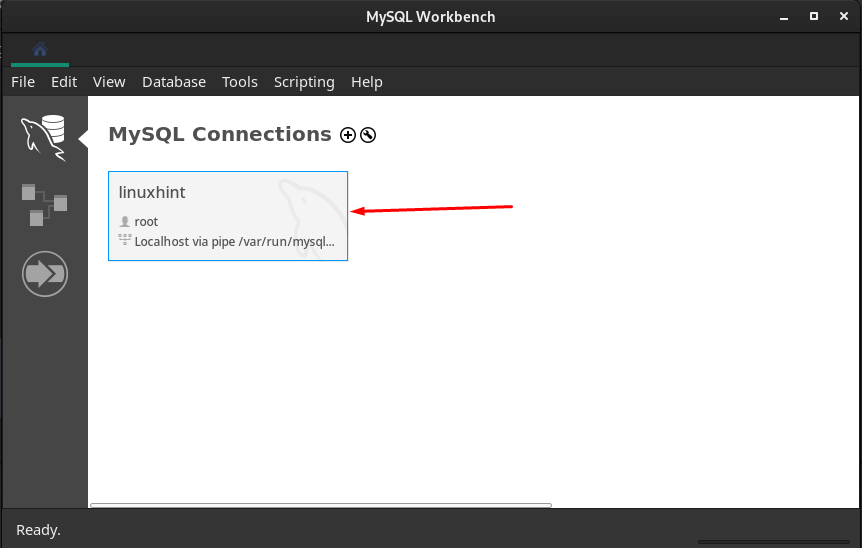
To run “linuxhint” connection, click on “linxuhint‘ and you would get the following interface.

Step 2 : Check the server status
Now, you must check the SQL server status by navigating to “Server Status” on the left pane of the window:

And you can see that the server is running.

Step 3 : Add new Schema
Click on the add schema icon as shown below:

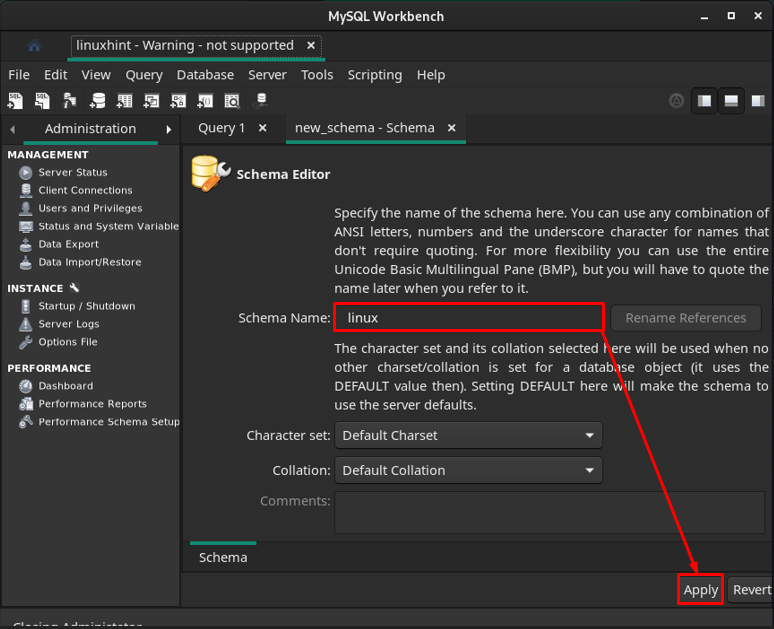
Choose the schema name and click on “Apply“:
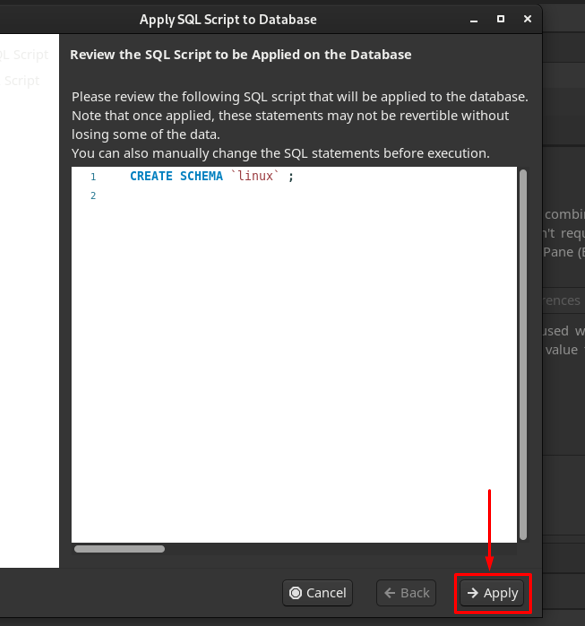
The next prompt will show you the query to create SQL Schema, navigate to “Apply“.
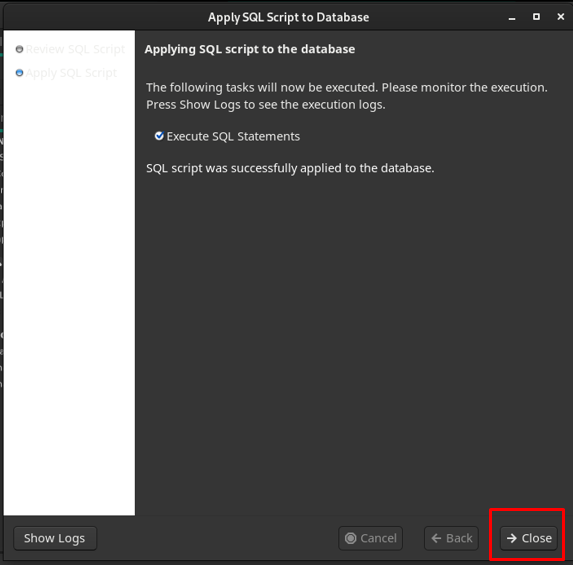
After successful application of the query, the Schema will be added, and click on “Close“.
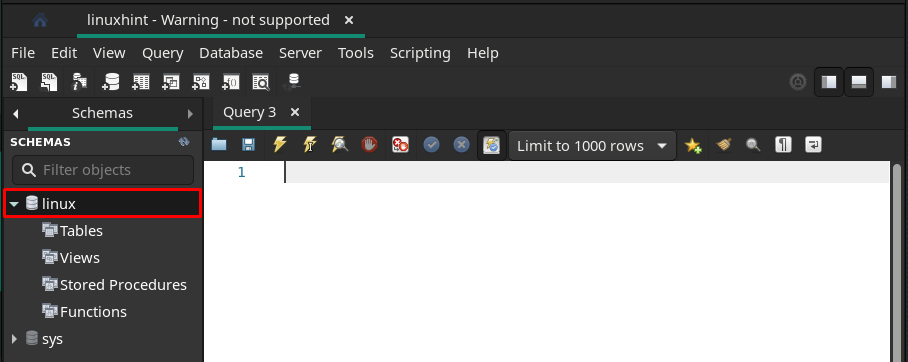
You can observe that the Schema is created with the name “linux“.
Step 4 : Create Tables
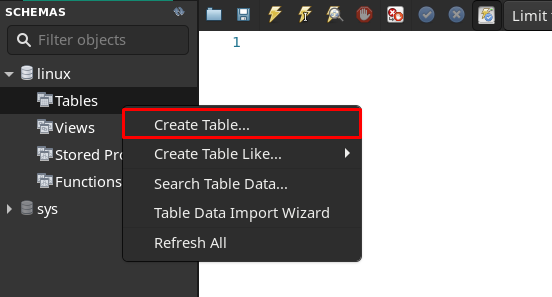
As observed, the “Tables” option is there. Right click on the “Tables” and then navigate to “Create Table“.
You would find the interface where you have to enter the “Table Name” and enter its field and then click on “Apply“.

After successful creation, it will appear under the “linux” named database.

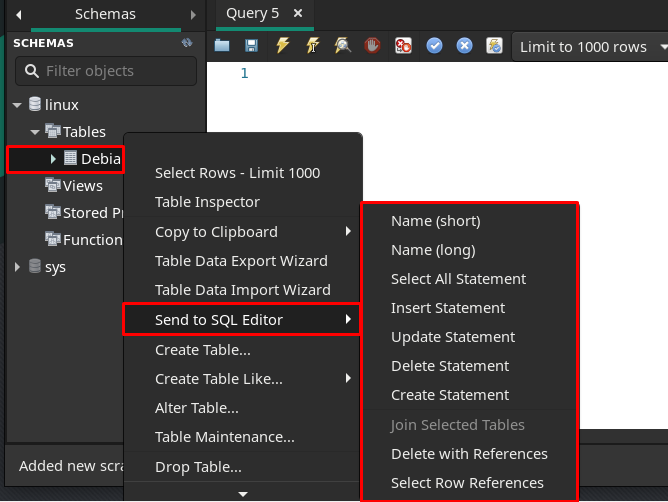
To perform any operation on the table, MySQL Workbench provides the built-in set of queries. To use any query, right-click on the table and choose “Send to SQL Editor“.
Insert Statement: Like here we are using “Insert Statement”, the time you click on “Insert Statement”, you will get the following syntax of INSERT query.
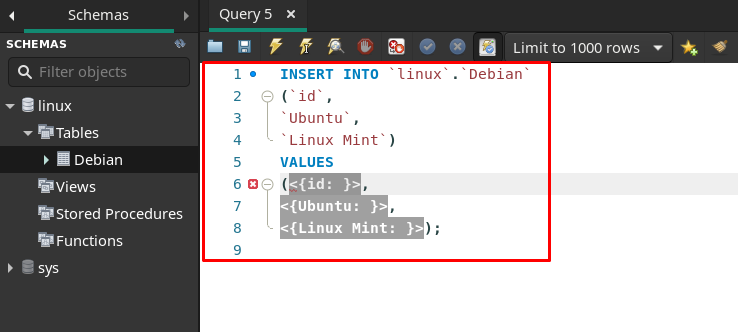
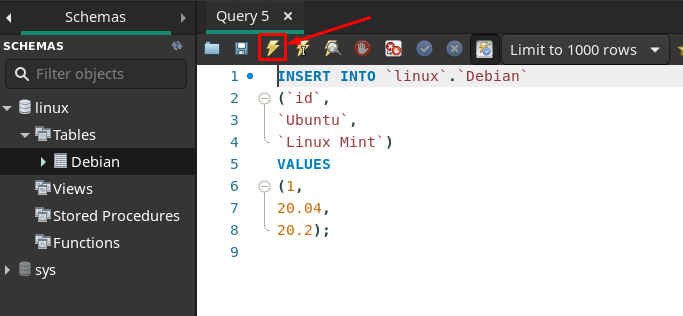
You can add values by replacing the values as we have done and then the query can be executed by clicking on the blitz icon. If the query is correct, then it will be executed(without showing any prompt), otherwise, it will return errors.
Select All Statement: To retrieve inserted data, you may navigate to the “Select All Statement”.
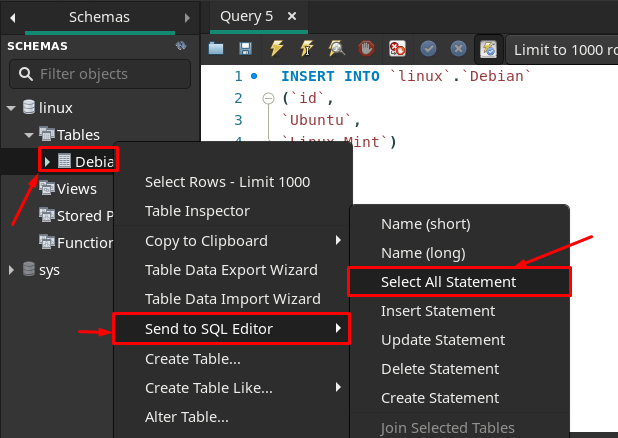
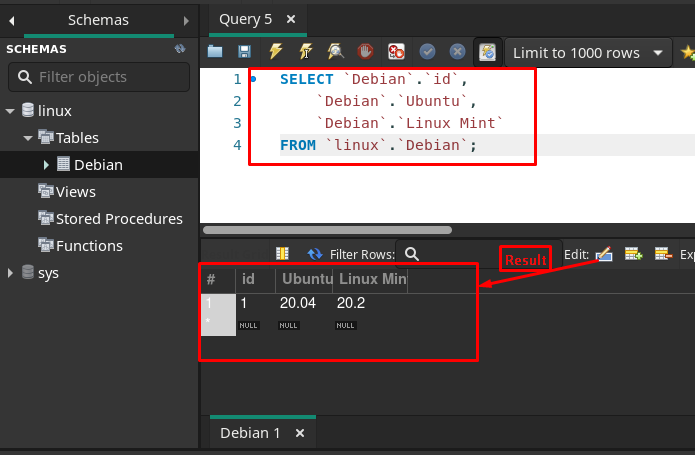
After clicking, you will get a built-in query of the Select All statement.

When you will execute this query, the result will be displayed in a new pane as can be seen below.
By following the same ways as mentioned above, you can use update and delete queries as well.
Conclusion
MySQL Workbench is a widely used graphical tool to work on MySQL databases and servers. This tool can be used by database stakeholders, like Database administrators, developers, and designers. This writeup is focusing on installing and using MySQL workbench on Manjaro. The installation is performed here using graphical and command line support of Manjaro. The usage of MySQL Workbench is demonstrated from scratch, like creating a connection, checking the server status, adding new schema, and creating tables. Moreover, you can also perform several operations on tables by using built in SQL queries.