To learn and do penetration testing, you may want to run Kali Linux as a virtual machine. This way, you can do everything in an isolated environment, take snapshots of your virtual machine and get back to an earlier state if anything goes wrong within a few seconds. It will give you a lot of flexibility that you will not get if you run it directly on your computer.
This article will show you how to run Kali Linux on a VMware Workstation Pro 16 virtual machine. So, let’s get started.
Table of Contents:
- Downloading the Kali Linux VMware Image
- Importing the Kali Linux VMware Image to VMware Workstation Pro 16
- Configuring the Kali Linux Virtual Machine
- Starting Kali Linux Virtual Machine
- Conclusion
- References
Downloading the Kali Linux VMware Image:
You can download the VMware image of the latest version of Kali Linux from the official website of Kali Linux and import it on VMware Workstation Pro 16 very easily. This way, you can get a Kali Linux VMware virtual machine up and running within a few seconds and with much less effort than installing it manually using an ISO image of Kali Linux.
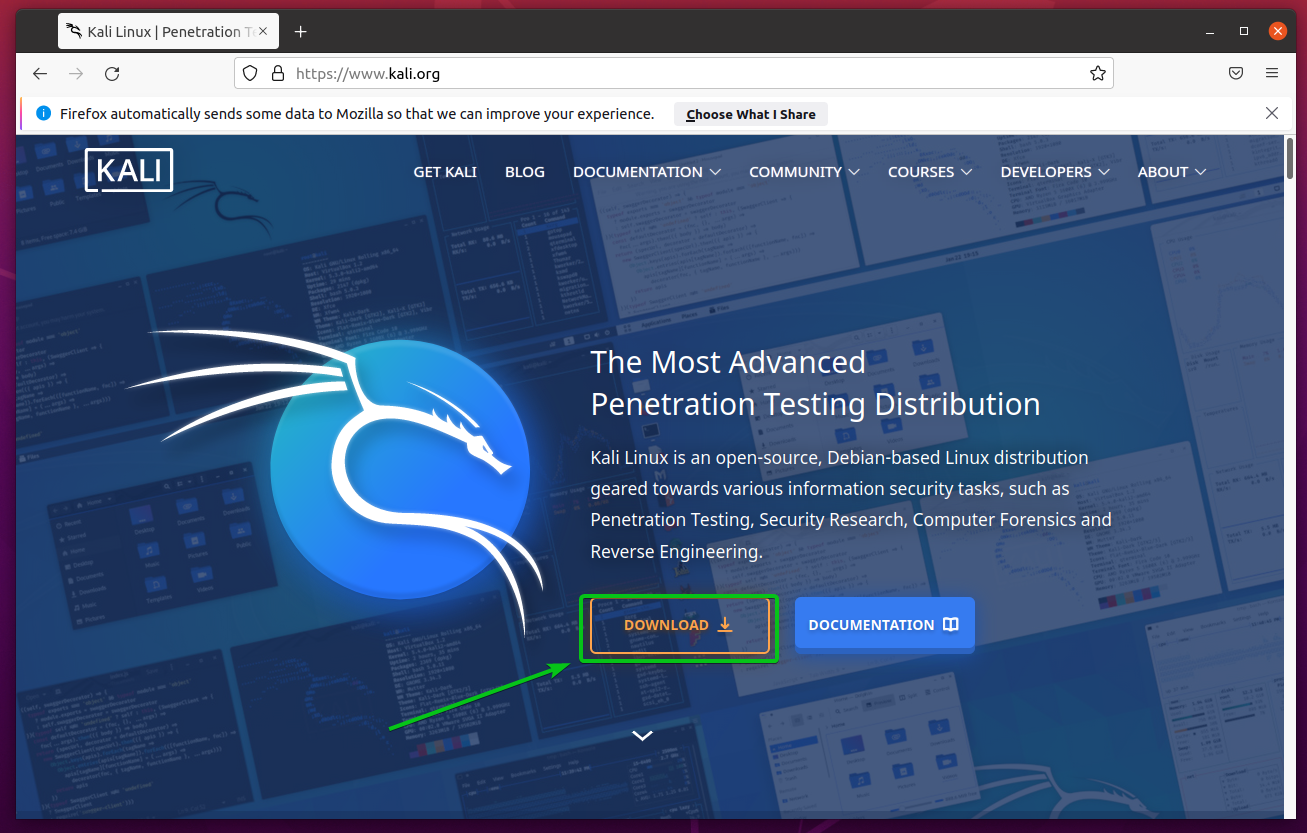
To download the VMware Image of the latest version of Kali Linux, visit the official website of Kali Linux from your favorite web browser.
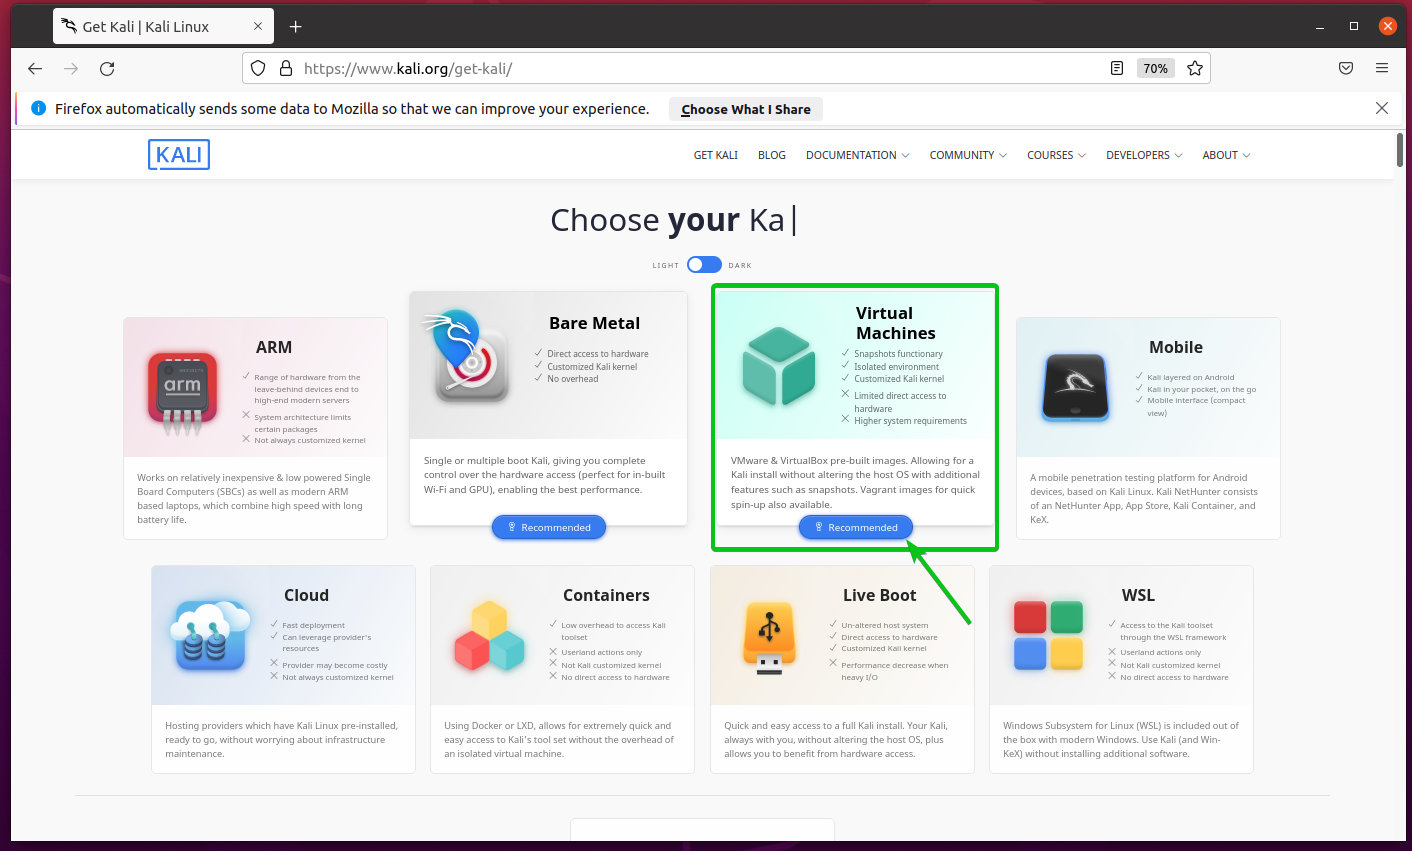
Click on the Recommended button from the Virtual Machines section as marked in the screenshot below.
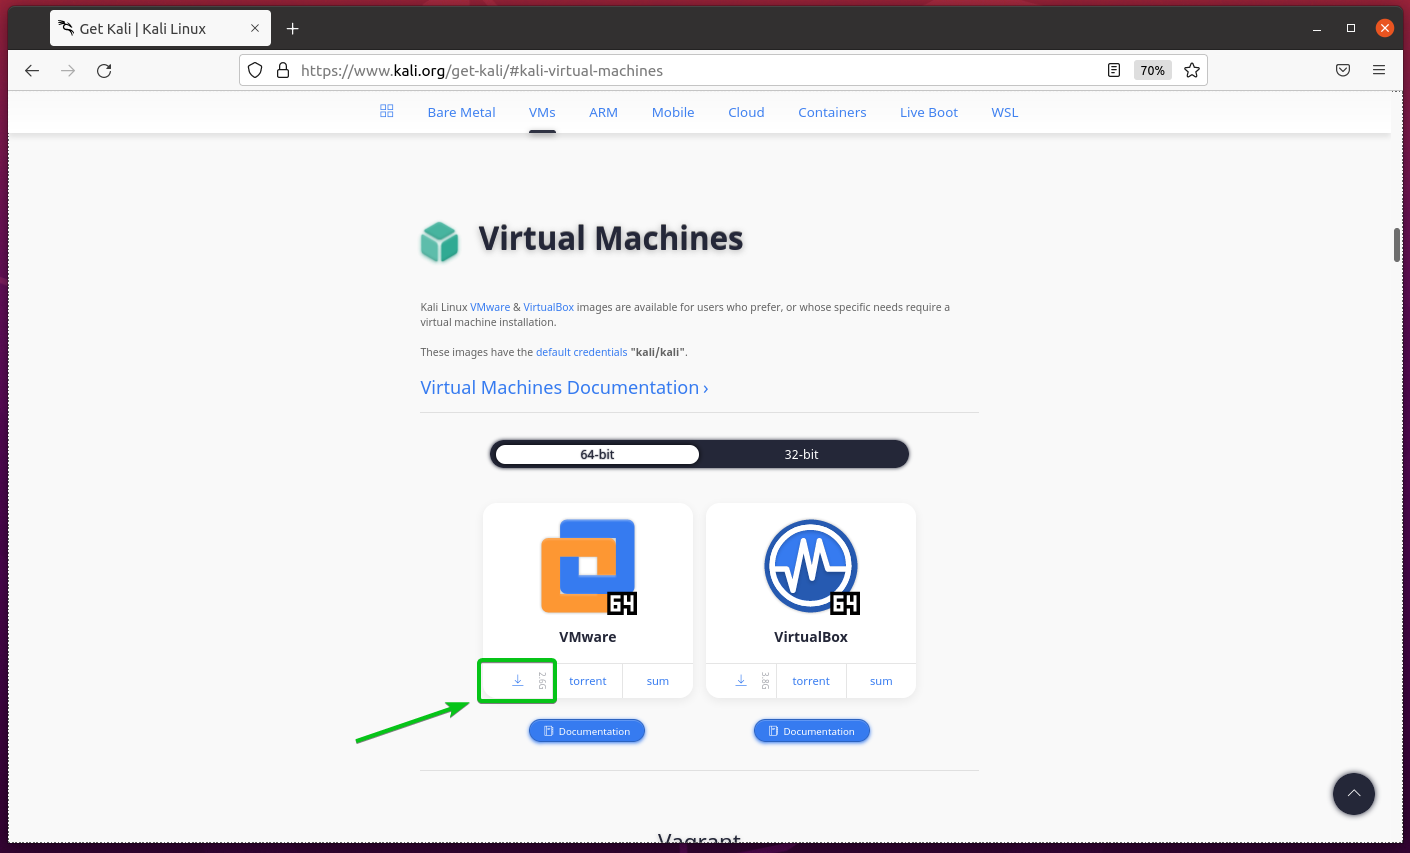
Click on the Download button from the VMware section as marked in the screenshot below.
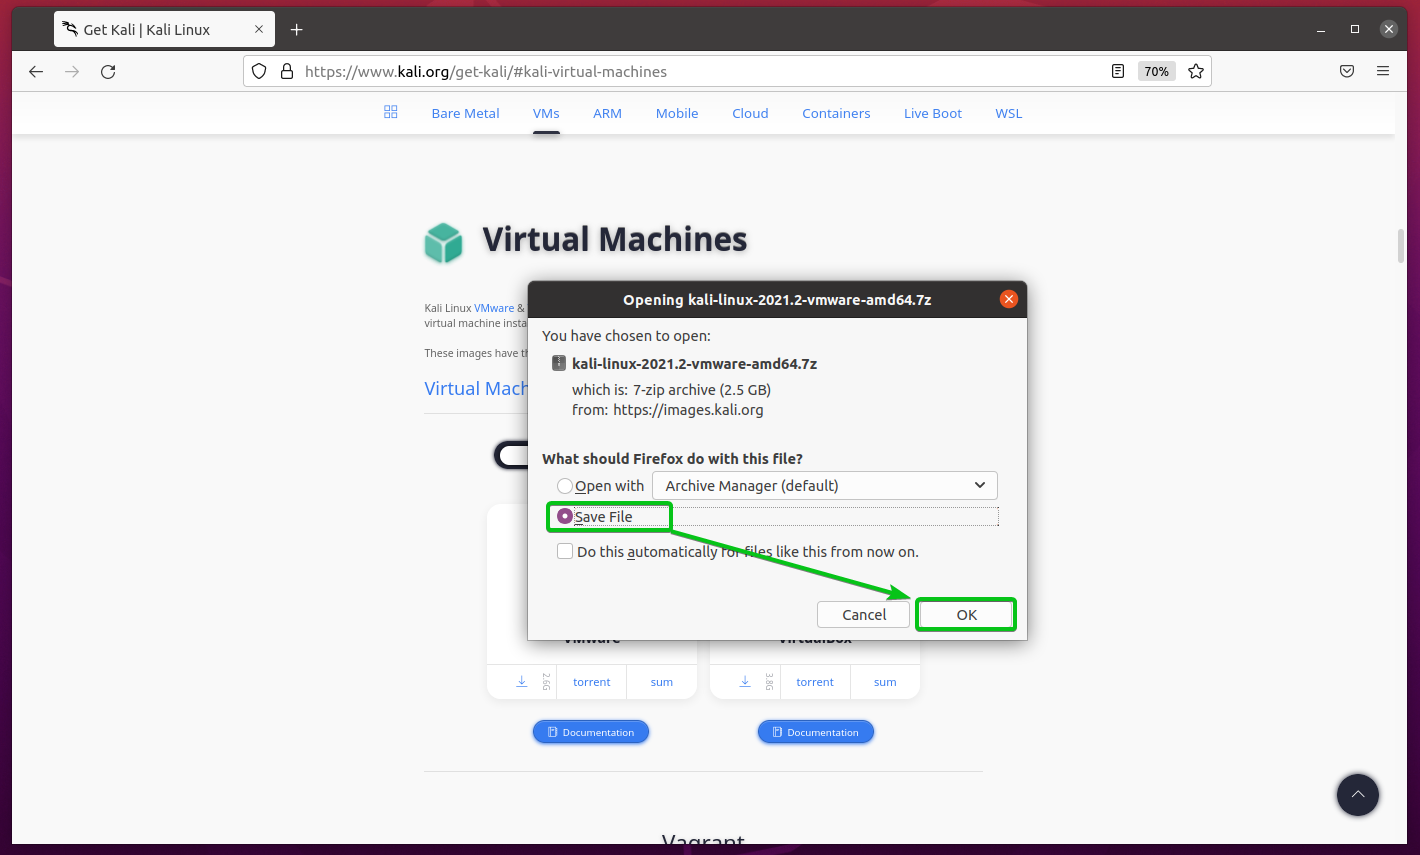
Your browser should prompt you to save the Kali Linux VMware Image archive.
Select Save File and click on OK as marked in the screenshot below.
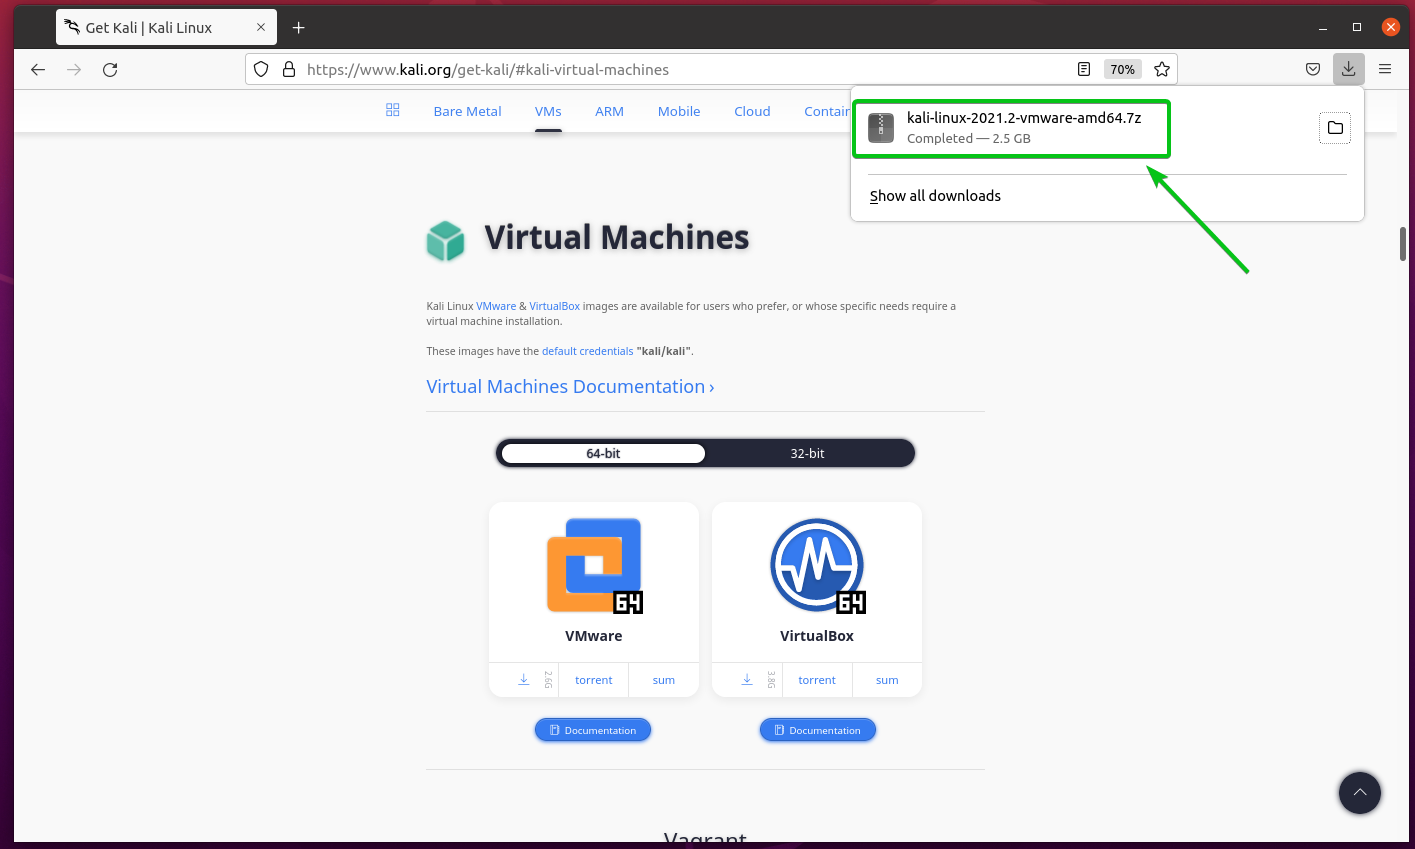
Your browser should start downloading the Kali Linux VMware Image archive, as shown in the screenshot below. It may take a while to complete.
At this point, the Kali Linux VMware Image archive should be downloaded.
Importing the Kali Linux VMware Image to VMware Workstation Pro 16:
To import the Kali Linux VMware Image to VMware Workstation Pro 16, you must know the filesystem location where VMware Workstation Pro 16 saves virtual machine data on your computer.
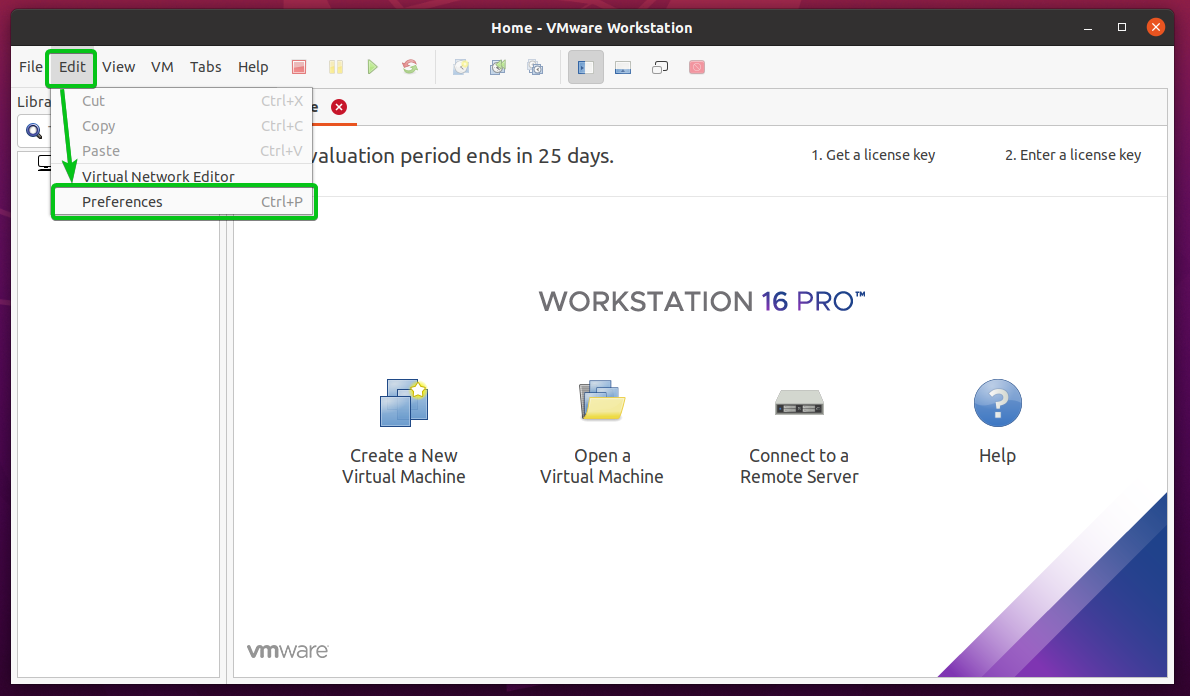
If you don’t know the filesystem location where VMware Workstation Pro 16 saves the virtual machine data on your computer, open VMware Workstation Pro 16 and click on Edit > Preferences as marked in the screenshot below.
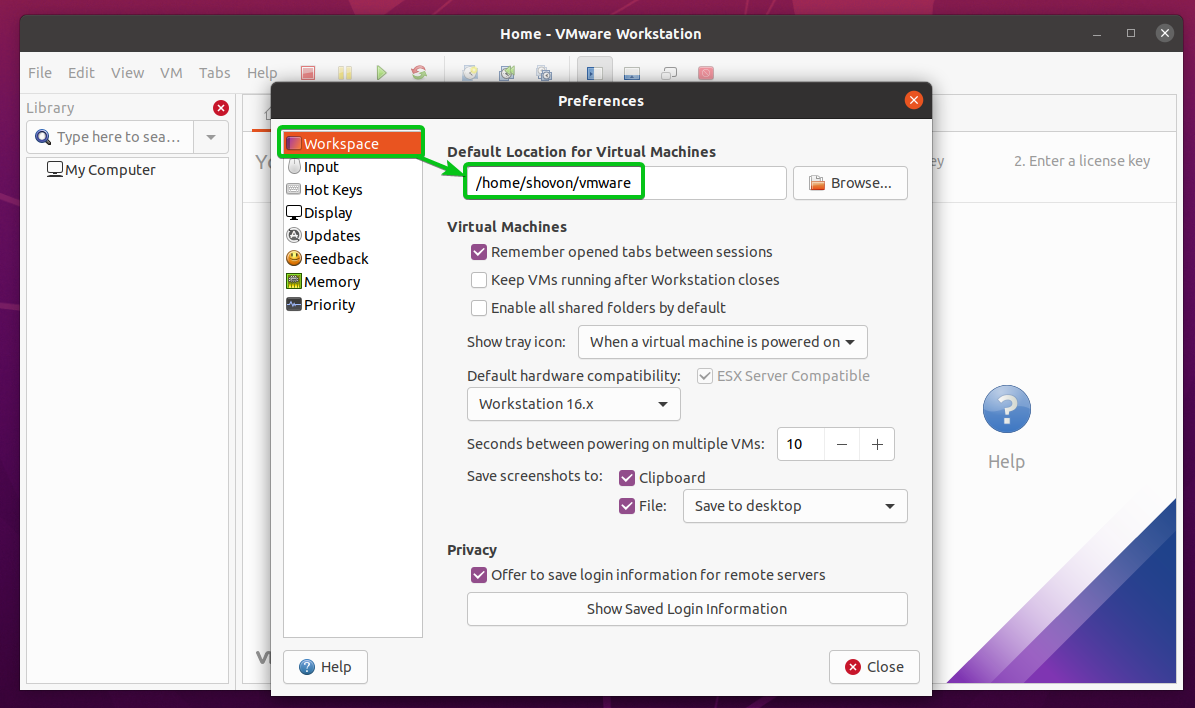
In the Workspace > Default Location for Virtual Machines section, as marked in the screenshot below, you should find the filesystem path where VMware Workstation Pro 16 stores the virtual machine data on your computer.
In my case, it is in the vmware/ directory in my user’s HOME directory.
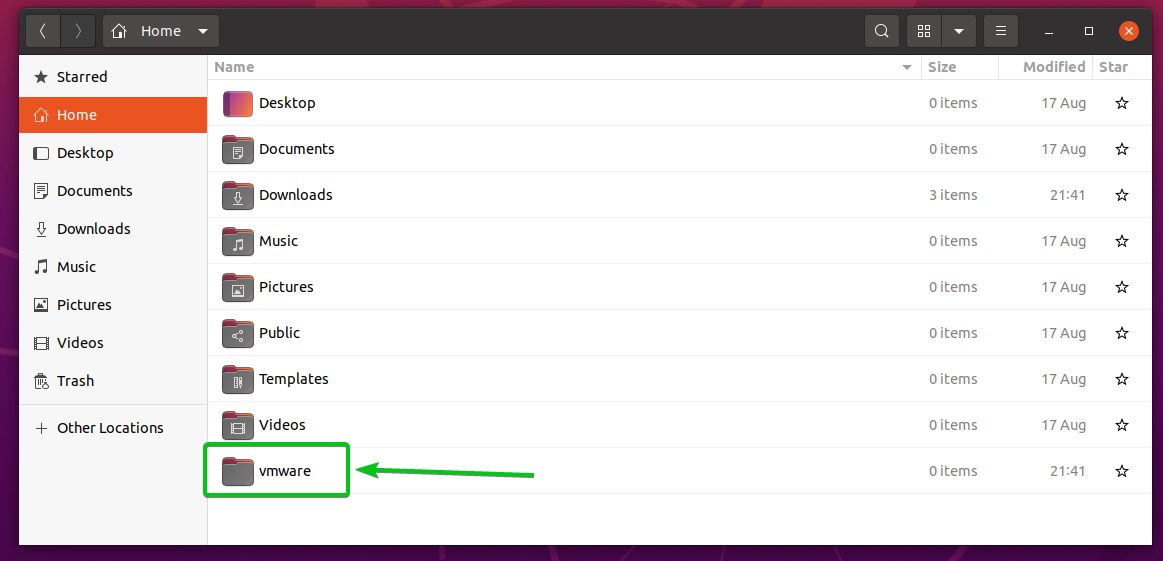
If you have just installed VMware Workstation Pro 16 on your computer and haven’t created any virtual machines, the vmware/ directory may not be available where it should be. In that case, you can simply create a vmware/ directory in your user’s HOME directory as marked in the screenshot below.
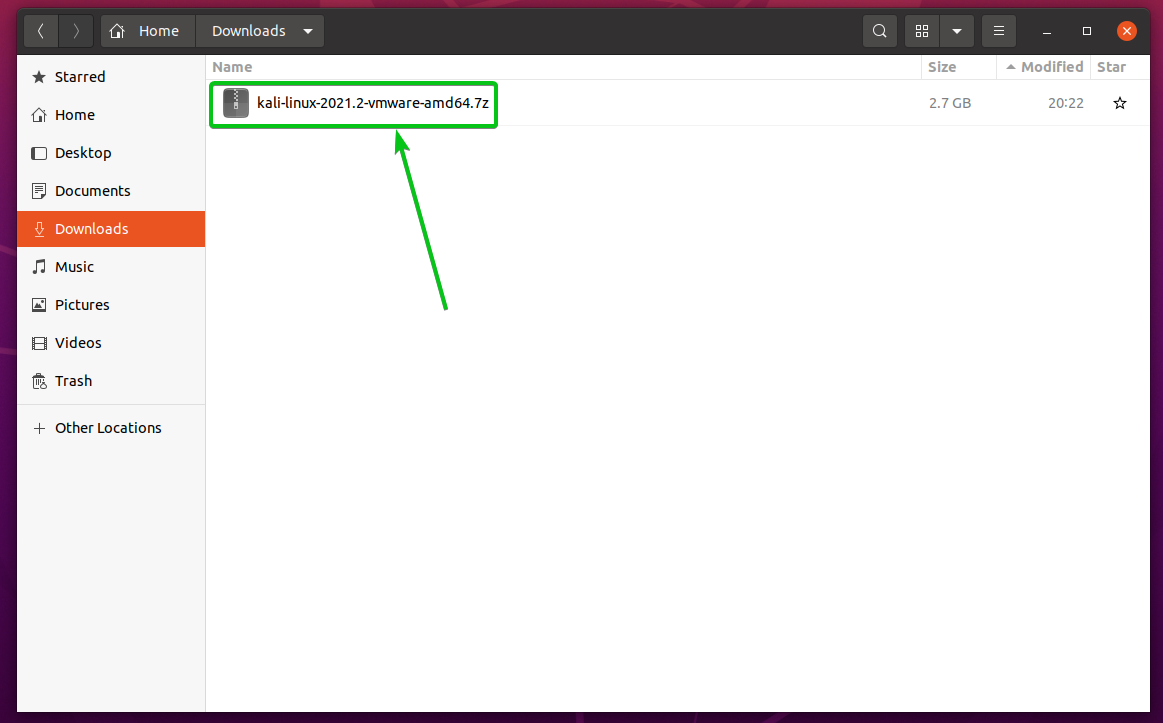
The Kali Linux VMware Image archive kali-linux-2021.2-vmware-amd64.7z should be in the Downloads/ directory of your computer, as you can see in the screenshot below.
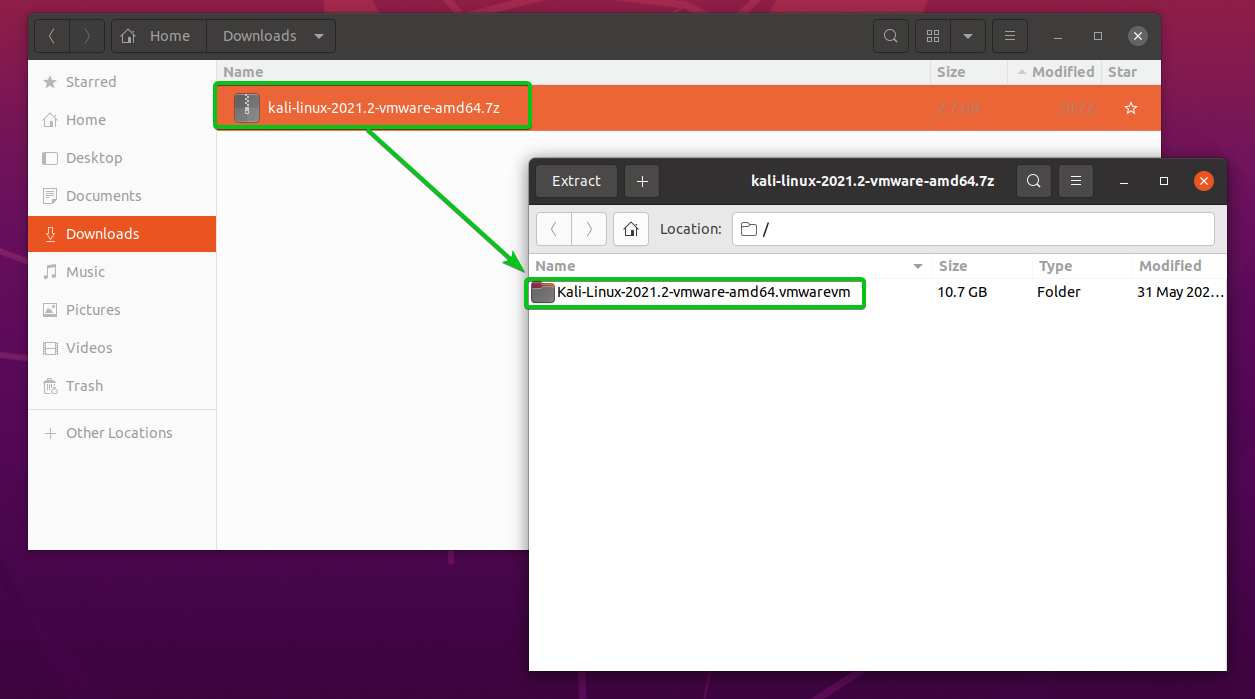
Double-click on the Kali Linux VMware Image archive to open it, and you should find a directory inside the archive, as you can see in the screenshot below.
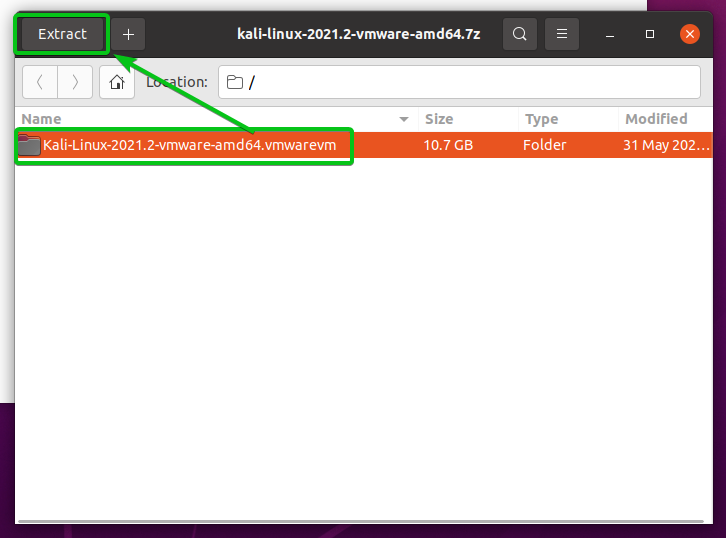
Select the directory and click on Extract as marked in the screenshot below.
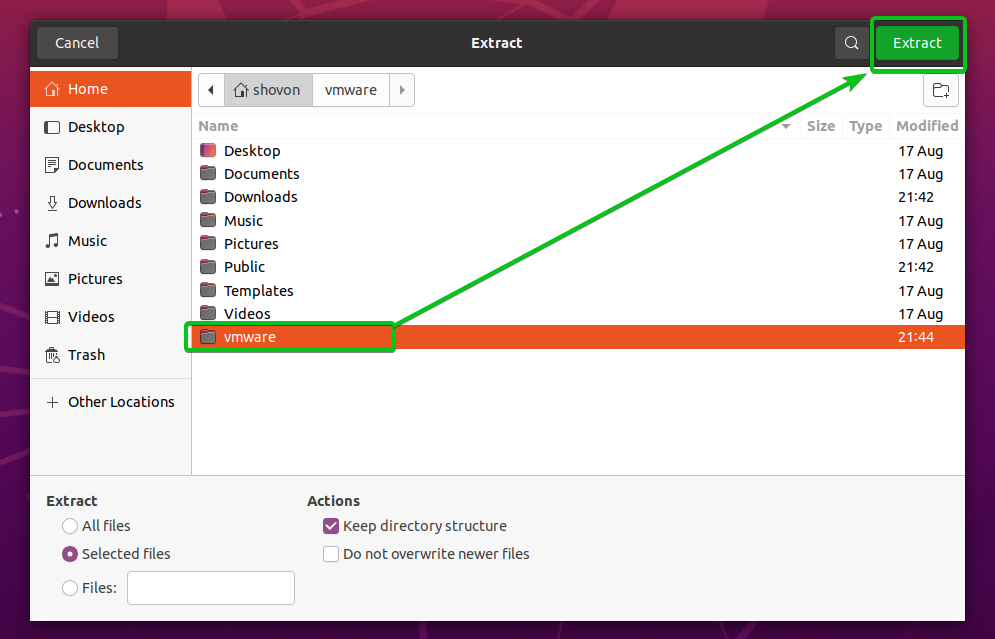
Select the ~/vmware/ directory and click on Extract as marked in the screenshot below.
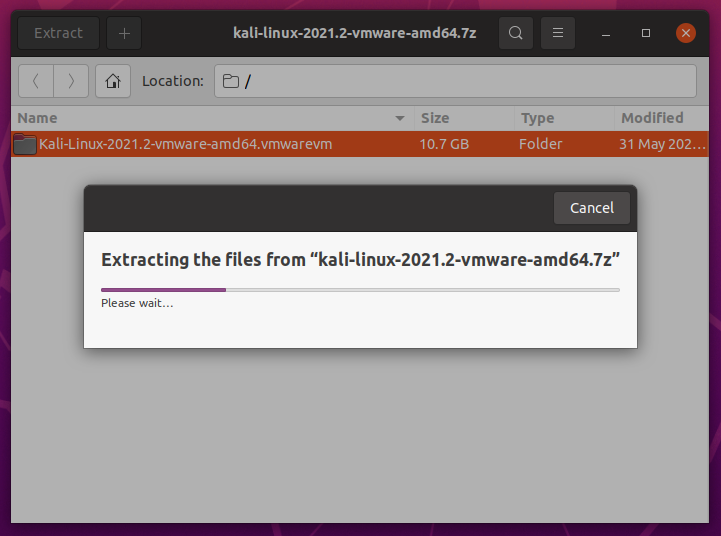
The Kali Linux VMware Image directory is being extracted to your computer’s ~/vmware/ directory, as you can see in the screenshot below. It may take a while to complete.
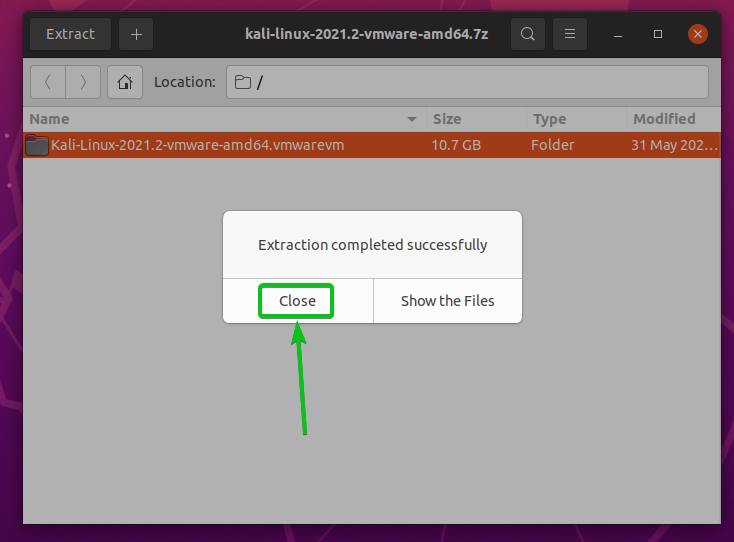
Once the Kali Linux VMware Image directory is extracted, click on Close.
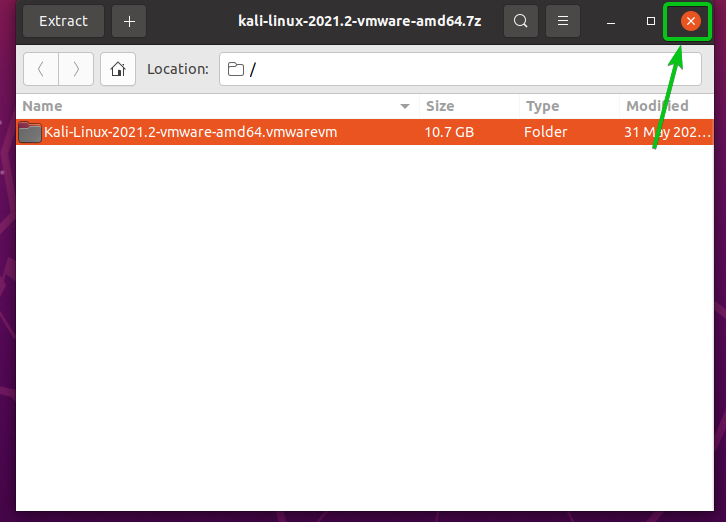
Also, close the Archive Manager app.
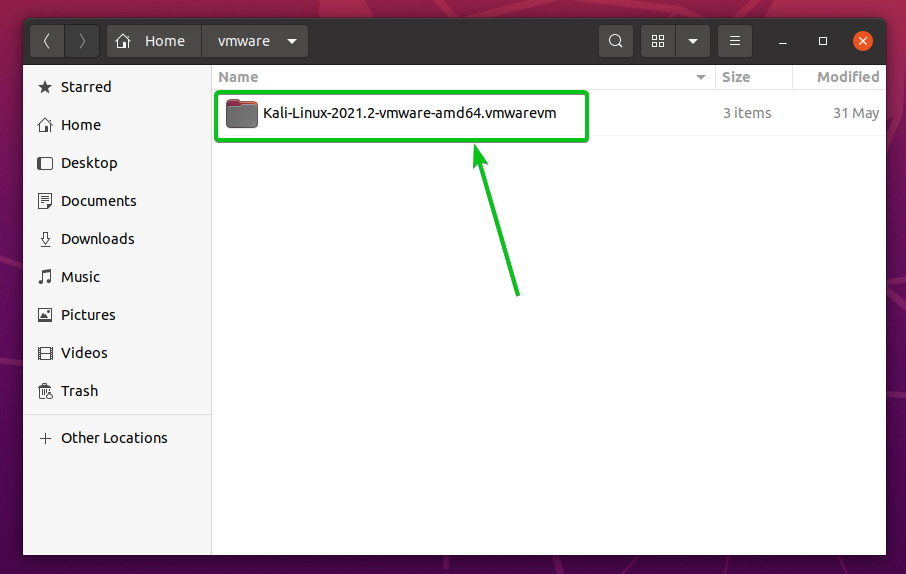
The Kali Linux VMware Image should be extracted in the ~/vmware/ directory of your computer, as you can see in the screenshot below.
Open VMware Workstation Pro 16 and click on File > Scan for Virtual Machines… as marked in the screenshot below.
Click on Next.
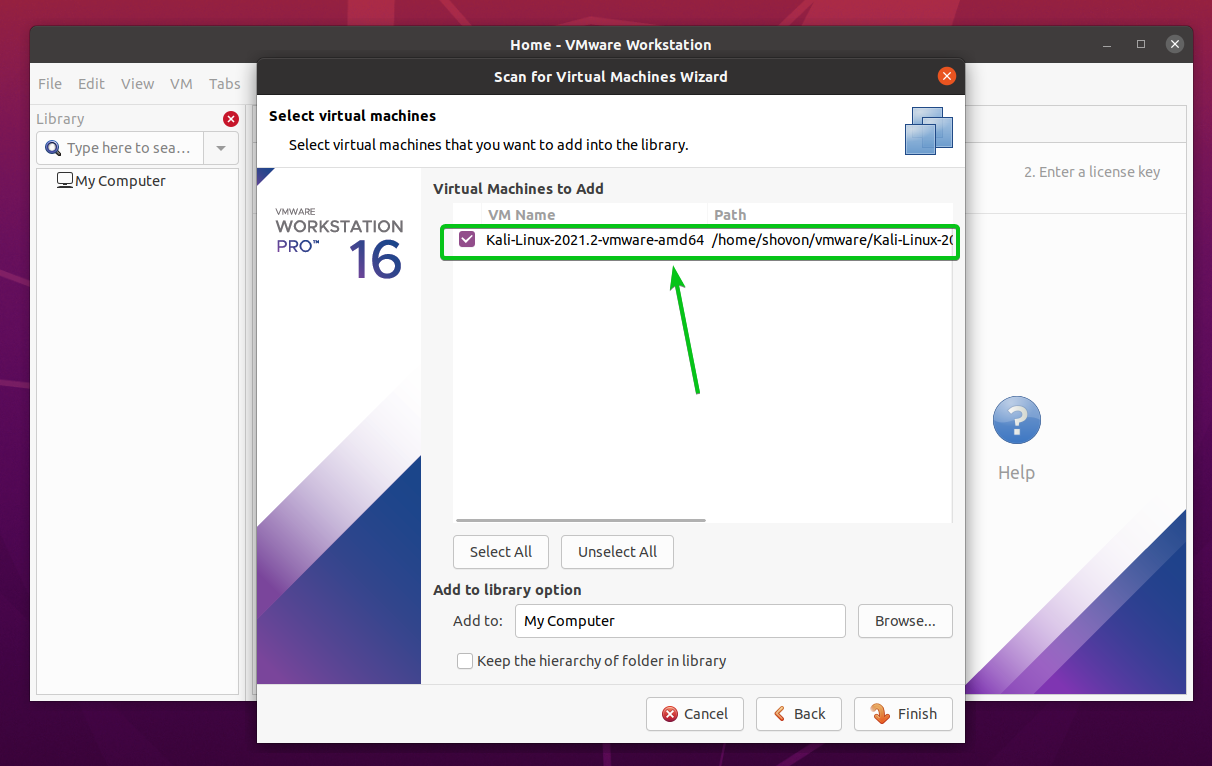
The Kali Linux VMware Image should be listed in the Virtual Machines to Add section, as shown in the screenshot below. Make sure that it is checked.
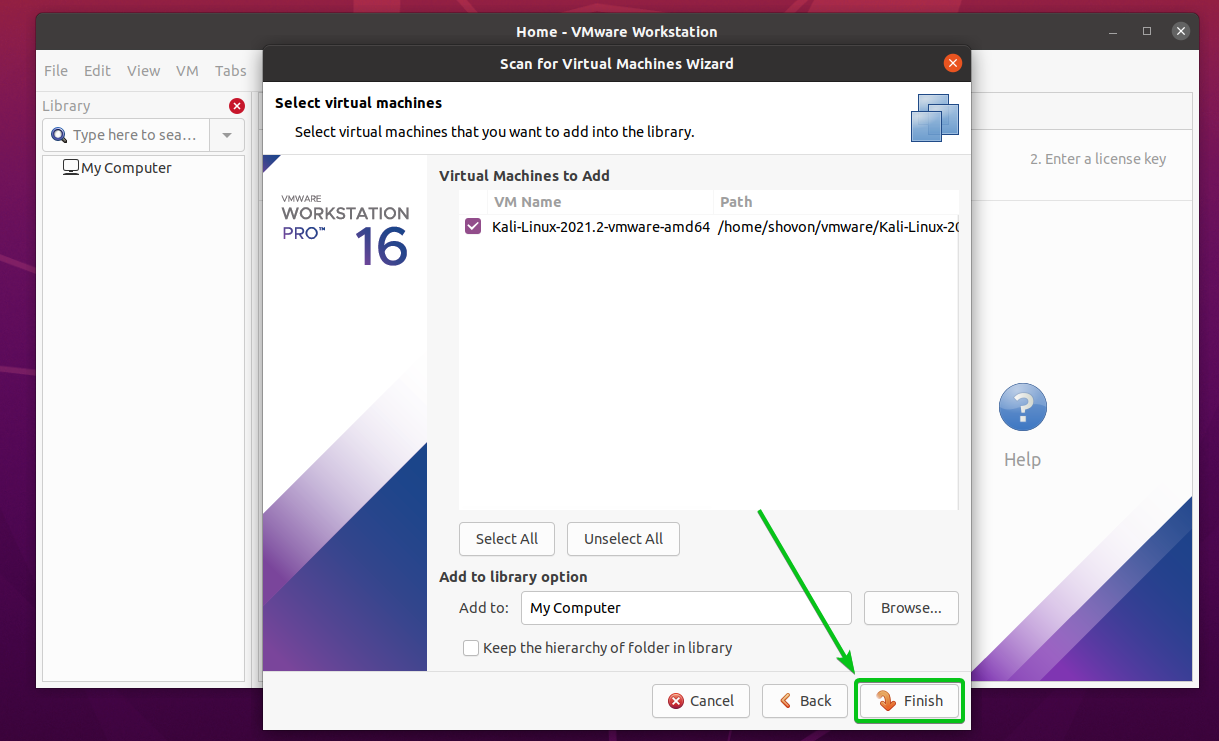
Click on Finish.
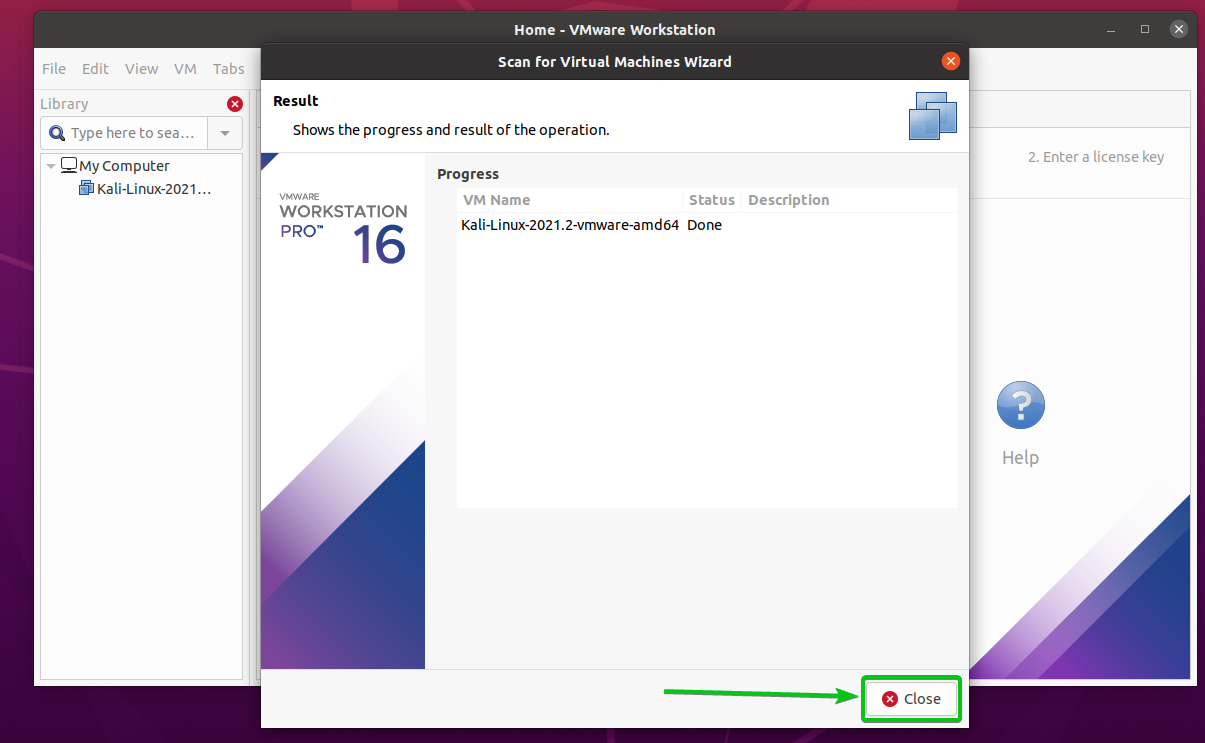
Click on Close.
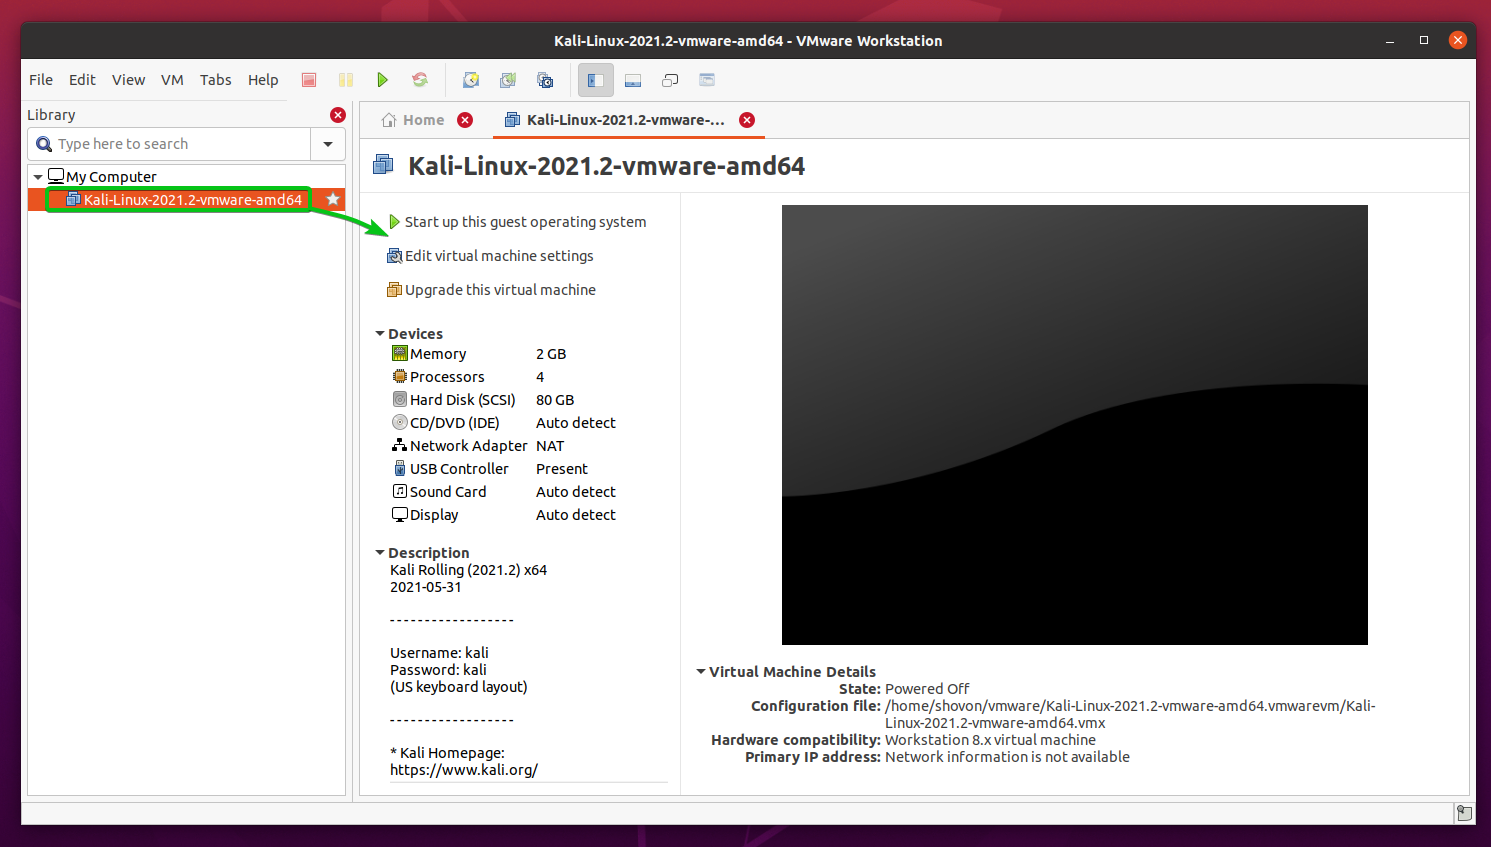
The Kali Linux VMware Image should be imported to VMware Workstation Pro 16 as a virtual machine, as shown in the screenshot below.
Configuring the Kali Linux Virtual Machine:
Before starting the Kali Linux virtual machine, you should update the virtual machine and change some settings depending on your requirements.
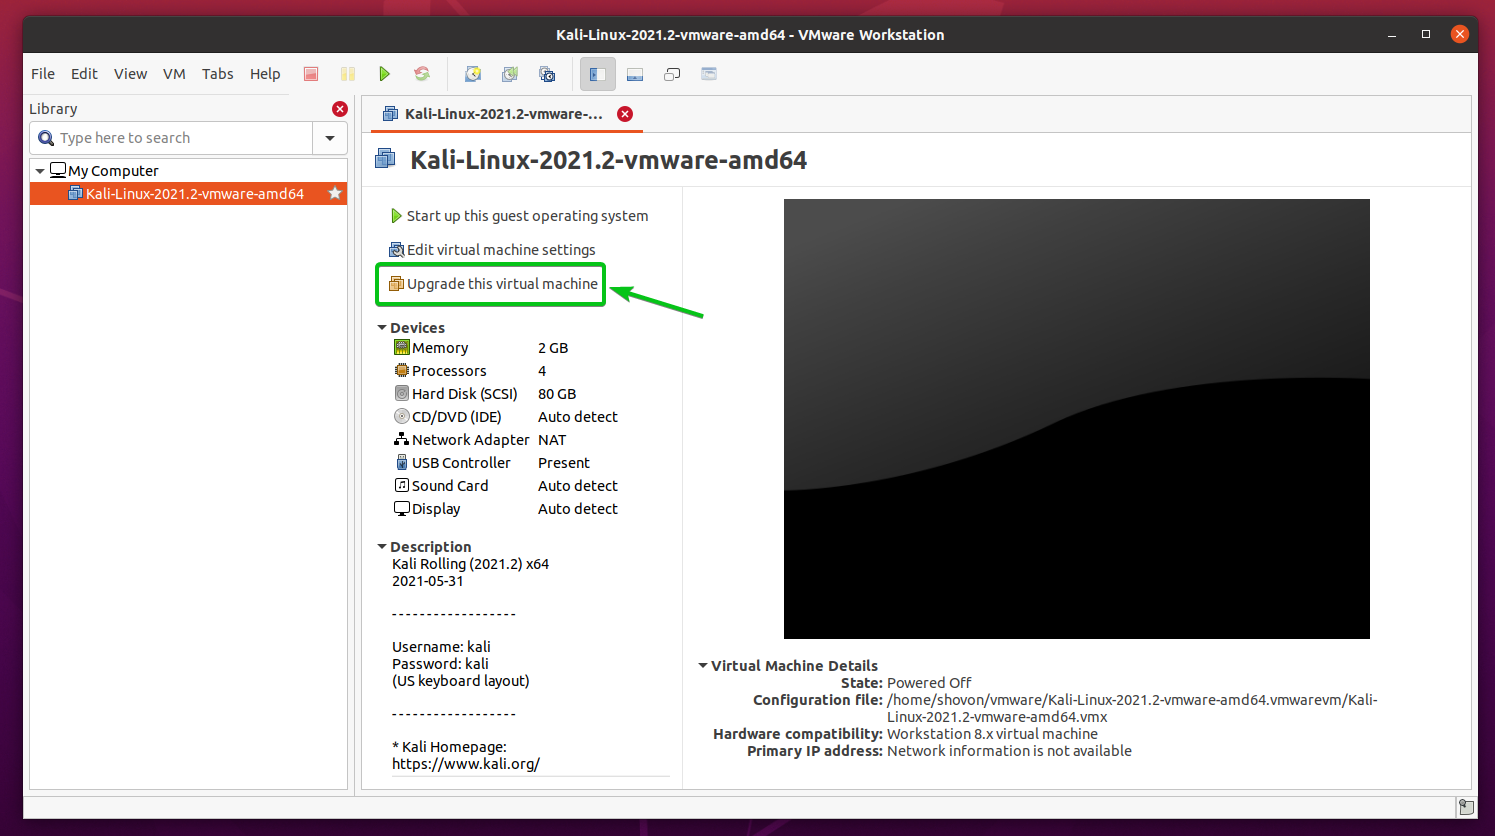
VMware Workstation Pro 16 supports OpenGL 4.1 3D acceleration for Linux virtual machines. To get the best performance and improve the Graphical User Interface (GUI) responsiveness, you should upgrade the Kali Linux virtual machine to the latest VMware Workstation Pro compatibility mode.
To do that, open the Kali Linux virtual machine you’ve just imported and click on Upgrade this virtual machine, as shown in the screenshot below.
Click on Next.
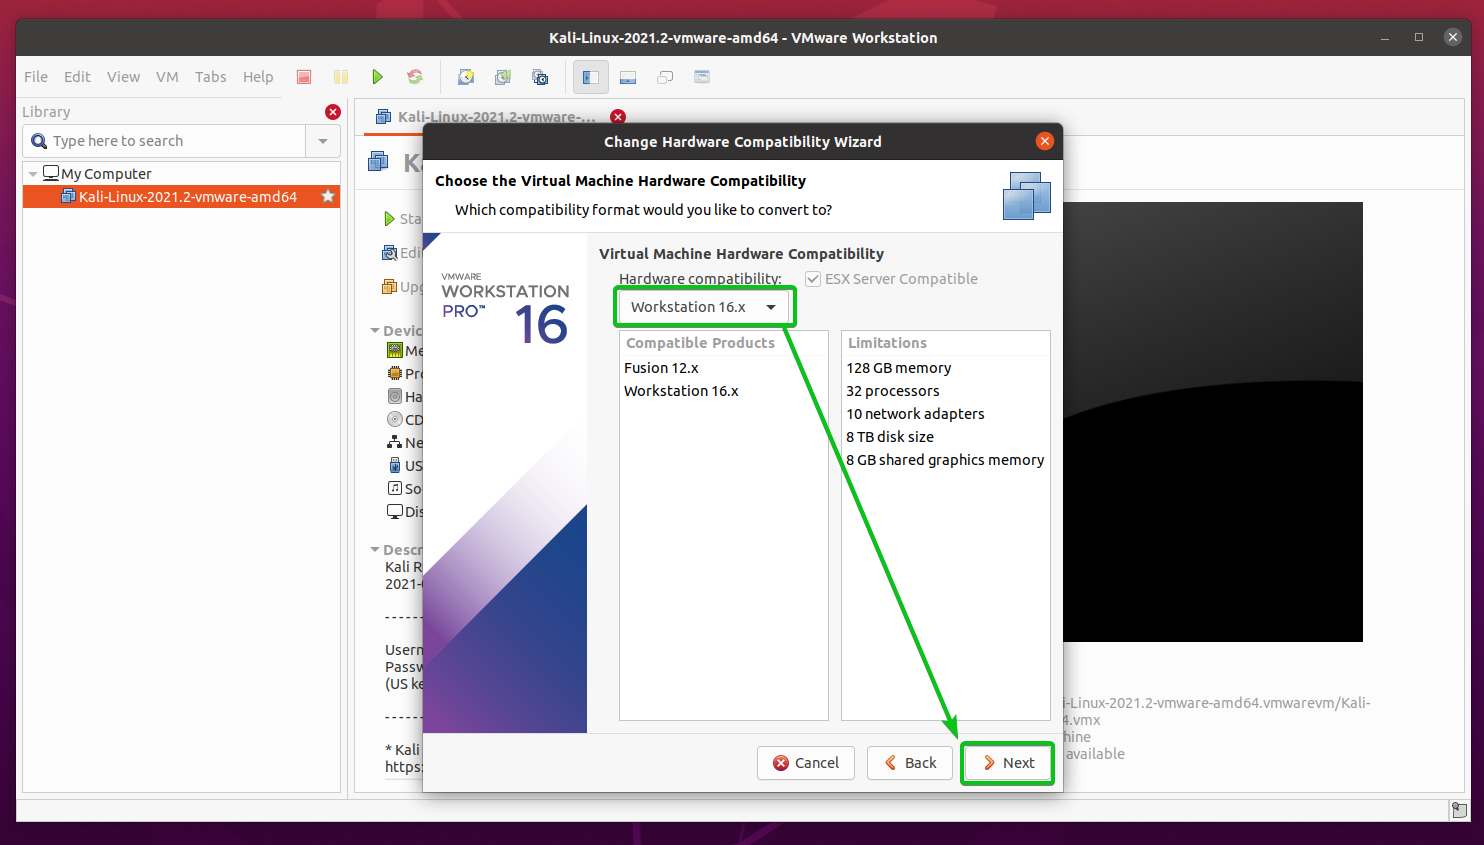
Select Workstation 16.x from the Hardware compatibility dropdown menu and click on Next as marked in the screenshot below.
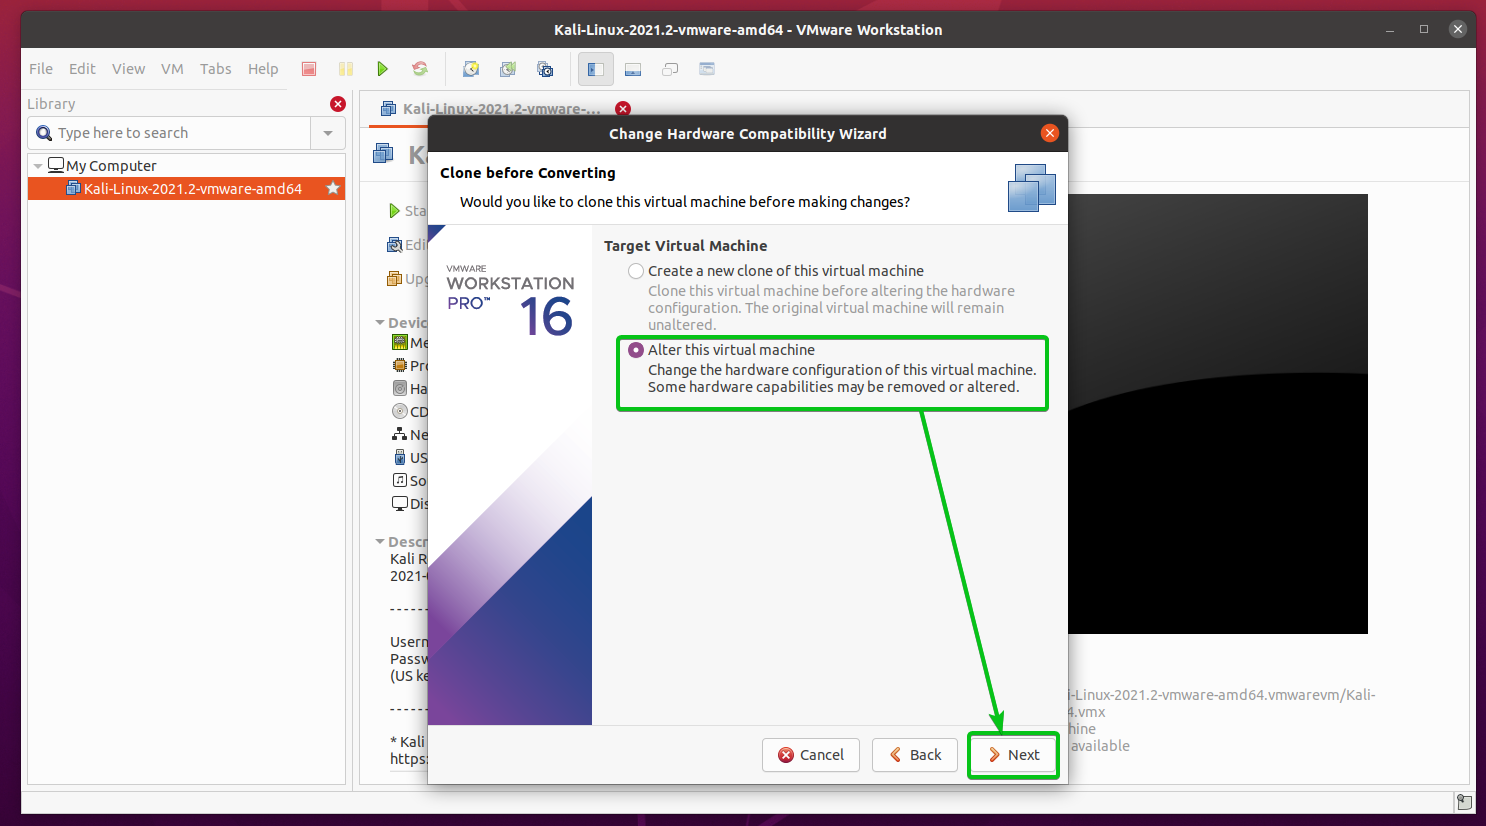
Select Alter this virtual machine and click on Next.
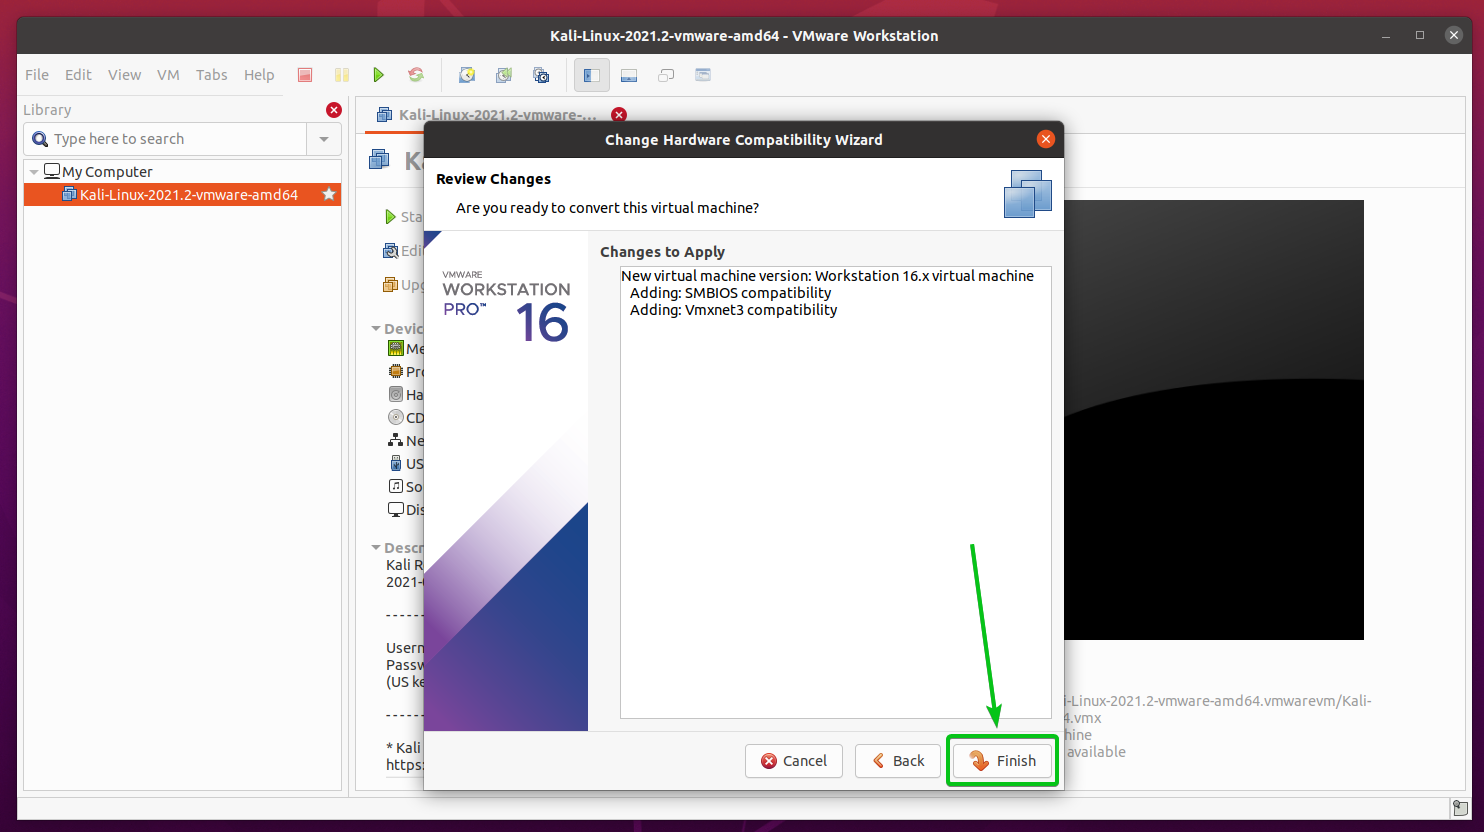
Click on Finish.
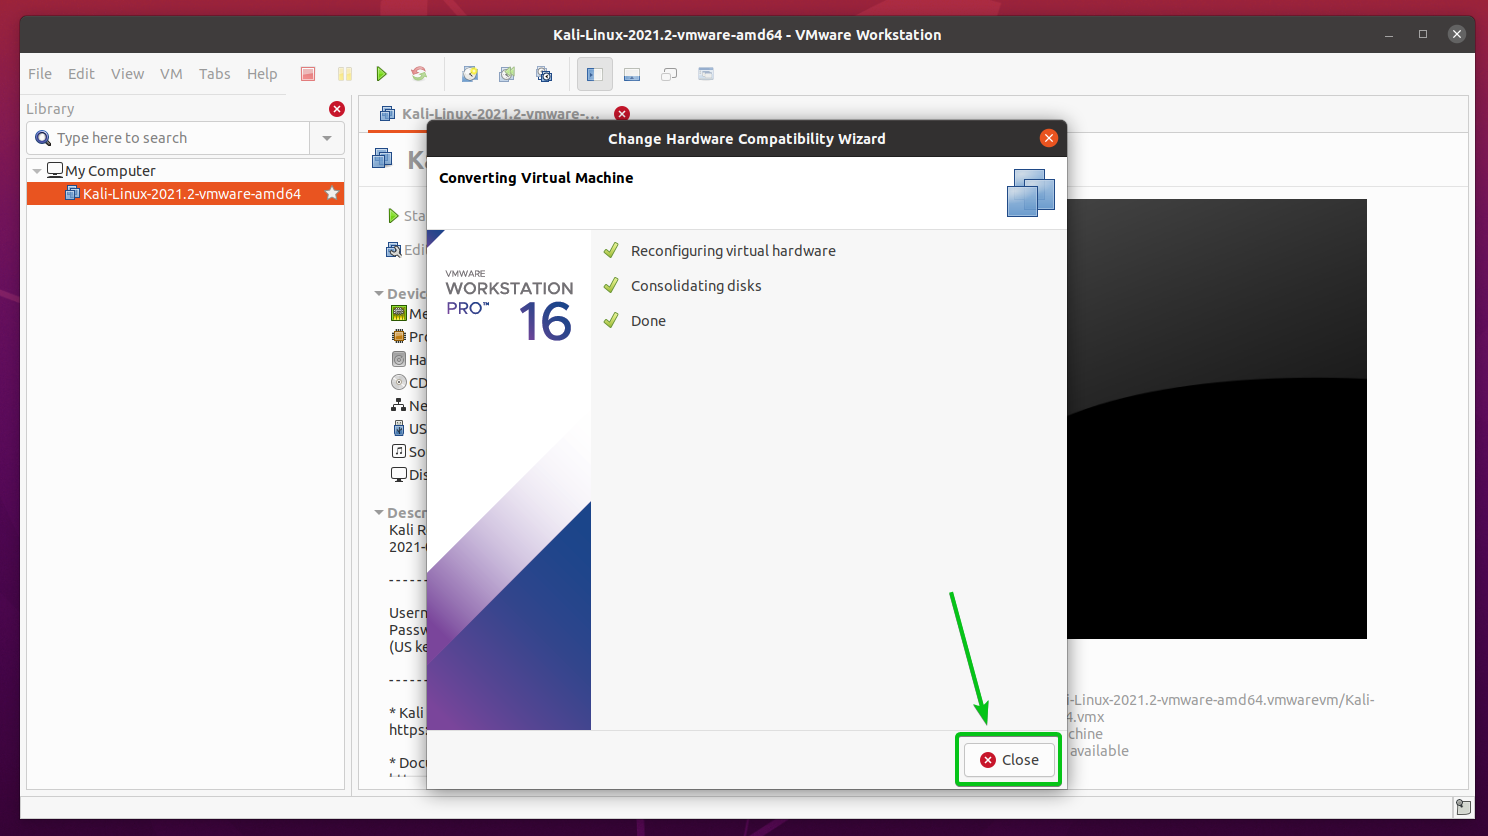
Click on Close.
The Kali Linux virtual machine should be upgraded to the latest VMware Workstation Pro 16 compatibility mode.
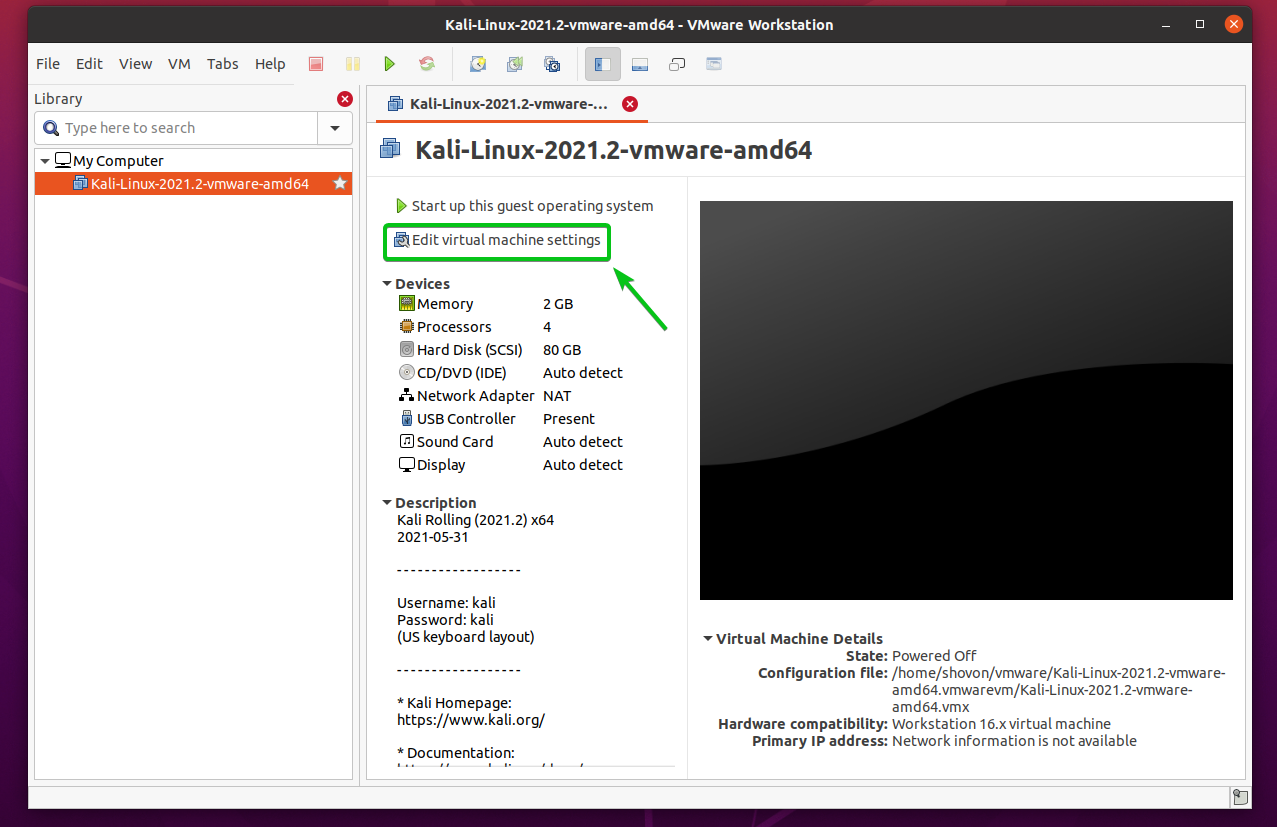
To change the hardware of the Kali Linux virtual machine, click on Edit virtual machine settings as marked in the screenshot below.
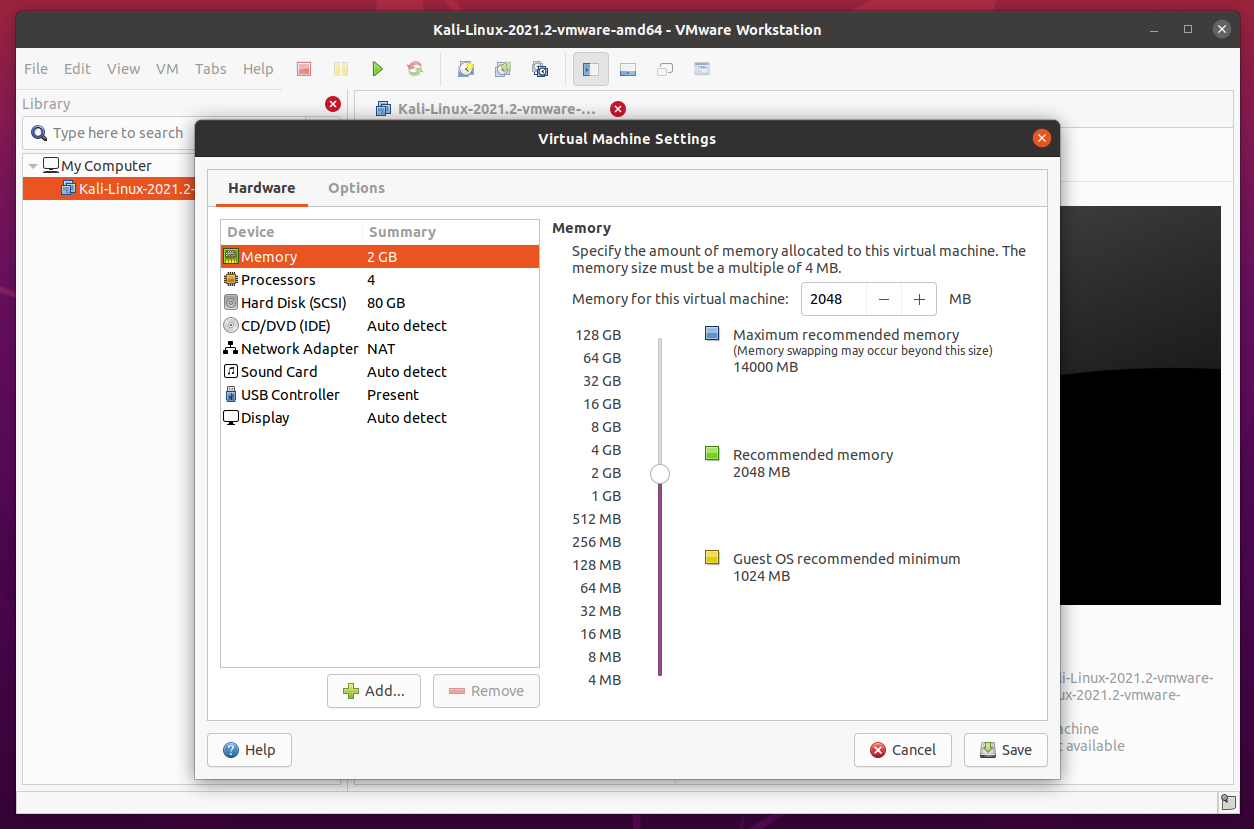
The Virtual Machine Settings window should be opened. You can configure the hardware of the Kali Linux virtual machine from here.
From the Hardware > Memory section, you can increase/decrease the amount of memory/RAM you want to allocate for the Kali Linux virtual machine.
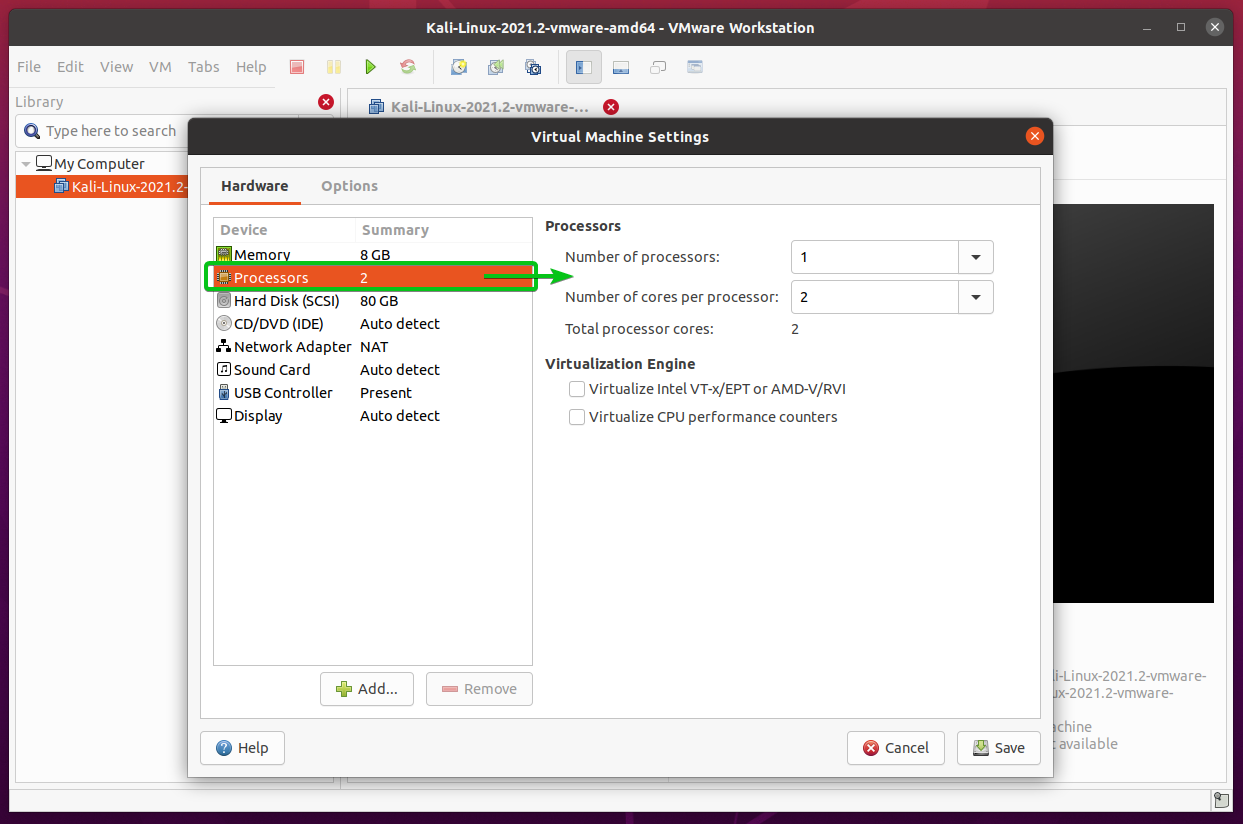
From the Hardware > Processors section, you can configure the number of processors and the number of cores to allocate for each of the processors for the Kali Linux virtual machine.
You can also check the Virtualize Intel VT-x/EPT or AMD-v/RVI checkbox to enable nested virtualization for the Kali Linux virtual machine. If you enable nested virtualization, you will be able to install VMware Workstation Pro, VirtualBox, or any other hypervisor of your choice in your Kali Linux virtual machine. You may need it for penetration testing.
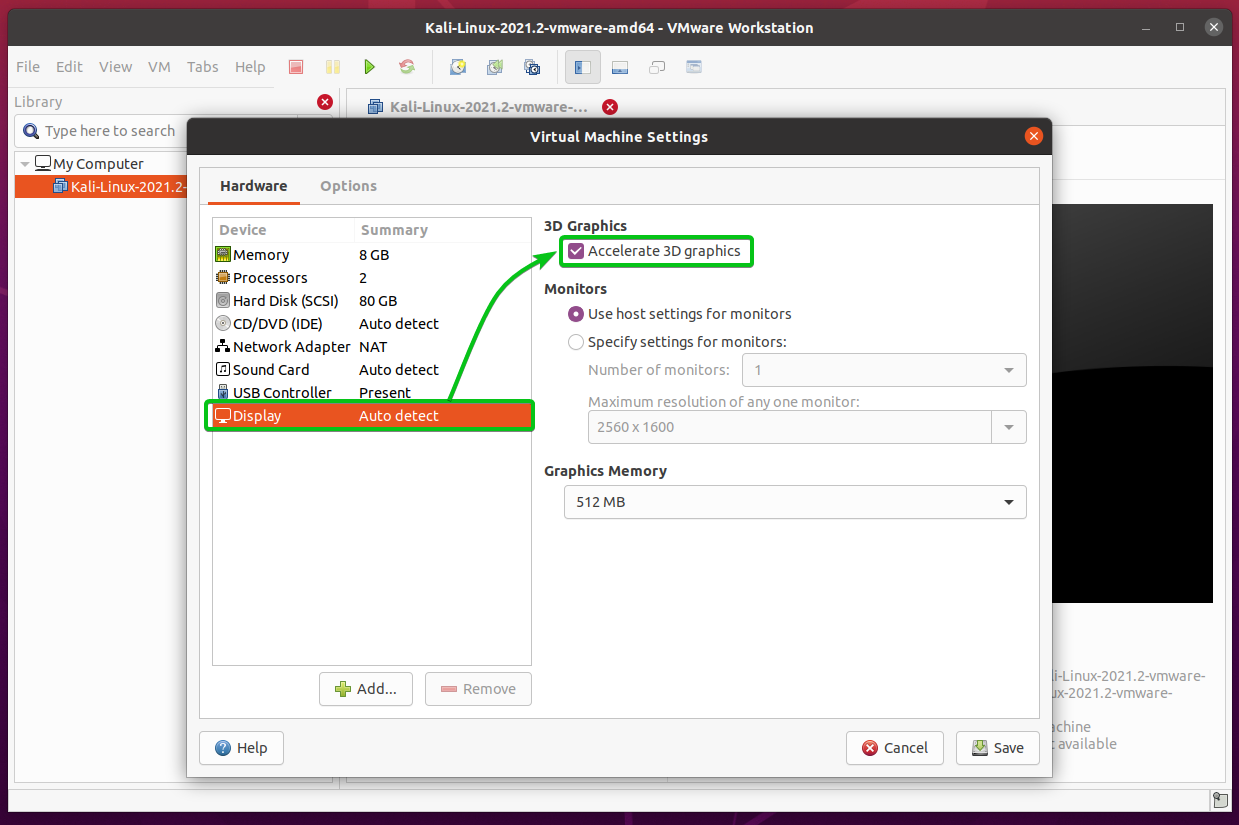
From the Hardware > Display section, check the Accelerate 3D graphics checkbox as marked in the screenshot below to enable 3D acceleration for the Kali Linux virtual machine.
You can also select the amount of Graphics Memory you want for the Kali Linux virtual machine from the Graphics Memory dropdown menu as marked in the screenshot below.
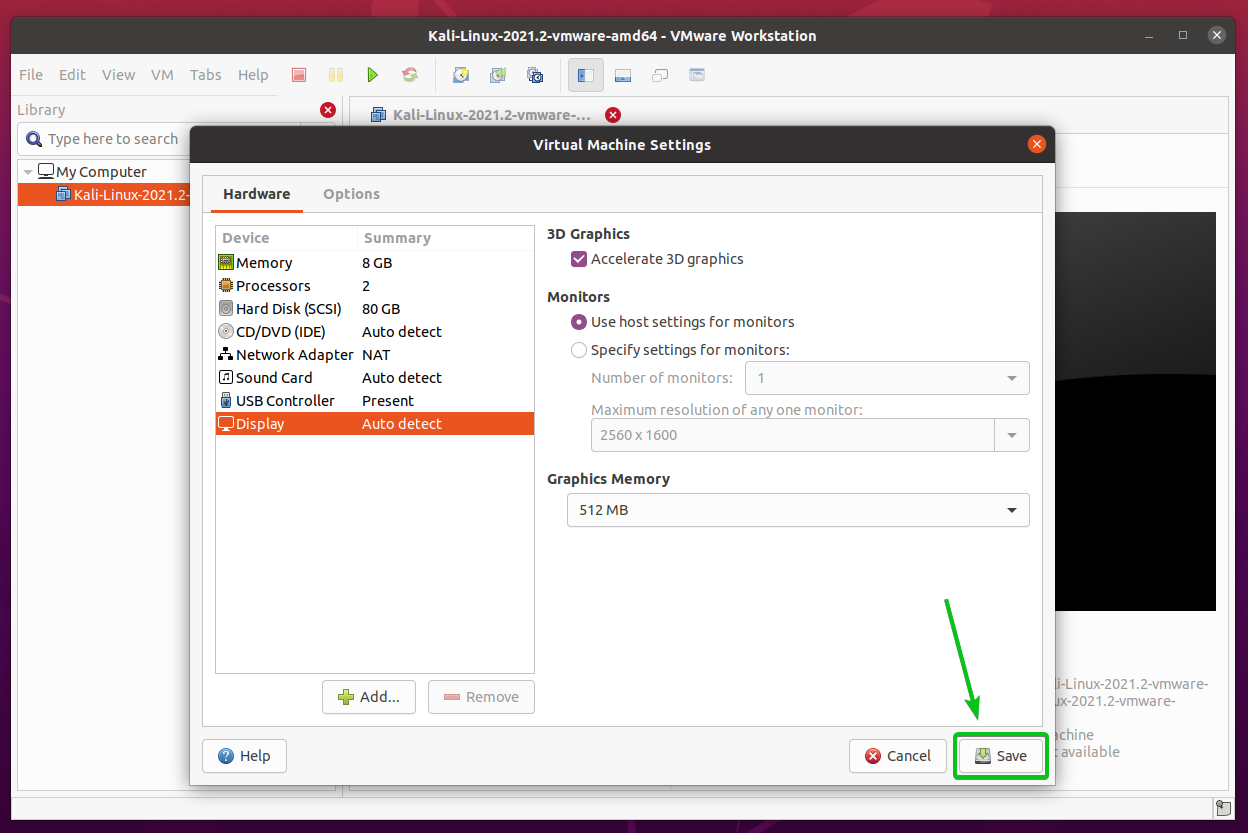
Once you’re done, click on Save.
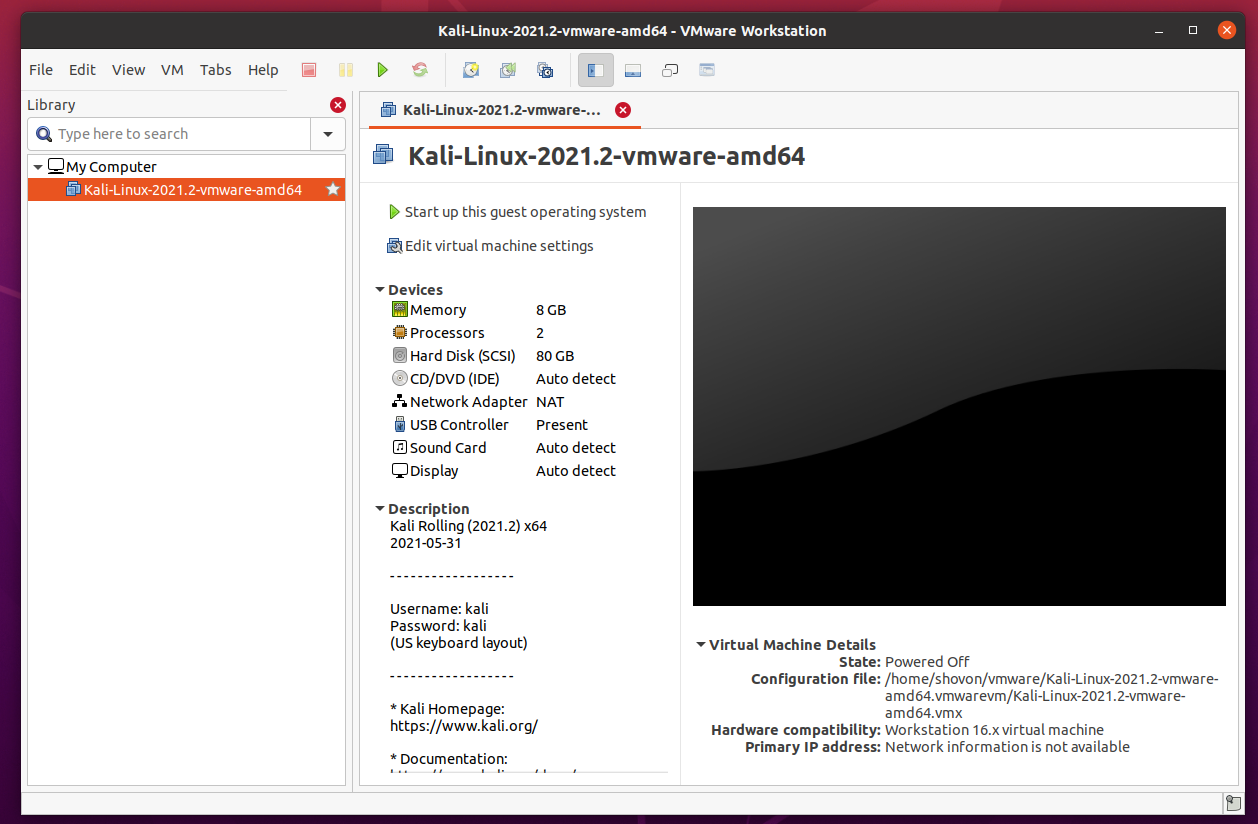
The hardware changes should be applied to the Kali Linux virtual machine, as shown in the screenshot below. Now, the Kali Linux virtual machine should be ready to start.
Starting Kali Linux Virtual Machine:
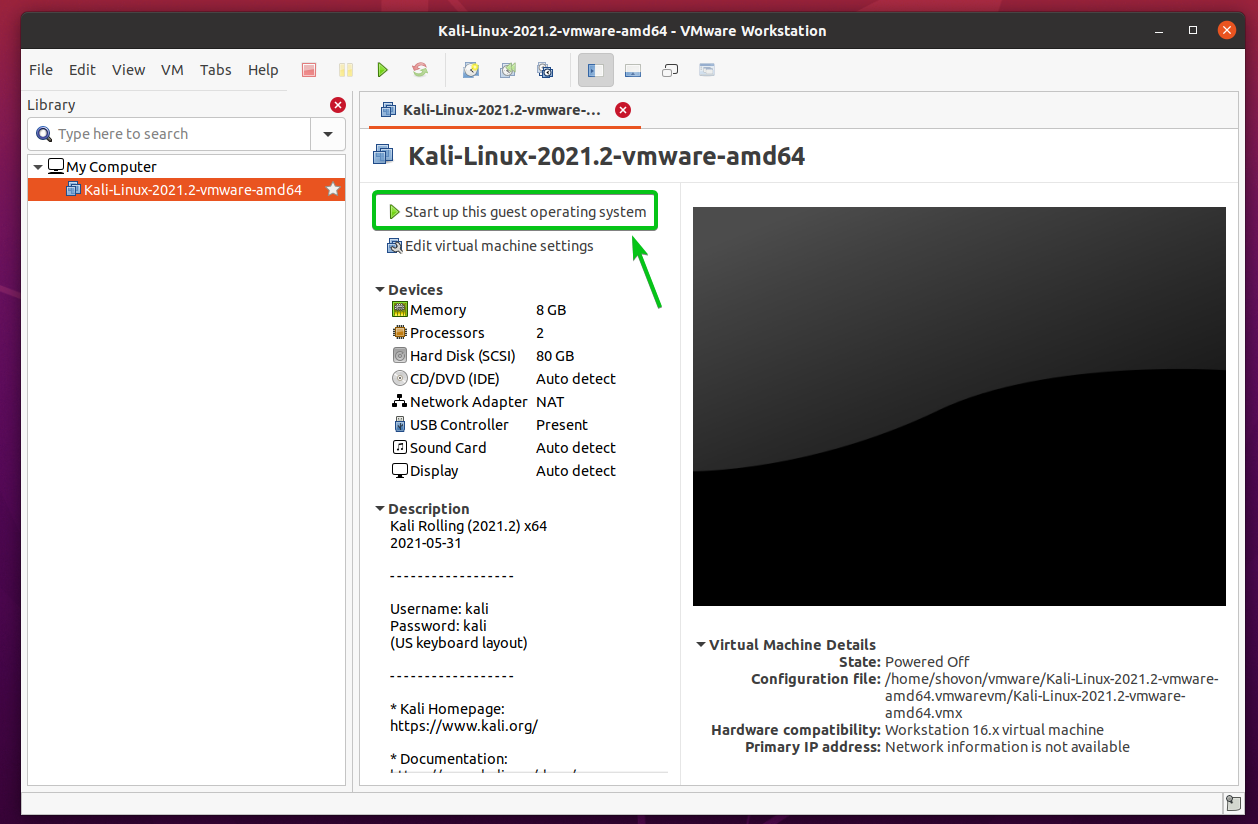
To start the Kali Linux virtual machine, click on Start up this guest operating system or click on the play ( ) button as marked in the screenshot below.
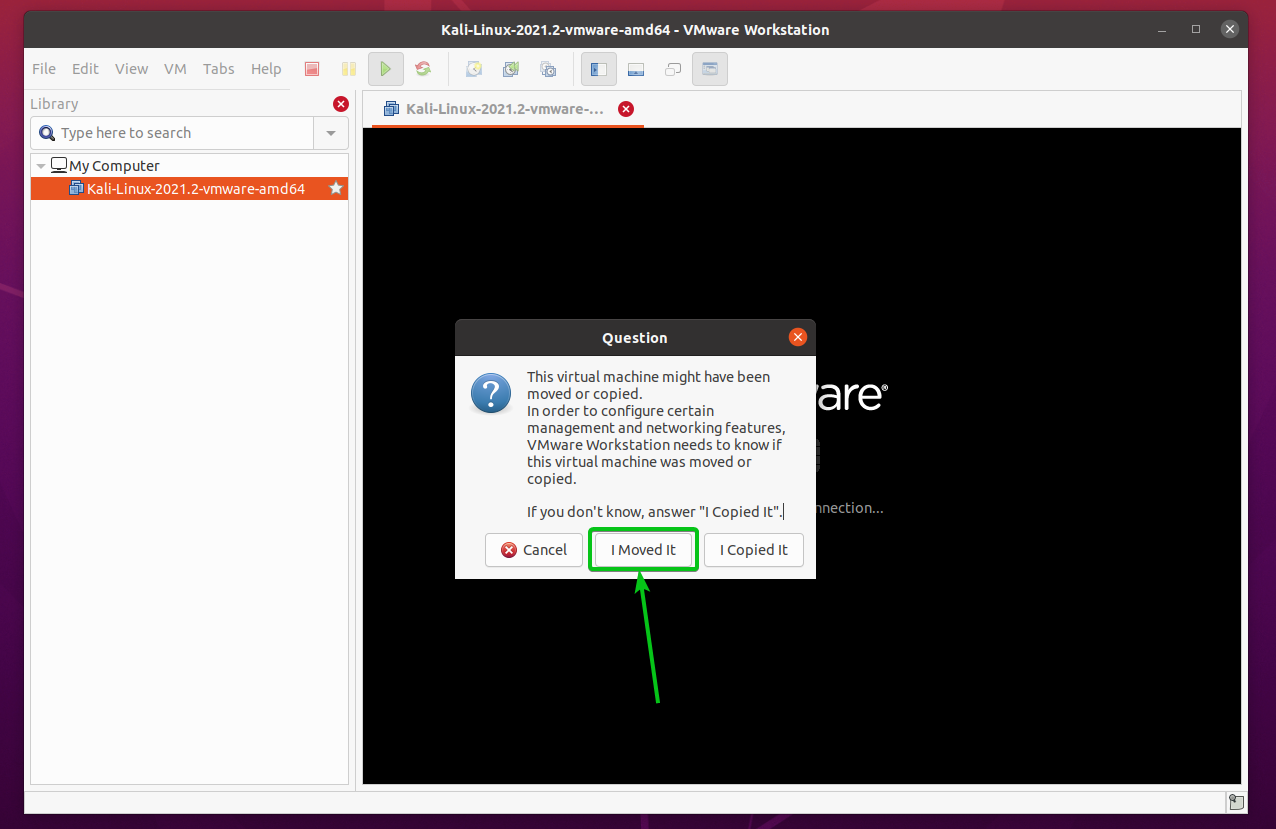
Click on I Moved It as marked in the screenshot below.
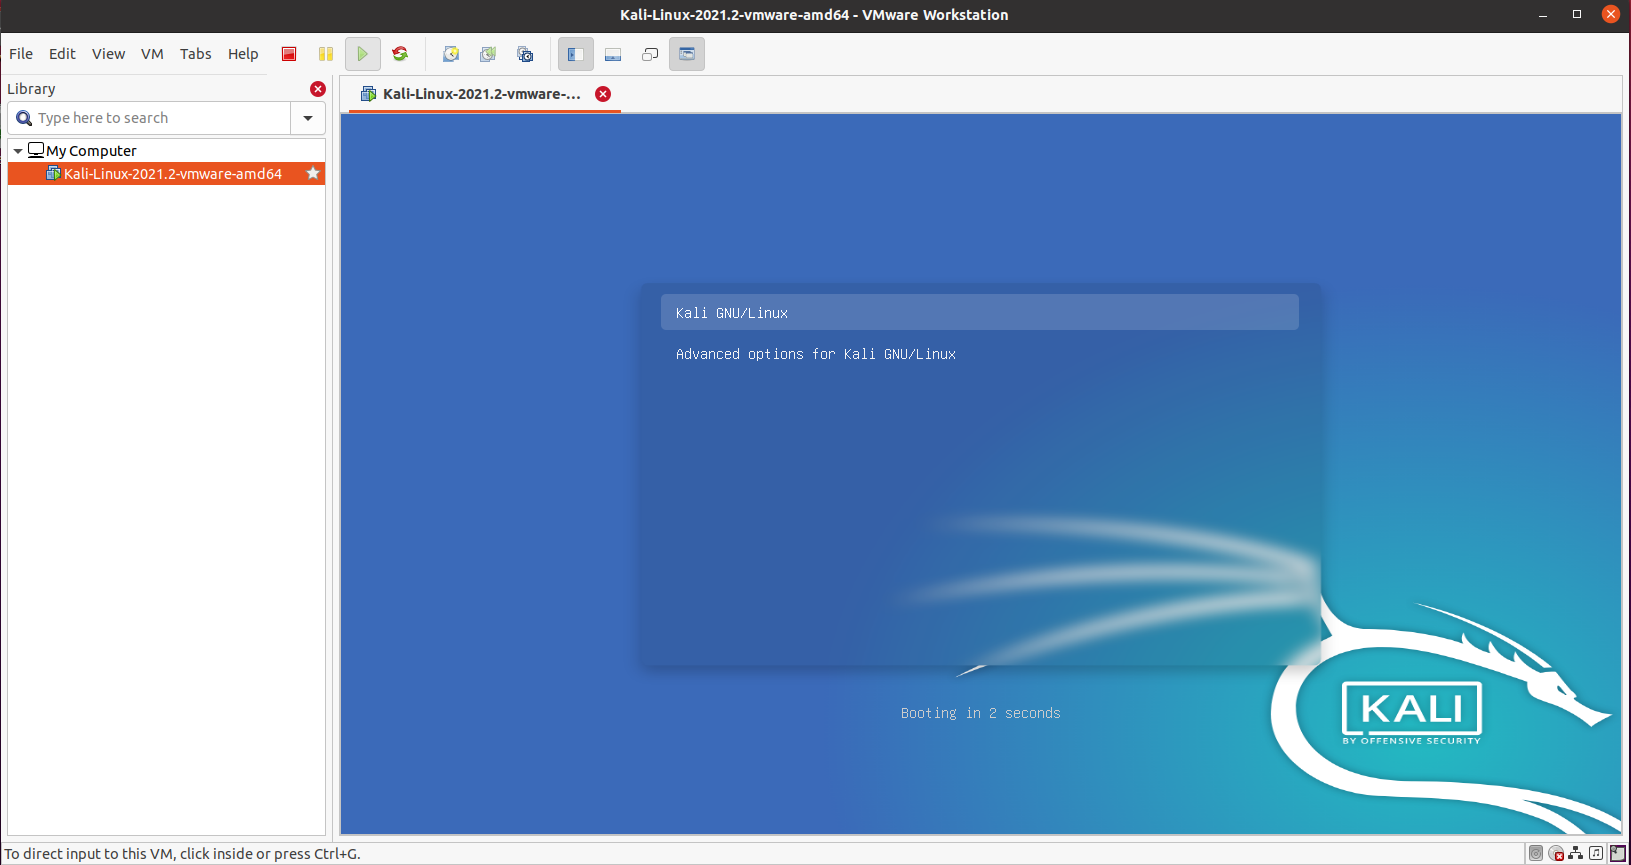
You should see the GRUB boot menu of Kali Linux in the virtual machine. It means that the virtual machine is correctly booting Kali Linux.
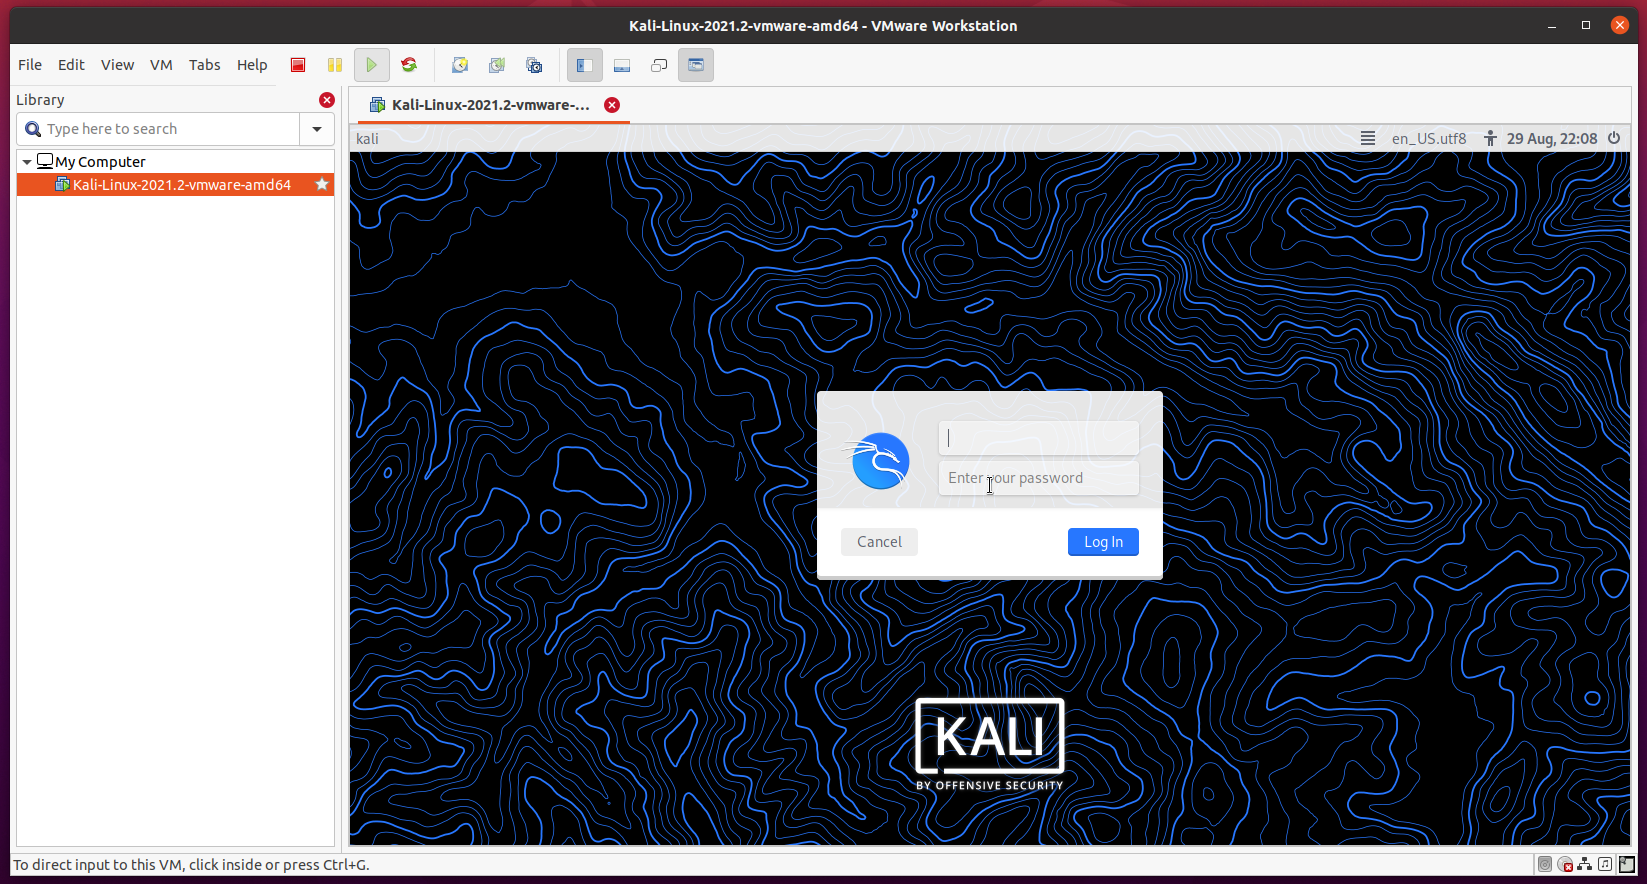
Shortly, you will be prompted for the login username and password. The default login username is kali, and the password is also kali.
Type in the default login username and password and click on Log In.
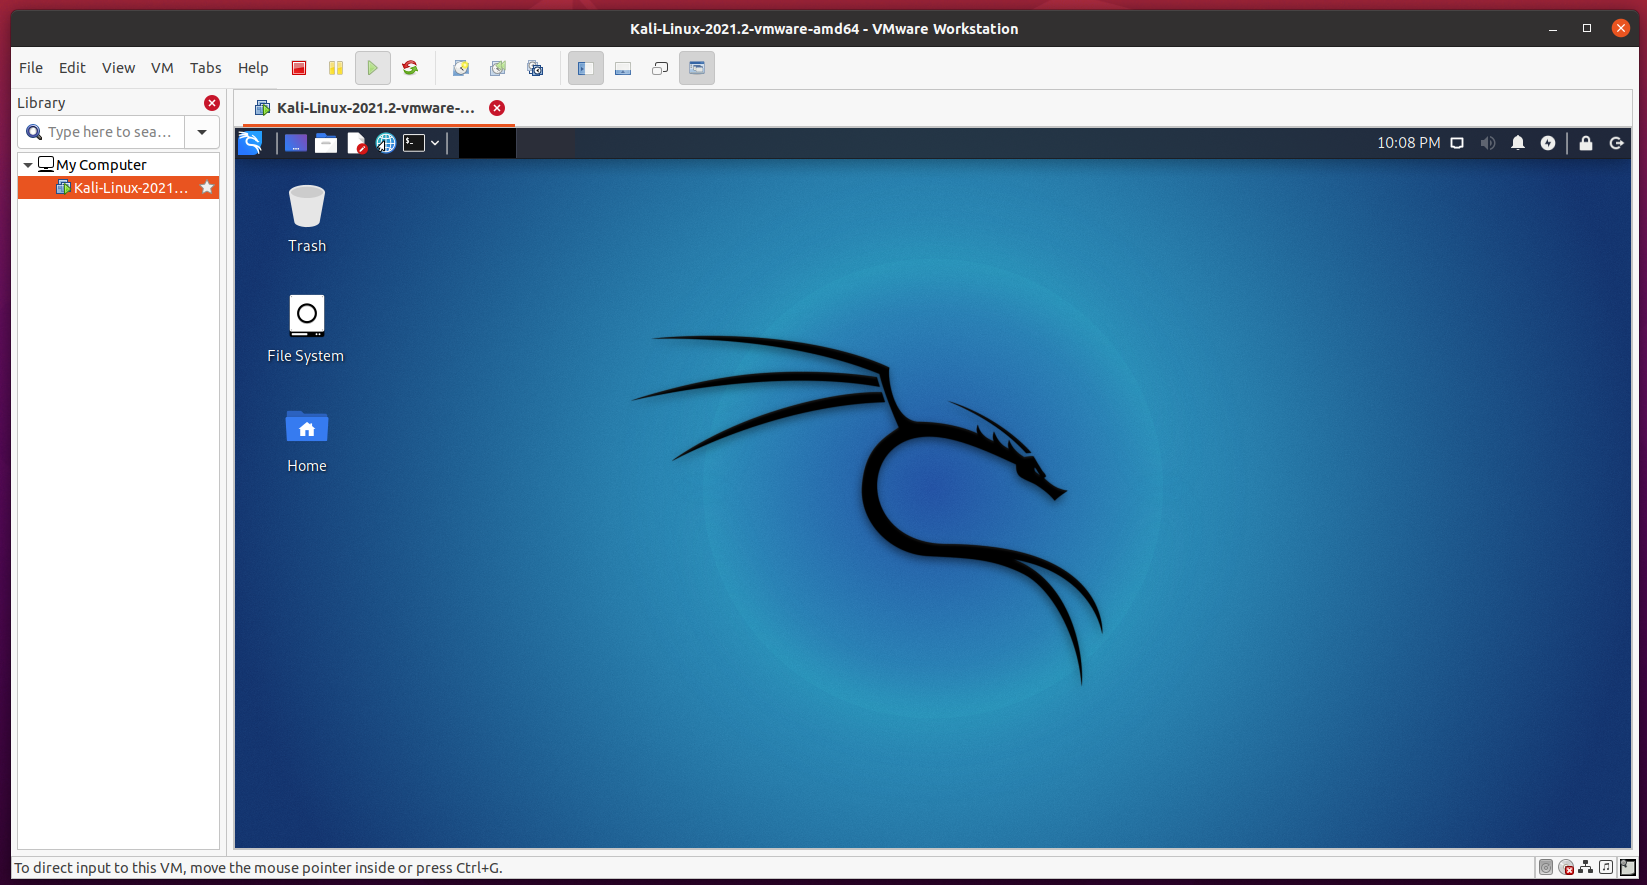
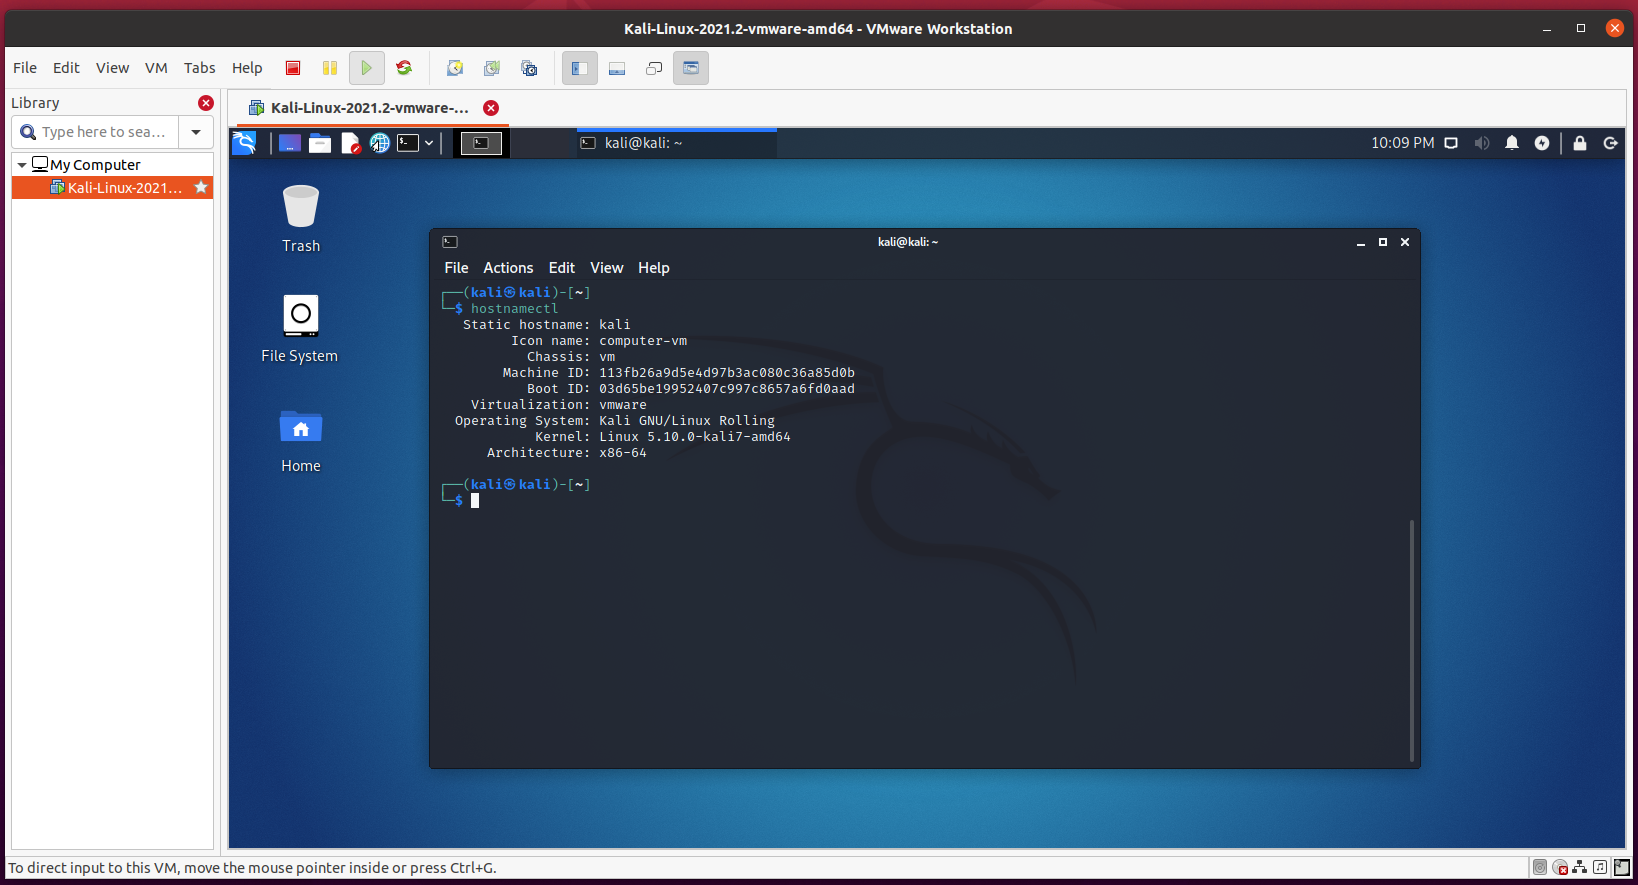
You should be logged in to the Kali Linux virtual machine, and the Kali Linux desktop environment should be loaded, as you can see in the screenshot below.
Kali Linux should run just fine on VMware Workstation Pro 16.
Conclusion:
In this article, I have shown you how to download the latest version of the Kali Linux VMware Image and import it as a VMware Workstation Pro 16 virtual machine. I have also shown you how to upgrade the compatibility mode of the Kali Linux virtual machine to the latest version of VMware Workstation Pro to enable the best 3D acceleration performance. I have shown you how to configure the hardware of the Kali Linux virtual machine and start the Kali Linux virtual machine as well.

