Windows 11 is an improved version of Windows 10 that provides a user-friendly interface and improved security and privacy features. To use Windows 11 just for testing purposes, install it on a Virtual machine and try the new features and latest software.
This article will provide a detailed demonstration of:
- How to Download Windows 11 ISO Image
- How to Create a Virtual Machine for Windows 11 in VMware
- How to Install Windows 11 in VMware
- Conclusion
In order to get started with the installation of Windows 11 in VMware, first download the ISO of Windows 11.
How to Download Windows 11 ISO Image?
Microsoft provides Windows 11 ISO Image on their official Website. To download the ISO Image of Windows 11 follow the steps provided below:
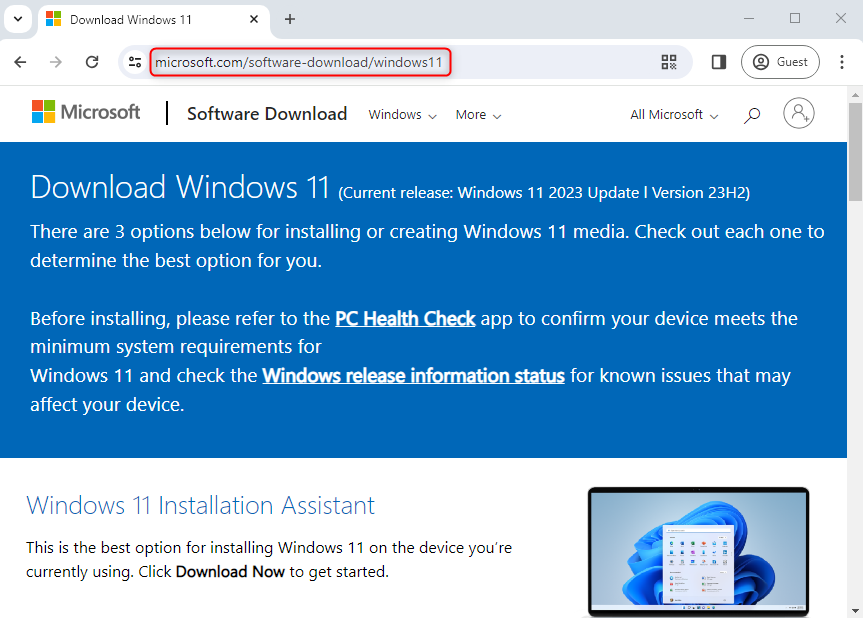
Step 1: Open the Microsoft Official Website
Visit the official website of Microsoft by opening the following link:
https://www.microsoft.com/software-download/windows11
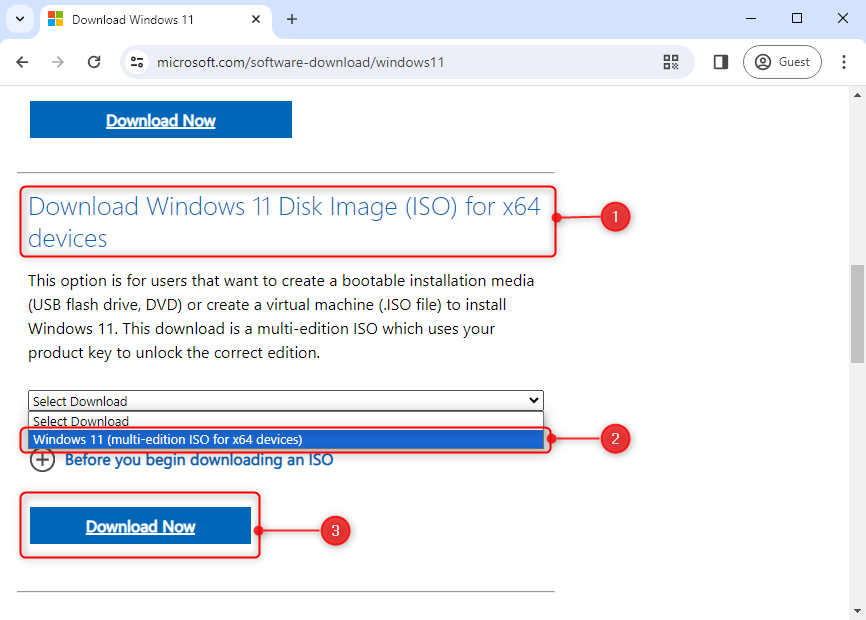
Step 2: Download Windows 11 ISO
Scroll down to the Windows 11 Download section, choose the edition, and click on the “Download Now” button as shown in the screenshot below:
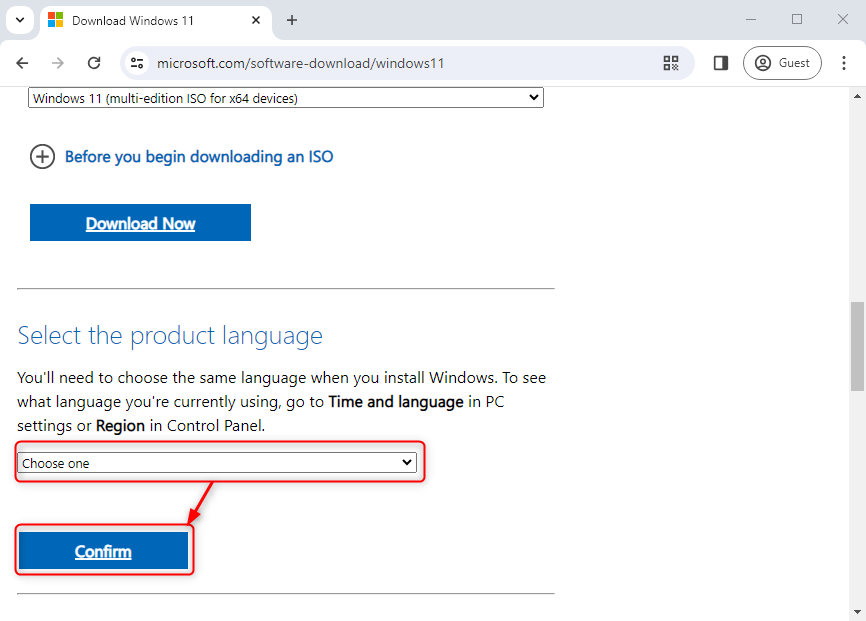
Step 3: Choose Language
It will ask to choose the language of Windows 11 ISO Image; select the language from the drop-down and click “Confirm” to proceed forward:
After selecting the product language, it will show up the download button to download 64-bit Windows 11 ISO Image.
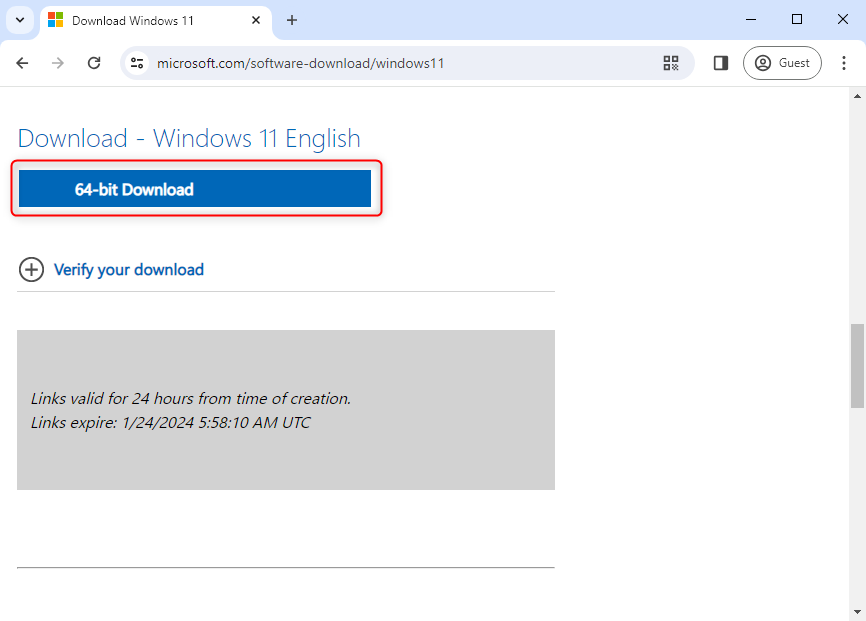
Step 4: Download the Windows 11 ISO Image
Click on the “64-bit Download” button to begin the downloading of Windows 11 ISO Image:
It will start to download and complete the downloading process in a while(based on your internet connection):
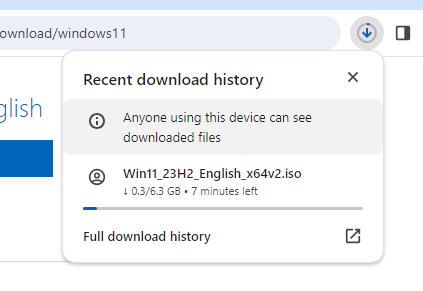
It will start to download and complete the downloading process in a while(based on your internet connection).
How to Make a VM for Windows 11 in VMware?
To create a virtual machine for Windows 11 in VMware, go through the step-by-step procedure demonstrated below:
Step 1: Open VMware
Fire up the VMware in your host operating system:

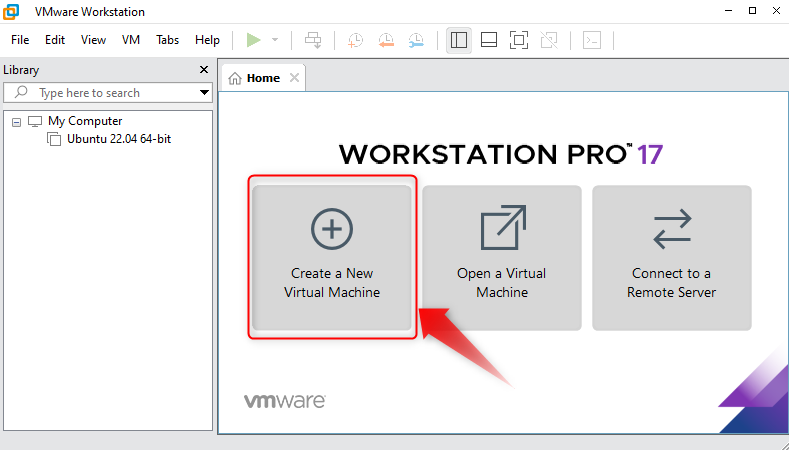
Once it is opened, create a new Virtual machine.
Step 2: Create a New Virtual Machine
Click on the highlighted button below to start the creation process of VM:
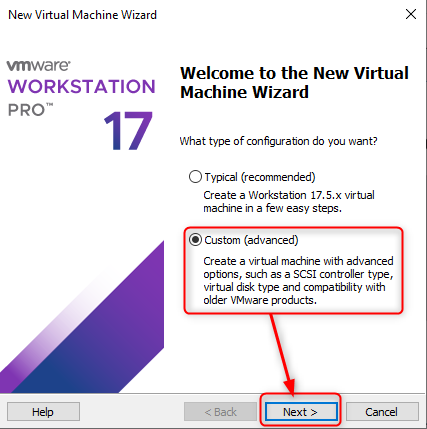
Step 3: Select Virtual Machine Configuration Type:
Select the “custom(advanced)” type of configuration and click “Next”:
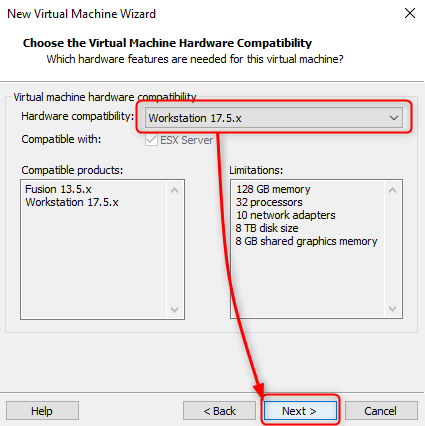
Step 4: Select Hardware Compatibility for VM
While choosing “Virtual Machine Hardware Compatibility”, select the latest version, and proceed forward by clicking on the “Next” button:
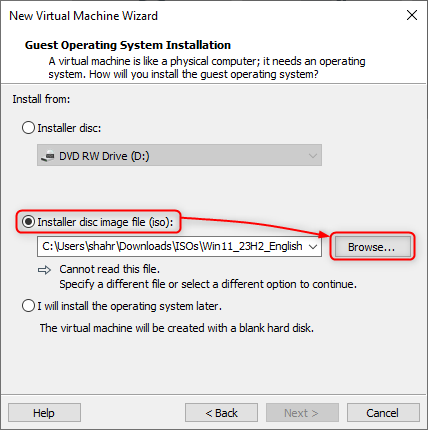
Step 5: Provide Windows 11 ISO Image to VMware
It’s time to provide the ISO Image of Windows 11 to the Virtual Machine(although we can provide it later and the Virtual machine will be created with a blank Hard drive). To provide the ISO Image of Windows 11, select the “Installer disc image file (iso)” radio button and click on the “Browse” button to choose Windows 11 ISO Image:
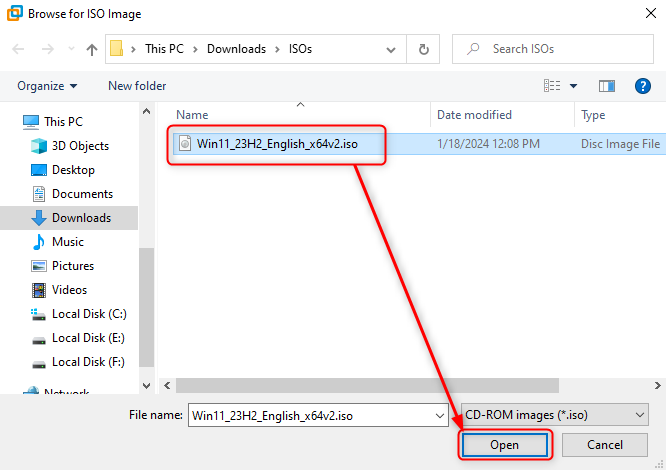
A pop-up selection box will open up to choose the ISO. Move to the respective directory where the Windows 11 ISO image is downloaded, select the Windows 11 ISO Image, and click on “Open” to provide the ISO image of Windows 11 to the Virtual Machine.
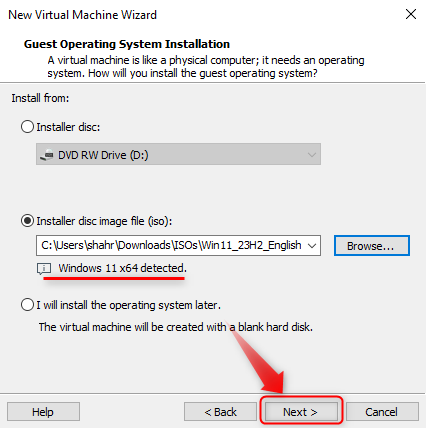
After selecting the Windows 11 ISO Image, VMware will prompt a detection message “Windows 11 x64 detected”. Once, the ISO Image is selected, click on the “Next” button to move forward to the next step of creating a virtual machine in VMware.
If upon selecting ISO, VMware didn’t detect the Windows 11 OS, it will display the message as shown below:
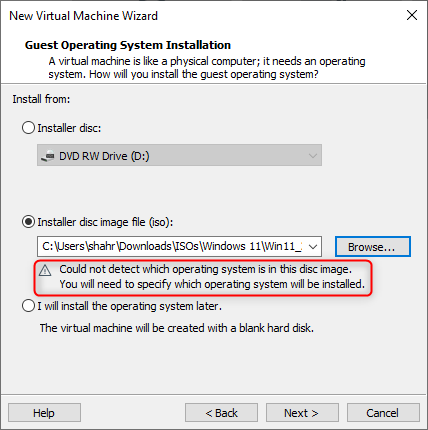
However, in any case, move forward and click Next, as you have to choose manually for the Operating system type:

Just choose the Guest Operating System and its version appropriately.
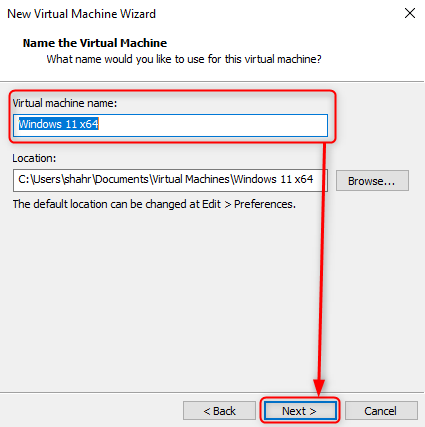
Step 6: Set the name of the Virtual Machine
Provide a suitable Virtual Machine name and click “Next”:
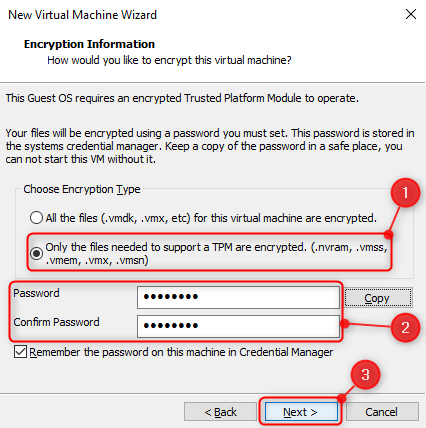
Step 7: Encrypt the Virtual Machine
While encrypting the Virtual Machine, set the password for the files needed to support a TPM.
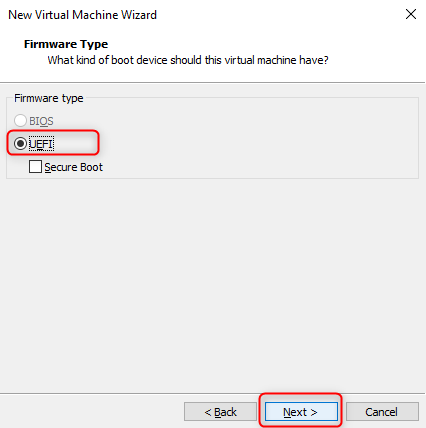
Step 8: Select the Firmware Type
Select “UEFI” for installing Windows 11 on VMware:
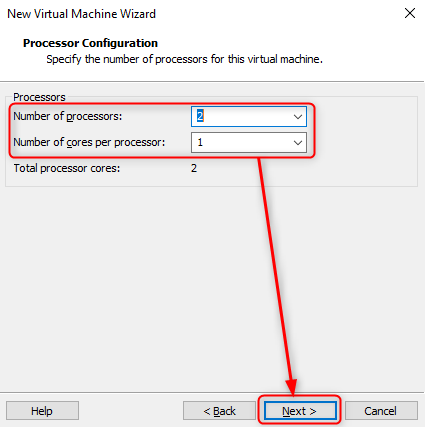
Step 9: Set the number of processors and its cores
2 Processors with a single would be enough for running a Windows 11 within a host:
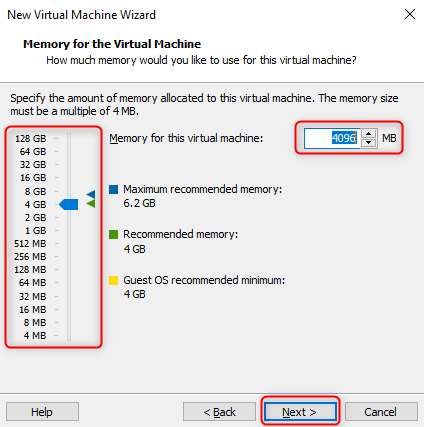
Step 10: Specify Memory for the Virtual machine
Dedicate at least 4GB of RAM(recommended) to run an operating system like Windows 11.
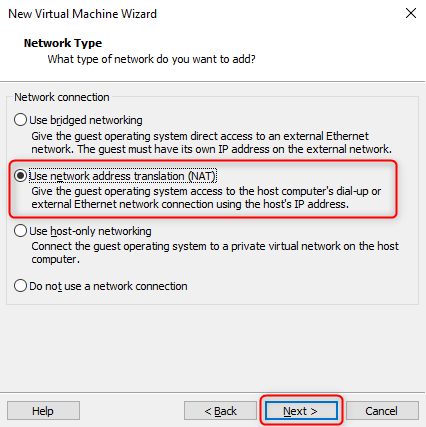
Step 11: Choose the appropriate Network Type
Use NAT for accessing the Ethernet Network connection through the Host Operating system. However, if you want this machine to communicate with the external network, then use “Bridged Networking”.
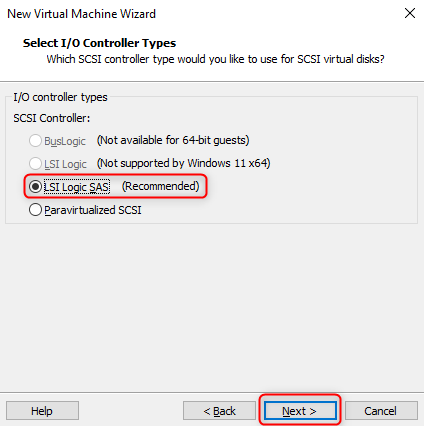
Step 12: Choose the SCSI Controller for the Virtual machine
Simply go for the recommended “LSI Logic SAS” I/O Controller type for Windwos 11 Virtual Machine as it is available and supported by Windwos 11 and Click Next.
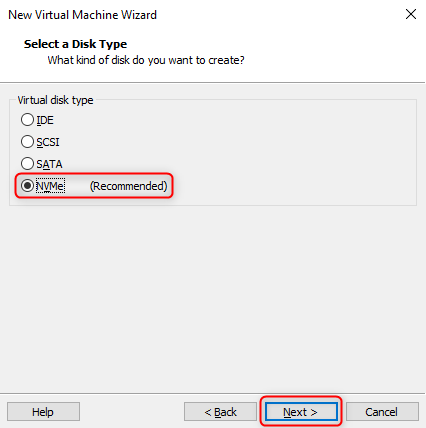
Step 13: Choose the Disk Type of the Virtual Machine
Create the disk type that is available and recommended by VMware and proceed forward; in our case, it is “NVMe”.
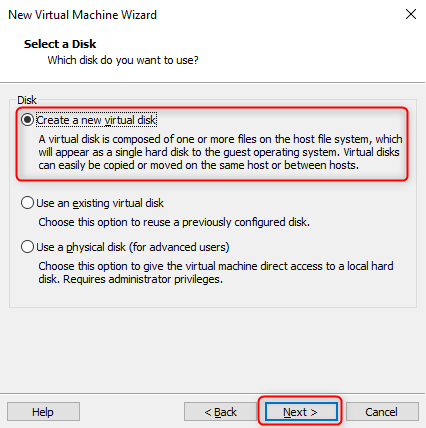
Here, if you are a beginner creating a Virtual Disk for the first time, simply go for “Create a new virtual disk” and click on the “Next” button.
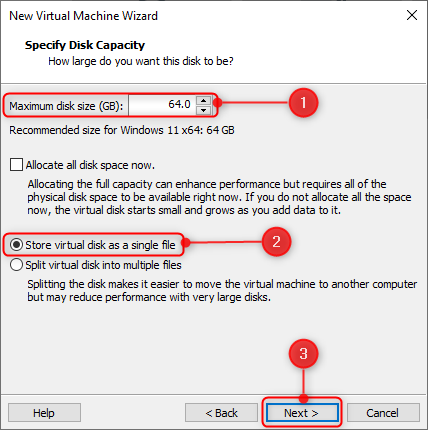
Step 14: Specify Disk Size
Mention the disk size in GB(64 GB recommended), select the “store Virtual Disk as a Single File”, and click on the “next” button:
Note: Check the “Allocate all Disk space now” check box for enhancing performance but it will consume all the specified disk space from the Host Operating before even installing Windows 11. Otherwise, let it stay as dynamically allocated and consume the space when required.
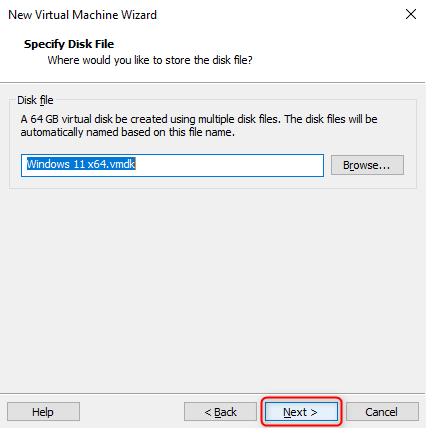
Step 15: Name the Disk File
Write down the name of the Virtual Disk or keep it as default and just click on the “Next” button:
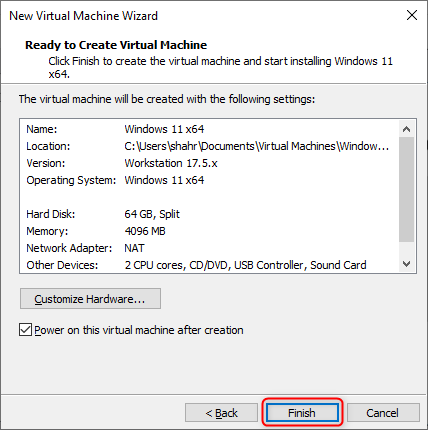
Step 16: Review the Virtual Machine Settings
Lastly, make sure everything is set up perfectly and click on the Finish button to complete the Virtual Machine creation process and run the machine for installation of Windows 11.
That’s it from the creation of a Virtual Machine in VMware for Windows 11; let’s start the installation process of Windows 11 in this created Virtual Machine.
How to Install Windows 11(VM) in VMware?
To start the installation process of Windows 11 on VMware, follow the guided steps below:
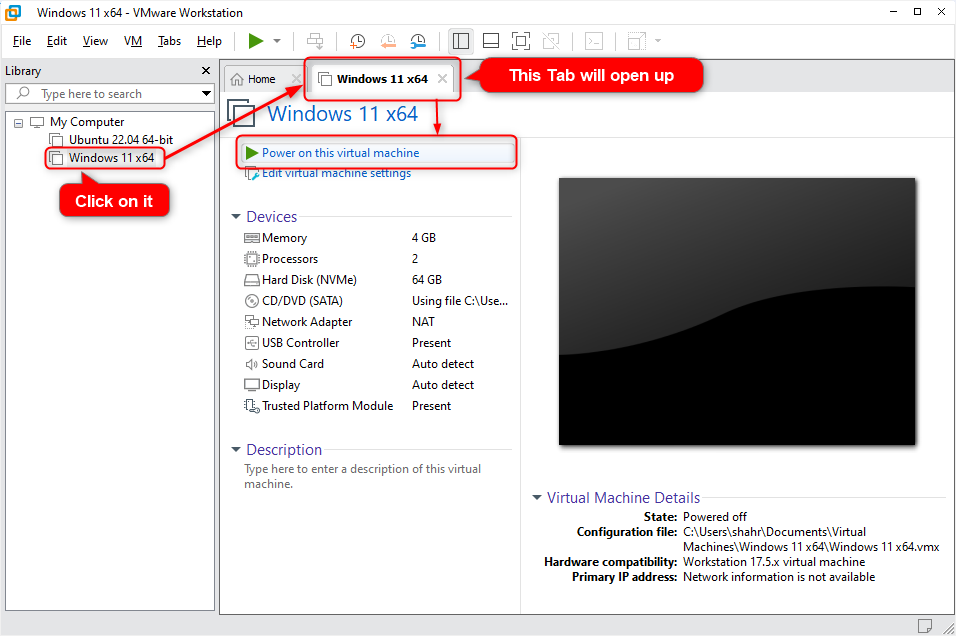
Step 1: Start the Machine
Turn ON the Virtual machine by first clicking on the machine name that you recently created. As a result, a new tab in VMware with the name of the Virtual Machine will open up. In the opened tab, click on the “Power on this Virtual machine” button as highlighted in the image below:
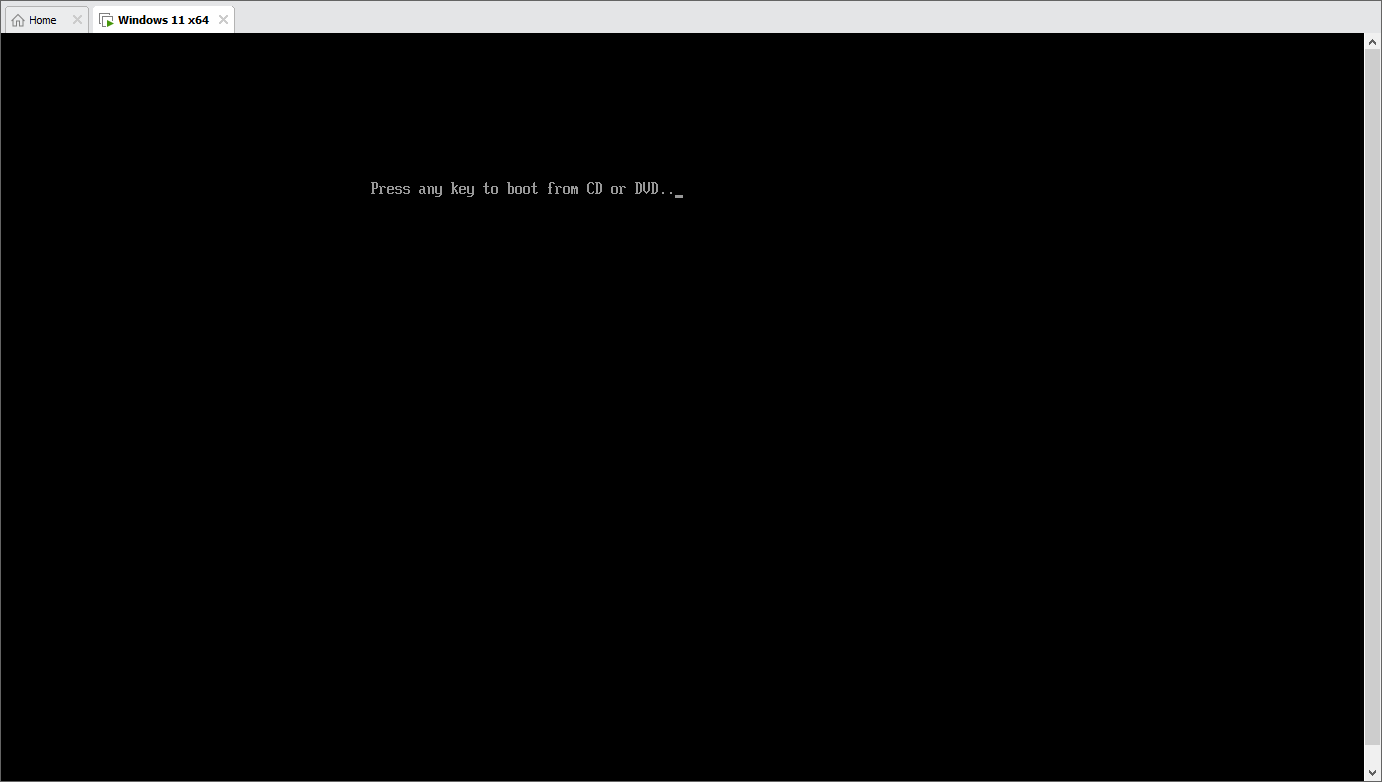
After turning on the machine, it will prompt you to “Press any key to boot from CD or DVD”(if the ISO file is provided correctly). Press any key on your keyboard and it will start the installation wizard of Windows 11 within VMware.
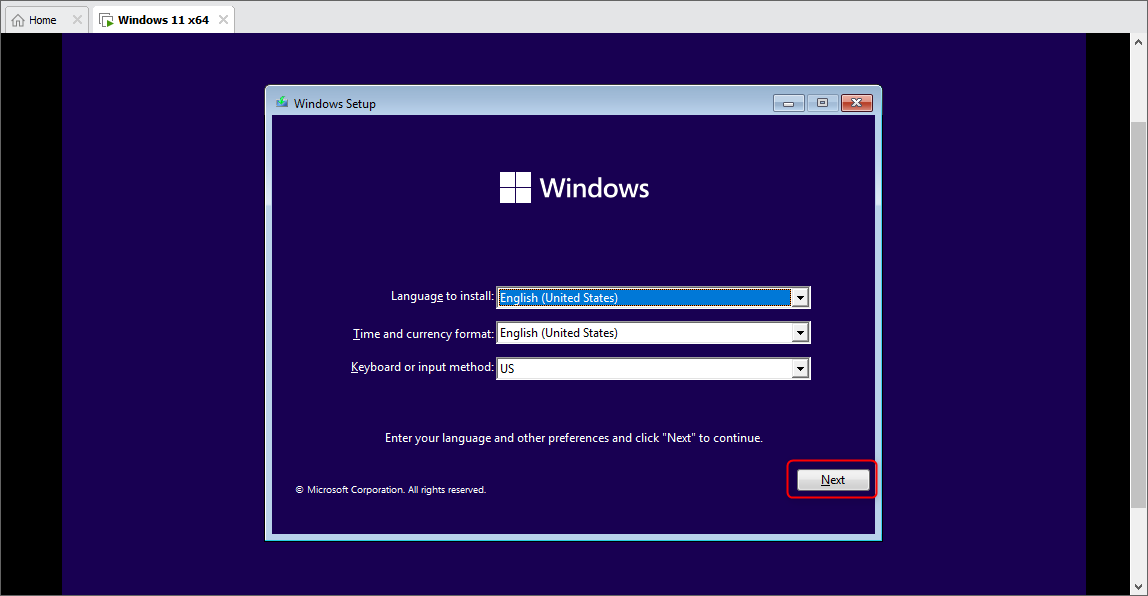
Step 2: Set the Language, Region, and Keyboard Settings
From the “Windows Setup” wizard, set the language, time zone, and keyboard. Then, press the “Next” to move to the next step:
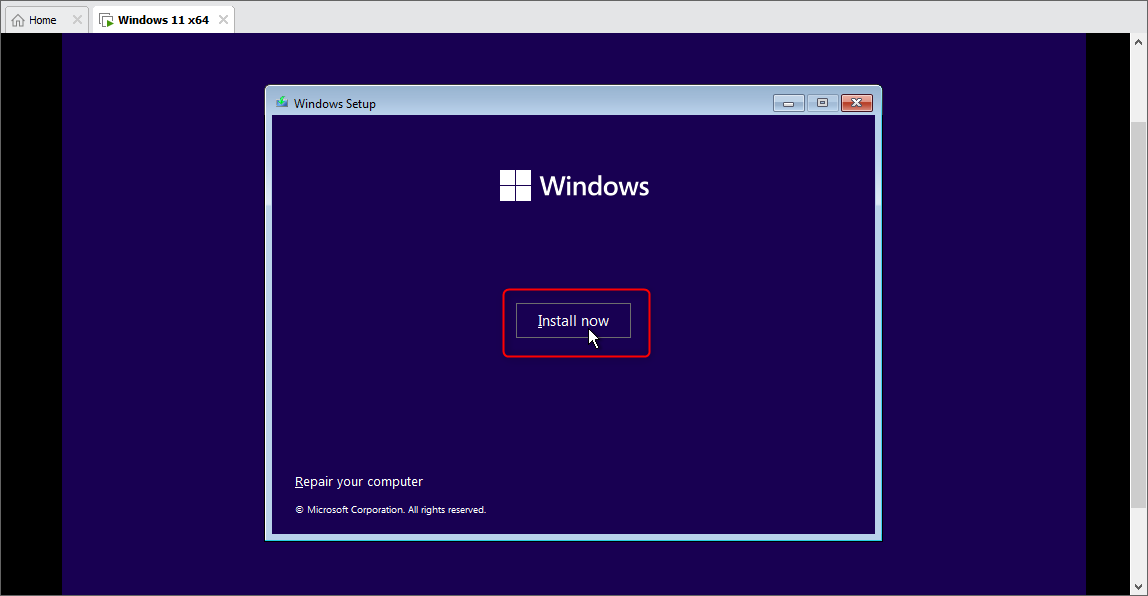
On the appearance of the “Install Now” button, press the “Install now” button to start the installation of Windows 11:
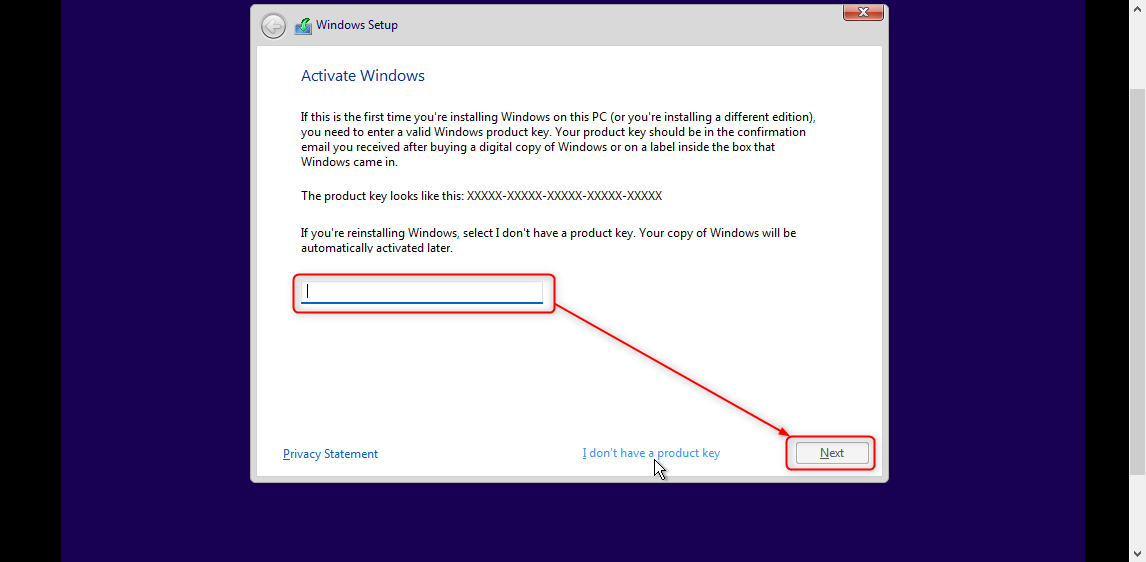
Step 3: Add Windows 11 Product Key
Provide the product key for Windows activation and press “Next”. If you want to continue using Windows 11 without a product key(and provide one after the installation), press the “I don’t have a product key” link:
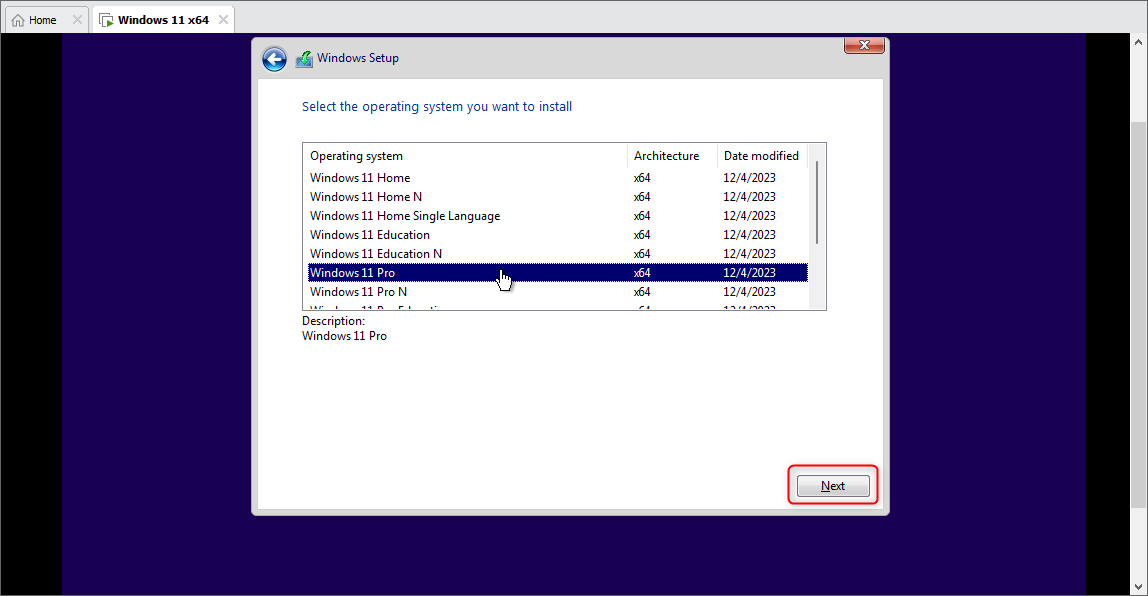
Step 4: Select the OS version
From the next Windows, select the Windows 11 version according to your preferences and hit “Next”. For instance, we have selected the “Windows 11 pro” version:
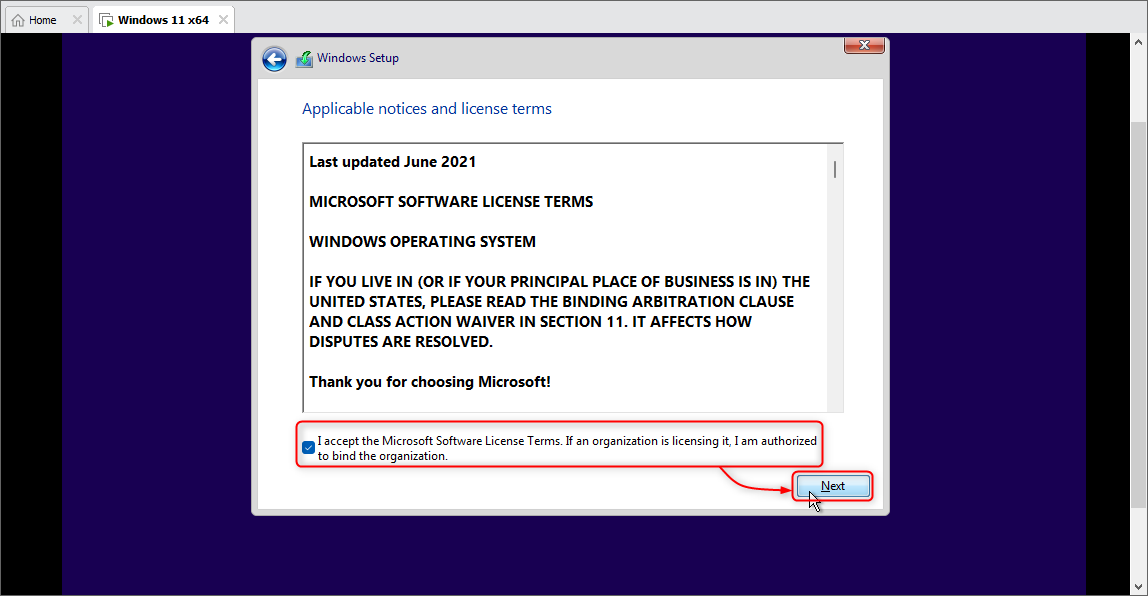
Now, accept all the license agreements of the Microsoft community by marking the below-pointed checkbox and hitting the “Next” button:
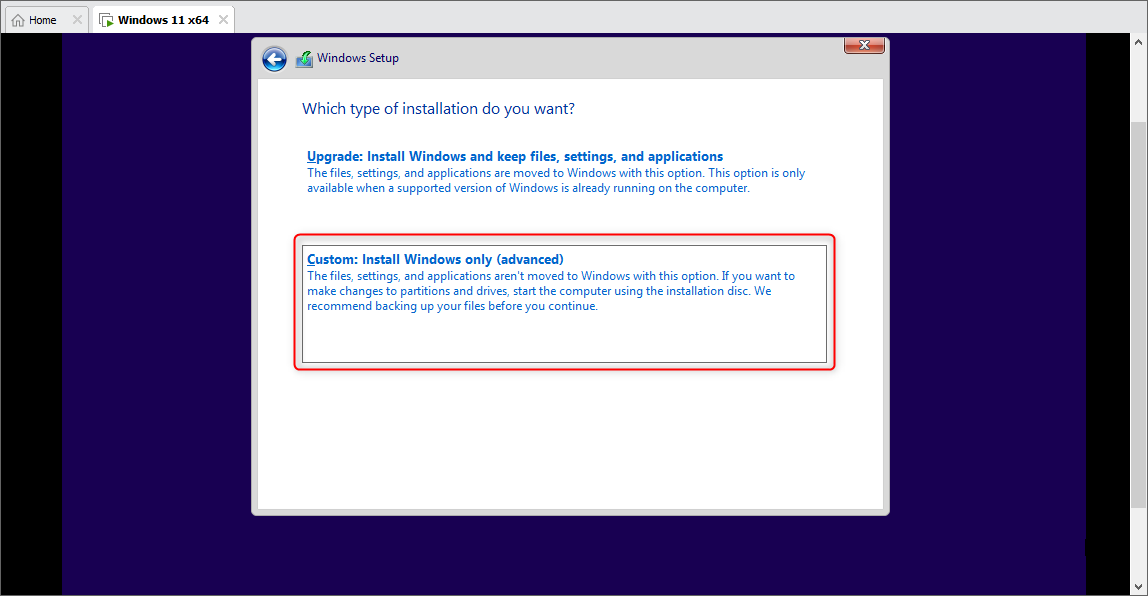
To install the Windows with advanced options, select the below pointed “Custom” option:
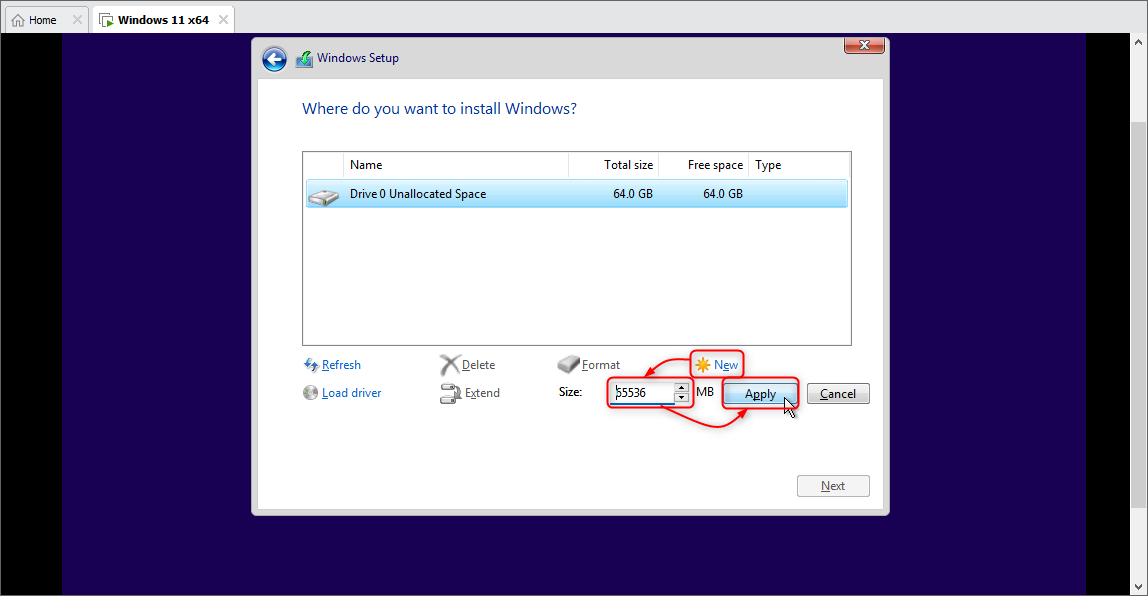
Step 5: Configure Disk Partition Settings
Next, you need to create the Windows installation disk. To create the new disk, first, click on the “New” option, allocate the size to partition, and press the “Apply” button:
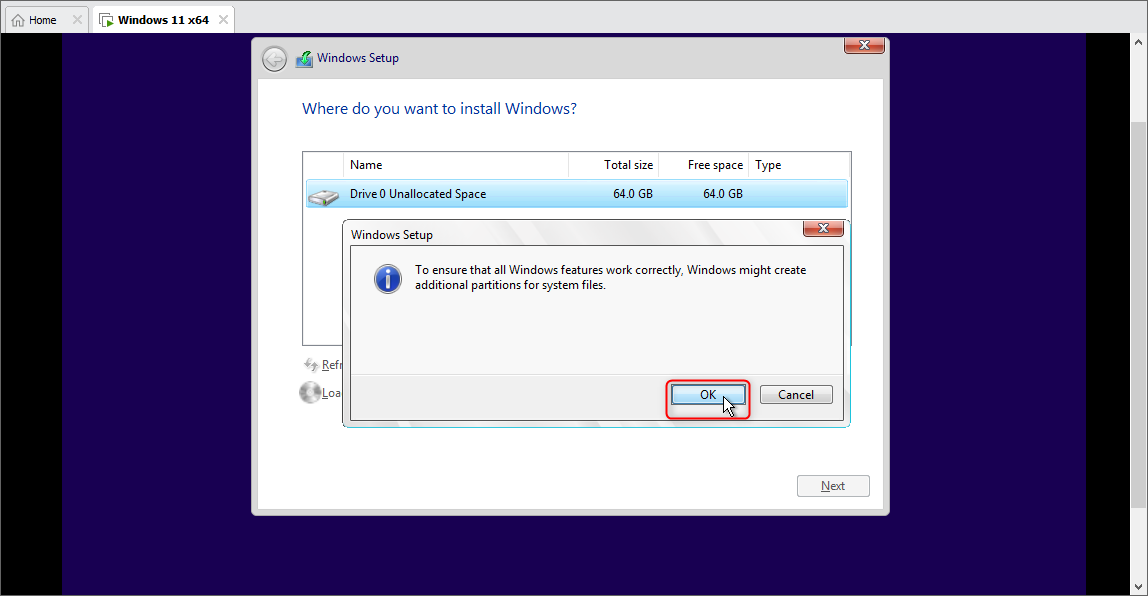
The “Windows Setup” confirmation box will pop up, press the “OK” to proceed:
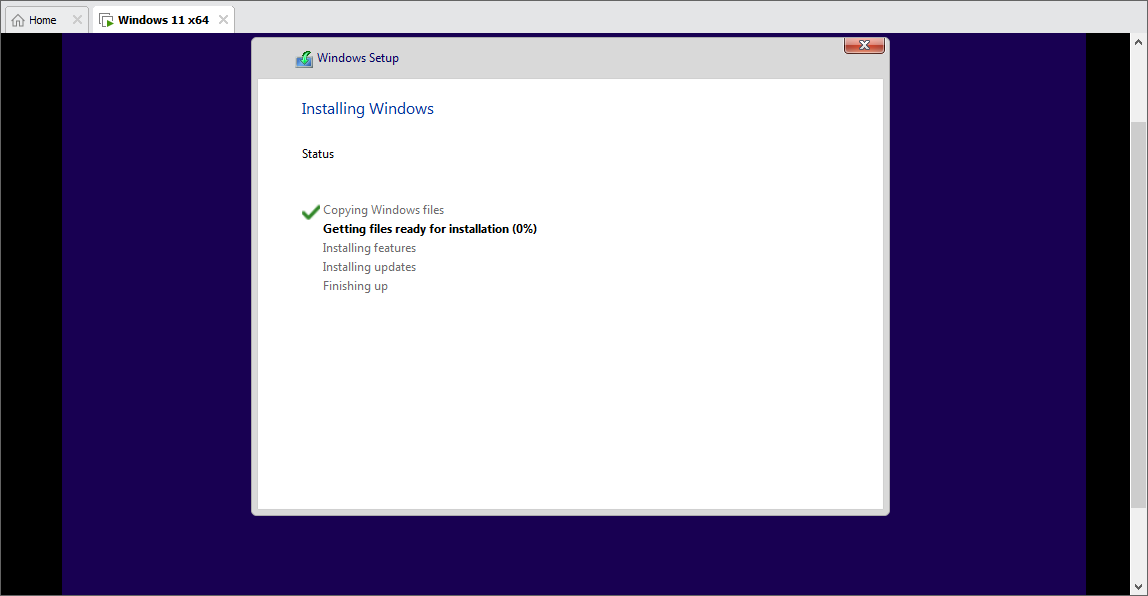
Select the Disk partition in which you want to install Windows 11 and press the “Next” button:
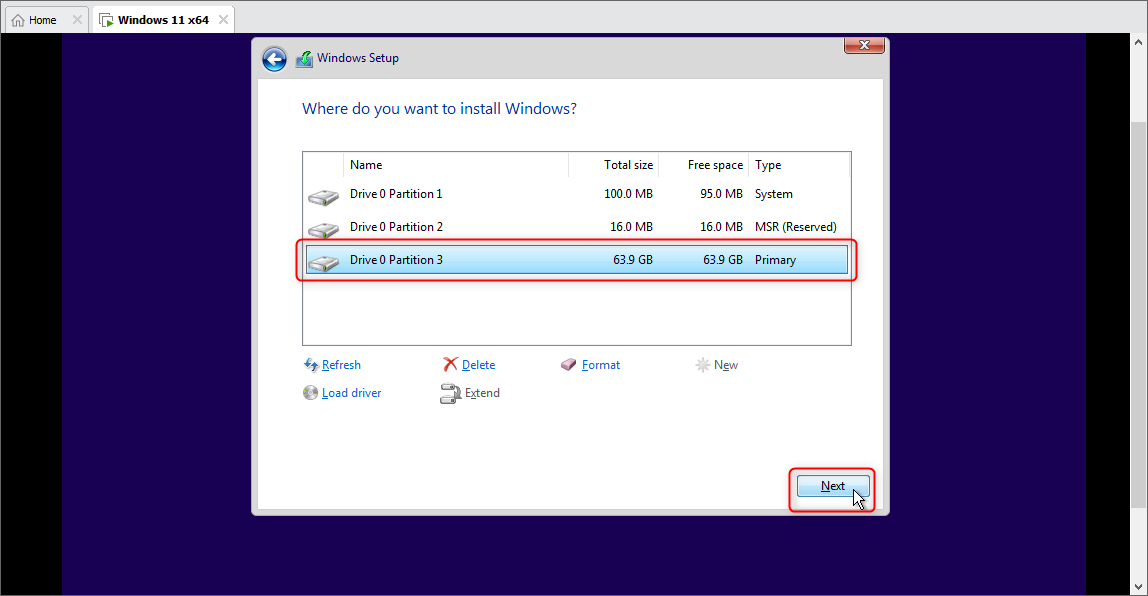
This will start installing Windows 11 on VirtualBox:
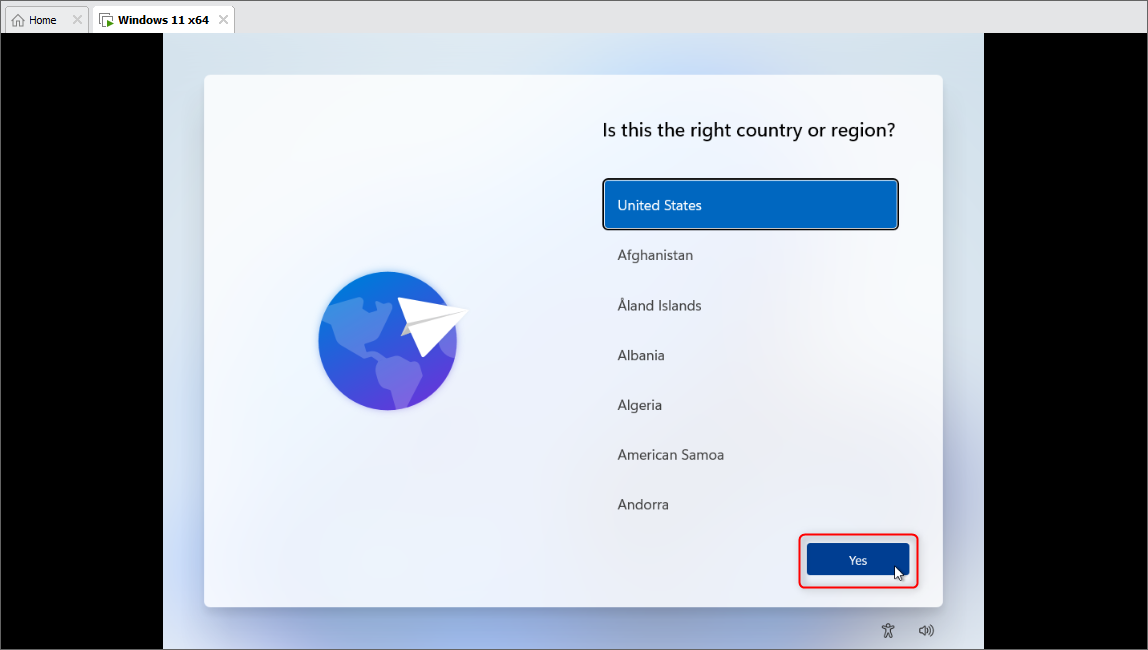
Step 6: Set the Timezone
After installing the Windows, the machine will restart and ask to set the timezone or region to access the correct time on the system. Choose the right country/region and press the “Yes” button:
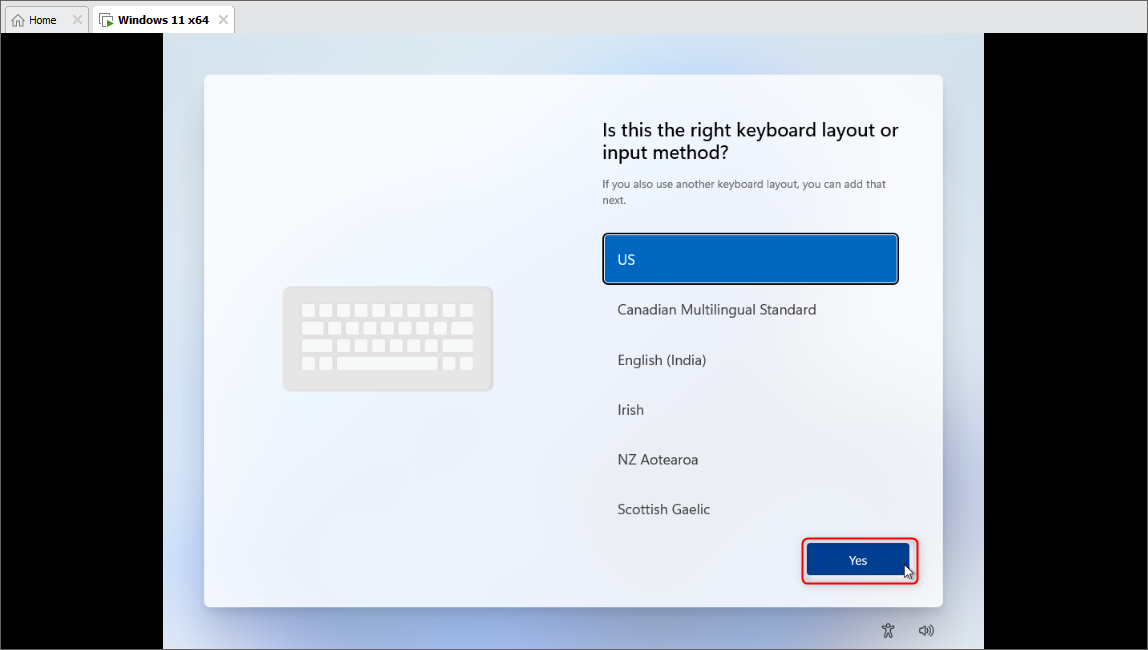
Next, set the Keyboard of your choice and press the “Yes” button:
This will ask you to set the second layout of the Keyboard(if you want), just press the “Skip” to skip the step:
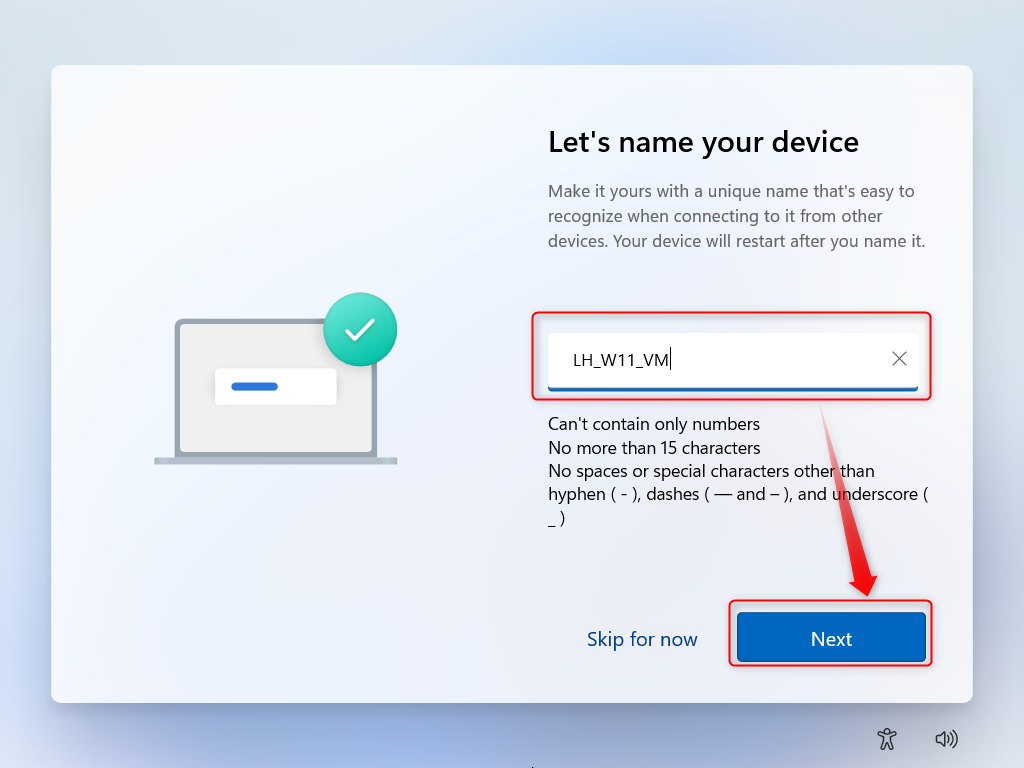
Step 7: Set Device Name
Set the name of your Windows 11 device and press “Next”:
After that, Windows will be restarting to configure and implement the changes.
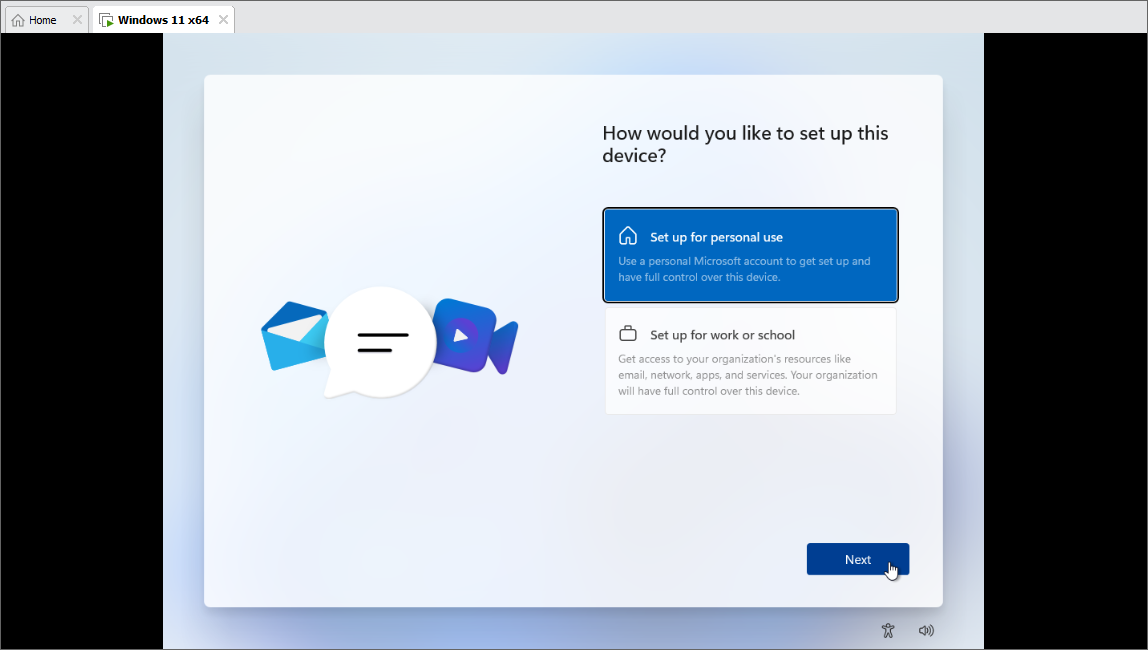
Step 8: Setup Your Windows 11 Machine
To set up a Windows 11 machine for personal use, select the first option and hit “Next”. Users can set the Windows 11 for work or school as well:
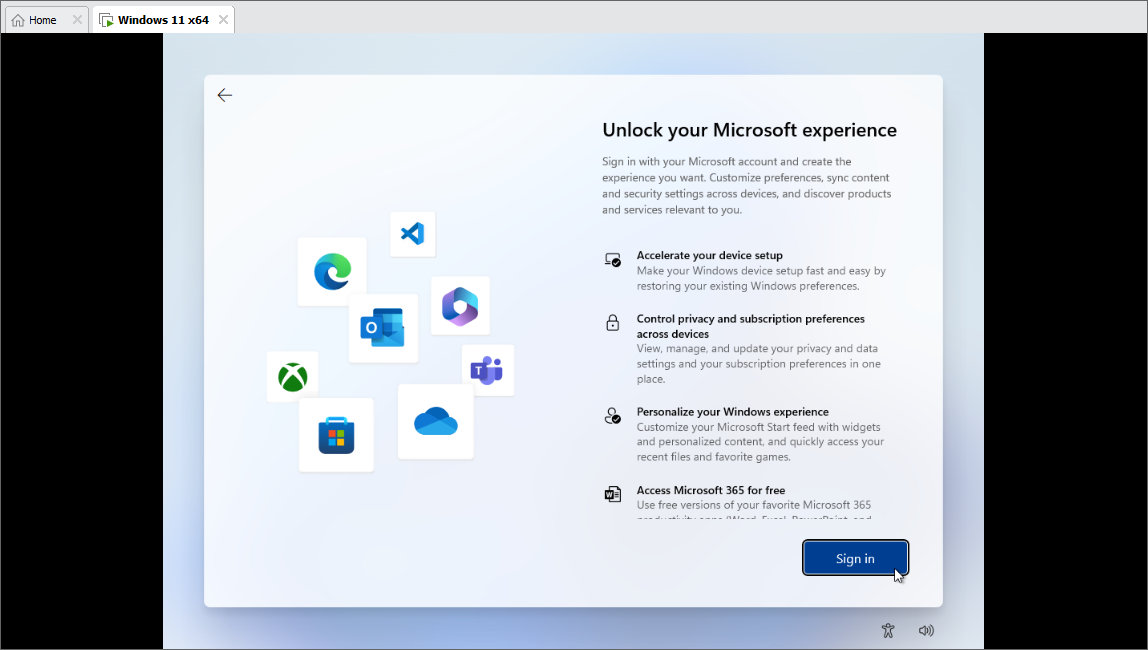
Step 9: Log In to Microsoft Account
To unlock other Microsoft features and applications, log in to your Microsoft account by pressing the “Sign in” button:
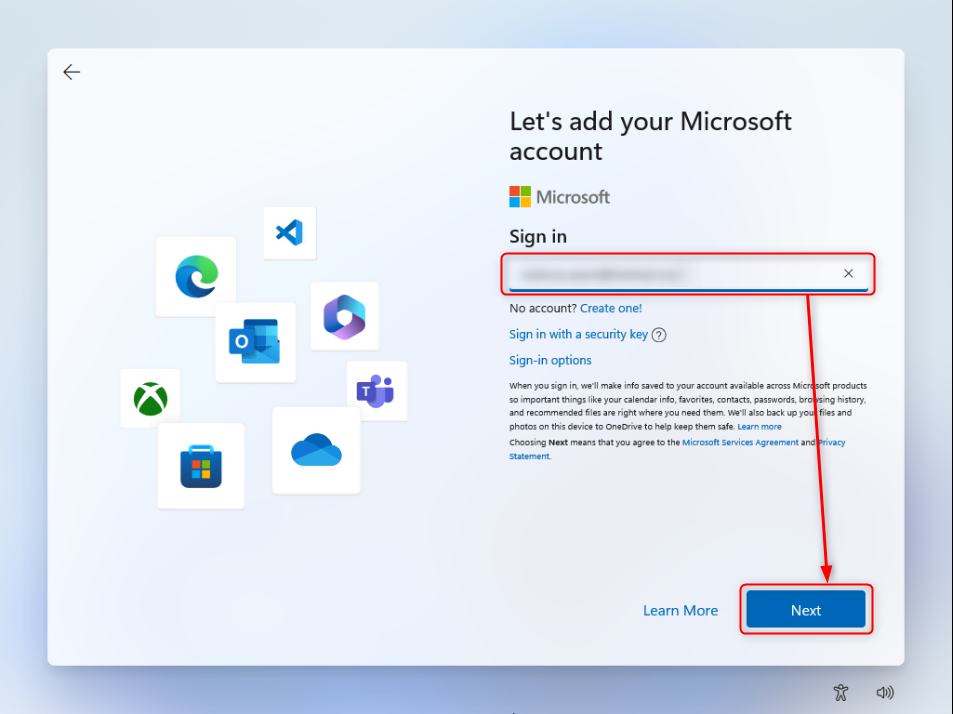
Sign in with the Microsoft account, provide the email address, and press the “Next”
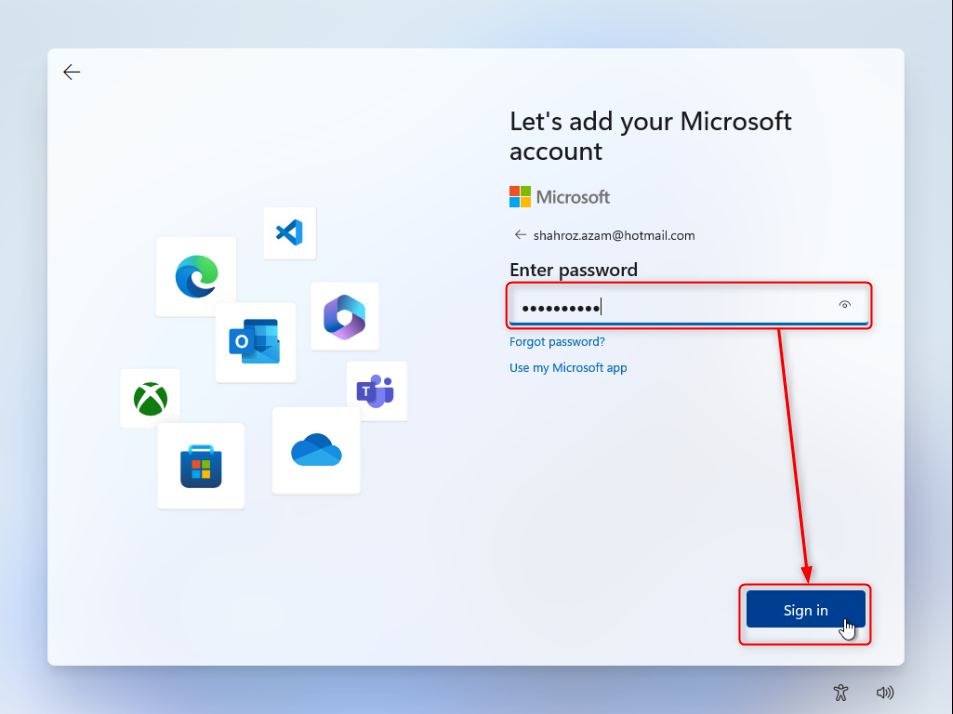
After that, type in your Microsoft account password and hit the “Sign in” button:
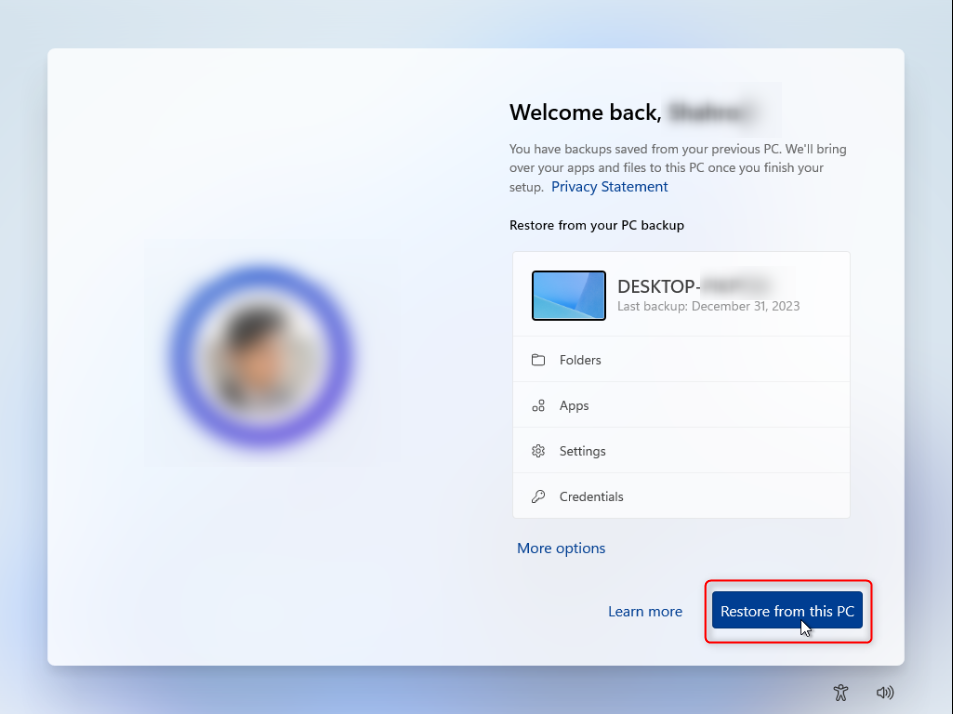
Now, press the “Restore from this PC” button to restore the backup that is saved in your Microsoft account:
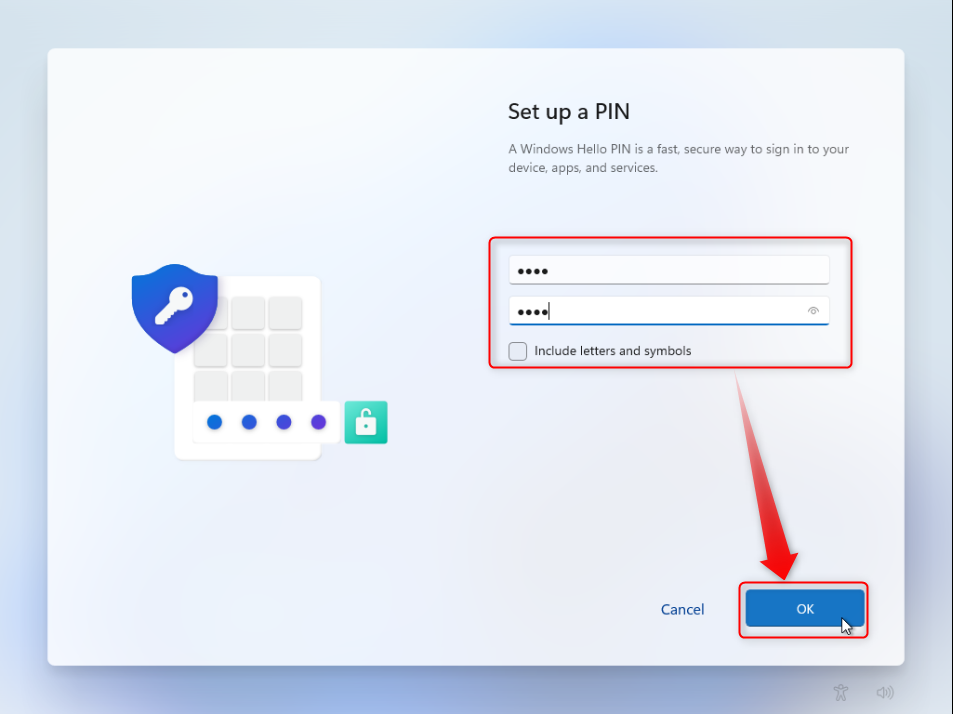
Step 10: Set up the System Pin
From the next window, create a system PIN by pressing the “Create PIN” button:

Type in the pin twice for confirmation and press the “OK” button to save the pin:
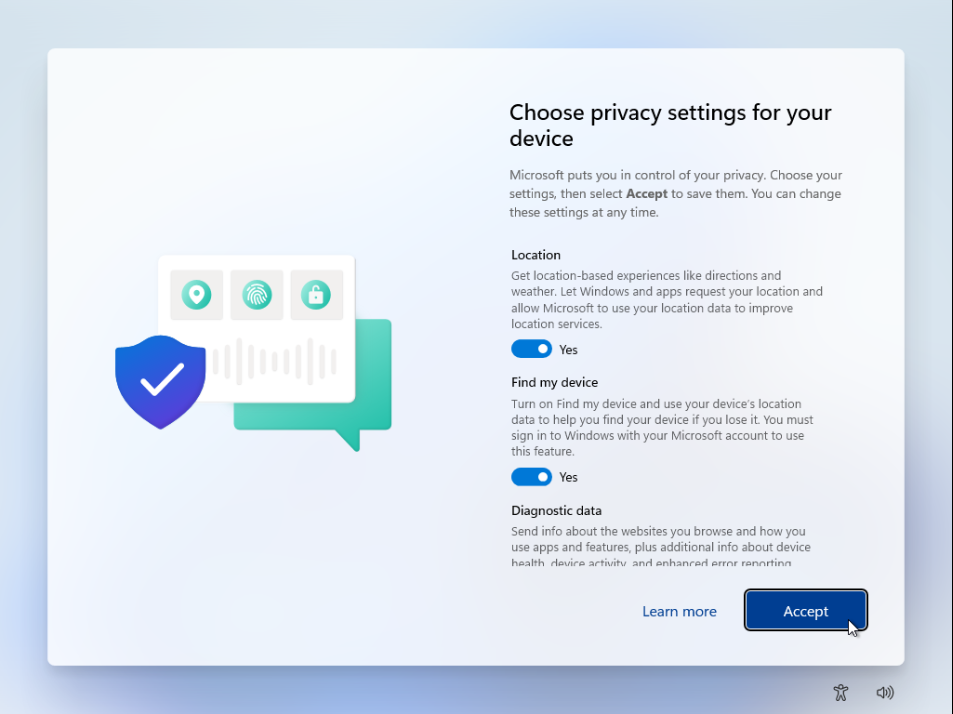
Step 11: Customize the Privacy and Other Settings
Next, customize the privacy settings. For this purpose, first, turn on the location and find my device settings option by turning on their respective toggles. After that, press the “Accept” button:
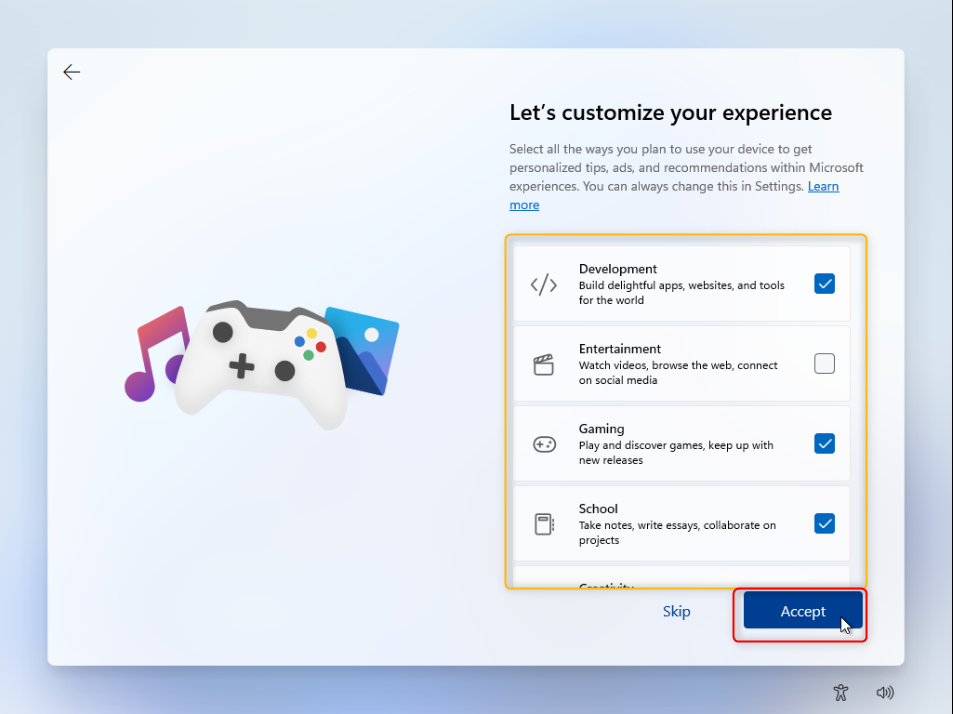
Customize the additional on-screen options or continue with the default selected options and press the “Accept” button:
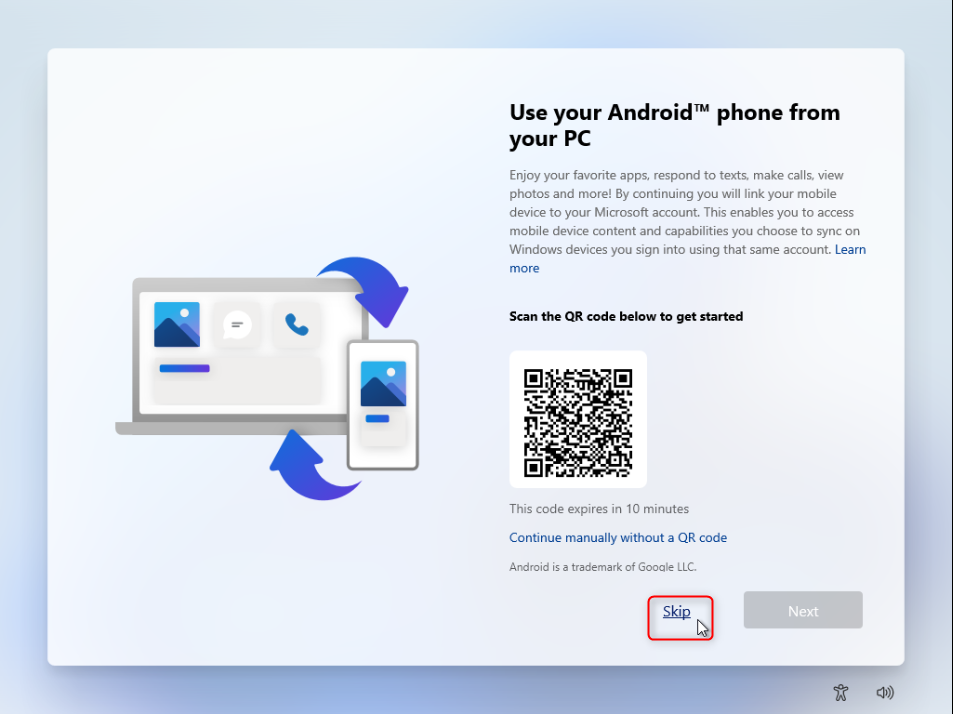
The next wizard will ask you to scan your phone to connect your phone to Windows 11. This feature is new in Windows 11. Click on the “Skip” button if you don’t want to sync and skip this step:
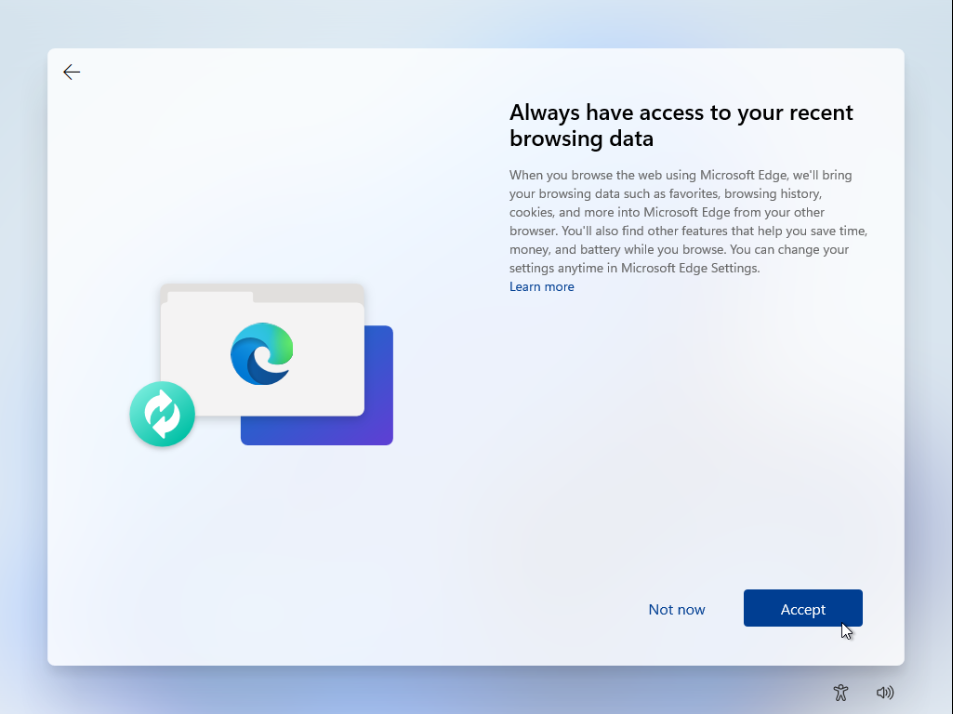
To save and access the browsing history, press the “Accept” button:
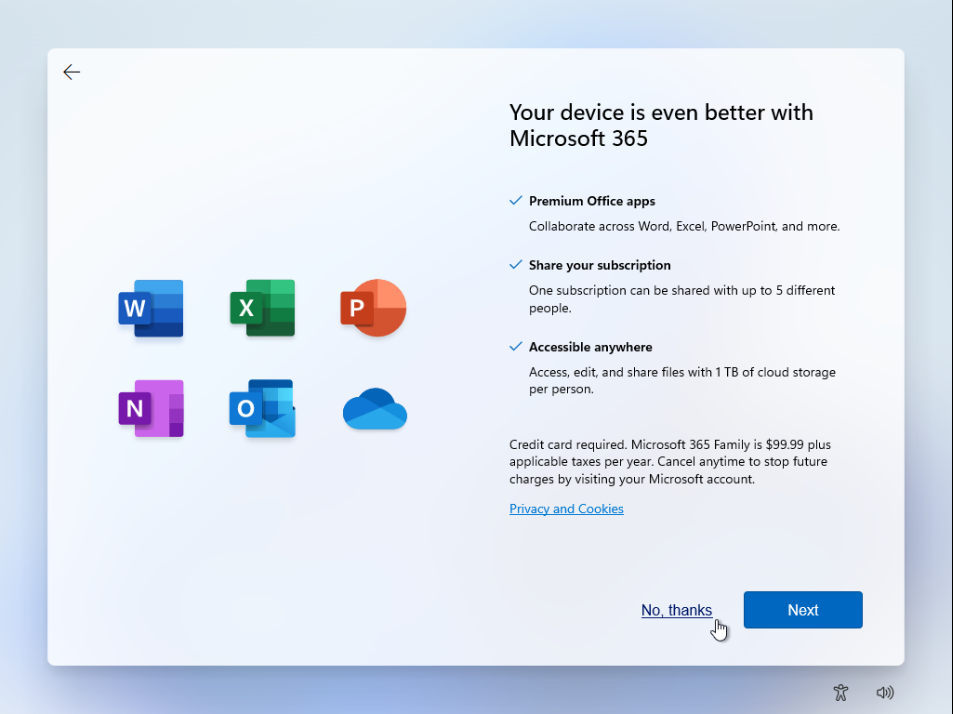
From the next few windows, some Microsoft products will be visible on the screen. To avoid installing them, press the “No, thanks” link and proceed to the next step:
Again, press the “Skip for now” link button and proceed:
This will start saving your settings and booting Windows 11 in the Virtual machine:

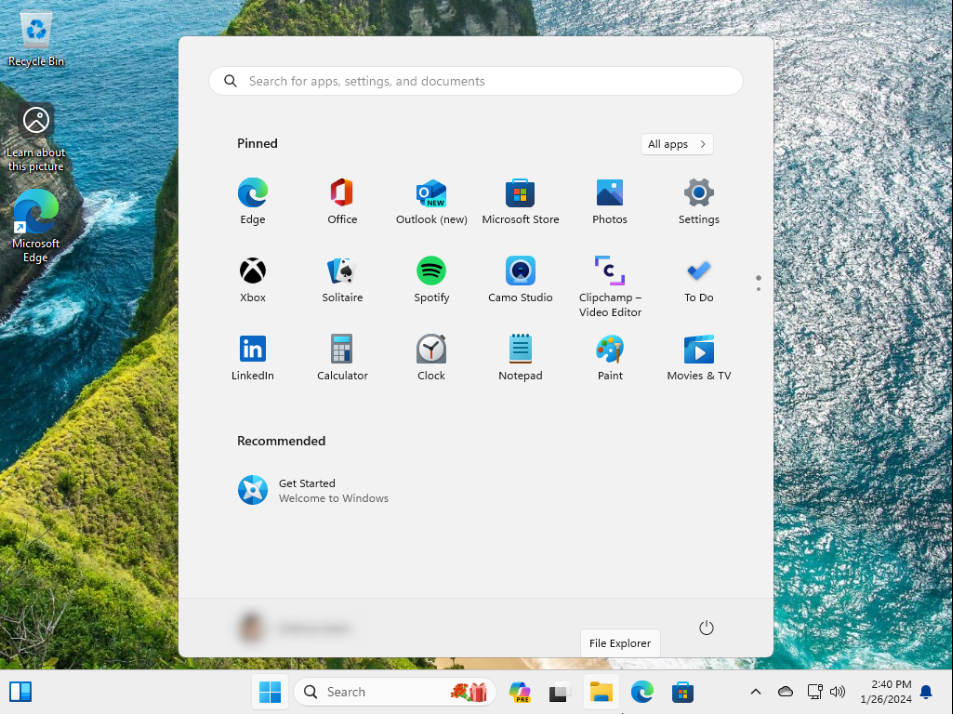
Here, you can see we have effectively installed the Windows 11 in VirtualBox:
That’s it for installing Windows 11(Virtual Machine) on VMware. We have covered the procedure to install Windows 11 from creating a Virtual Machine, installing Windows 11 in it, and setting up the basic preferences of Windows 11 in Vmware.
Conclusion
To install Windows 11 on VMware, download the Windows 11 ISO image, create a new machine in VMware, and allocate it the essential resources like system memory, internal storage and number of processors, disk type, I/o Controller, and many more. After that, start the machine, and follow the on-screen procedure to install Windows 11 in VMware.