In this guide, you will learn:
How to Install Arduino IDE on Mac
- How to Install Arduino IDE on Mac from Terminal
- How to Remove Arduino IDE on Mac from Terminal
- How to Install Arduino IDE on Mac from GUI
- How to Remove Arduino IDE on Mac from GUI
- How to Update Arduino IDE on Mac
- How to Upload Code to Arduino IDE
How to Install Arduino IDE on Mac
You can install Arduino IDE on Mac from:
- Terminal
- GUI
How to Install Arduino IDE on Mac from Terminal
To install Arduino IDE on Mac from terminal, follow the steps below:
Step 1: Install Homebrew on Mac
Homebrew is an effective package manager widely used by the macOS users to install different packages on the system. It performs the package installation with required dependencies in a single command and it is a quick way to install a package from the software repository. You can install Homebrew on Mac from the guide presented here.
Step 2: Install Arduino IDE on Mac from Homebrew
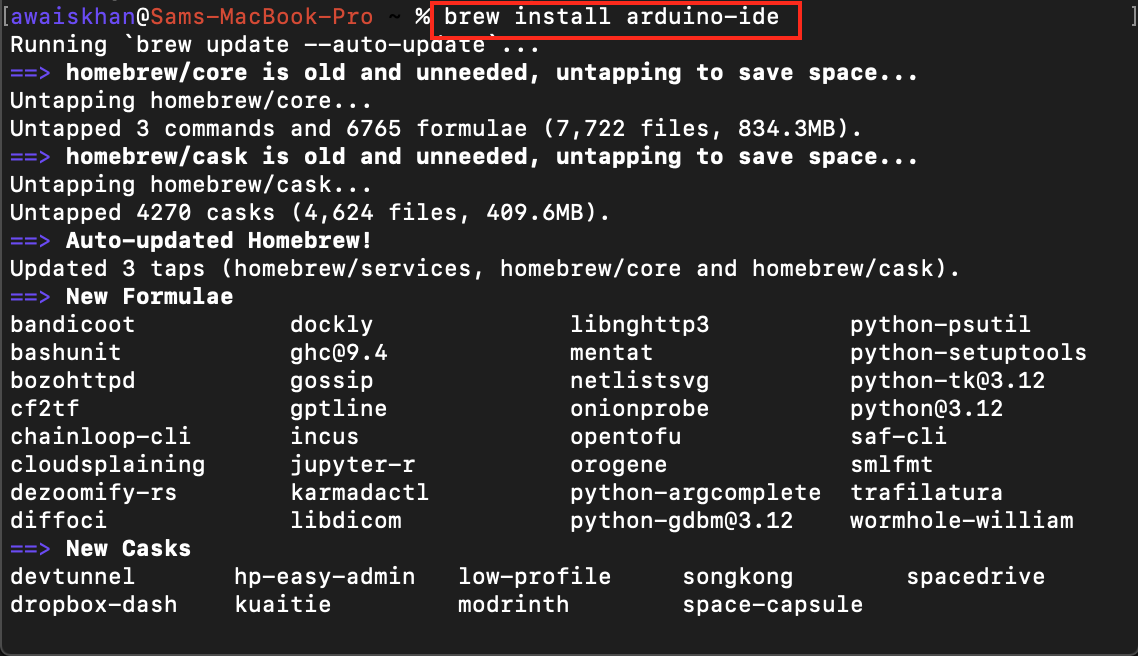
After installing the Homebrew package manager, you can install Arduino IDE on Mac from the terminal through the following command:
Step 3: Run Arduino IDE on Mac
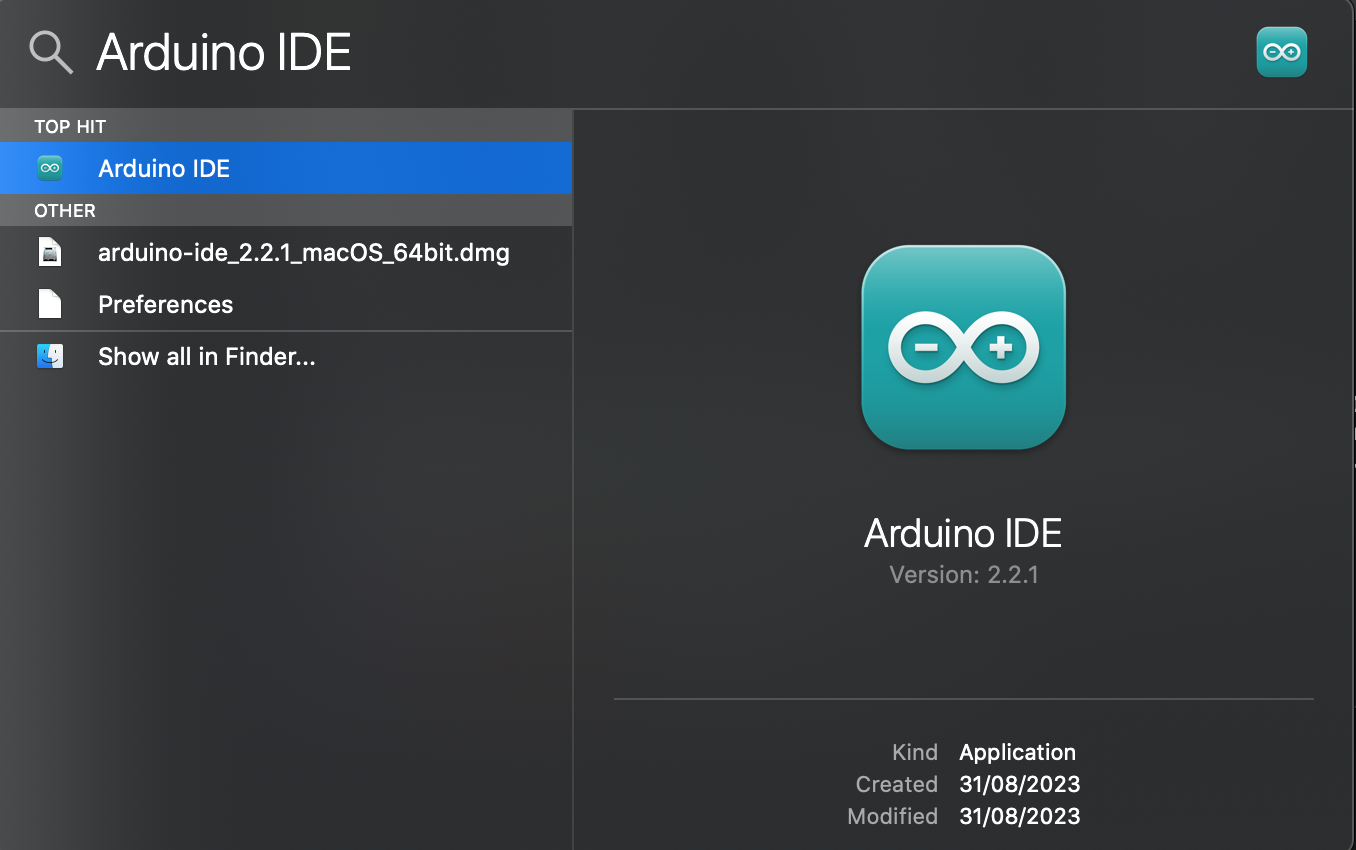
To run Arduino IDE on Mac, open Spotlight Search, enter Arduino IDE in the search box and double-click on Arduino IDE application to open it on the system:
How to Remove Arduino IDE on Mac from Terminal
If you have installed Arduino IDE on Mac from the terminal through Homebrew package manager, you can simply run the following command to remove it:
How to Install Arduino IDE on Mac from GUI
You can also install the Arduino IDE latest version on Mac from GUI by downloading the .dmg file and then running it to complete the installation. A complete step-by-step instruction for installing Arduino IDE on Mac from GUI through .dmg file is given below:
Step 1: Download the Arduino .dmg File
First, download the Arduino .dmg file from the official website of Arduino here.
Step 2: Run the Arduino .dmg File
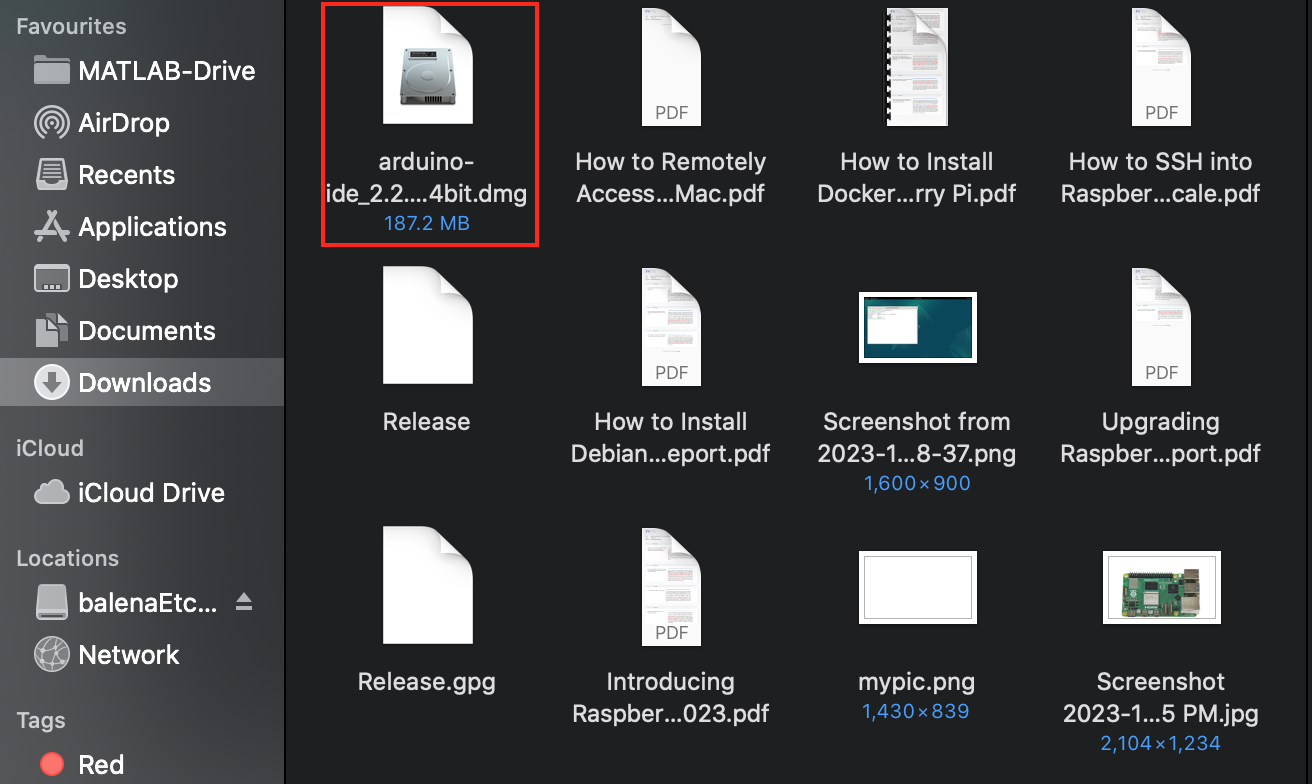
Now double-click on the .dmg file from the Downloads directory of your Mac system:
Step 3: Move the Arduino IDE to Applications Folder
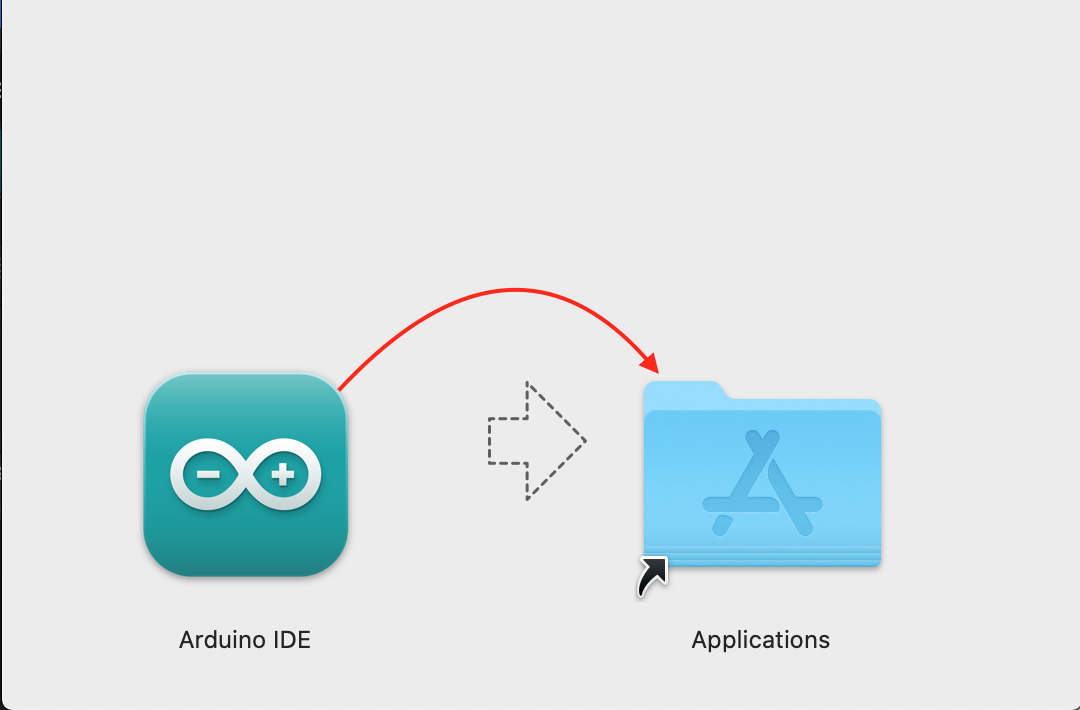
You have to move the Arduino IDE to the Applications folder on your Mac system by dragging it:
Step 4: Run the Arduino IDE Application File
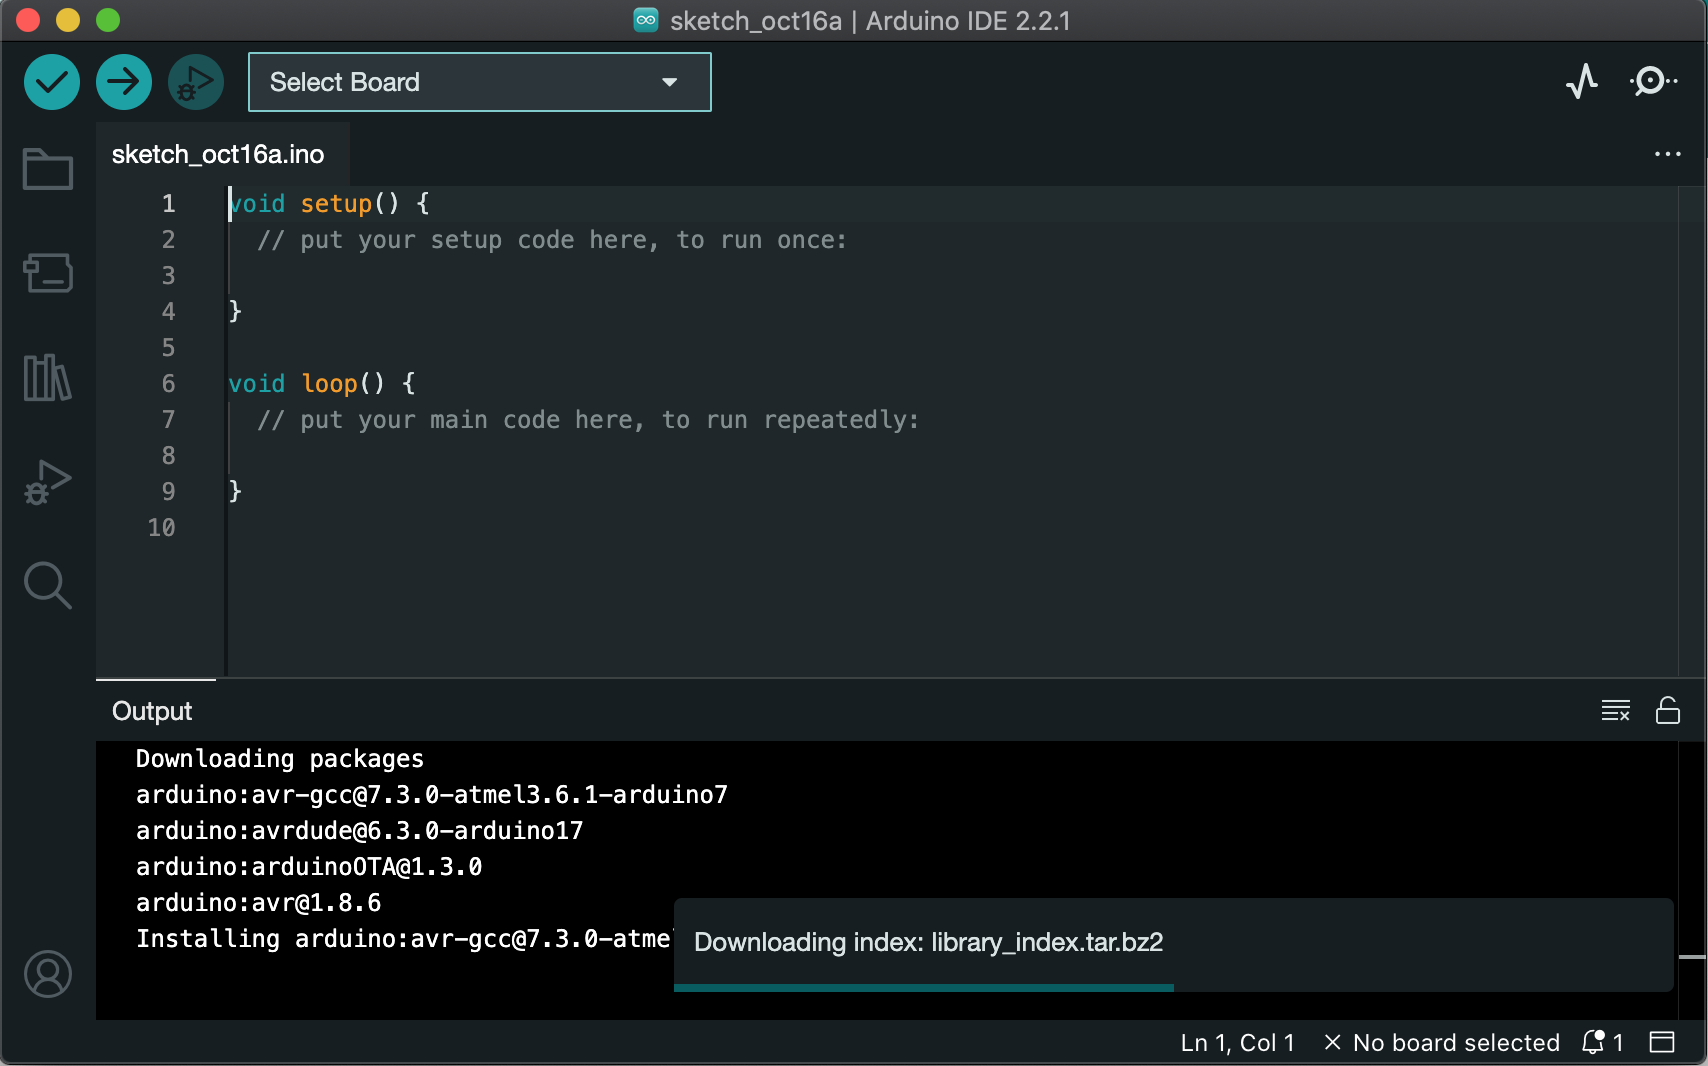
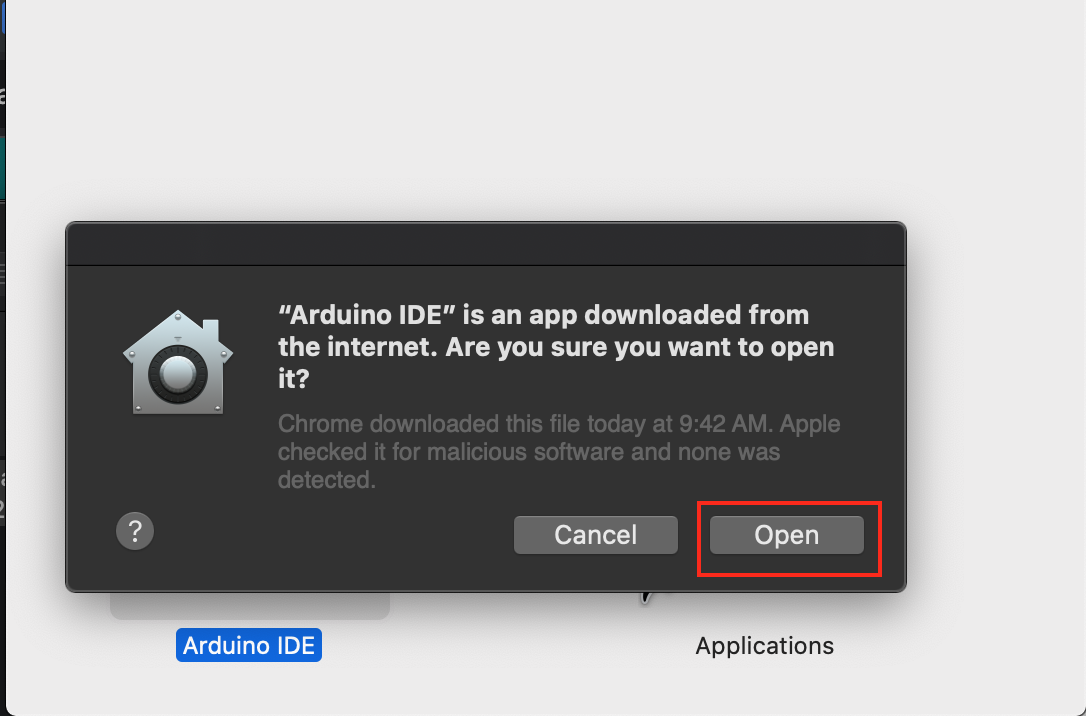
Open Spotlight Search, enter Arduino IDE and double-click the application for installation. You will see a screen prompt asking for your approval whether to open this application, do it by clicking on the Open button, as shown below:
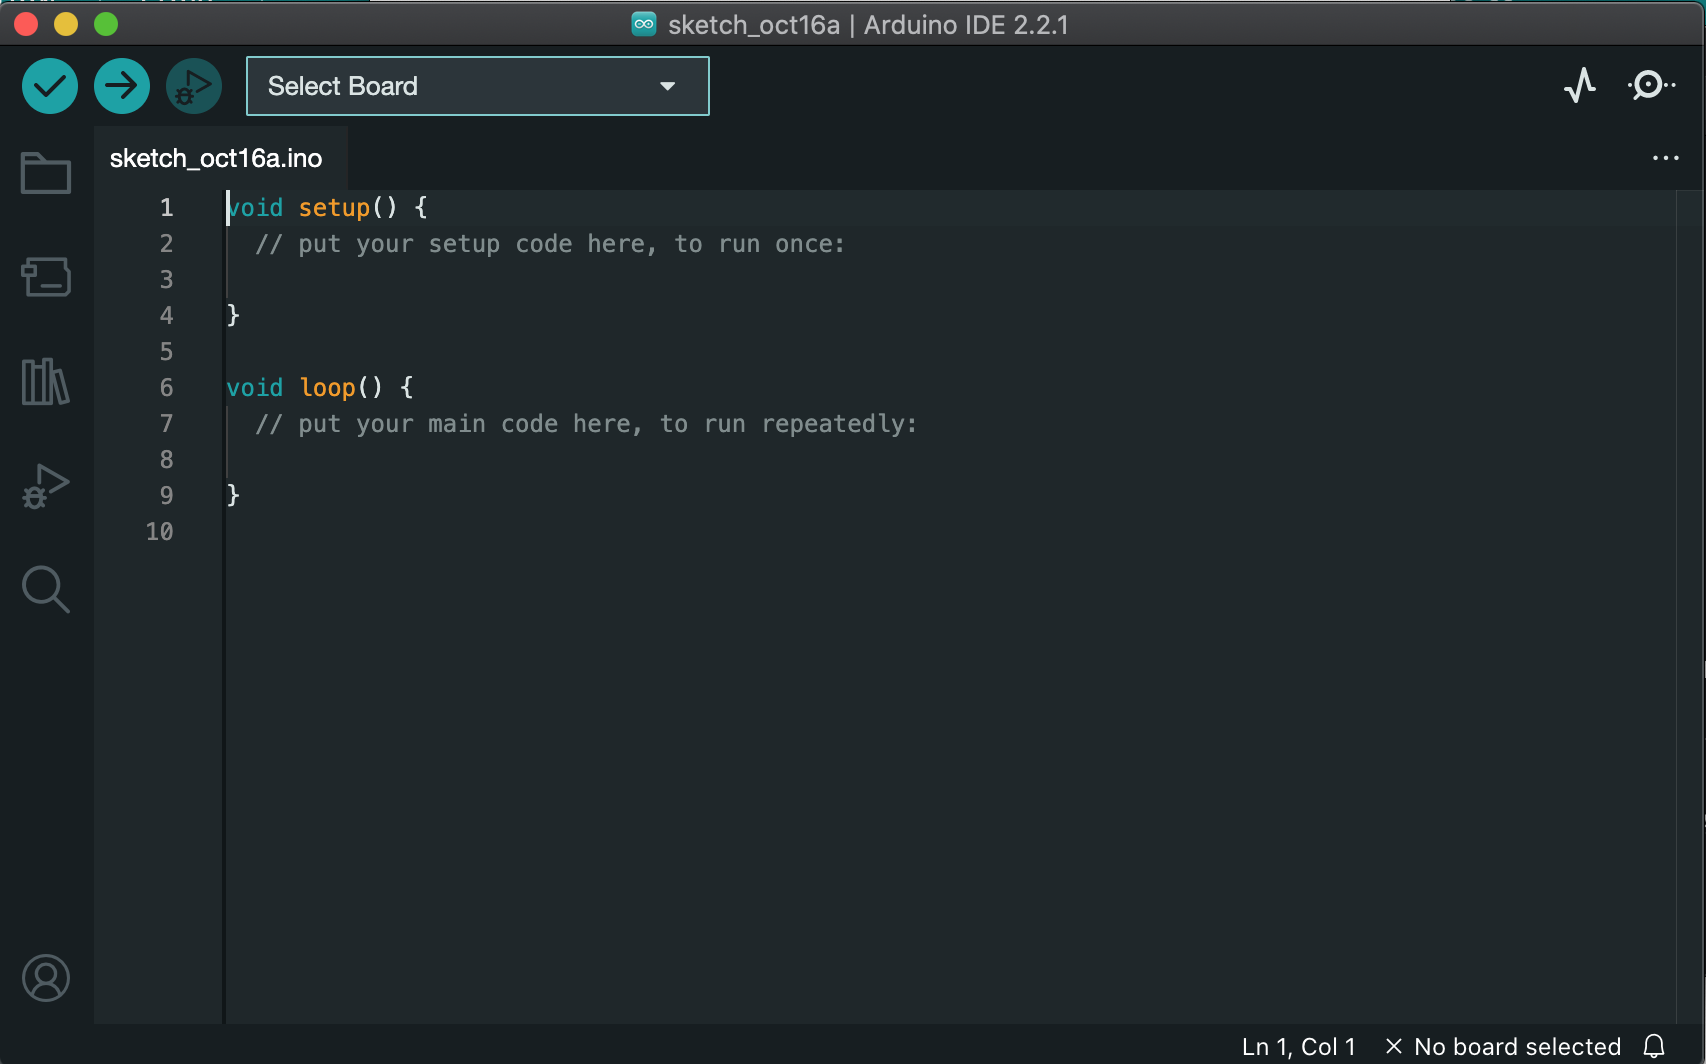
Once this is done, the Arduino IDE application will open on your desktop:
How to Remove Arduino IDE on Mac from GUI
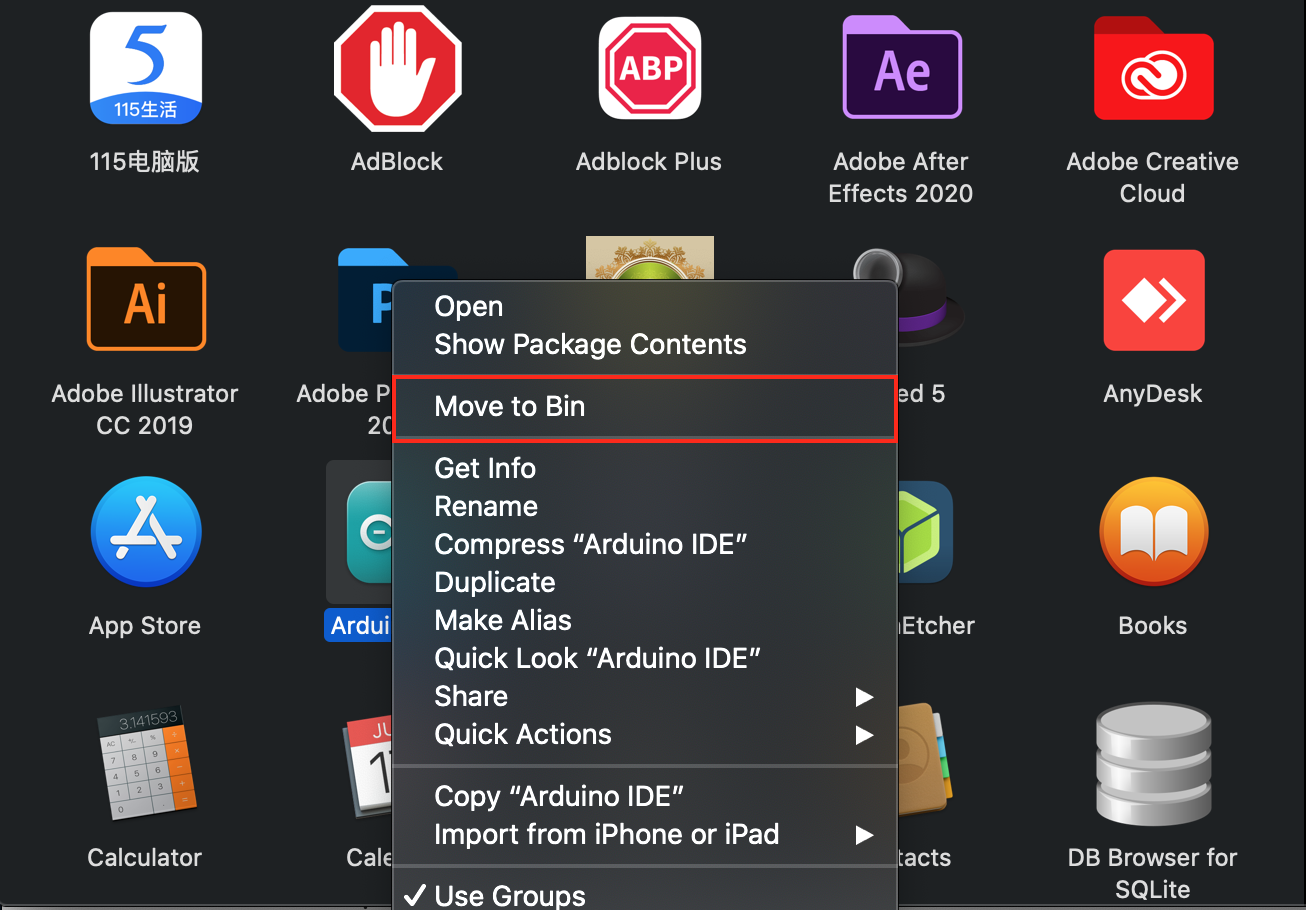
To remove Arduino IDE on Mac from GUI, simply remove the application from the Applications folder on Mac. It can be done by right-clicking on the application and then choosing the Move to Bin option to move the application to the Bin directory on the Mac system.
How to Update Arduino IDE on Mac
If you want to update the Arduino IDE on Mac, you can simply download the latest version of the .dmg file from the official website. Then run it and replace it with the previously placed application file in the Applications folder of your Mac system.
You can also reinstall the Arduino IDE on Mac from the Homebrew package manager that installs the latest version of Arduino IDE on Mac.
How to Upload Code to Arduino IDE
After installing the Arduino IDE, in case you need help uploading your first code to Arduino IDE, you can read this guide for more details.
Conclusion
Arduino IDE is an effective platform for writing codes and uploading it on the Arduino board. You can install this IDE on your Mac system either from Homebrew package manager or from GUI. The method involving Homebrew can be done with a single command. The method involving GUI requires downloading the .dmg file, then running and dragging the application to the Applications folder. After that, simply run the application to complete the installation of Arduino IDE on Mac. You will also find the methods to remove Arduino IDE from Mac in the above section of this guide.

