Keycodes in JavaScript work by assigning a particular key code value to the corresponding key. This functionality helps restrict the user from entering an invalid value, especially when filling out a form or a questionnaire. Similarly, prompting the end-user of the enabled “caps lock” when filling a case-sensitive field.
What are keycodes?
JavaScript assigns a numeric code to every key contained in a keyboard. Key codes for alphanumeric and function keys are numbered consecutively. In this blog, the working of the following keycodes against the particular keys will be explained:
| Key | Key Code |
| Tab | 9 |
| Enter | 13 |
Syntax
In the above syntax:
- “event” refers to the attached event to the particular key against the key code.
How do keycodes Work in JavaScript?
The working of keycodes can be carried out by using the “addEventlistener()” method in combination with the following methods:
Approach 1: Working of Keycodes in JavaScript Using the getElementById() Method
The “addEventListener()” method attaches an event to the element, and the “getElementById()” method accesses an element having the specified “id”. These methods can be utilized to access the input text field and detect the particular key with the help of the assigned key code and an attached event.
Syntax
In the above syntax:
- “event” indicates the attached event.
- “listener” corresponds to the function that will be invoked.
- “use” is the optional value.
In the given syntax:
- “element” corresponds to the “id” to be fetched against the particular element.
Example
Let’s focus on the below-stated example:
<h2 id="head">Detect Tab Key</h2>
let get= document.getElementById("text");
let result= document.getElementById("head");
get.addEventListener("keydown", (e) => {
if (e.keyCode === 9){
result.innerText= "Tab Key Pressed";
}
else {
result.innerText= "Tab Key Not Pressed";
}
});
In the above code-snippet:
- Allocate an input “text” field with the specified “id” and “placeholder” value.
- In the next step, include the stated heading to contain the message displayed on the Document Object Model(DOM) upon the detection of the particular key.
- In the JavaScript part of the code, access the input “text” field and the included heading by their “id’s” using the “getElementById()” method.
- After that, attach an event named “keydown” to the “input” text field using the “addEventListener()” method.
- Also, apply the “keyCode” property and assign it the key code of the “Tab” key.
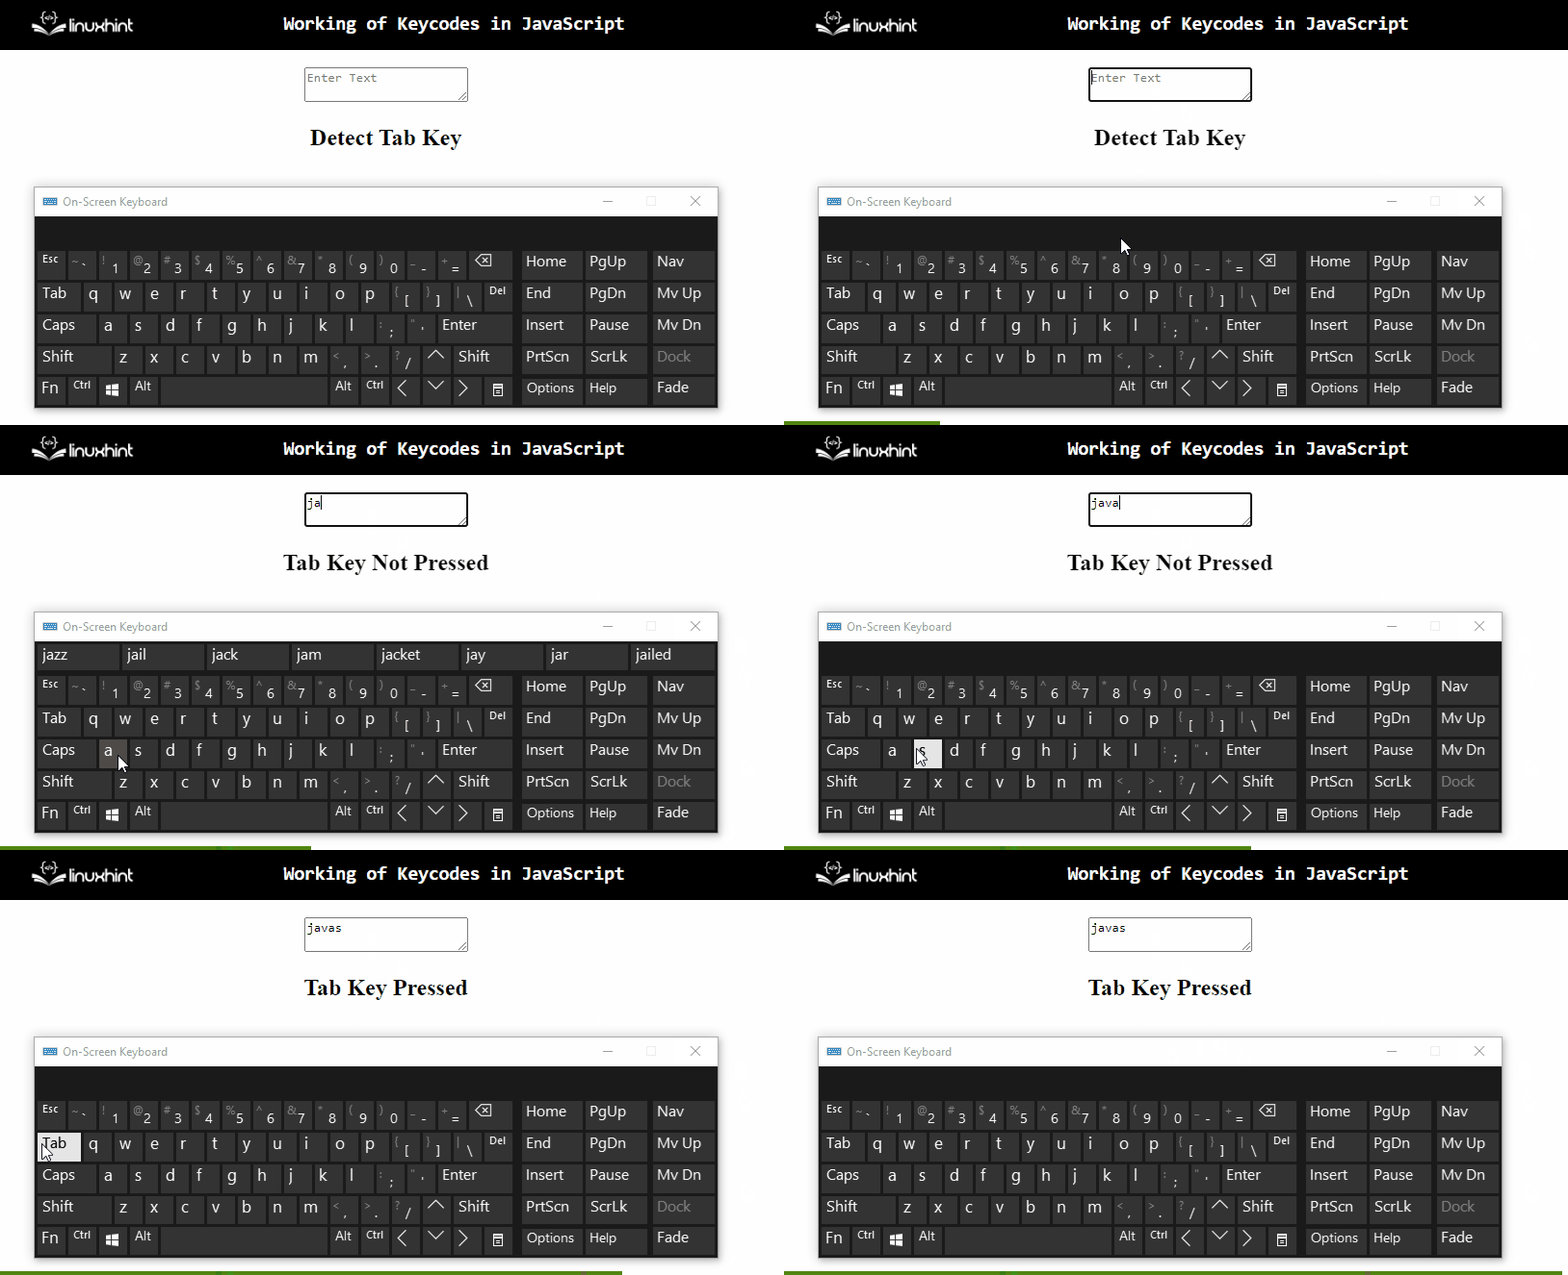
- This will result in displaying the stated message in the “if” condition as a heading upon detecting the tab key via the “innerText” property.
- In the other case, the “else” condition will execute.
Output
From the above output, it can be observed that the detection of the “Tab” key is being done successfully.
Approach 2: Working of Keycodes in JavaScript Using the querySelector() Method
The “querySelector()” method gets the first element that matches a CSS selector. This method can be utilized to similarly access the input text field and attach an event to it, resulting in the detection of the specified key based on the key code.
Syntax
In the above given syntax:
- “CSS selectors” refers to one or more than one CSS selectors.
Example
Let’s observe the following example step-by-step:
let get= document.querySelector("input");
let result= document.querySelector("h2");
get.addEventListener("keydown", (e) => {
if (e.keyCode === 13){
result.innerText= "Enter Key Pressed";
}
else {
result.innerText= "Enter Key Not Pressed";
}
});
In the above lines of code, perform the following steps:
- Recall the discussed steps for including an input text field and a heading.
- In the JavaScript part, similarly access the allocated input field and the heading using the “querySelector()” method.
- In the next step, attach an event named “keydown” to the “input” text field” using the “addEventListener()” method.
- Also, specify the “key code” of the “Enter” key via the “keyCode” property.
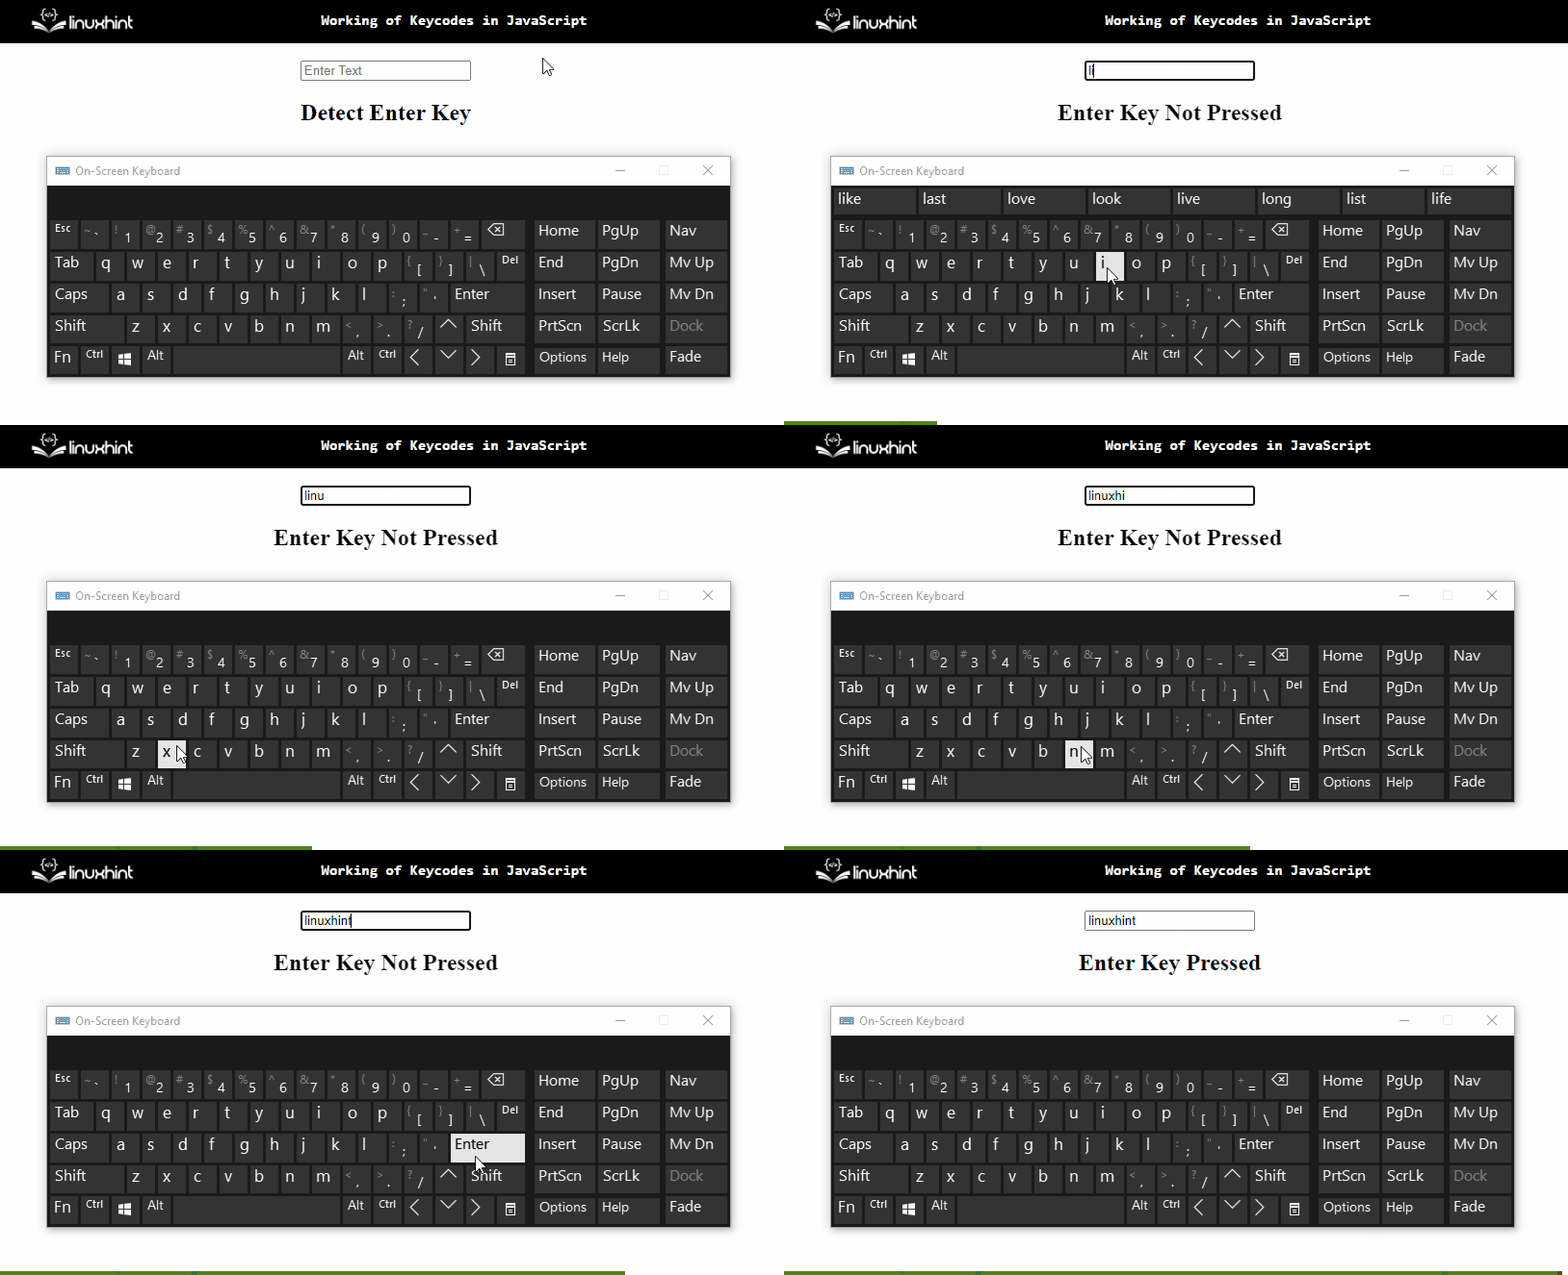
- This will result in displaying the corresponding message in the “if” condition upon the detected “Enter” key.
- In the other case, the “else” condition will remain in effect.
Output
In the above output, it can be observed that upon the detection of the “Enter” key, the heading changes, thereby making the detection successful.
Conclusion
The “addEventListener()“ method in combination with the “getElementById()” method, or the “querySelector()” method can be implemented to ensure the working of keycodes in JavaScript. The former approach can be utilized to access the input text field and detect the specific key via key code with the help of an attached event. The latter approach can be applied to access the input text field and attach an event to it, which will detect the specific key based on its key code. This tutorial explained the working of key codes in JavaScript.


