This blog will discuss how to get reaction roles on Discord with the Carl bot.
How to Get Reaction Roles on Discord with Carl Bot?
Carl bot has various features such as moderation controls, permissions management, and many more but reaction roles are one of the most popular features of the Carl bot.
Let’s check out the below instructions to understand the method of getting reaction roles on Discord with the Carl bot.
Step 1: Visit Carl Bot
First, open up your favorite browser, visit “Carl bot”, and click on the “Invite” option:
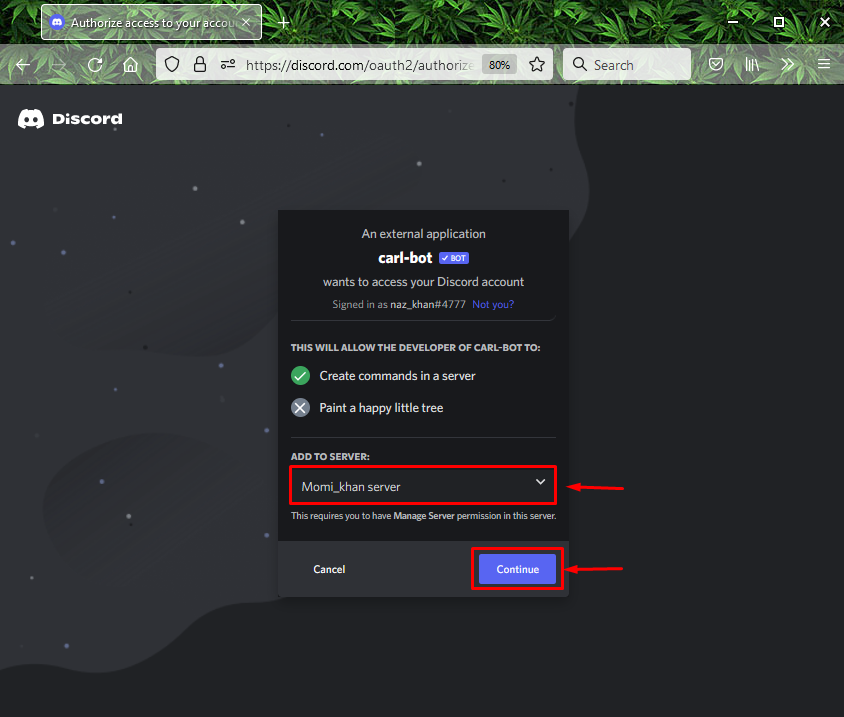
Step 2: Select Discord Server
Next, select the server to which you want to add the Carl bot and press the “Continue” button. For instance, we have selected “Momi_khan server”:
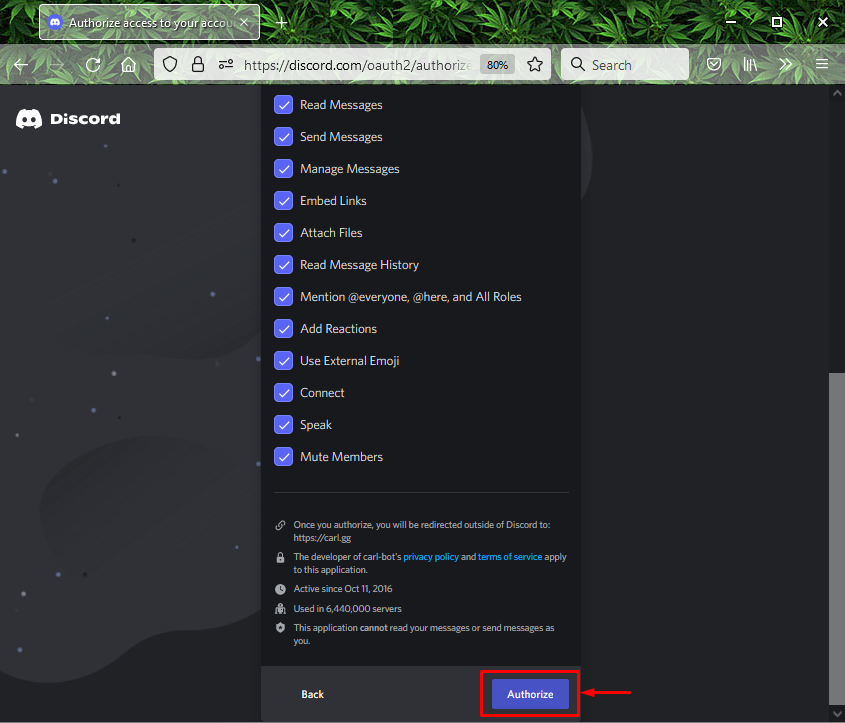
Step 3: Grant Permissions
Grant required permissions to the Carl bot and click on “Authorize”:
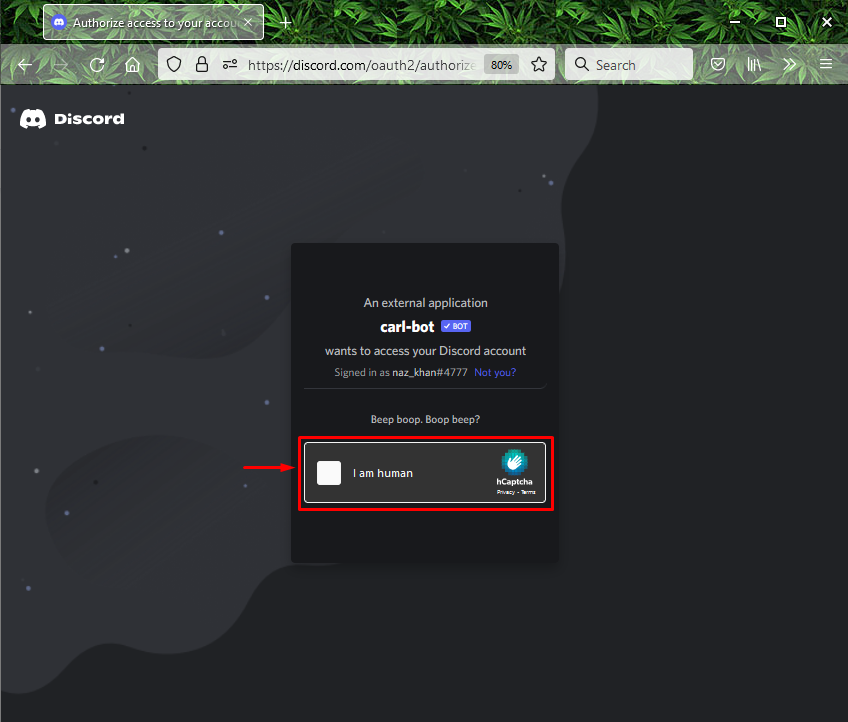
Step 4: Mark Captcha
Mark the captcha box to complete the process of adding the Carl bot:
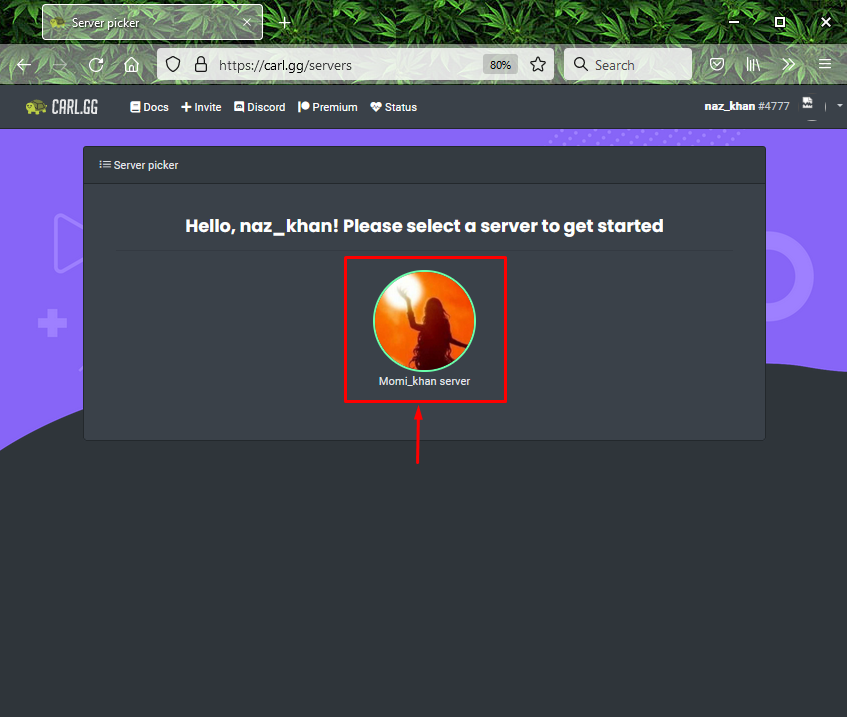
The below image indicates that “Carl bot” is successfully added to our specified server named “Momi_khan server”:
Step 5: Open Discord
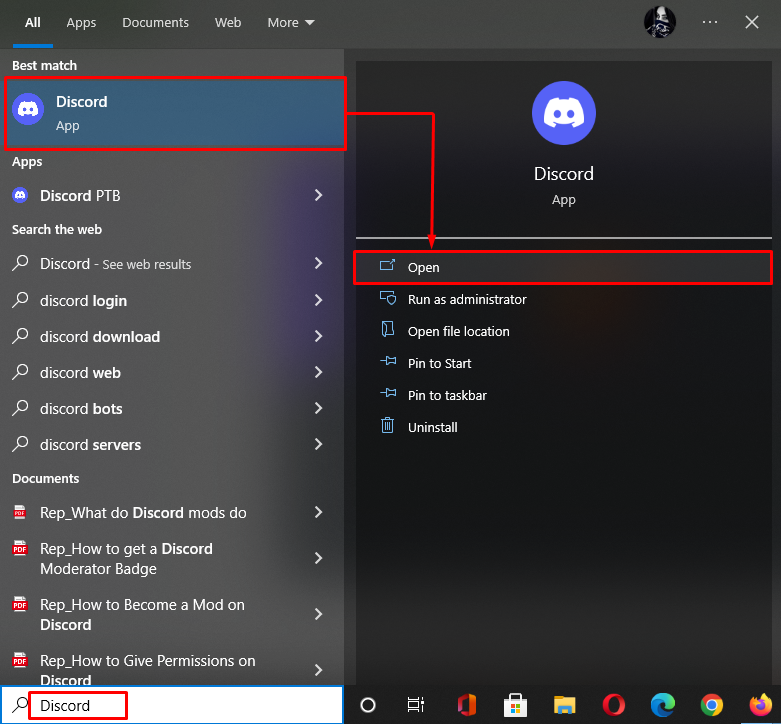
Open up the “Discord” app with the help of the “Startup” menu:
Step 6: Open Discord Server
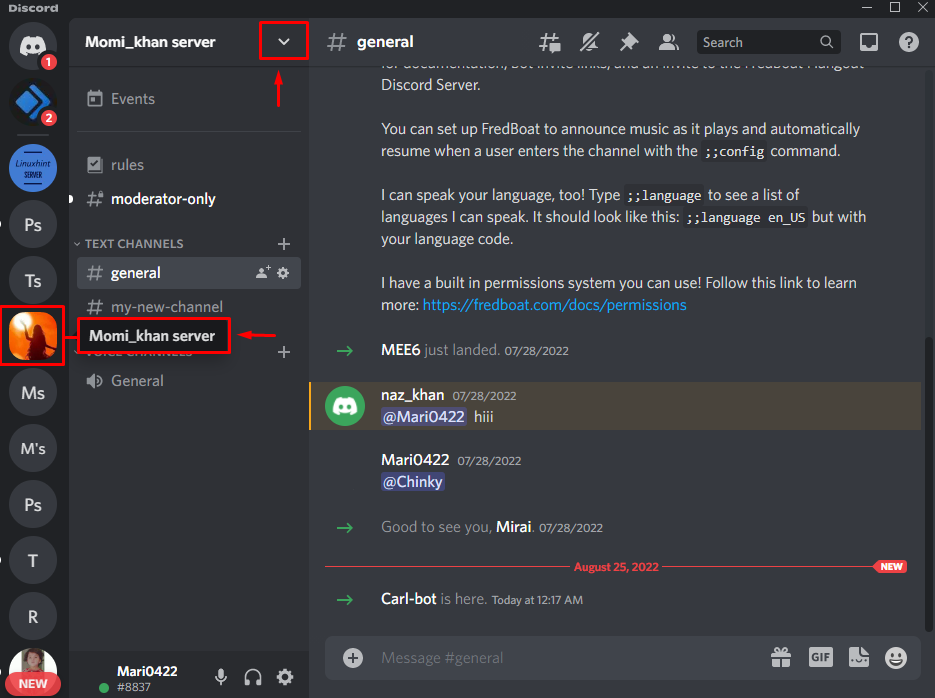
Open the server where you have invited the Carl bot and click on the below-highlighted arrow:
Step 7: Open Server Settings
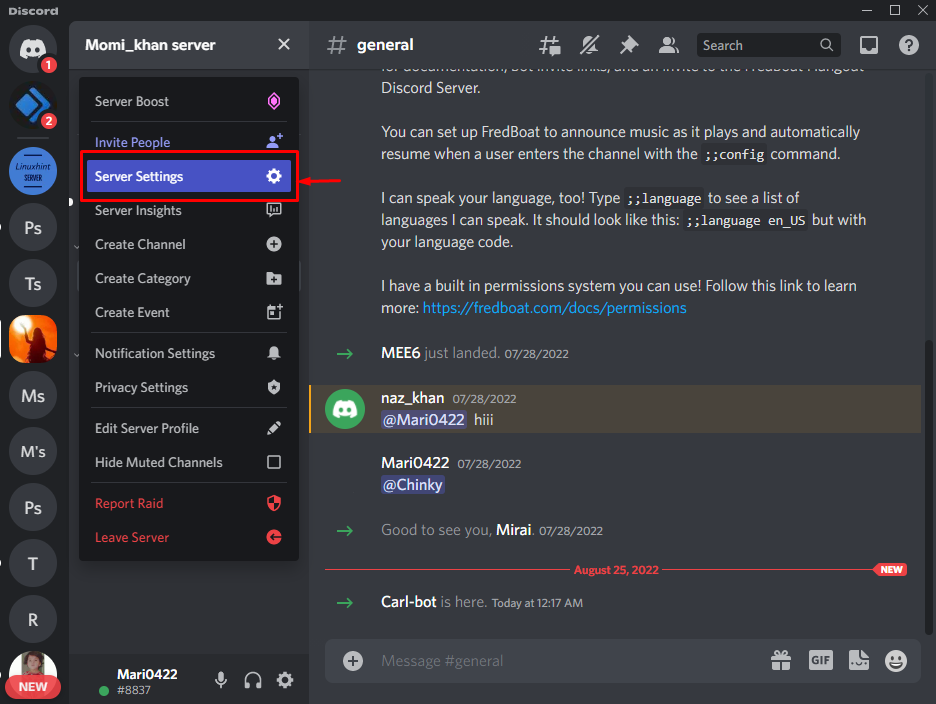
Choose the “Server Settings” option from the opened drop-down menu:
Step 8: Open Roles Settings
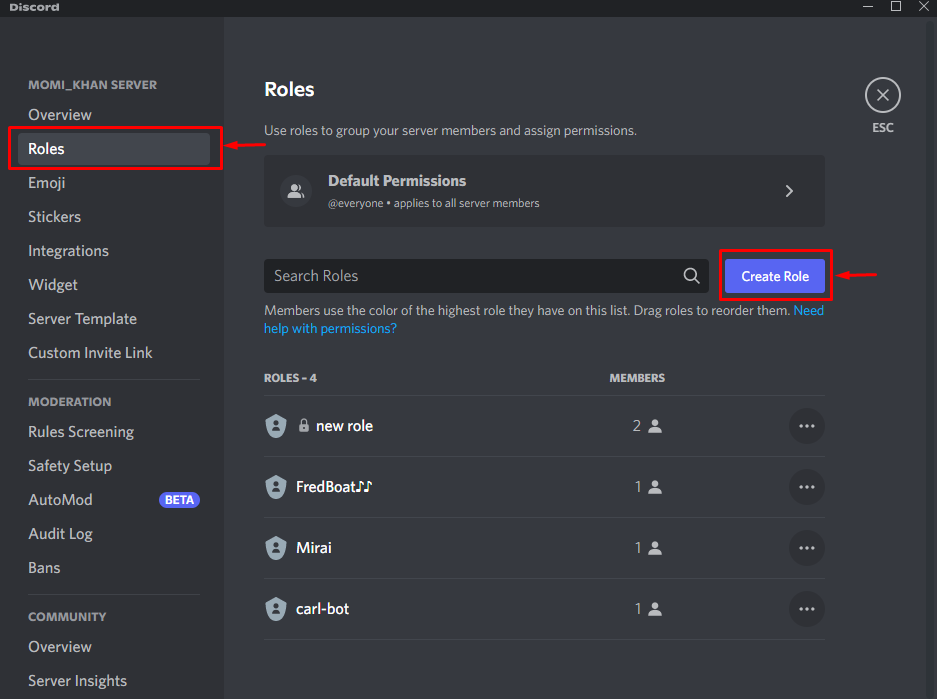
Select the “Roles” category from the sidebar and click on the “Create Role” button:
Step 9: Create Role
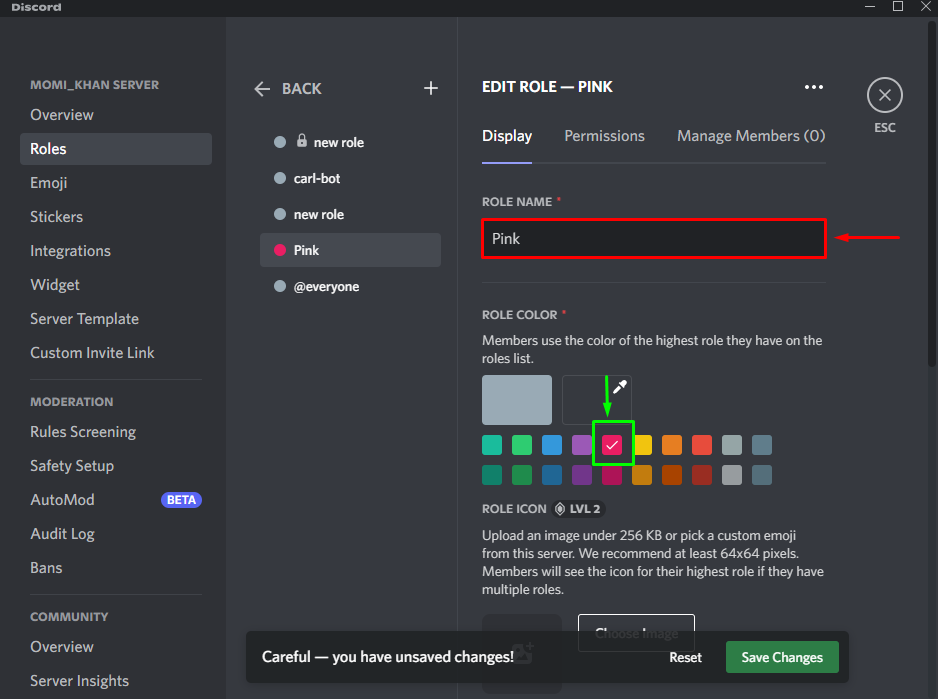
Set the role name in the “ROLE NAME” field and the role color underneath “ROLE COLOR” according to your choice. For instance, we have set our role name as “Pink”:
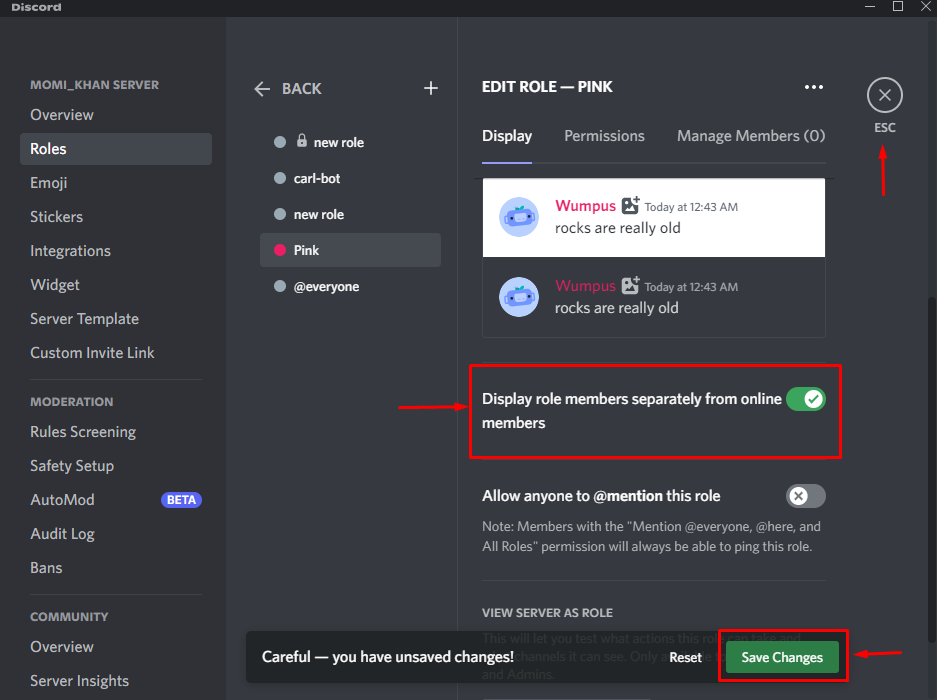
After that, scroll down the “Display” tab and turn on the highlighted toggle. Then, click on the “Save changes” button to update all changes and press the “Esc” key:
Step 10: Make Reaction Role
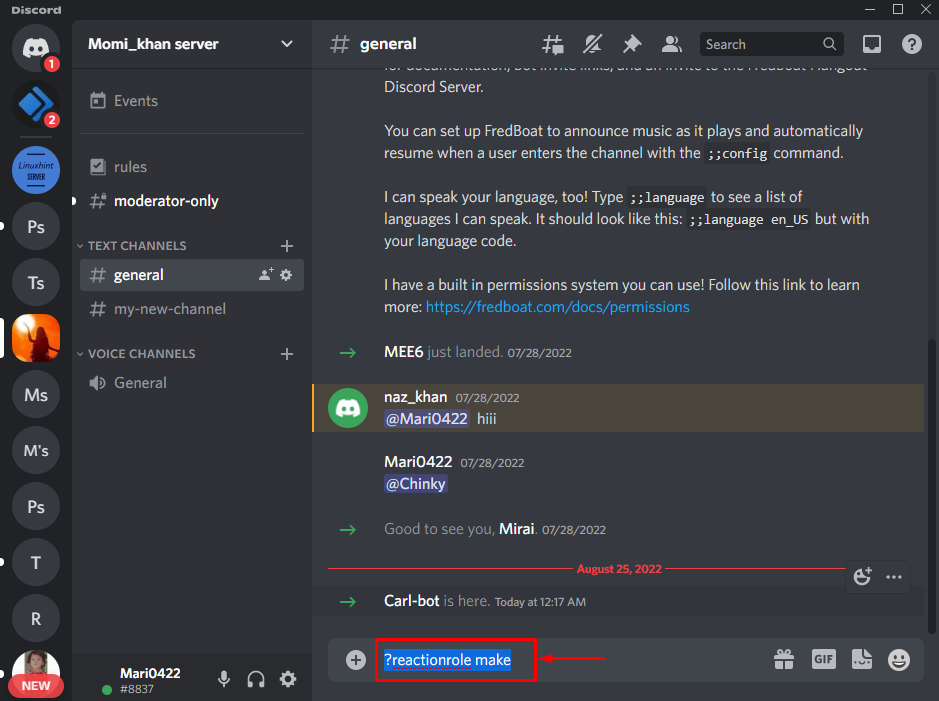
Next, go to the server where Carl bot is added, type the “?reactionrole make” command, and hit the “Enter” key:
Step 11: Select Channel
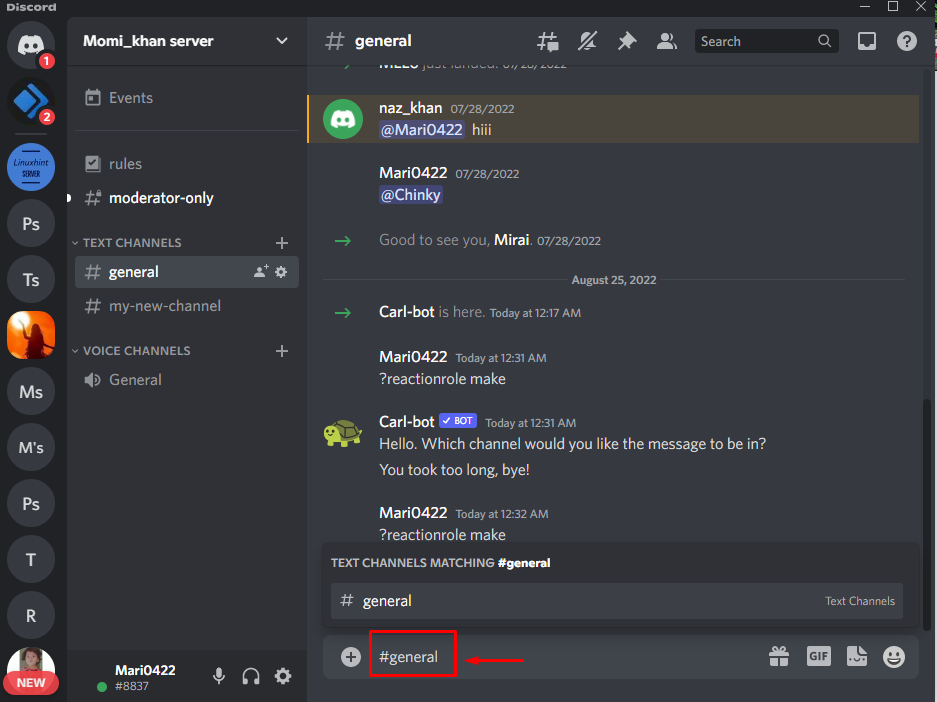
After that, you will get a message from the Carl bot asking you to choose the channel that will host your reaction roles. Select any channel and hit “Enter”. For instance, we have typed the “#general” text channel:
Step 12: Customize Reaction Role
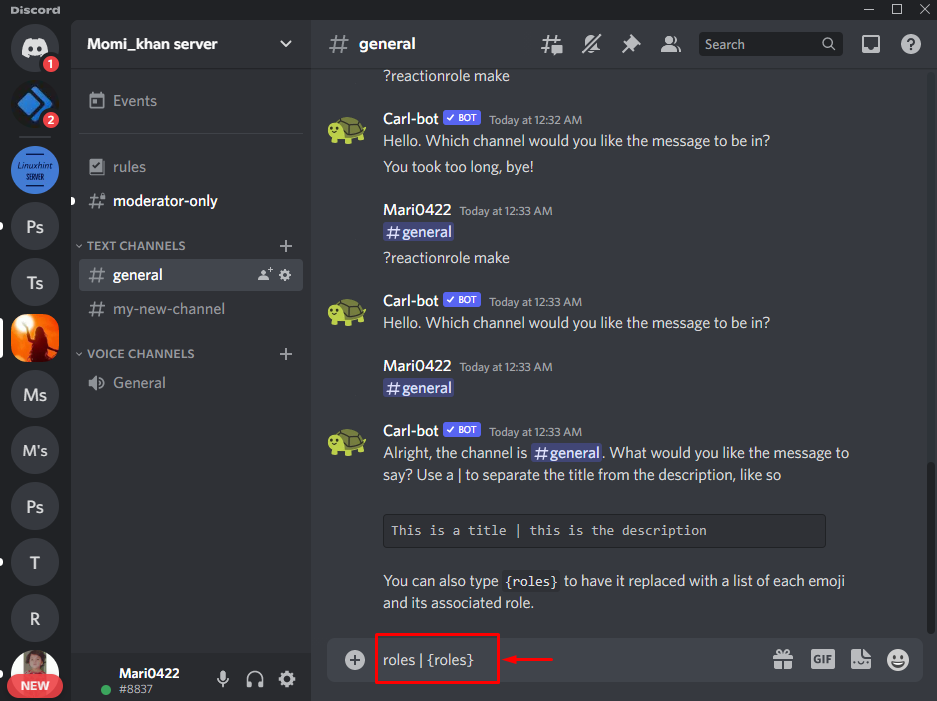
To customize the reaction role, first, type the “roles | {roles}” command, and press “Enter”:
Step 13: Add Role Color
Add the hexadecimal code of the color you want to assign to the reaction role and press “Enter”. For instance, to add a “Pink” color, we have added its hexadecimal code as “#FFCOCB”:
Step 14: Add Emoji
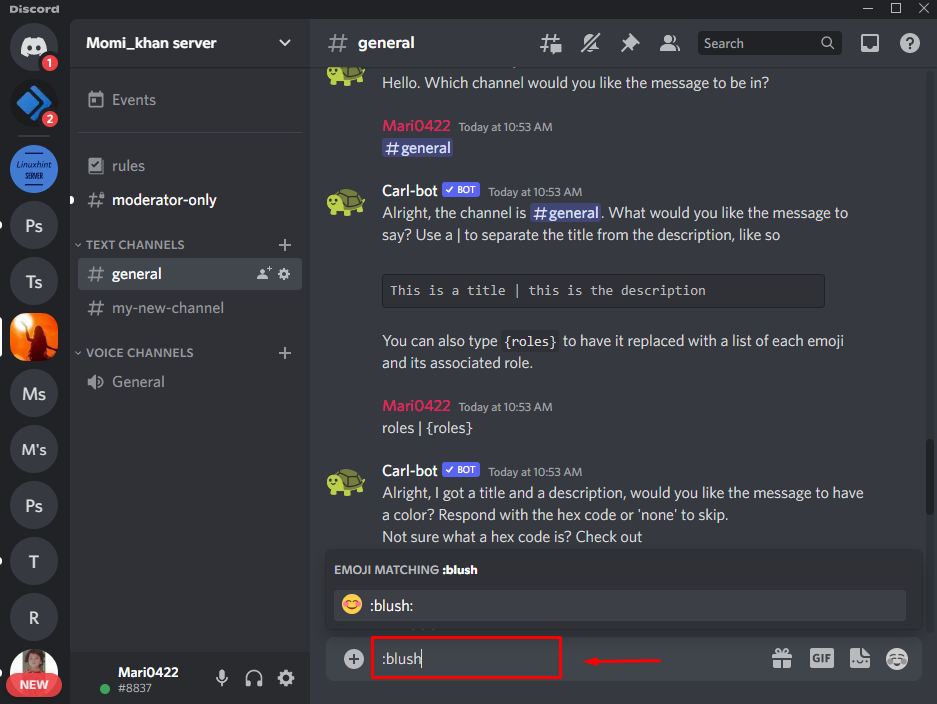
Add any emoji with the reaction role:
Step 15: Add Name
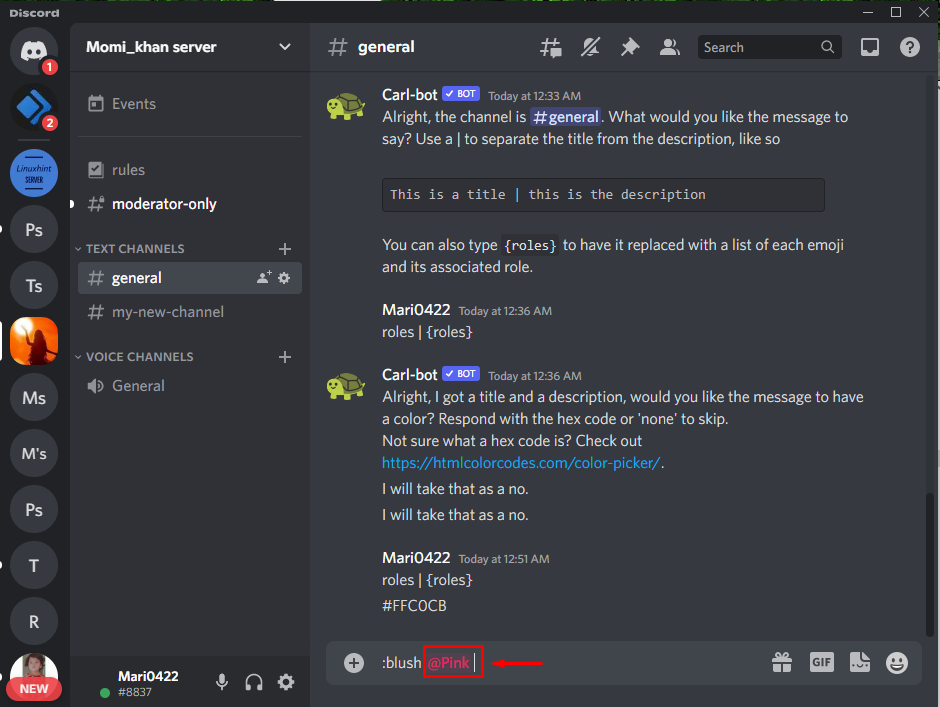
After adding the emoji, now enter the name of the role that you have created in Discord and press “Enter”:
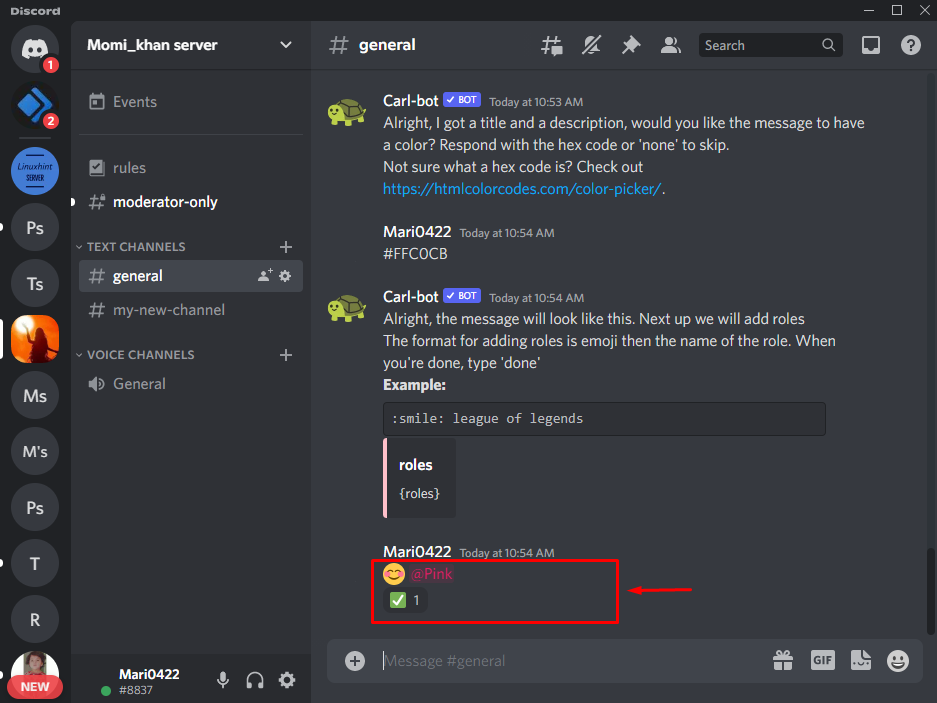
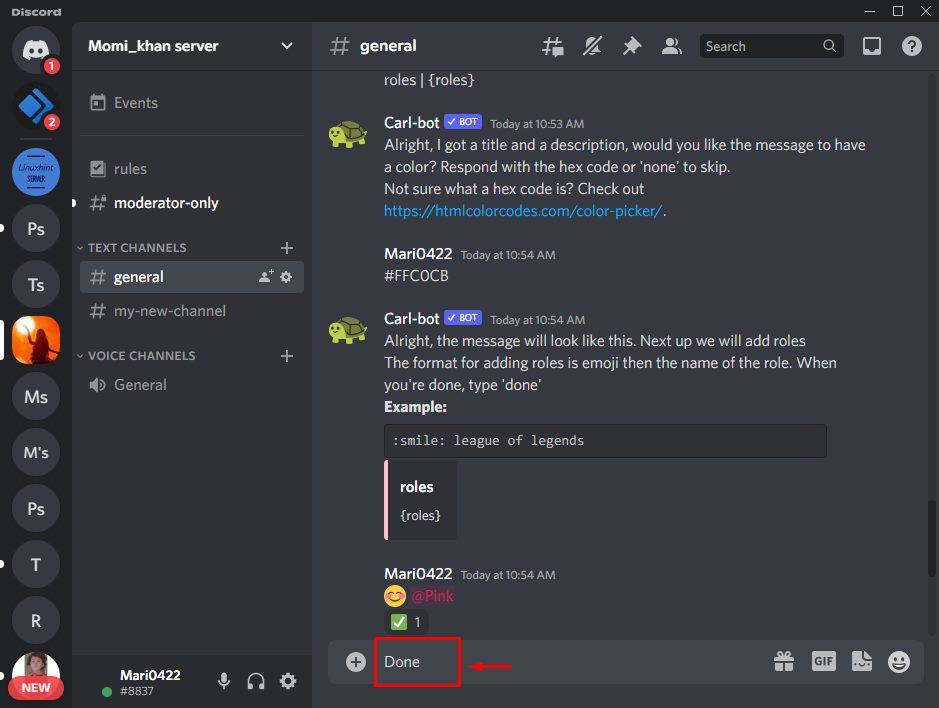
As you can see, our reaction role is successfully created:
Lastly, type “Done” and hit the “Enter” key to complete the process:
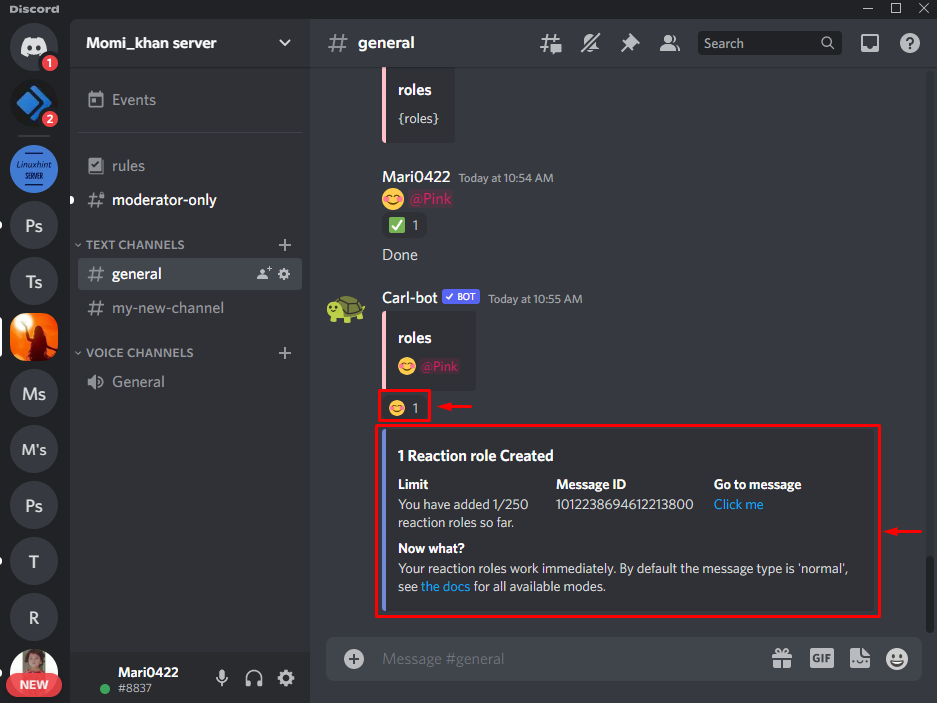
You will see a message from the Carl bot that one reaction role is created. Note that you can add a maximum of 250 roles with the help of the Carl bot:
Note: With the help of Carl bot, a new reaction role is added. Now, whenever a user joins the channel, the Carl bot immediately requests them to select a role.
That’s it! We have specified the easiest process of getting reaction roles on Discord with the Carl bot.
Conclusion
To get reaction roles on Discord with the Carl bot, first, invite the Carl bot to your selected server. After that, open the Discord server and go to its settings. Create a new role with a name and save changes. Then, type the “?reactionrole make” command in the channel text field. Next, customize the reaction role using color and emojis. Lastly, type “Done” and press “Enter”. This blog demonstrated how to get reaction roles on Discord with the Carl bot.


