This tutorial will define the process for exporting the HTML table data to Excel using JavaScript.
How to Export HTML Table to Excel Using JavaScript?
For exporting a table from an HTML to an excel spreadsheet, use the JavaScript Library “SheetJS”. It provides features to read, edit, and export spreadsheets while working in web browsers.
Add the below source of the “SheetJS” JavaScript Library in <head> tag of the project:
Let’s try an example to export an HTML table with data in a spreadsheet.
Example
First, create a table in HTML file, using <table> tag:
<thead>
<th>Id</th>
<th>Name</th>
<th>Grade</th>
<th>Roll#</th>
<th>Age</th>
</thead>
<tbody>
<tr>
<td>1</td>
<td>John</td>
<td>8</td>
<td>118</td>
<td>13</td>
</tr>
<tr>
<td>2</td>
<td>Rohnda</td>
<td>7</td>
<td>153</td>
<td>12</td>
</tr>
<tr>
<td>3</td>
<td>Stephen</td>
<td>9</td>
<td>138</td>
<td>14</td>
</tr>
</tbody>
</table>
Then, create a button by attaching an “onclick” event that will trigger the “htmlTableToExcel()” function to export the table into an Excel sheet:
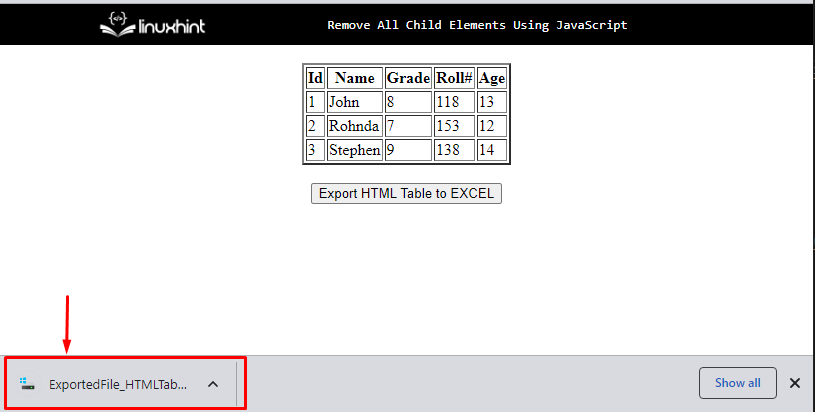
The output shows the table with data:
The JavaScript code for exporting the data table into a sheet is as follows:
var data = document.getElementById('tblToExcl');
var excelFile = XLSX.utils.table_to_book(data, {sheet: "sheet1"});
XLSX.write(excelFile, { bookType: type, bookSST: true, type: 'base64' });
XLSX.writeFile(excelFile, 'ExportedFile:HTMLTableToExcel' + type);
}
The above JavaScript code follows the given steps to export the table to the excel sheet:
- Define a function “htmlTableToExcel()” in a <script> tag or the JavaScript file by passing the “type” as a parameter.
- Then, fetch the table using its id “tblToExcl” with the help of the “getElementById()” method.
- Convert the table into a sheet by calling the “table_to_book()” method.
- Write the table data into the excel sheet and set the file’s name.
After clicking the button, the sheet will be downloaded.
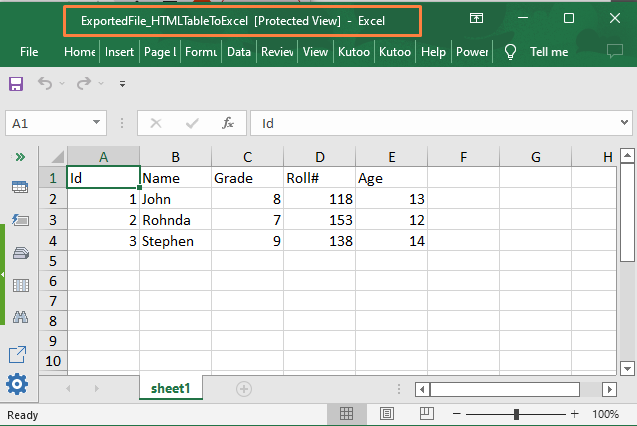
Open the downloaded file, the HTML table is now successfully exported to an excel sheet:
It is clear from the screenshot above that the data has been successfully exported to an excel file with the help of JavaScript.
Conclusion
For exporting an HTML table to an excel spreadsheet, use the JavaScript Library “SheetJS”. It offers features for reading, editing, and exporting spreadsheets while working in web browsers. Make sure that the data to be exported is written inside the HTML table. The reason is that SheetJS takes the rows and columns from the Table tags of the HTML document. This tutorial described exporting the HTML table data into an Excel sheet.


