In this guide, you will learn:
What Does the Green and Red Status LEDs Mean in Raspberry Pi
Why Is it Useful to Disable Status LEDs on Raspberry Pi
How to Disable Status LEDs on Raspberry Pi
- How to Disable Power Status LED on Raspberry Pi Using echo Command
- How to Disable Activity Status LED on Raspberry Pi Using echo Command
- How to Disable Power Status LED on Raspberry Pi Using Boot Configuration File
- How to Disable Activity Status LED on Raspberry Pi Using Boot Configuration File
- How to Disable Ethernet Status LED on Raspberry Pi Using Boot Configuration File
- How to Disable All Status LEDs on Raspberry Pi Using Boot Configuration File
- How to Disable Status LED on Raspberry Pi Using MATLAB
What Does the Green and Red LEDs Mean in Raspberry Pi
Raspberry Pi has two different color LEDs; green and red that indicate the status of the Raspberry Pi device in different ways. Both these color LEDs have different meanings and if you are new to Raspberry Pi, you should be aware of them. A detailed description of green and red LEDs in Raspberry Pi is provided here.
Why is it Useful to Disable Status LED on Raspberry Pi
Disabling the Status LEDs on Raspberry Pi is useful in terms of reducing the device’s power consumption. Since Raspberry Pi is a low-powered device, it is crucial to save the device’s power consumption so that you can perform your task efficiently. However, the major disadvantage of disabling the Status LEDs on Raspberry Pi is that you will not be able to find out whether your device is powered on.
How to Disable Status LEDs on Raspberry Pi
In general, there are two types of Status LEDs on Raspberry Pi; PWR and ACT. The PWR LED is the Power Status LED that turns on with the Raspberry Pi device. It indicates that Raspberry Pi is receiving power from the power source. While the ACT Status LED shows the activity on the device. It blinks when some activity is performed on your system, like installing applications.
You can disable Status LEDs on Raspberry Pi by:
- Using echo Command
- Using Boot Configuration File
- Using MATLAB Tool
All types of status LEDs on Raspberry Pi can be disabled through the Boot configuration file, while the ACT Status LED can also be disabled with the MATLAB tool.
How to Disable Power Status LED on Raspberry Pi Using echo Command
You can easily disable Power Status LED on Raspberry Pi using the following echo command:
Note: You can turn on the Power Status LED on Raspberry Pi anytime using the following command:
How to Disable Activity Status LED on Raspberry Pi Using echo Command
You can also use the following echo command in Raspberry Pi to disable the Activity Status LED:
Note: To enable the Activity Status LED on Raspberry Pi, you can use the following command:
How to Disable Power Status LED on Raspberry Pi Using Boot Configuration File
To disable Power Status LED (PWR) on Raspberry Pi, you can follow the steps below:
Step 1: First open Raspberry Pi terminal and use the command below to open Boot configuration file in nano editor:
Step 2: Then inside the Boot configuration file, add the following lines at the end of the file:
dtparam=pwr_led_activelow=off
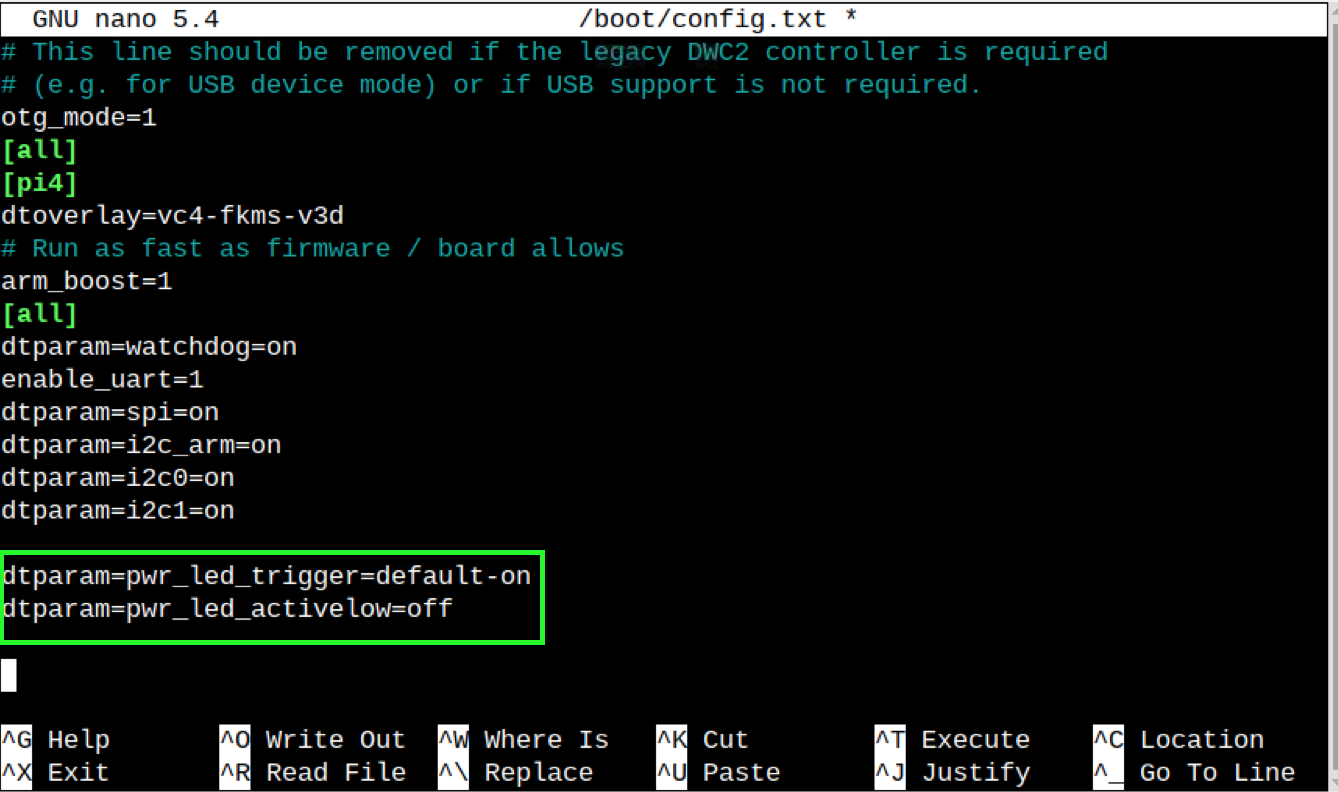
Step 3: Save the file by using CTRL+X, press Y and enter to exit, then reboot the device to disable the Power Status LED on Raspberry Pi.
Note: You can enable the Power Status LED on Raspberry Pi by removing the added lines from the Boot configuration file.
How to Disable Activity Status LED on Raspberry Pi Using Boot Configuration File
The Activity Status LED on Raspberry Pi is responsible for various activities performed on the Raspberry Pi SD Card. It remains static when the SD Card is connected to Raspberry Pi, but blinks when it detects any activity on the system. Disabling the Activity Status LED on Raspberry Pi is as simple as disabling the Power Status LED and can be done using the following steps:
Step 1: First, use the following command to open Boot configuration file on Raspberry Pi:
Step 2: Then add the following lines at the end of the Boot configuration file:
dtparam=act_led_activelow=off
Step 3: You should save this file using CTRL+X, add Y and press Enter, then reboot the device to make the changes.
Note: You can enable the Activity Status LED on Raspberry Pi any time by removing the added lines from the Boot configuration file.
How to Disable Ethernet Status LED on Raspberry Pi Using Boot Configuration File
On Raspberry Pi, there are two types of Ethernet Status LEDs as well at the back of the Ethernet port; LNK and ACT. The green one (LNK) shows the Ethernet connection status, which blinks if Internet activity is performed on the device through Ethernet. While the amber one (ACT) indicates the speed of the connection used in Raspberry Pi devices. You can disable both by opening the boot configuration file in the same way you did in the above methods. Then add the following lines inside the file and save it.
dtparam=eth_led1=4
# Disable Ethernet ACT LED
dtparam=eth_led0=4
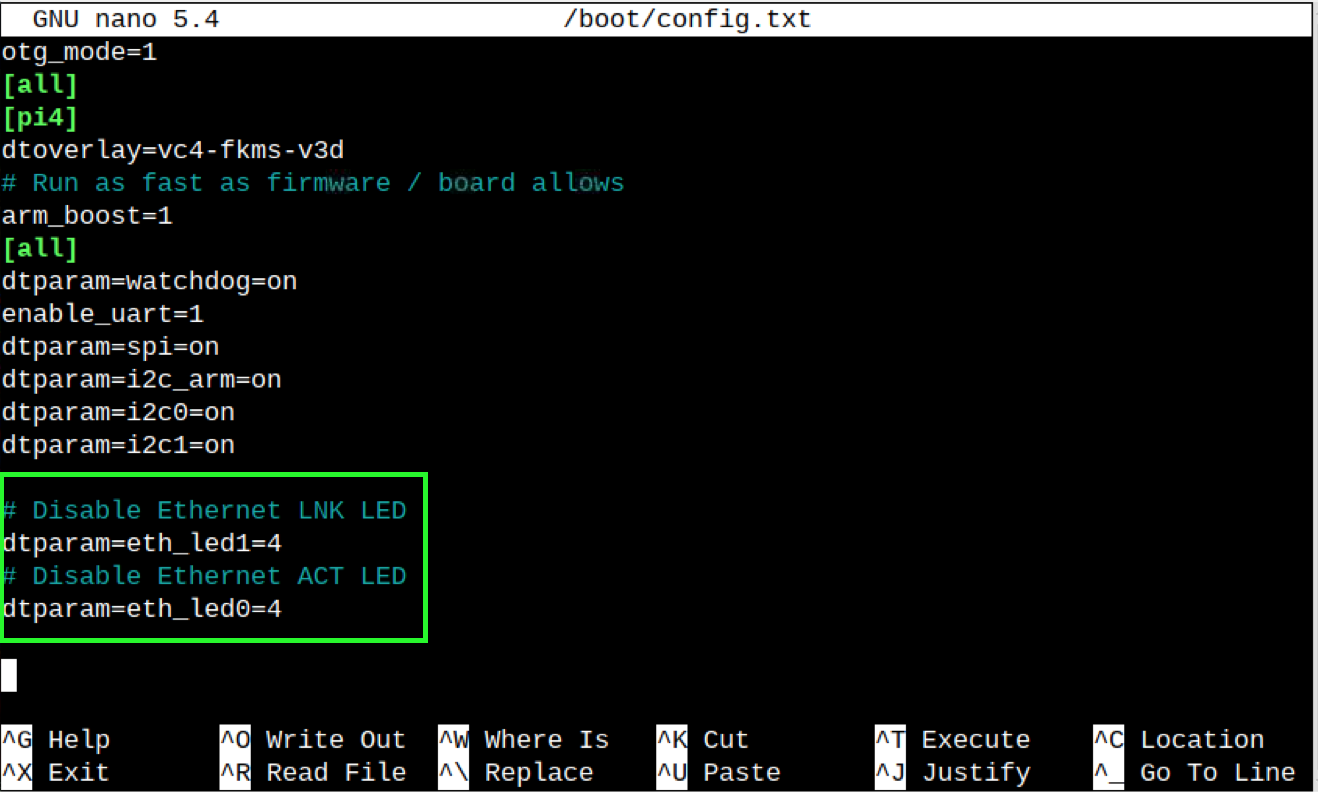
Save the file using CTRL+X, add Y, and press Enter and reboot the device to make the changes.
How to Disable All Status LEDs on Raspberry Pi Using Boot Configuration File
You can also disable all Status LEDs on Raspberry by adding all the lines used in the above-mentioned methods inside the boot configuration file.
How to Disable Status LED on Raspberry Pi with MATLAB
MATLAB is an effective and widely used tool used by engineers and mathematicians to perform complex calculations. It uses the MATLAB programming language to perform a wide range of complex tasks within seconds. With MATLAB, you can also disable the Activity Status LED on Raspberry Pi, this can be done using the following steps:
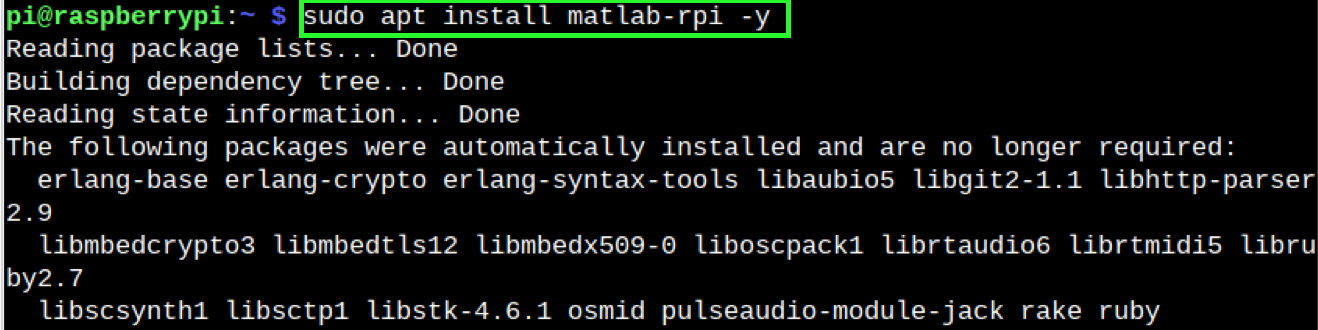
Step 1: Install matlab-rpi Package on Raspberry Pi
First, install matlab-pi package on Raspberry Pi system using the following command, as it will be required for connecting Raspberry Pi with MATLAB:
Step 2: Configure MATLAB Rpi Setup
After installing the matlab-rpi on Raspberry Pi, you have to configure it using the following command:

You must provide a name for your Raspberry Pi and enable peripherals on your Raspberry Pi:

You should also provide MathWorks Account credentials to complete the installation. If you are new to MATLAB, you can create an account from here.

Step 3: Open MATLAB Online or MATLAB Desktop
Now open MATLAB Online or install MATLAB desktop according to your system from the official MATLAB from here. If you are using MATLAB Online, you should sign in to the MathWorks account using your credentials.
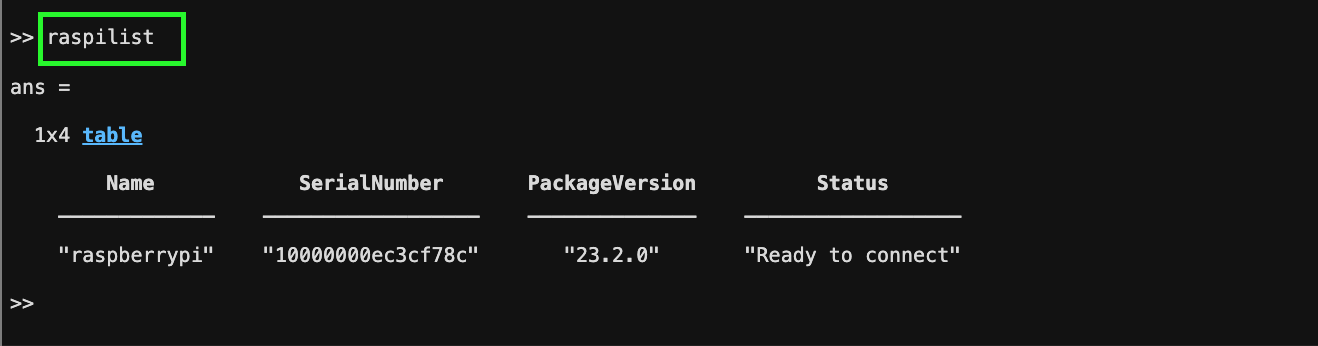
Step 4: Scan for Raspberry Pi Hardware
In the MATLAB’s Command Window, enter the following command to scan for Raspberry Pi hardware:
After entering the command, you will see your Raspberry Pi device in the list, which is ready to connect.
Step 5: Create Connection with Raspberry Pi
Now use the raspi command without any parameter to create a connection with Raspberry Pi:
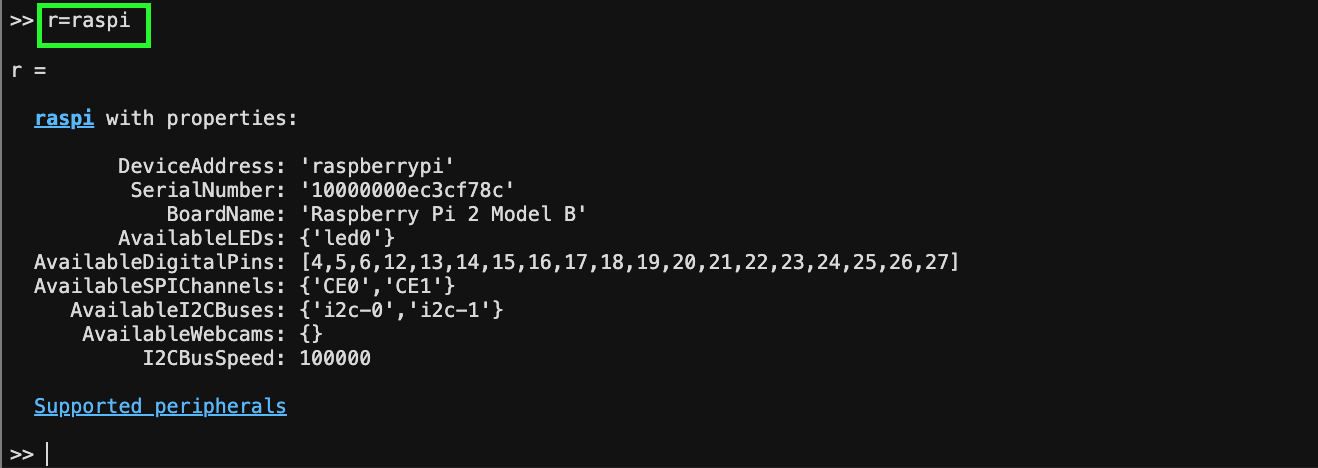
Note: You can also specify the name of your Raspberry Pi device that you have set in the Step 2, this can be done from the following command:
Or
Ensure using the same name or serial number for your device provided to you.
Step 6: Ensure Device is Connected
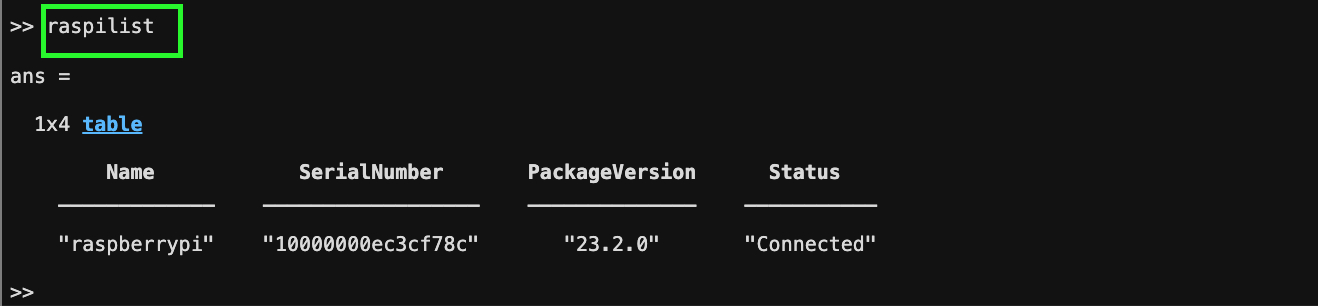
To confirm whether your Raspberry Pi device is successfully connected to MATLAB, you can run the following command again:
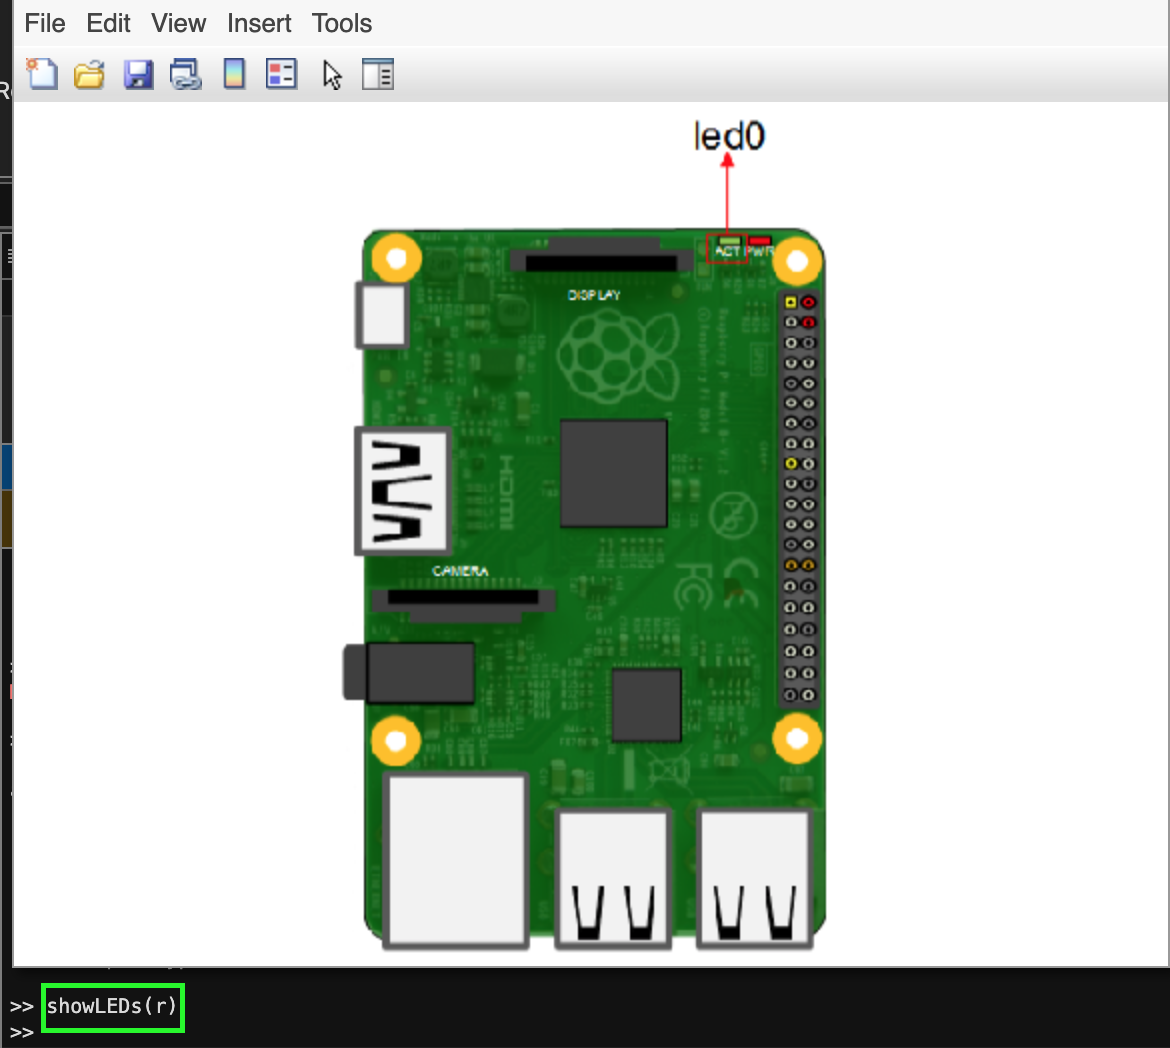
Step 7: See Raspberry Pi LED
To view Raspberry Pi LED in MATLAB, you can use the following command with the variable where you Raspberry Pi information is stored:
Step 8: Disable Activity Status LED on Raspberry Pi
To disable Activity Status LED on Raspberry Pi, you can use the following command:
Conclusion
Disabling Status LEDs on Raspberry Pi is helpful for saving the device’s power consumption; however, it can be a disadvantage too. The reason is you will not be able to find out whether your device is powered on until you have set up a desktop environment. You can disable Status LEDs on Raspberry Pi directly through the echo command. However, this method only disables the Power and Activity Status LEDs on Raspberry Pi. You can use the Boot configuration file and add a few lines to disable Power, Activity and Ethernet LEDs separately or simultaneously at the same time. You can also use the built-in MATLAB function to disable the Activity Status LED on Raspberry Pi. You will find a detailed description of all the aforementioned methods in the above-sections of this guide.