In this guide, you will learn in detail how to SSH into a Raspberry Pi to remotely control your Raspberry Pi device.
Guide Outline:
- How to SSH into a Raspberry Pi
- How to SSH into a Raspberry Pi without Password
- How to SSH into a Raspberry Pi Outside Local Network
- How to Limit Number of Users for SSH into a Raspberry Pi
- How to Allow Only Specific User to SSH into a Raspberry Pi
- How to Block a Specific User to SSH into a Raspberry Pi
- How to Change Port Number for SSH into a Raspberry Pi
- How to Lock Users for Trying Multiple Attempts to SSH into a Raspberry Pi
- How to Enable Login as a Root for SSH into a Raspberry Pi
- How to Enable Password Authentication for SSH on Raspberry Pi
- Conclusion
How to Enable SSH on Raspberry Pi
Like other Linux based systems, the Raspberry Pi has also disabled the SSH service by default to keep your system safe from unauthorized access. However, you can enable the SSH service on your Raspberry Pi system anytime by using:
How to Enable SSH on Raspberry Pi from GUI
The Raspberry Pi system includes a pre-built Raspberry Pi configuration settings that allows you to configure your system with various options. Within these options, you will also find an SSH option that can be enabled or disabled any time.
To enable SSH on Raspberry Pi, you can open Raspberry Pi configuration from the GUI using the following steps:
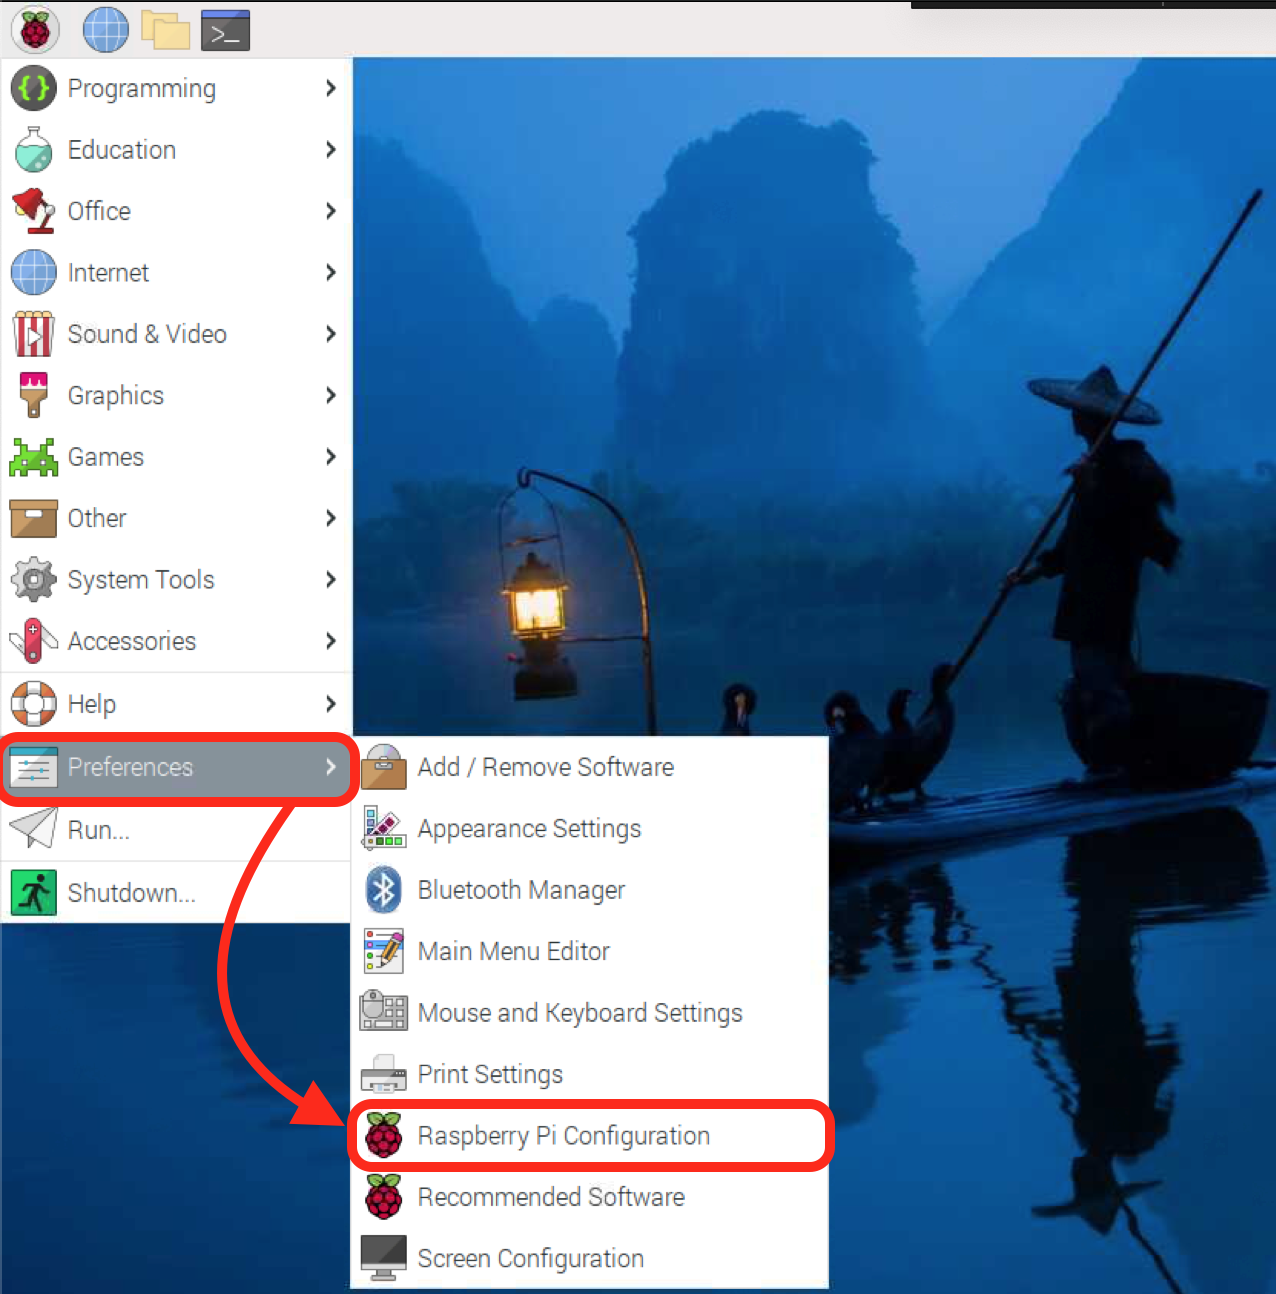
Step 1: First, click on the Raspberry Pi icon on the top left side of your screen to open Raspberry Pi menu:

Step 2: Navigate to the Preferences menu and then select the Raspberry Pi Configuration option:
Step 3: Head towards the Interfaces tab, there navigate to SSH option and move the toggle button to right to enable the SSH on Raspberry Pi:
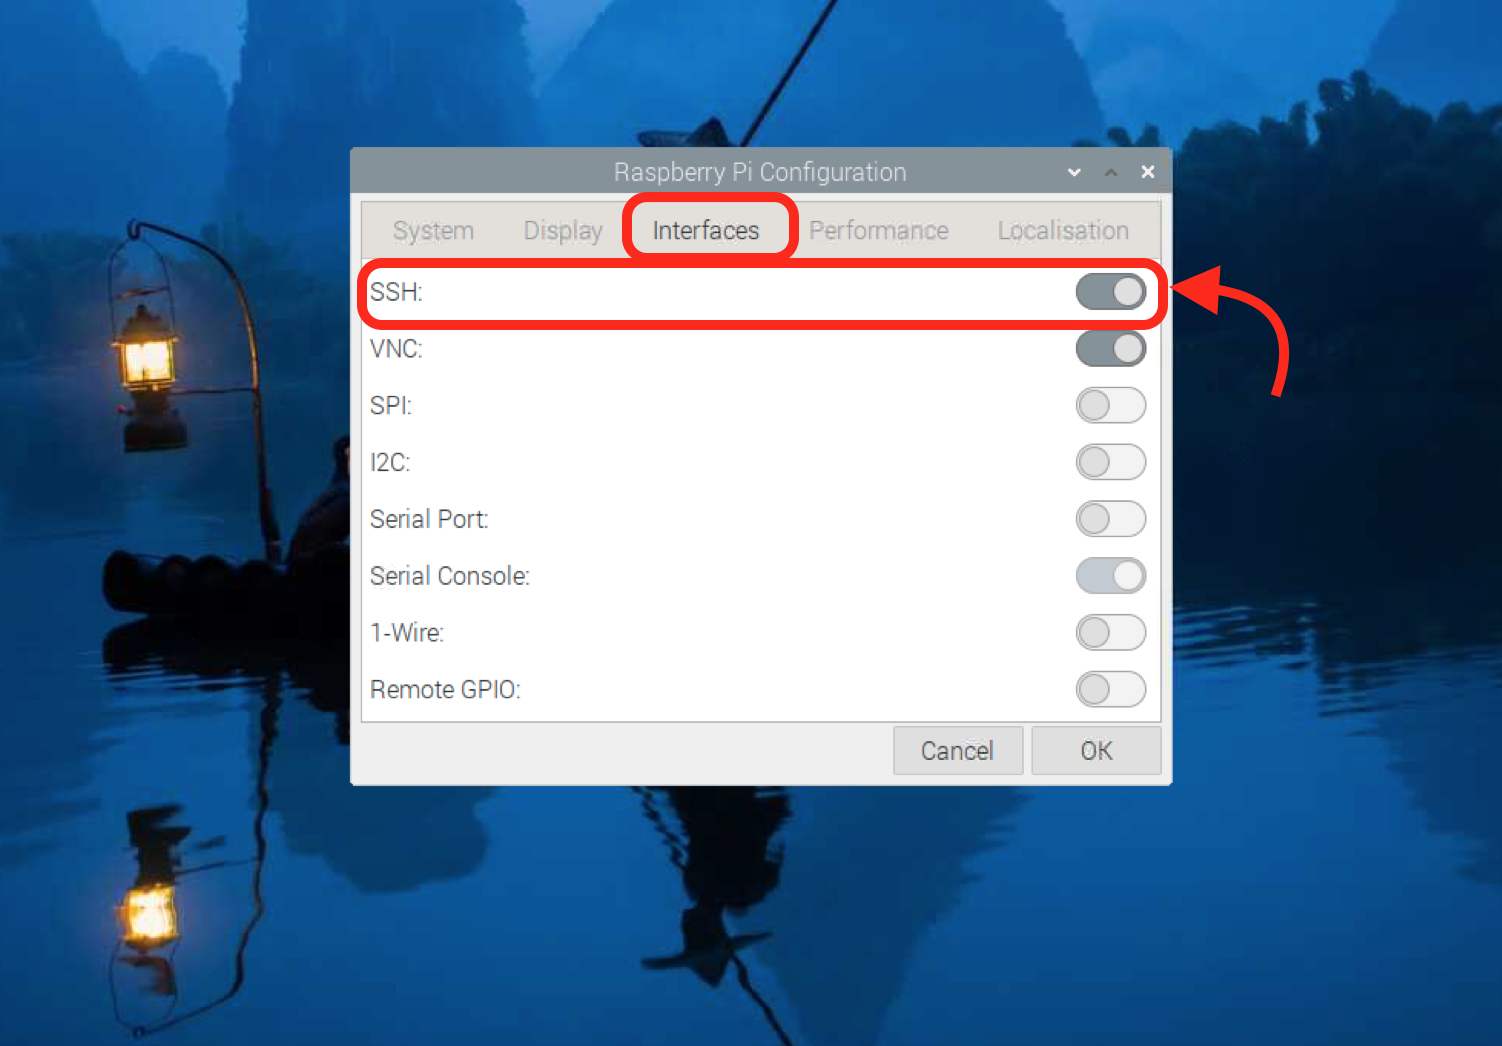
Note: You must click on the OK button or close the Raspberry Pi Configuration using the x button.
How to Enable SSH on Raspberry Pi from Terminal
You can also enable SSH on Raspberry Pi by opening the Raspberry Pi configuration on the terminal. This method will help users who are using the Raspberry Pi Lite version on their devices because the above GUI method will work for desktop users only.
To enable SSH on Raspberry Pi from terminal, follow the below-given steps:
Step 1: Use the following command with sudo to open Raspberry Pi configuration on the terminal:
If you don’t use sudo with raspi-config command, you will encounter the “Script must be run as root” error, as shown below:

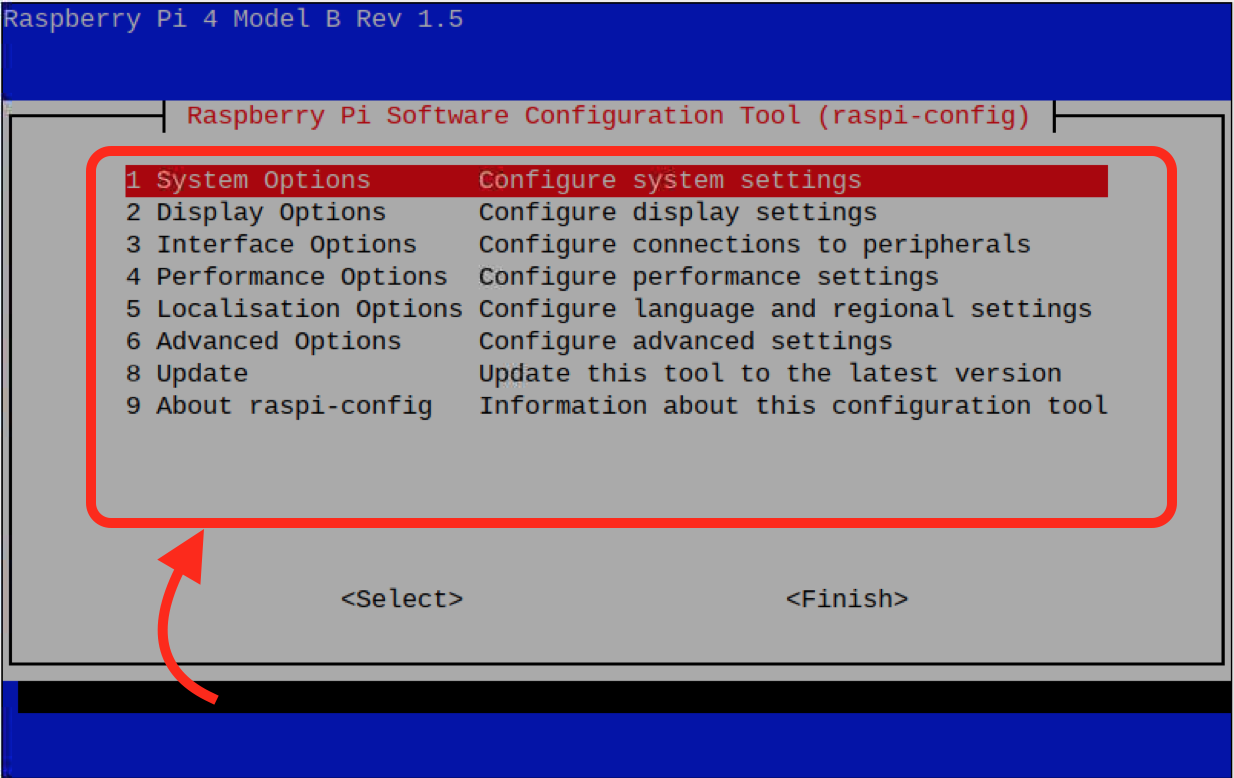
Step 2: Now use the down arrow key from the keyboard to navigate to Interfaces Options:

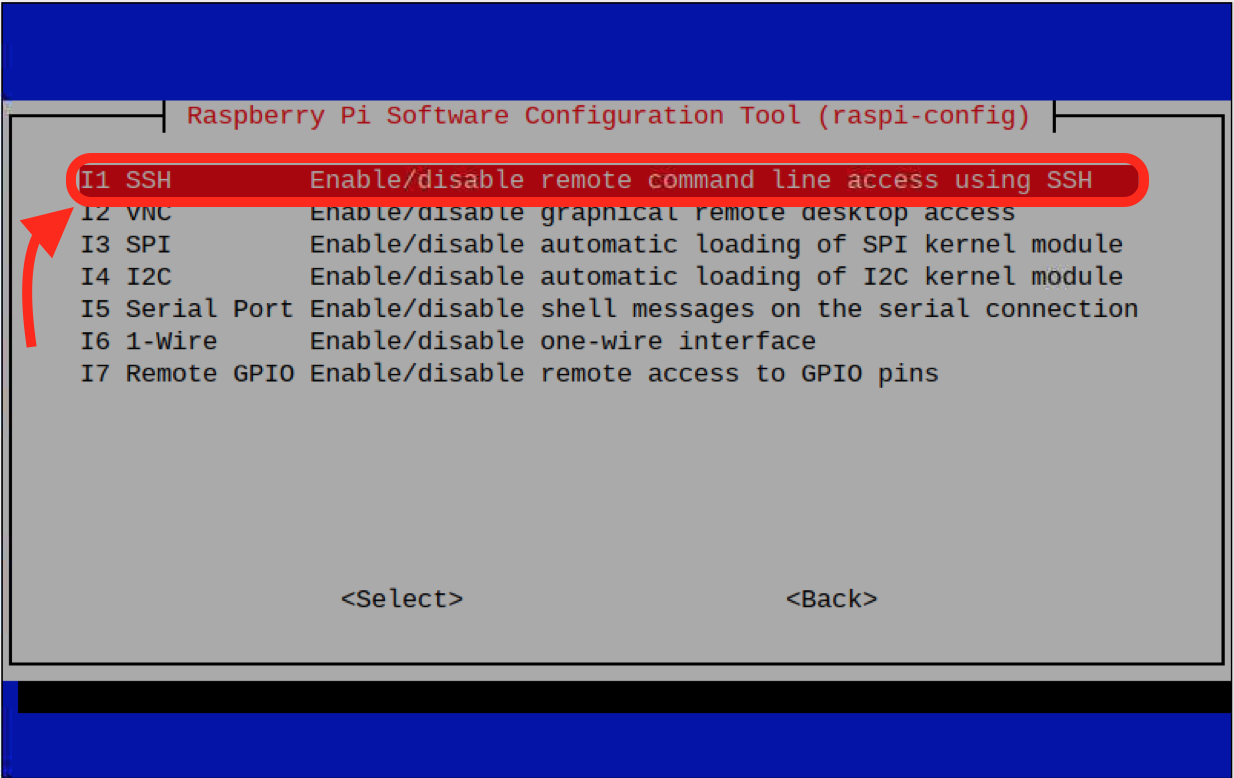
Step 3: Select the SSH option from the Interfaces menu:
Step 4: Select “Yes” option using the Enter button or Spacebar button from the keyboard:
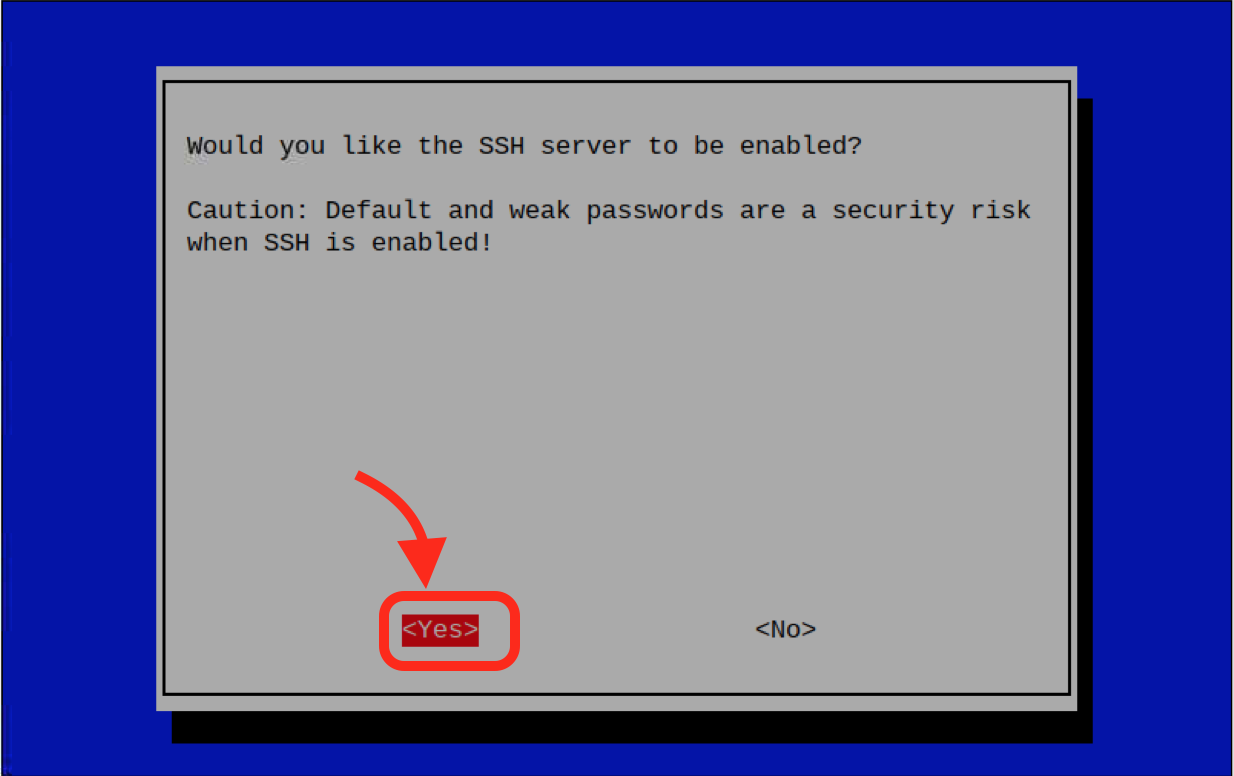
Once done, you will see a confirmation screen that informs you that SSH server is enabled:

How to SSH into Raspberry Pi
You can SSH into Raspberry Pi:
- With Password
- Without Password
How to SSH into Raspberry Pi with Password
You can SSH into Raspberry Pi with password:
- Without Port Number
- With Port Number
How to SSH into Raspberry Pi with Password Without Port Number
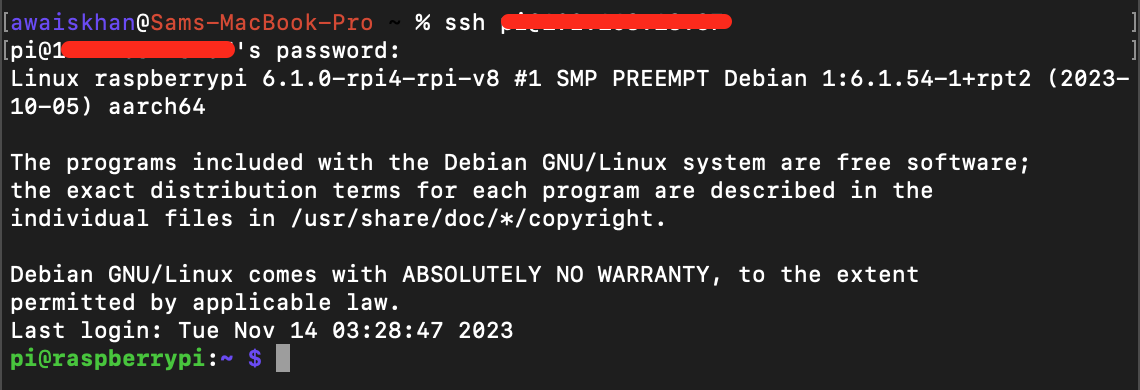
If you haven’t changed the default port for SSH on Raspberry Pi, you can simply open the terminal on other Linux or MacOS systems, or Command Prompt on the Windows system. Then use the following syntax to SSH into Raspberry Pi:
In place of username, you must enter the default Raspberry Pi username, while in place of Pi-IP-address, you must provide the IP address of your Raspberry Pi.
Note: You can use the command hostname -I to find the IP address on Raspberry Pi terminal.
How to SSH into Raspberry Pi with Password With Port Number
If you have changed the default port for SSH login to Raspberry Pi, you can use the following command in the terminal to remotely access the device:

How to SSH into a Raspberry Pi without Password
The SSH into a Raspberry Pi with password may look secure until someone doesn’t know the password. However, the password of your Raspberry Pi system can be cracked easily thus compromising the device security. You can use a more secure option to SSH into your Raspberry Pi device using the SSH keys for authentication. This method allows only a specific user to login to your Raspberry Pi through SSH from a system that does include the SSH key file. For a detailed description, you can read the guide here.
How to SSH into a Raspberry Pi Outside Local Network
The default SSH service only allows accessing the device remotely within the local network. However, if you want to access Raspberry Pi remotely outside the local network, you can use the following steps to do it:
Step 1: Download SocketXP on Raspberry Pi
First, you have to install the SocketXP command-line tool on your Raspberry Pi. This can be done by using the curl command that downloads the file based on your system’s architecture. Since, I am using 64 Bit Raspberry Pi OS, the following command will download the arm64 version of SocketXP on Raspberry Pi:

To download SocketXP for different system’s architecture, you can visit here.
Step 2: Give Execute Permission to SocketXP File
You must provide the execute permission to SocketXP file you just downloaded in the above step, this can be done from the following command:

Step 3: Move the SocketXP Executable File to Bin Directory
After making the SocketXP file executable, you have to move this file to /usr/local/bin directory using the following command:

Step 4: Confirm SocketXP Installation
To confirm SocketXP is successfully installed on Raspberry Pi, you can use the following command:
Step 5: Create an Account on SocketXP Portal
For authentication, you have to create an account on SocketXP Portal using your email credentials.
Step 6: Copy the Authentication Token
Navigate to the Auth Token section and copy the SocketXP login command:

Step 7: Authenticate Raspberry Pi Device
Now use the command you just copied from the above steps; the command will look like this:
Ensure replacing the auth_token with the token provided to you in the earlier step and don’t forget to use sudo to avoid permission denied error.
Step 8: Enable SSH Remote Access to Raspberry Pi
You can now enable SSH remote access to Raspberry Pi using SocketXP from the following command:

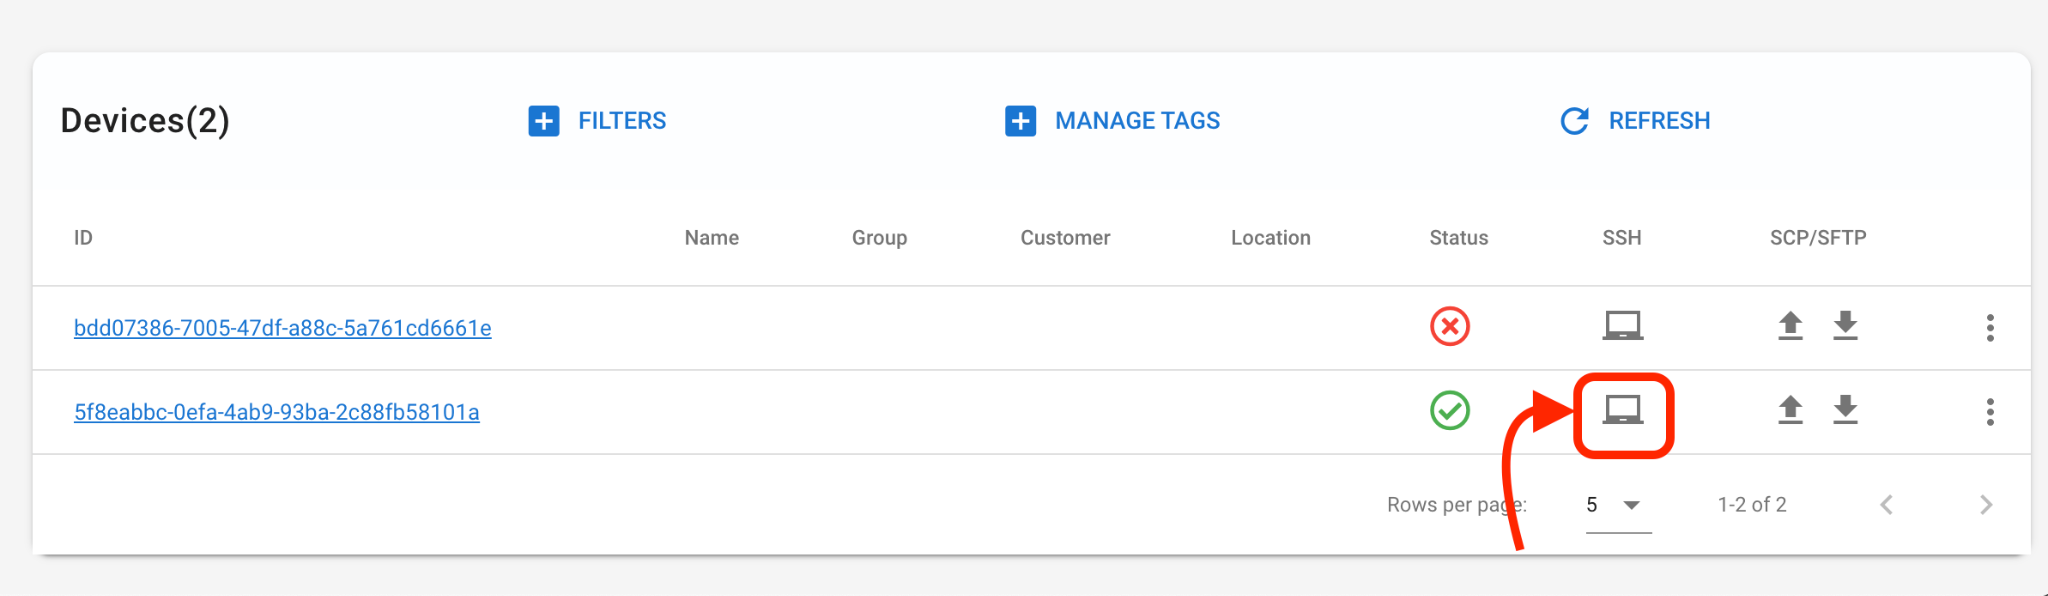
Step 9: Open SSH Terminal
Now navigate to Terminal option in the Devices section at the bottom of the screen on the SocketXP Portal on the browser and click on it:
Step 10: Enter Raspberry Pi Credentials
Enter your Raspberry Pi credentials like username and password for SSH login, once done, press the LOGIN button:
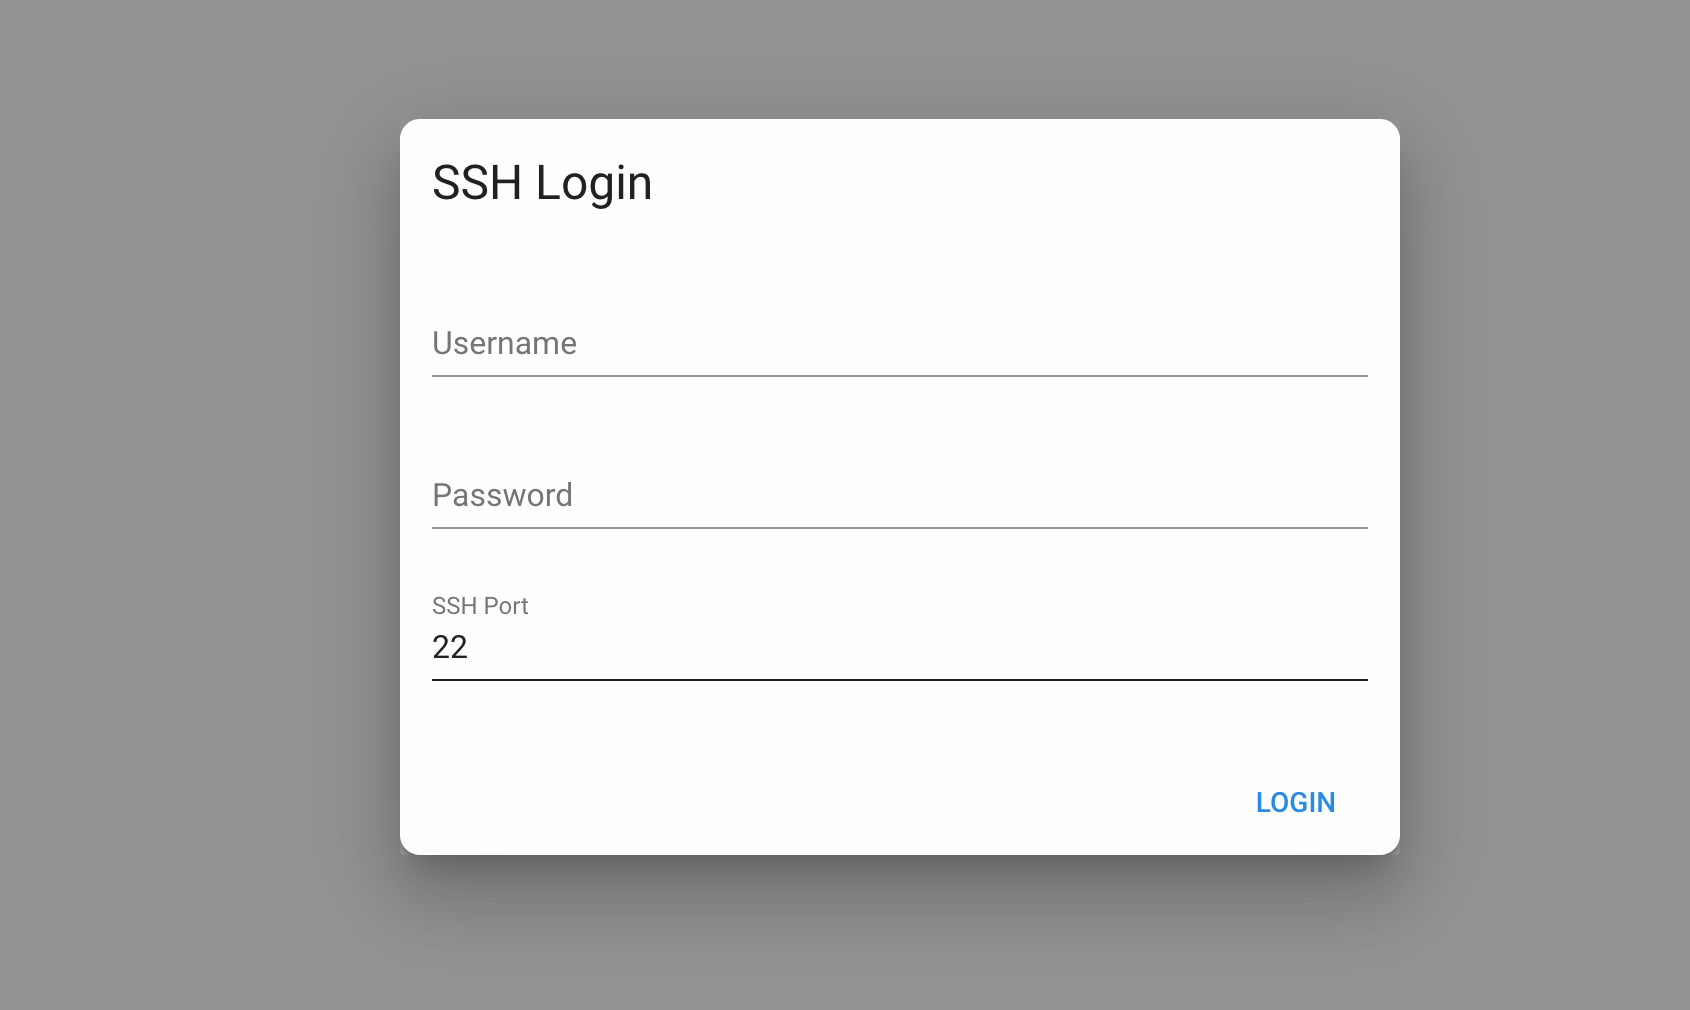
This will open the Raspberry Pi terminal on your browser tab that ensures that you have successfully SSH into a Raspberry Pi outside your local network:
How to Limit Number of Users for SSH into a Raspberry Pi
If you want to limit the number of users to use the SSH service to access your Raspberry Pi system, you can use the following steps:
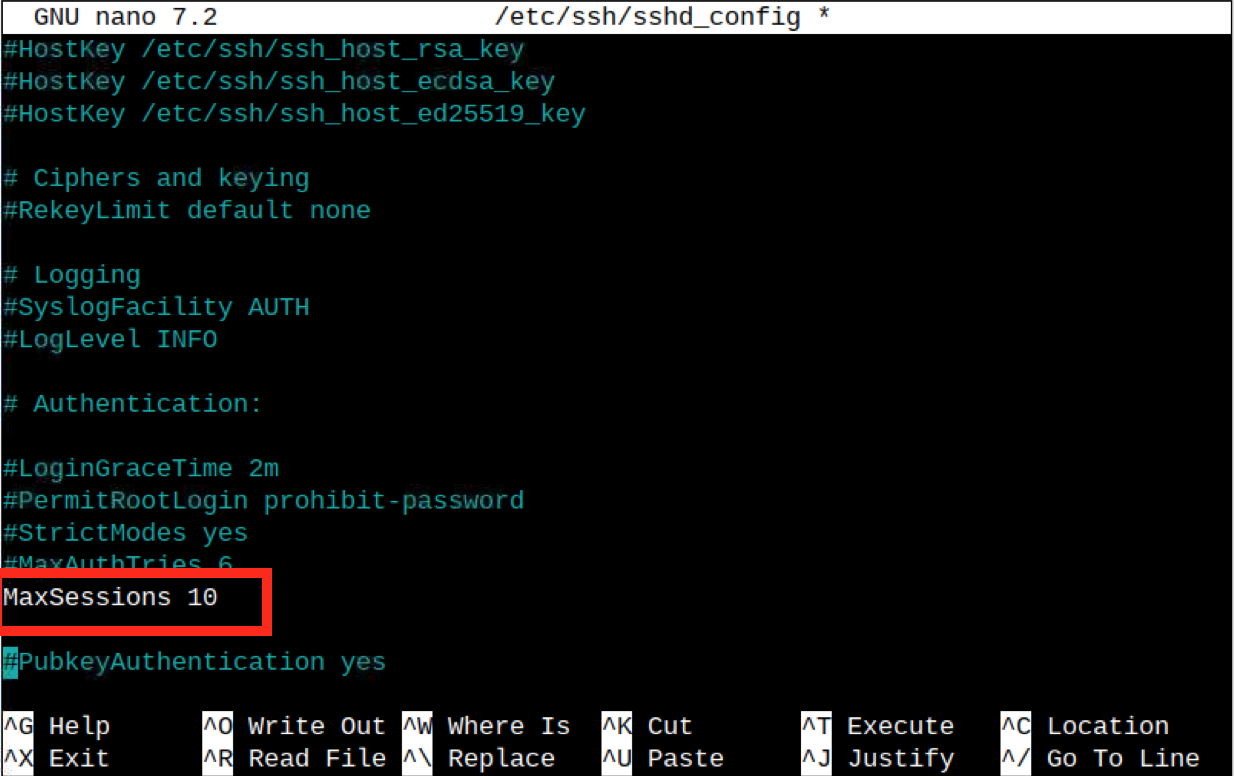
Step 1: First, open the SSH configuration file on Raspberry Pi from the following command:

Step 2: Inside the file, uncomment MaxSessions by removing # before it and use the number of users according to your choice. By default, it is set to 10, you can change it with the number you like.
Step 3: After the changes, you can save the file using CTRL+X keys, then use Y to confirm file saving and enter to exit back to the terminal.
Step 4: Now restart the SSH service again on Raspberry Pi using the following command:

How to Allow Only Specific User to SSH into a Raspberry Pi
You can also allow only a specific Raspberry Pi user to SSH into your Raspberry Pi, this can be done by adding the following line inside the SSH configuration file:
Note: Replace the username with the user you want to allow.
How to Block a Specific User to SSH into a Raspberry Pi
If you want to block a specific user to SSH into a Raspberry Pi, you can simply add the following line inside the SSH configuration file:
How to Change Port Number for SSH into a Raspberry Pi
By default, SSH uses the default port number 22 to allow users to SSH into a Raspberry Pi. However, you can change the port number inside the SSH configuration file by uncommenting the line Port 22 and replace the number 22 with the port number of your choice:

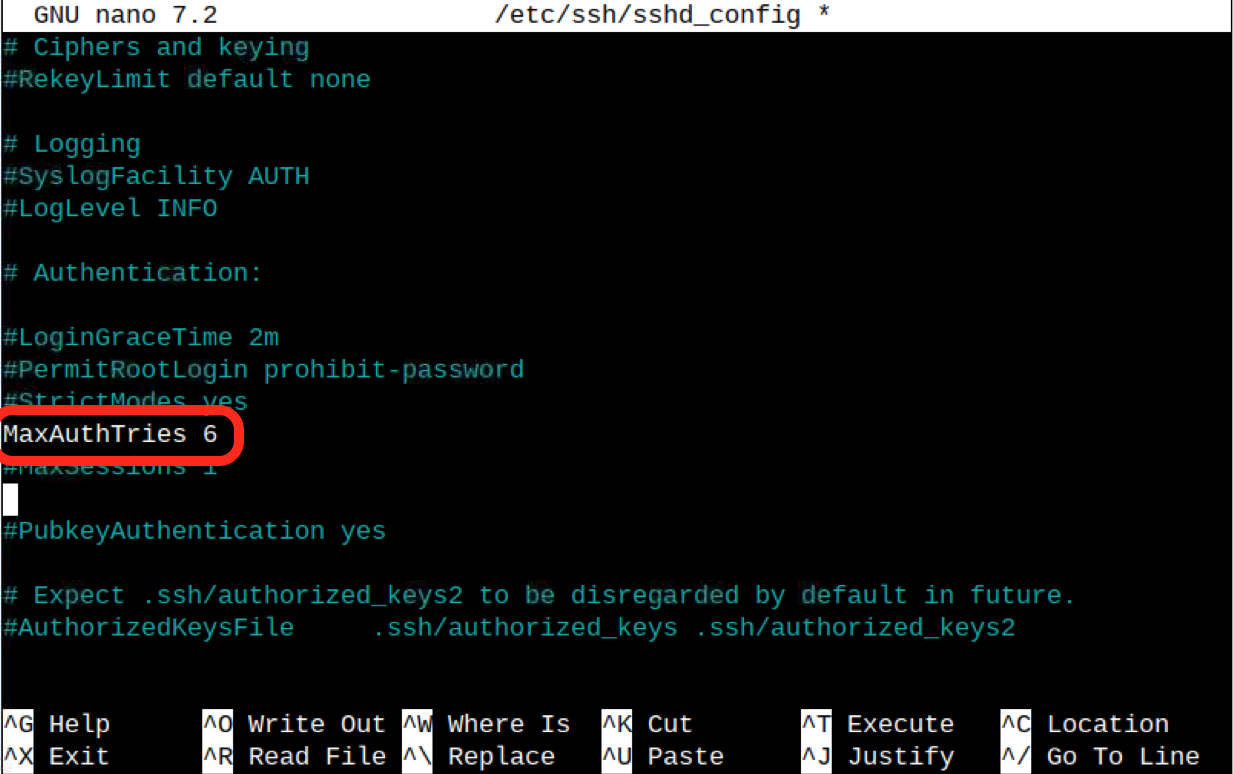
How to Lock Users for Trying Multiple Attempts to SSH into a Raspberry Pi
You can also lock users who try to login to your Raspberry Pi through SSH by attempting multiple failed attempts. This is crucial for your device security since it protects your Raspberry Pi from unauthorized login attempts. To lock users for trying multiple attempts, you can uncomment the line MaxAuthTries and replace the number according to your choice.
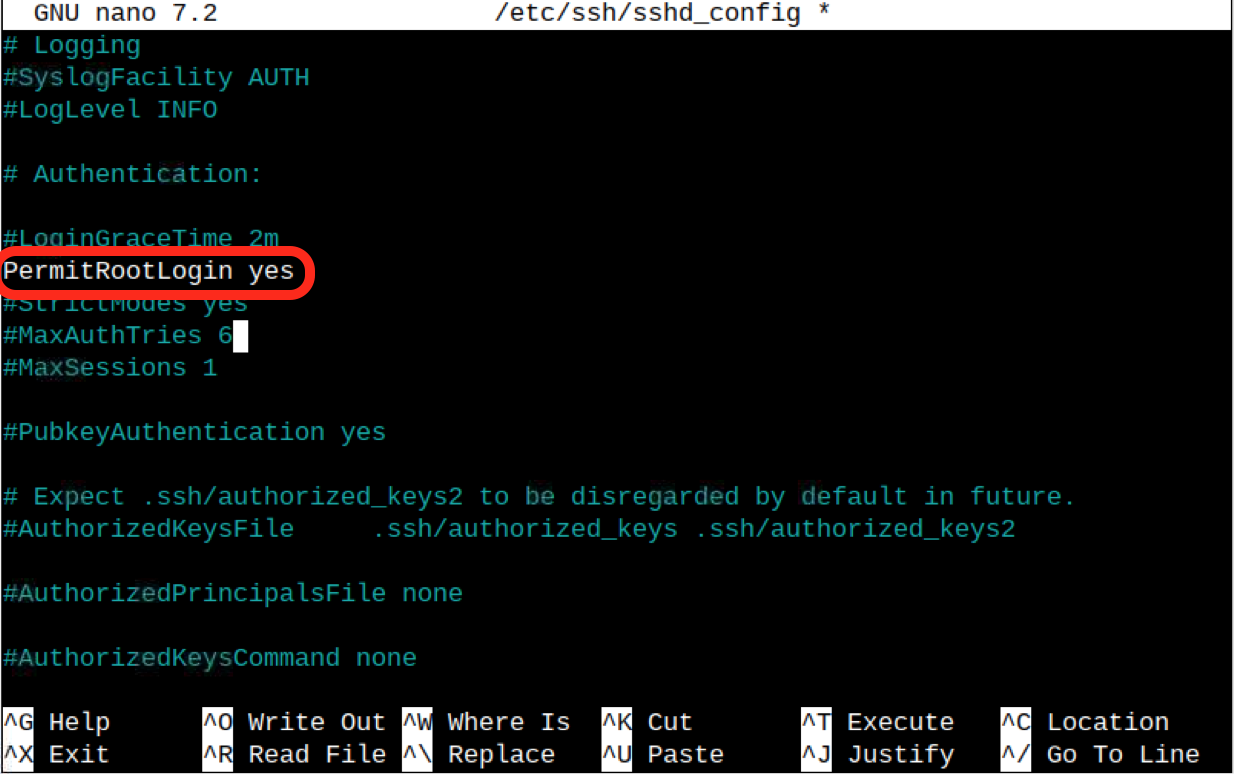
How to Enable Login as a Root for SSH into a Raspberry Pi
By default, you can SSH into a Raspberry Pi with a username that can be either pi or any other. However, if you want to access Raspberry Pi remotely as a root user, you can enable the root login option from the SSH configuration file. You can do this by uncommenting the line PermitRootLogin prohibit-password, replace prohibit-password with yes, then save the file and restart the SSH service.
After that, you can set the password for root login using the following command:

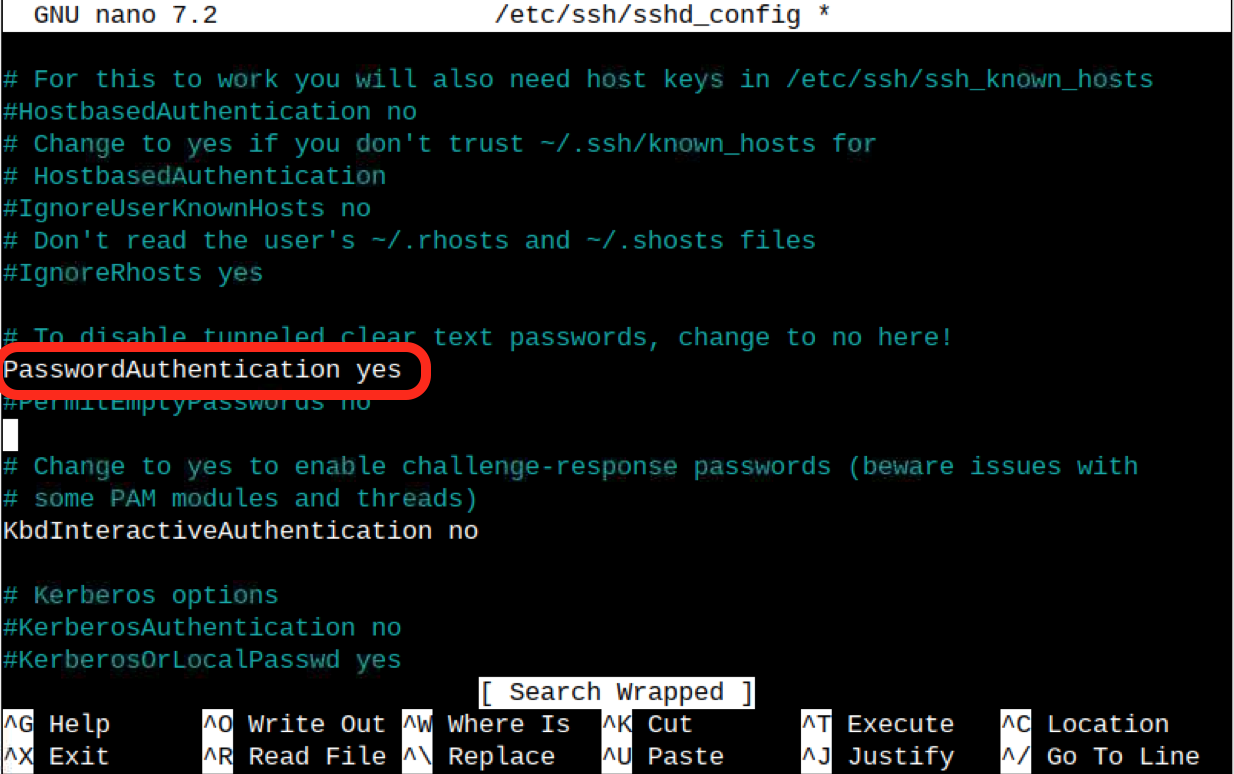
How to Enable Password Authentication for SSH on Raspberry Pi
Enabling password authentication for SSH into Raspberry Pi will add extra security to your device privacy. Because you will then be able to set a strong password instead of using the default Raspberry Pi password. Further a widely used SFTP protocol for SSH will not work by default if SSH password authentication is disabled on your Raspberry Pi system. Thus, to enable password authentication for SSH on Raspberry Pi, you can simply uncomment the line PasswordAuthentication yes line.
Note: Don’t forget to save the configuration file after the changes and restart the SSH service on Raspberry Pi for the changes to take place.
Bonus Tip: If you are a MATLAB desktop user, you can also SSH into a Raspberry Pi using the built-in openShell() function.
Conclusion
Remotely accessing Raspberry Pi through SSH is useful since it allows you to use the system’s terminal from a remote location. You have to enable SSH on your Raspberry Pi from GUI or terminal to use it. After enabling the SSH, you can then be able to SSH into a Raspberry Pi with or without password. You can also SSH into a Raspberry Pi with password with or without port number. You can also SSH into a Raspberry Pi outside the local network by using the SocketXP tool. Besides that, you can modify SSH to limit the number of users, allow or block a specific user, change port number, lock users, enable login as a root or password authentication to secure your Raspberry Pi device.