One of the advantages of having a Raspberry Pi device is that you can execute jobs on the system quite easily. Executing a job refers to running a program or script automatically after a scheduled time or at the system startup.
In this guide, you will learn:
Why Is it Necessary to Execute Job on Raspberry Pi
How to Execute Job on Raspberry Pi
- How to Execute Job on Raspberry Pi Using crontab
- How to Execute Job on Raspberry Pi Using at Command
- How to Execute Job on Raspberry Pi Using .bashrc File
Why Is it Necessary to Execute Job on Raspberry Pi
Executing a job on Raspberry Pi will help you automate the task, such as backing up your data or updating your system at the scheduled time. This will help you focus on other activities instead of remembering these things every time. Moreover, if you have set up a smart home system, created web servers or performed real-time monitoring, you won’t be bothered by the power cutoff. The reason is all your activity becomes live again on Raspberry Pi once it reboots.
How to Execute Job on Raspberry Pi
You can execute job on Raspberry Pi using:
How to Execute Job on Raspberry Pi Using crontab
The crontab is a file on the Linux system that tells your computer which task to run and when to run it on your system. It is like a to-do list for your computer, but it is a lot more powerful compared to it. A crontab allows you to execute jobs to run a specific time interval and it could be days, minutes, hours or seconds.
To execute job on Raspberry Pi using crontab, use the following steps:
Step 1: Open your Raspberry Pi terminal and enter the following command to open cron job:
Step 2: As soon as you execute the above command, you will be provided with options to choose your editor for crontab. Since, the easiest one to use is nano editor as recommended by the crontab itself, so you can select option 1 and press Enter to open the file:

Step 3: Inside the crontab file, you must schedule a job that you will need to execute at the given time frame. The time frame could be minutes, hours, days or months. You can also schedule the cron jobs as soon as the system reboot.
The format for using cron job is provided in the screenshot below:

This means that the first * shows the number of minutes that you can define, while if you want to execute a cron job at a given hour, you can add second * and so on.
If you execute a cron job on Raspberry Pi by adding * instead of numbers, the crontab will execute the job a few seconds after saving the file. As an example, I have executed the following cron job on Raspberry Pi that put the text “cron job is successfully executed” inside the file as soon as you save the file using CTRL+X, add Y and Enter:

To see the cron job is successfully executed, you can use the cat command to check for the content inside the file:

If you want to execute cron job as soon as your Raspberry Pi boots up, you can use the following syntax:
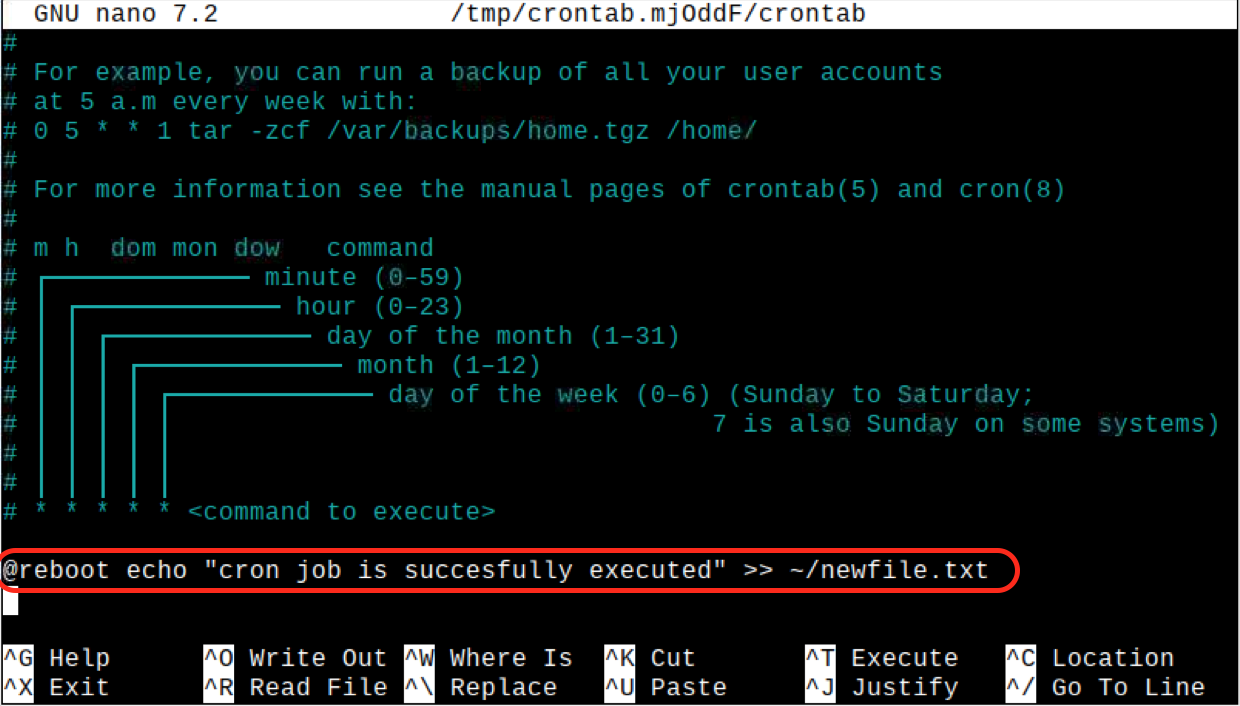
Now, once you save the file and reboot the device, you can then use the cat command to see another line with the same text “cron job is successfully executed” is added in the file:

This ensures that you have successfully executed the cron job on your Raspberry Pi system.
You can use the same format to execute other tasks, such as updating the system, executing a script, creating directories and more.
How to Execute Job on Raspberry Pi Using at Command
The at command is a command-line tool in the Linux system that allows you to schedule jobs to be executed on your system at a specified time interval. It is similar to crontab, but offers more flexible options, such as with crontab, you can only schedule jobs at specific time intervals, but with at command, you can specify any time or date in future.
To execute job on Raspberry Pi using at command, you can follow the below-given steps:
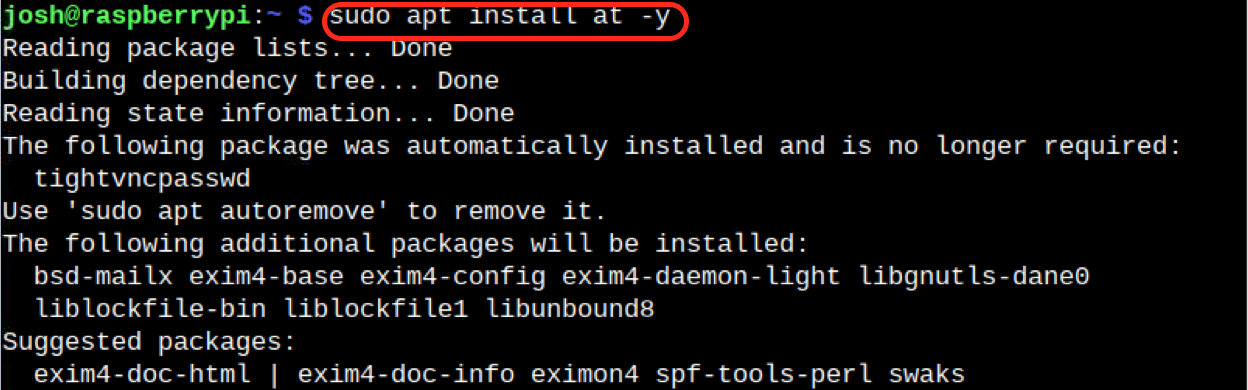
Step 1: By default, the at command-line utility is not installed on the Raspberry Pi system. However, you can open terminal and install this utility using the following command:
Step 2: Add your desired job that you want to execute on Raspberry Pi. As an example, I am going with the same process of adding the text “cron job is successfully executed” inside the newfile. The command for the process is provided below that execute the job after 1 minute:

Note: I have removed the file which I have added for crontab. For this process, a new file is created.
Step 3: Wait for 1 minute and then use the cat command to see whether the text is added in the file. After 1 minute, the text will be added to the file that ensures job is successfully execute on Raspberry Pi:

Step 4: If you want to execute the job as soon as you enter the at command, you can use the following syntax:

Here is the confirmation that job is successfully execute using the at command on Raspberry Pi:

How to Execute Job Using .bashrc File
.bashrc is a configuration file on the Raspberry Pi system that includes commands, functions and aliases that are executed every time whenever you perform activities on your Bash shell. You can customize the file and automate the tasks on your Raspberry Pi system with a .bashrc file like scheduling the jobs and executing them at the launch of the terminal. However, to automate the job execution process, it is better to make the terminal launch automatically on your system. The complete step-by-step process to execute job using .bashrc file is provided below:
Step 1: First, open the terminal and use the command given below to create a file:
Step 2: Then add the following line inside the .desktop file:
Exec=lxterminal

Step 3: Save the file using CTRL+X, add Y and Enter to exit the terminal then reboot the device to ensure the terminal is opened on your system once it boots again.
Step 4: Now, open .bashrc file on your Raspberry Pi system using your favorite nano editor through the following command:
Step 5: At the last line of the file, add your job that you want to execute. As an example, I am executing a script as soon as the Raspberry Pi reboot:
sudo sh shutdown.sh
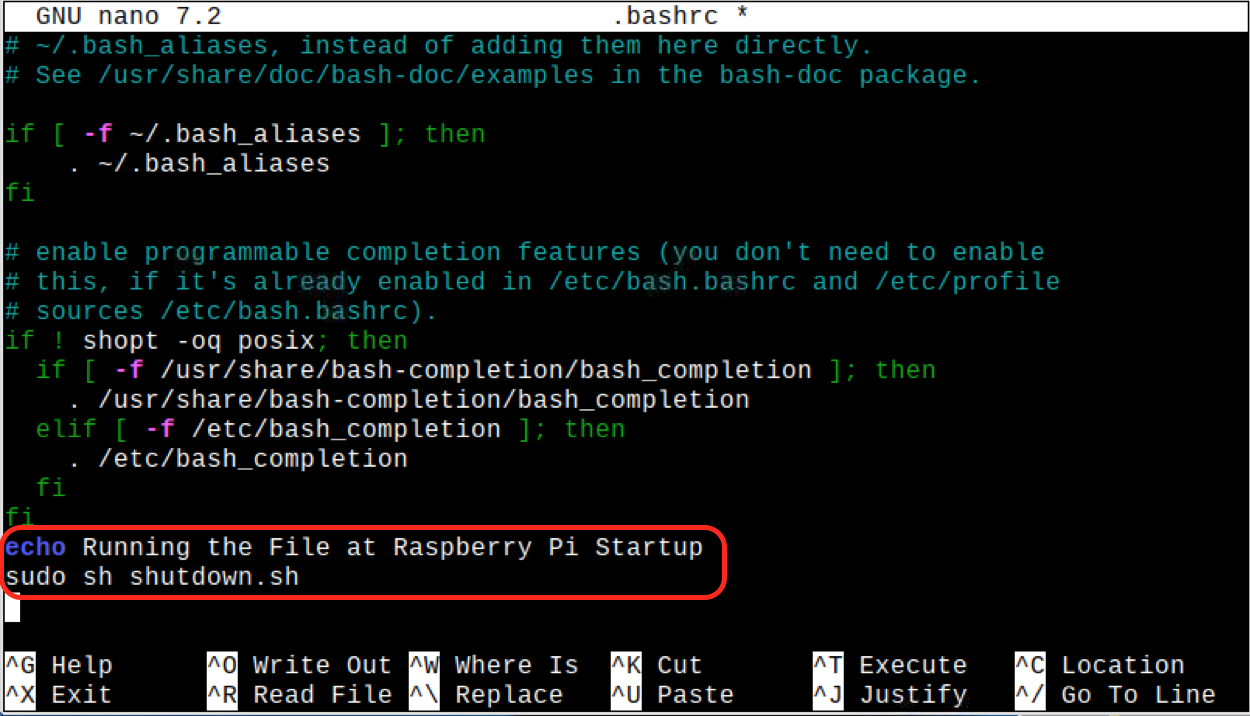
Step 6: Save the file and reboot your Raspberry Pi device. After the reboot, the Raspberry Pi system will launch the terminal and execute the script automatically:

Note: You can also try executing the job on Raspberry Pi using the rc.local file. This method may work on older versions of the Raspberry Pi system. However, in the updated Raspberry Pi versions, this method is deprecated due to compatibility issues with the systemd.
The above three methods presented in this guide will work on updated Raspberry Pi versions including Bullseye and Bookworm.
Conclusion
Executing a job on Raspberry Pi is an important task that saves your time by automating the scheduled tasks on your system. You can execute a job on a Raspberry Pi device by using the crontab method that allows adding the job inside the crontab file. You can also use the at command to set your job and specify the time to execute the job. Besides that, you can use the .bashrc file to add a job that is executed whenever you open the terminal on your system. All these methods are valuable for anyone who wants to learn how to automate tasks on their Raspberry Pi device.