RealVNC Server is a widely used and open-source remote access software preinstalled in Raspberry Pi OS including Raspberry Pi Bookworm. However, with the newly introduced Raspberry Pi Bookworm OS, the users are facing issues using RealVNC Server on the system.
This guide will show you:
- Why RealVNC Server Not Working on Raspberry Pi Bookworm by Default
- How to Remote Access Raspberry Pi Bookworm Through RealVNC
- How to Remote Access Raspberry Pi Bookworm if RealVNC Server isn’t Working
- How to Open Multiple VNC Sessions for Raspberry Pi Bookworm Using TigerVNC
- Conclusion
Why RealVNC Server Not Working on Raspberry Pi Bookworm by Default
The newly introduced Raspberry Pi Bookworm comes with Wayland which is a newer and more secure display server alternative to X11. However, most VNC servers including RealVNC are optimized for X11, which means that they may not work correctly on Raspberry Pi Bookworm by default. The Raspberry Pi foundation is working on a new VNC server called WayVNC that is in the development phase. This is the main reason they have included X11 and Wayland options for the Raspberry Pi Bookworm users.
How to Remote Access Raspberry Pi Bookworm Through RealVNC
The RealVNC Server that is used by default in the previous Raspberry Pi OS has a regression. This means that initially the developers have fixed the bug or defect, but it was then reintroduced due to a change in the code. This change in the code could be an addition of new features or a change in the environment. This change prevented the RealVNC Server from working on the Raspberry Pi Bookworm 32-Bit OS.
However, if you are using Raspberry Pi Bookworm 64-Bit OS, you can use the following steps to remotely access the system through RealVNC on your other computer:
Step 1: Open Raspberry Pi Configuration
The Raspberry Pi system has a built-in tool called raspi-config that allows you to configure your system. Through this tool, you will enable or disable SSH, VNC, Boot menu, Wi-Fi and more. You can open Raspberry Pi configuration easily from the terminal through the command given below:
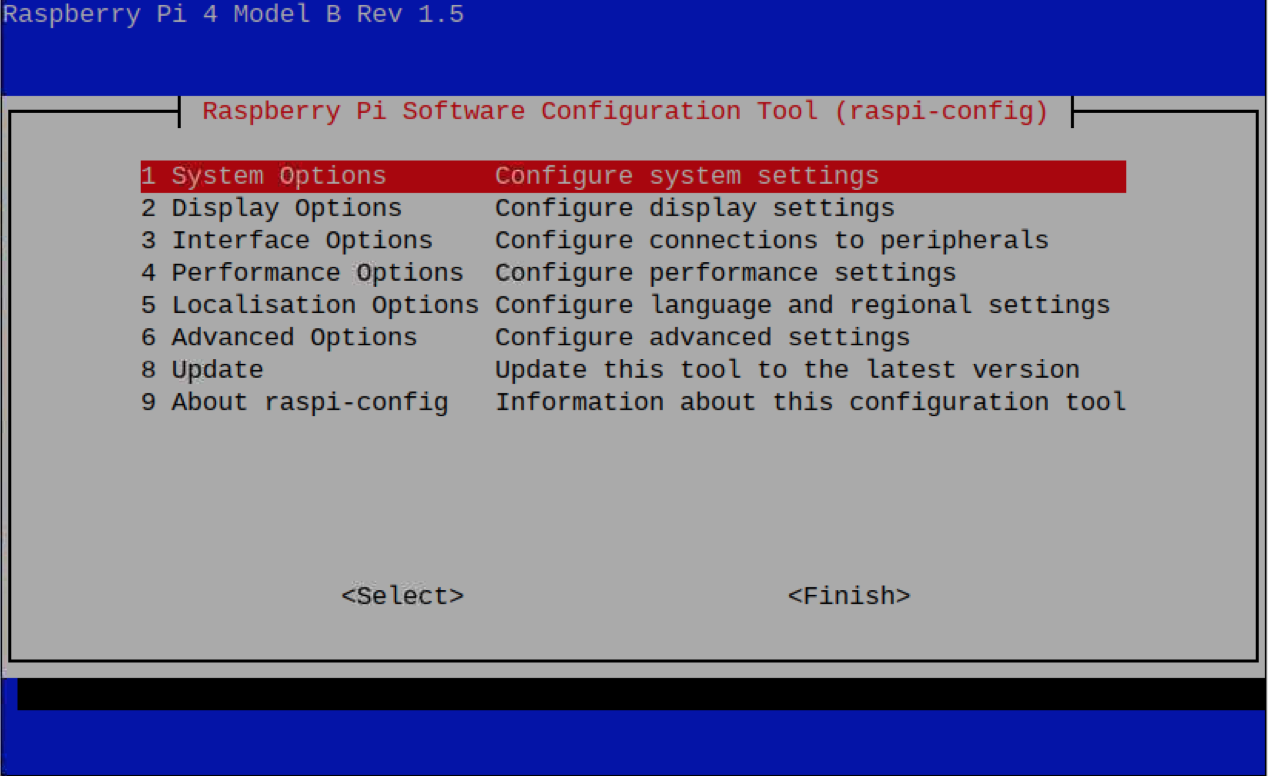
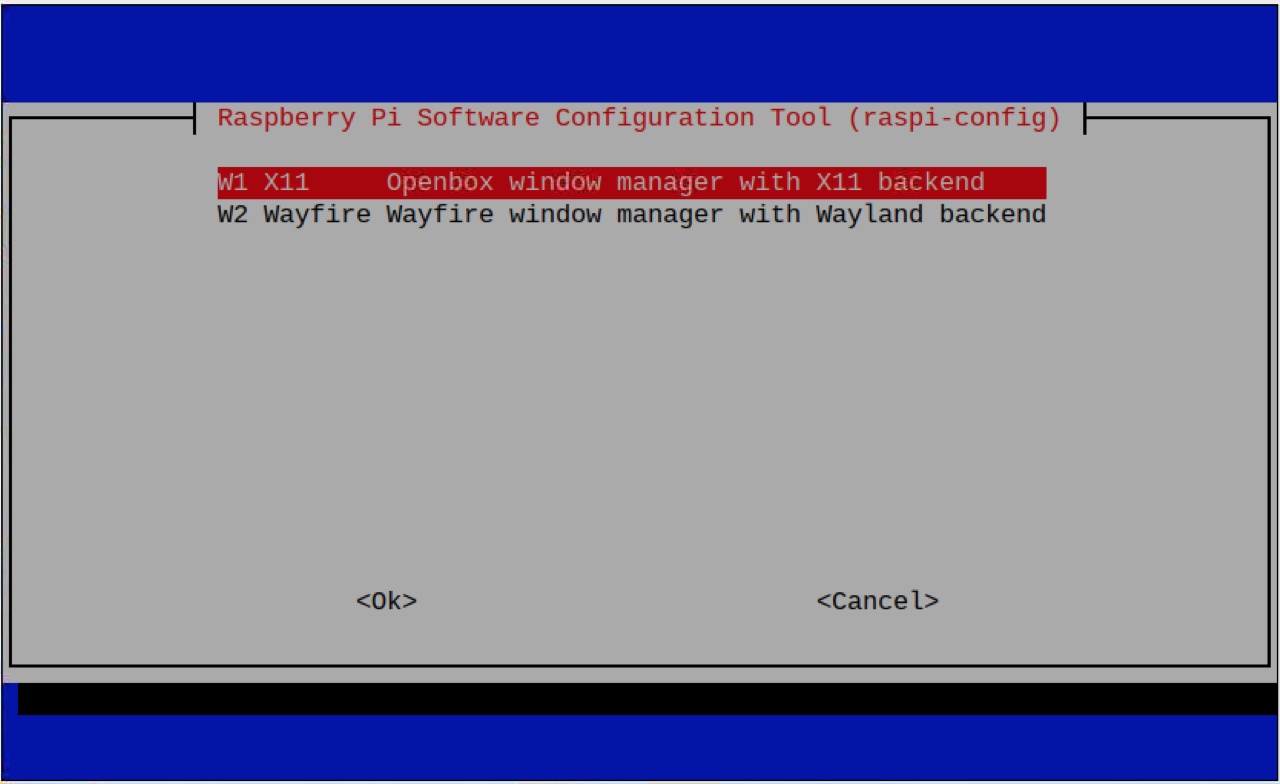
Step 2: Enable X11 on Raspberry Pi
Go to Advanced Options, select Wayland, then choose X11:
Step 3: Reboot Raspberry Pi
Reboot the Raspberry Pi device using the reboot command to successfully make the changes to the system.
Step 4: Enable VNC Server from Raspberry Pi Configuration
Once the device restarts again, open the Raspberry Pi configuration either from the terminal or GUI and enable the VNC Server on the system.
For terminal, you can simply navigate to Interface options, then select VNC and enable the option from there:

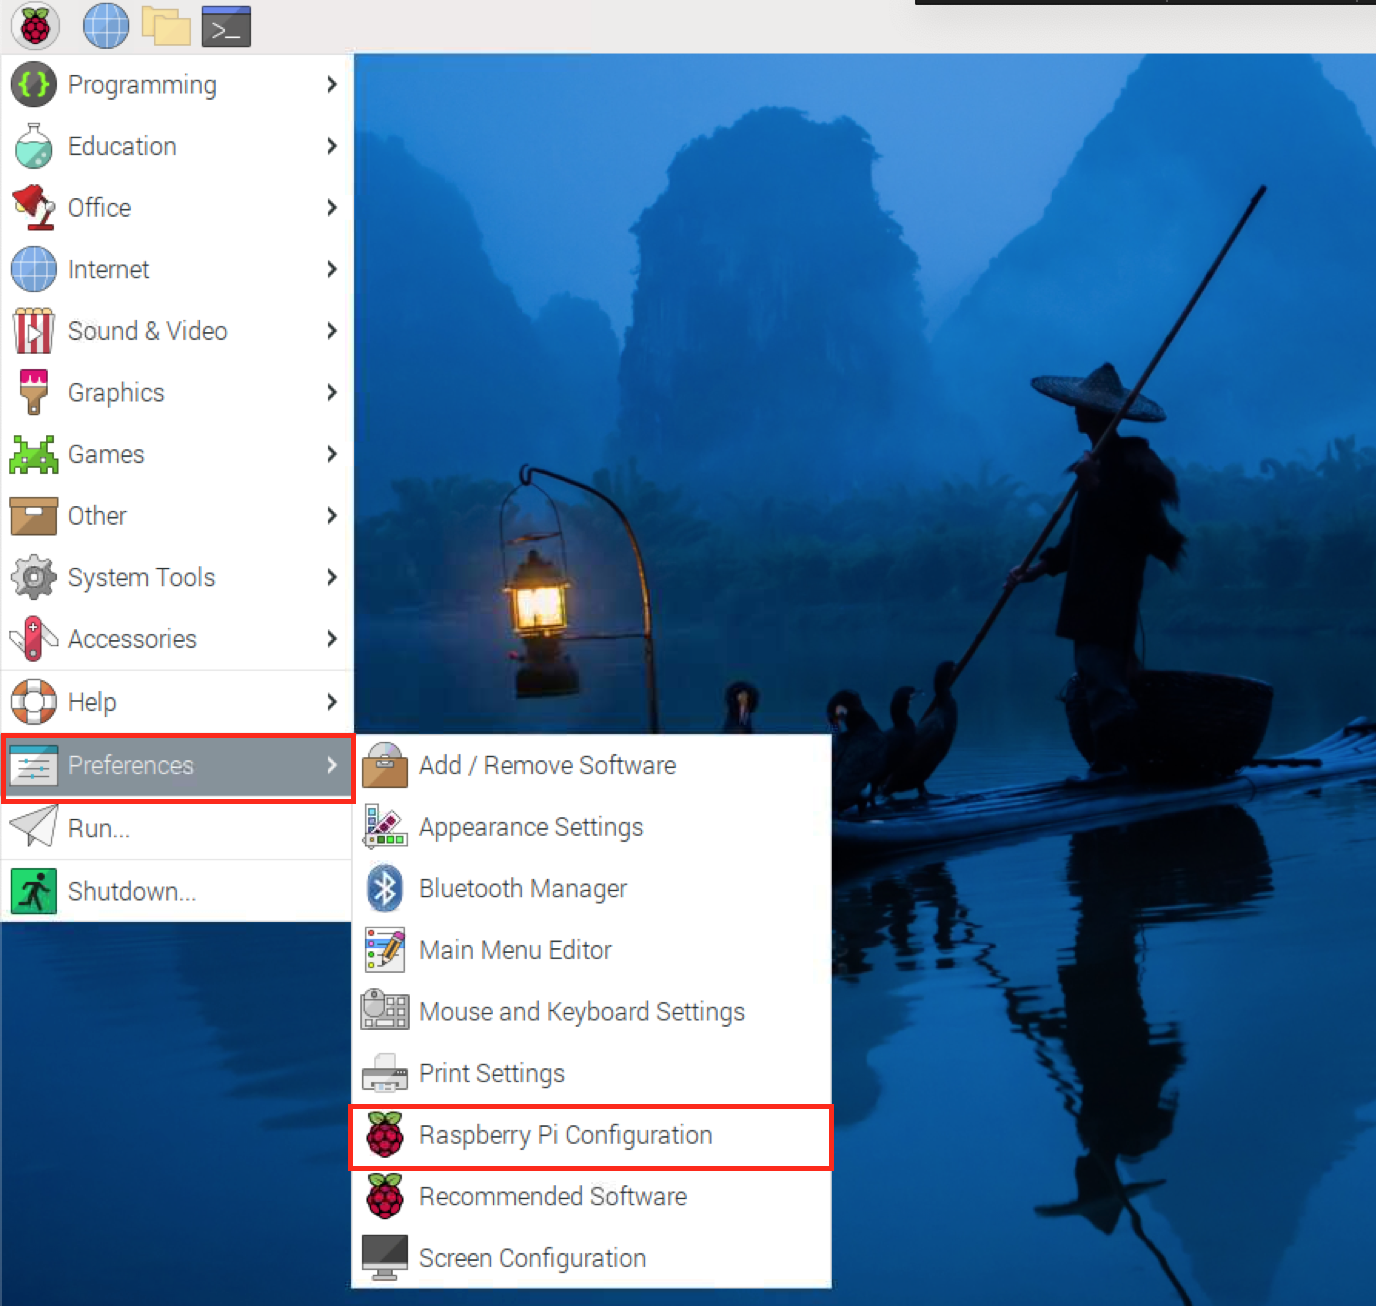
From GUI, go to Raspberry Pi menu, navigate to Preferences and select the Raspberry Pi Configuration:
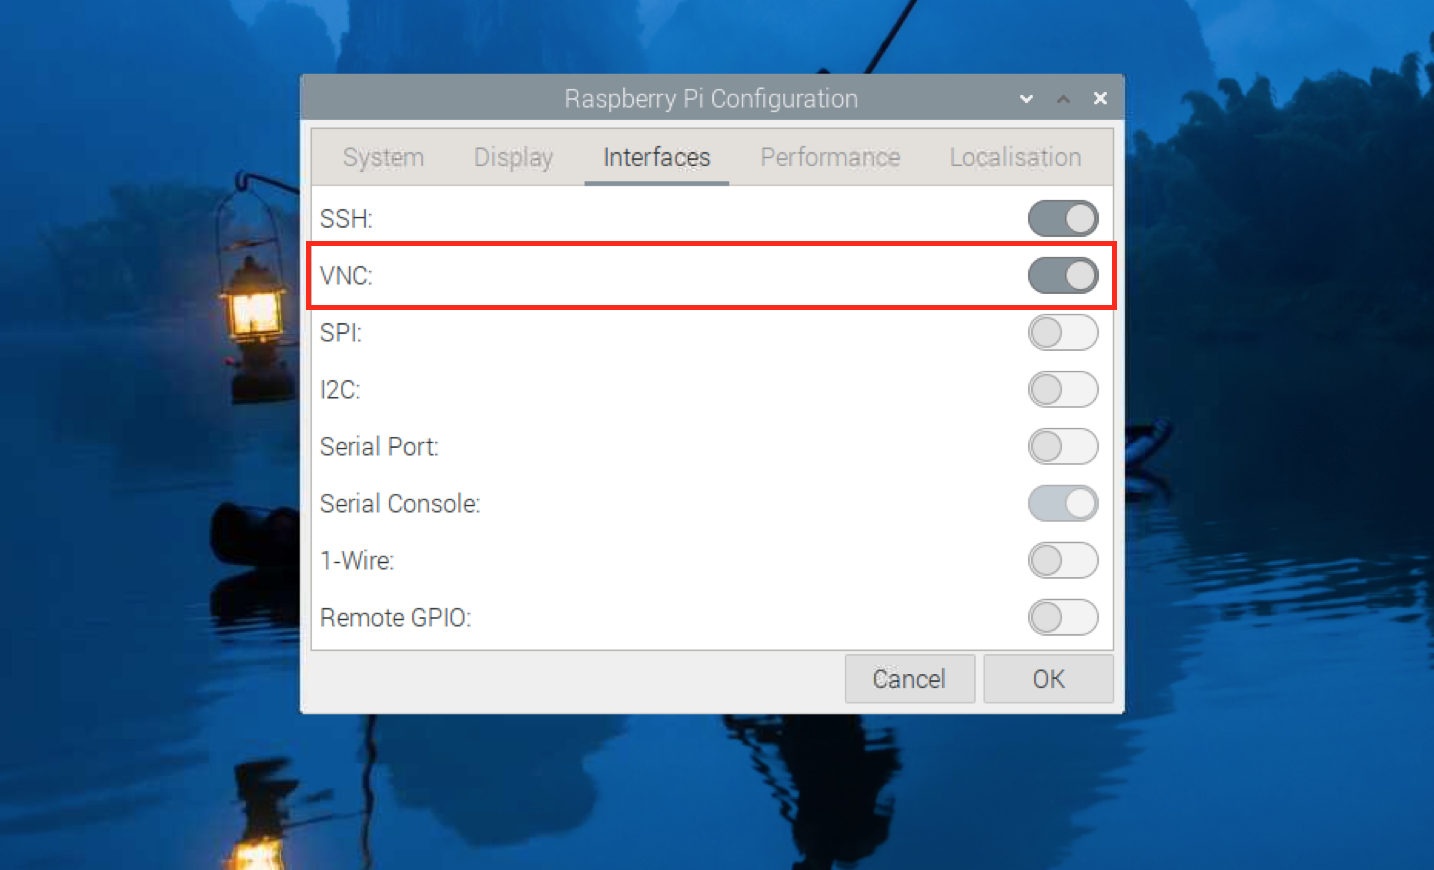
Then enable the VNC from the Interfaces tab by moving the toggle button to the right:
This will enable the RealVNC Server on Raspberry Pi Bookworm, which you can confirm from the system’s Taskbar menu on the right:

Step 5: Find Raspberry Pi Hostname
To remotely connect Raspberry Pi Bookworm through RealVNC, you will need to find out the Raspberry Pi hostname or IP address. You can find hostname or IP address on Raspberry Pi Bookworm using the following command:
Or you can click on the RealVNC icon on the Taskbar to see your Raspberry Pi hostname or IP address on the dashboard.
Step 6: Install RealVNC Viewer on Windows, Mac or Linux
To remotely connect Raspberry Pi Bookworm from another computer, you have to install RealVNC Viewer on the system you are using either Windows, Mac or Linux from here.
Step 7: Enter Raspberry Pi Credentials in RealVNC
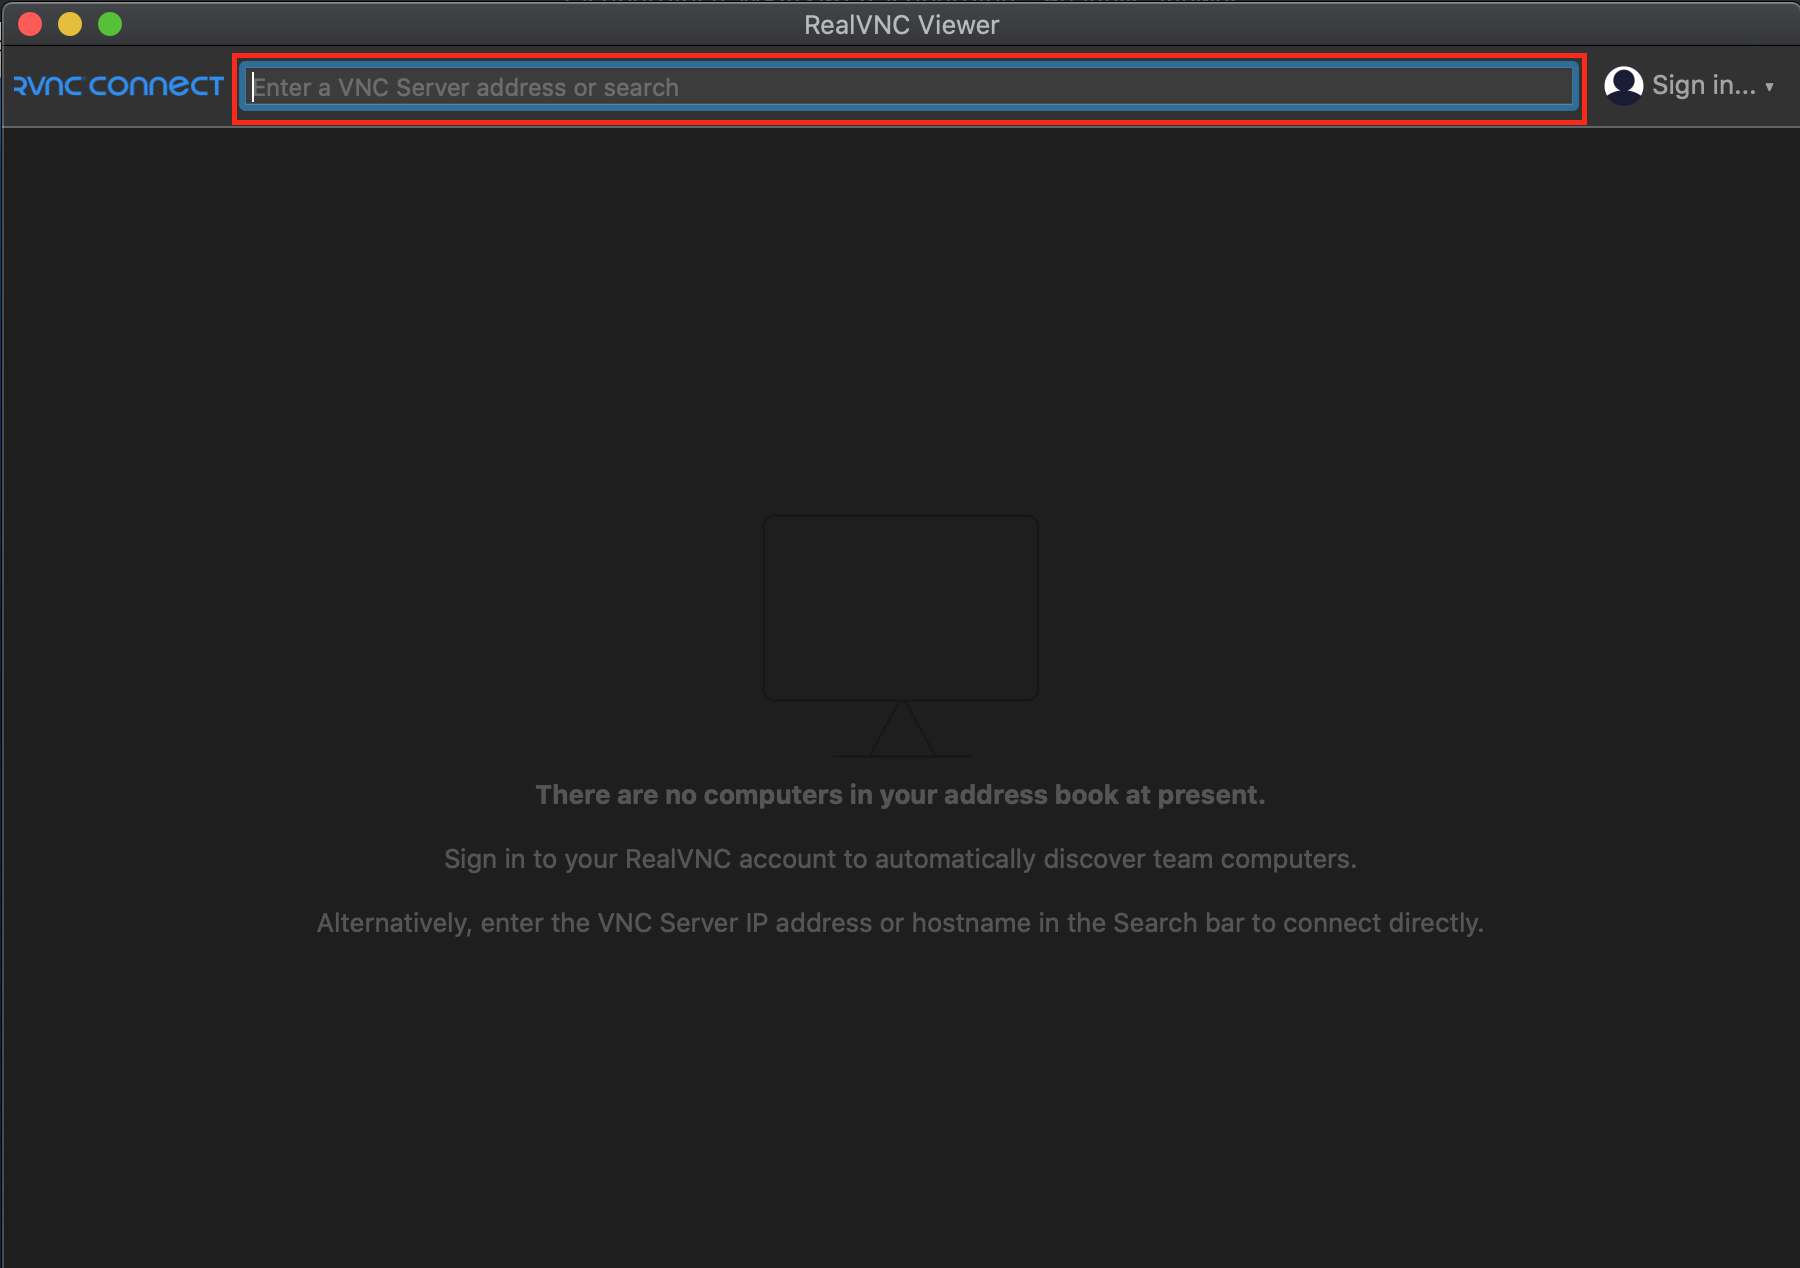
Open RealVNC Viewer on your computer and enter the IP address of your Raspberry Pi device in the box similar to the one highlighted in the image below:
You must enter the Raspberry Pi Bookworm username and password that you set at the start of OS installation. After successfully establishing the connection, you will be able to see the Raspberry Pi Bookworm desktop on your computer:

Note: The above steps can only be done on Raspberry Pi Bookworm 64-Bit OS.
How to Remote Access Raspberry Pi Bookworm if RealVNC Server isn’t Working
If you are using the Raspberry Pi Bookworm 32-Bit OS, you can use the Wayland supported VNC server client called TigerVNC. The following steps will guide you remotely access Raspberry Pi Bookworm 32-Bit OS through TigerVNC:
Step 1: Install TigerVNC on Raspberry Pi
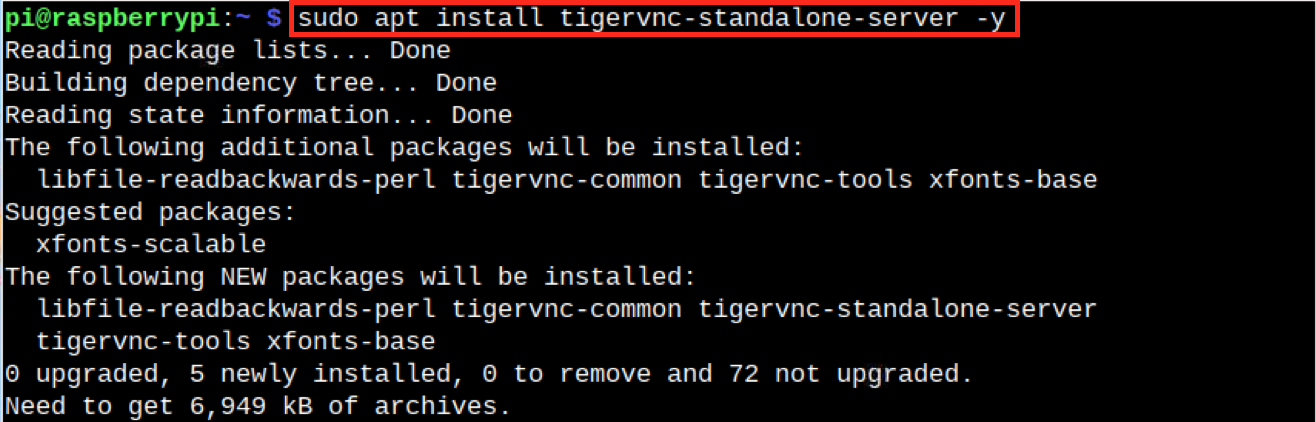
First, you have to install TigerVNC on your Raspberry Pi Bookworm OS using the following command:
Step 2: Configure TigerVNC on Raspberry Pi Bookworm
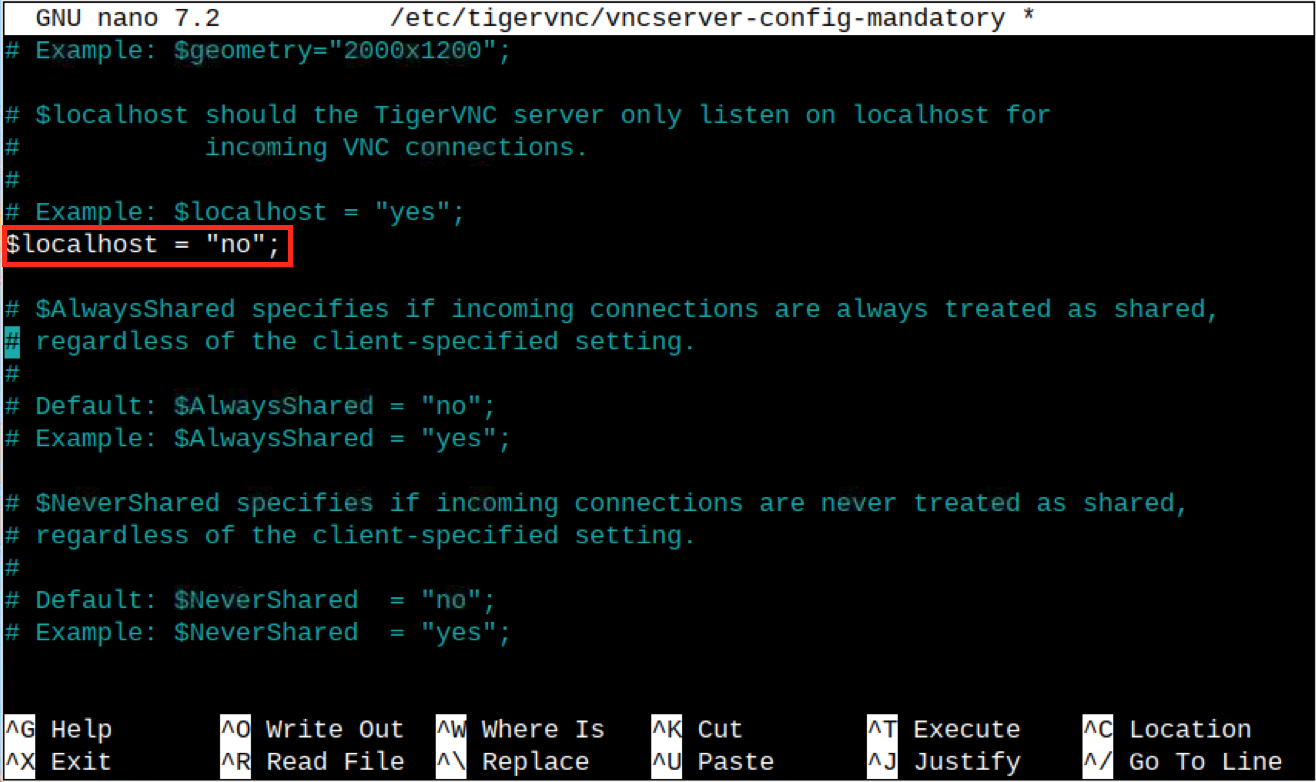
You must open the TigerVNC configuration file on your Raspberry Pi system using the following command:
Inside the file, find the line commented with $localhost= “no”; and uncomment it by removing the # sign. This will allow the TigerVNC Server only listen on local host for incoming VNC connection:
Step 3: Save the TigerVNC Configuration File
After making the necessary changes, you must save the TigerVNC configuration file using CTRL+X, add Y and press Enter.
Step 4: Set Password for TigerVNC on Raspberry Pi Bookworm
You have to set a password that can be used to access Raspberry Pi Bookworm through TigerVNC on your other computer. You can set the password for TigerVNC using the following command:
You have to type the password according to your choice and verify the password by typing it again. You can also type y or n according to your choice on the view-only password option.

Step 5: Install TigerVNC Viewer on Windows, Mac or Linux
To remotely access Raspberry Pi Bookworm on your other computer, you must install TigerVNC Viewer on Windows, Mac or Linux system from here.
Step 6: Run TigerVNC Session on Raspberry Pi
Go back to your Raspberry Pi terminal and enter the following command to run TigerVNC session on your Raspberry Pi Bookworm OS:
Enter the password you set in Step 4, verify the password to create a TigerVNC session on Raspberry Pi Bookworm:

At the completion of the above command, you will be provided with the server and the port number on which the server will operate:

Step 7: Remotely Access Raspberry Pi Bookworm
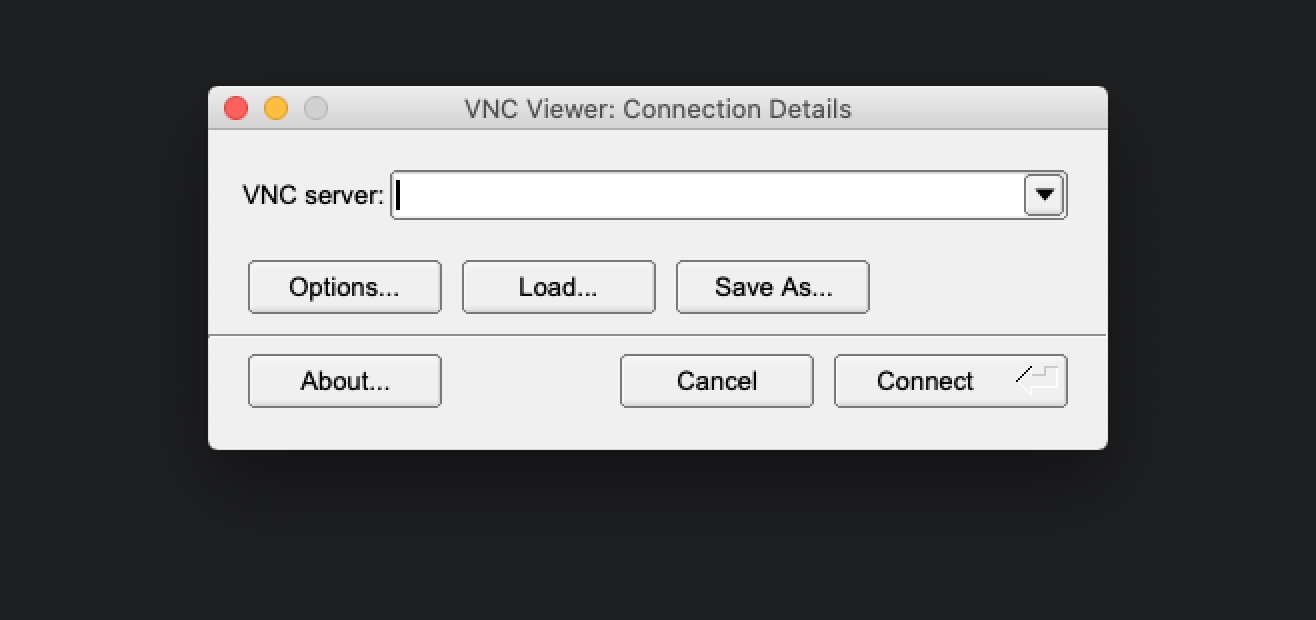
Now, open the TigerVNC Viewer on your computer and enter the hostname or IP address of your Raspberry Pi system in the VNC server option with the port number that is 5901 in my case:
Enter the TigerVNC password you set in Step 4 and press Enter:

Once done, the Raspberry Pi Bookworm desktop will open on the TigerVNC Viewer dashboard:
You can now begin working with your Raspberry Pi Bookworm OS using TigerVNC and it will work on 32-Bit and 64-Bit systems.
Note: Ensure both Raspberry Pi device and your computer are connected to the same Wi-Fi network.
How to Open Multiple VNC Sessions for Raspberry Pi Bookworm Using TigerVNC
With the TigerVNC Server, you can also open multiple VNC sessions like the default RealVNC Server. This can be done by first running the TigerVNC Server command again on the terminal as shown below:
This time you will be provided with another session with different port number for an independent VNC display for remotely access Raspberry Pi Bookworm:

You only have to enter the Raspberry Pi IP address with the desired port number that is 5902 in my case to access the Raspberry Pi Bookworm independent session on your other computer.
Conclusion
Remote Access Raspberry Pi is a widely used task that people do to perform all the activities on their Raspberry Pi devices right from another computer. The latest version of Raspberry Pi operating system called Raspberry Pi Bookworm doesn’t support RealVNC by default. However, if you are using Raspberry Pi Bookworm 64-Bit OS, go to Wayland option from the Raspberry Pi configuration and switch to X11 instead of Wayfire. Then reboot the device and when it restarts, you can enable VNC from Raspberry Pi configuration and it will work this time. However, for Raspberry Pi Bookworm 32-Bit OS, you have to use other VNC alternatives like TigerVNC whose detailed step-by-step instructions are provided in the above section of this guide. This will help you work remotely on your Raspberry Pi device if you have installed Raspberry Pi Bookworm on it.