This manual will explain the method of enabling and disabling buttons with the help of JavaScript and jQuery.
How to Disable or Enable Buttons Using JavaScript and jQuery?
One of the most practical things each web application includes in its buttons is the enabling and disabling functionalities. You can use the “disabled” attribute for enabling or disabling the buttons in jQuery and JavaScript.
Example 1: Disable or Enable Buttons Using JavaScript
In HTML file, we will first, create three buttons, the button where actions will perform, one is for disabling and the other one is for enabling the button:
<button onclick="disableButton()">Click to Disable</button>
<button onclick="enableButton()">Click to Enable</button>
We will define function “disableButton()” for disabling the button by setting the value of the disabled attribute to “true”:
document.getElementById("button").disabled = true;
}
For enabling button, set the disabled property value to “false”:
document.getElementById("button").disabled = false;
}
The corresponding output is as follows:
Example 2: Disable or Enable Buttons Using jQuery
In this example, we will use jQuery to disable and enable the button. To do so, first, create two buttons in an HTML file. One of them is used to disable and enable the other button:
<button id="toggle">Click Here to Disable and for Enable double click on it</button>
For using jQuery, specify it the “src” attribute in <head> tag:
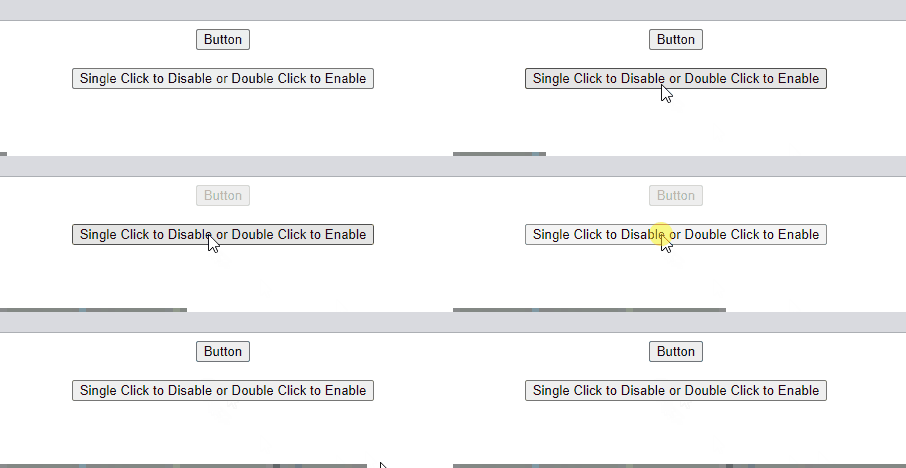
In the <script> tag, disable the button on a single click by triggering the “click” event in the button with id “toggle” and set the value of the “disabled” attribute of the first button to “true”. Similarly, on the “dblclick” event, set the value of the disabled attribute to “false” to enable the “Button” on double click:
$('#toggle').on('click', function () {
$('#button').prop('disabled', true);
});
$('#toggle').on('dblclick', function () {
$('#button').prop('disabled', false);
});
});
The output signifies that we successfully disable and enable the button using jQuery:
Example 3: Enable the Disabled Button Using JavaScript
Now, we will enable the disabled button after entering some text in the text field using JavaScript. For this, create an input field and a submit button with ids “text” and “submit”. The submit button is disabled by default utilizing the disabled attribute:
<input type="submit" id="submit" disabled="disabled" />
In the JavaScript file, we will first get the ids of the input field and button and then call the function “stateHandle” in “addEventListener” method, where we will set the value of the disabled attribute to “false” if the text field is empty, which indicates the disable button; else, we will set it as “true”, if the input field is filled with any text and the submit button will be enabled:
let button = document.querySelector("#submit");
input.addEventListener("change", stateHandle);
function stateHandle() {
if (document.querySelector("#Text").value !="") {
button.disabled = false;
}
else {
button.disabled = true;
}
}
Output
Example 4: Enable the Disabled Button Buttons Using jQuery
In this example, we will use jQuery to enable the disabled submit button. To do so, first set the value of the disabled attribute to “false” for disabling the button while the input field is empty. Then, if the field is filled with any text, set the value of disabled attribute to “true”, which enables the submit button:
$('#Text').on('input change', function () {
if ($(this).val() != '') {
$('#submit').prop('disabled', false);
}
else {
$('#submit').prop('disabled', true);
}
});
});
The corresponding output is shown below:
We have covered all the aspects of the enabling and disabling button using JavaScript and jQuery.
Conclusion
For enabling and disabling the button in JavaScript and jQuery, you can use the “disabled” property. To do so, set the value of the disabled attribute “true” or “false” to disable or enable the button, respectively. In this manual, we have explained the method of enabling and disabling buttons with the help of JavaScript and jQuery.


