Use the crop tool to remove unwanted negative space from your picture or easily cut out people or objects from a scene. You can also use the crop tool to resize your pictures without losing photo quality.
Besides using the crop tool, you can also crop images using any of the selection tools. This tutorial shows you how to crop images in GIMP using the crop tool and the selection tools.
(1) CROPPING AN IMAGE WITH THE CROP TOOL
Step 1: Launch GIMP
Step 2: Open the picture you want to edit.
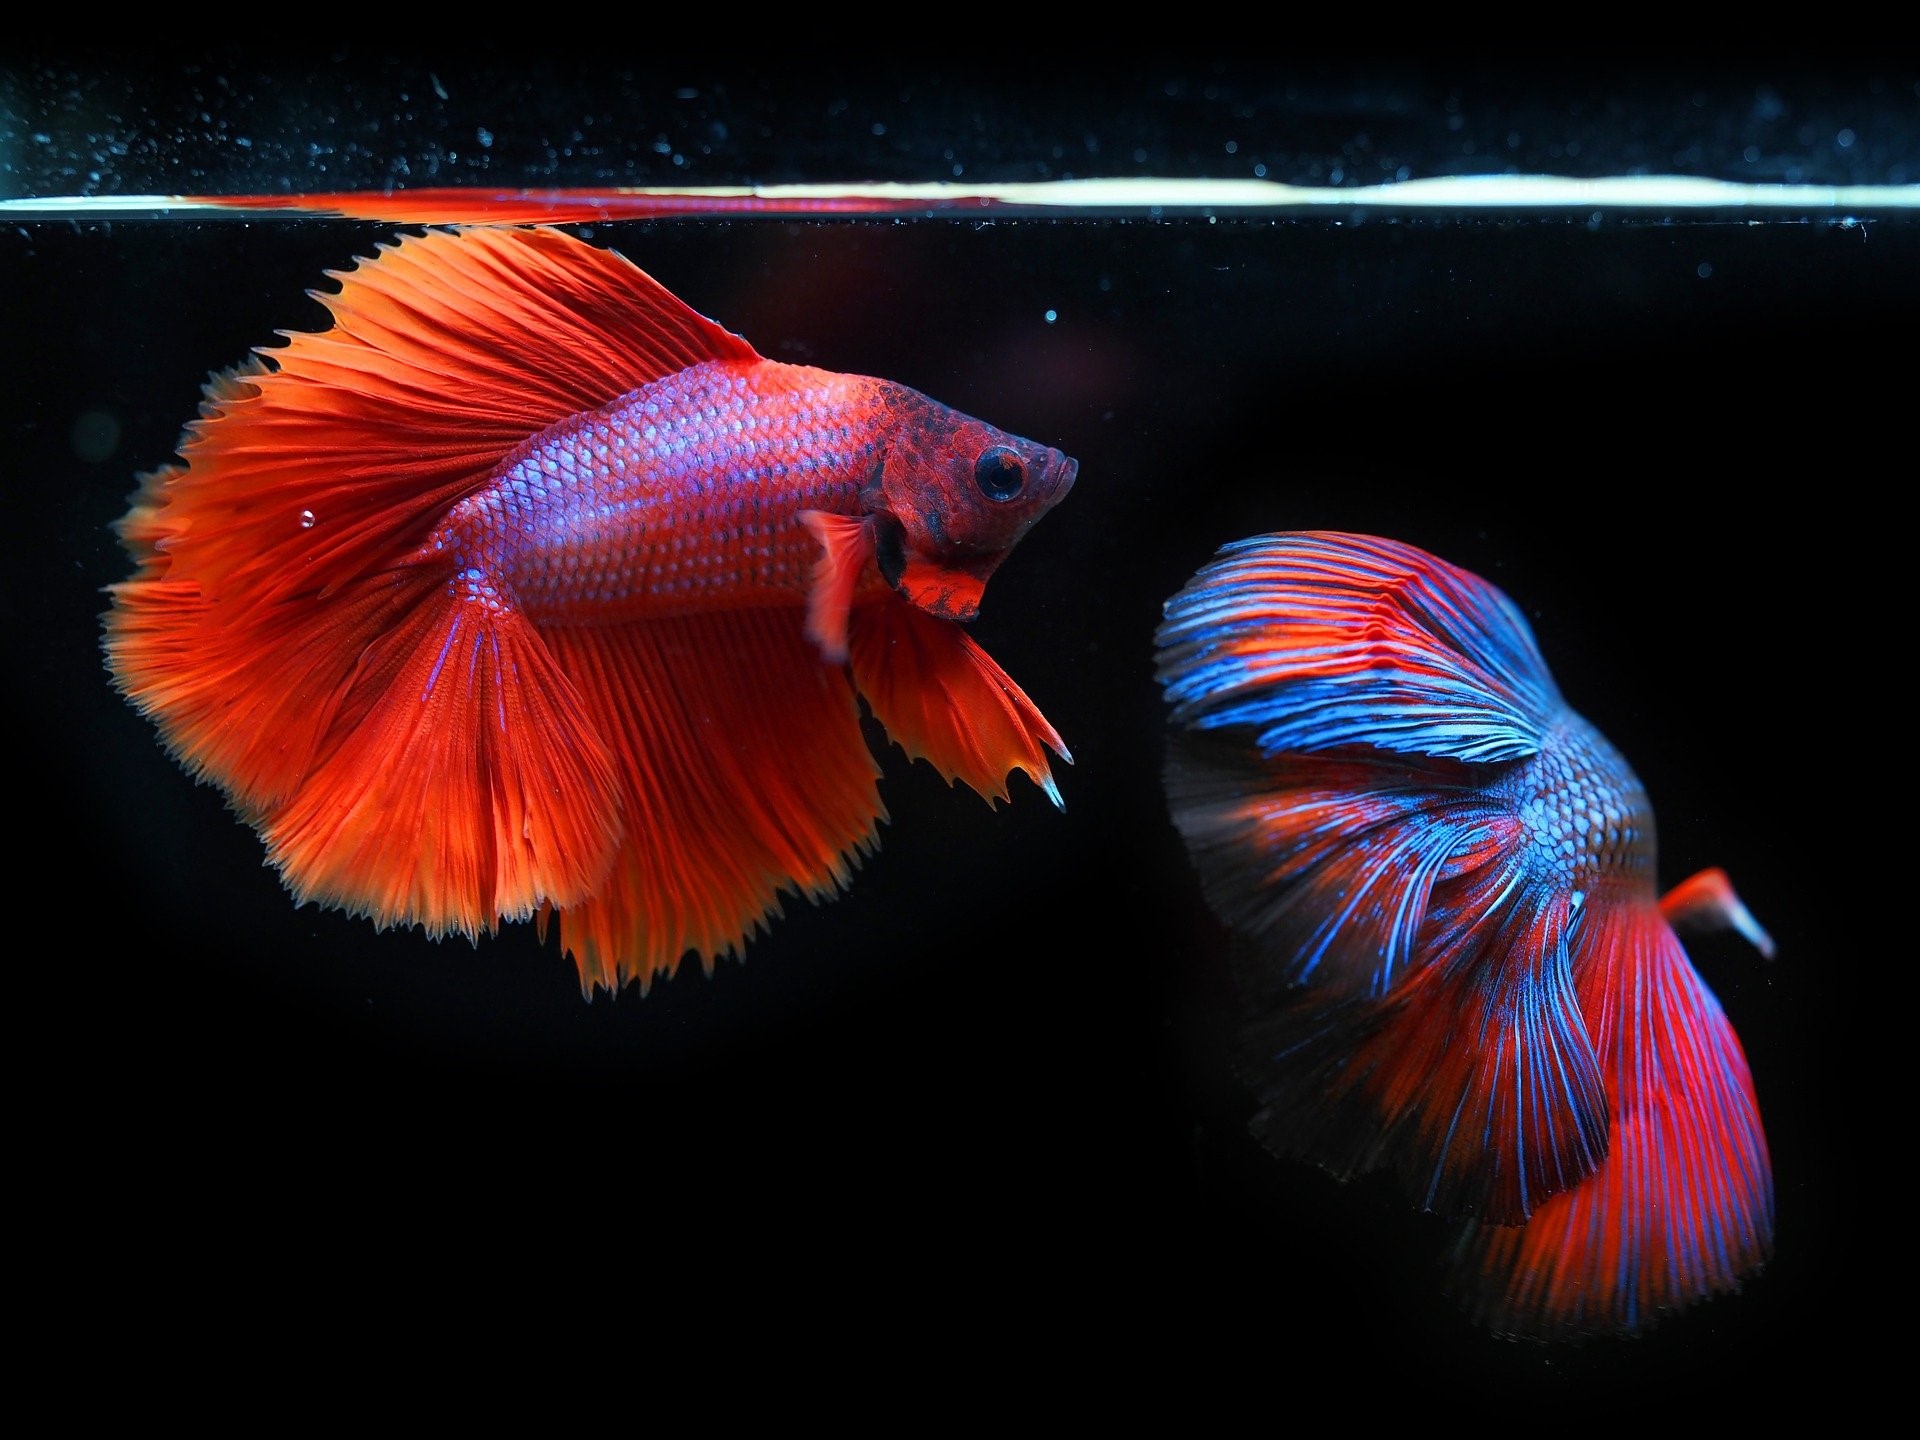
I found this beautiful picture of two Siamese fighting fish. However, the one on the right isn’t well-positioned, so I want to crop it out of the photo for this tutorial.
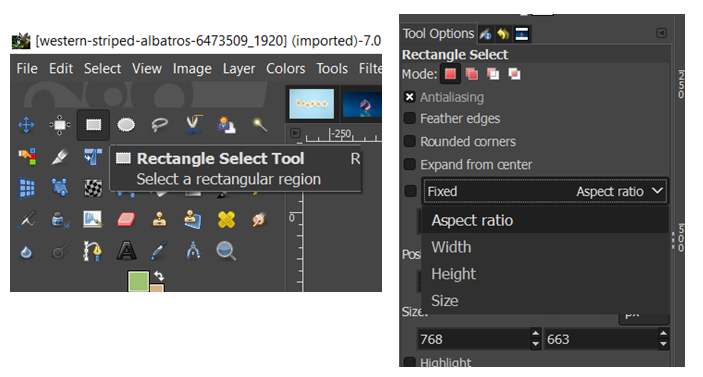
Step 3:Click on the ‘crop tool’ icon to activate it.
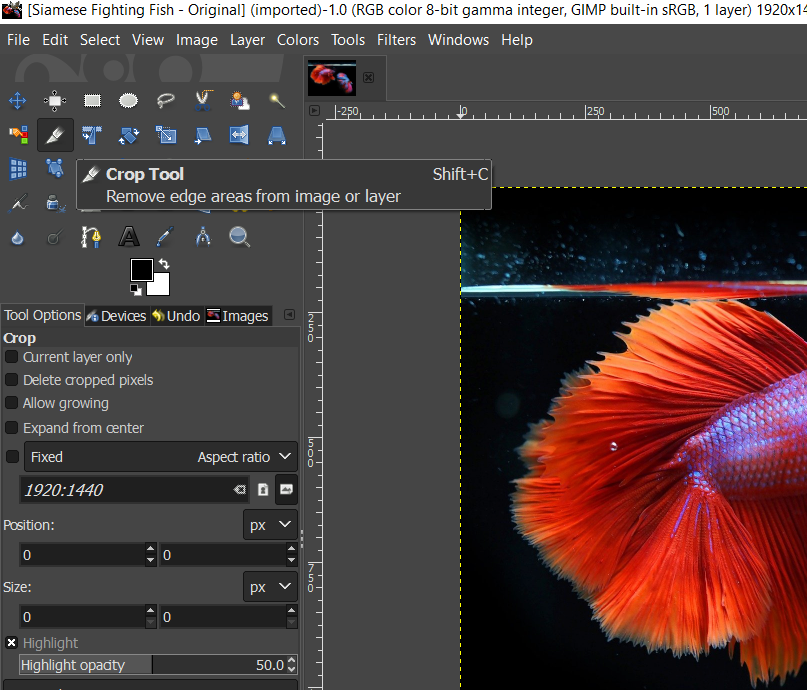
Step 4:Choose crop size from tool options.
The ‘fixed’ option lets you crop to a specific aspect ratio (1:1, 1:2, etc.). You can also crop to a fixedheight, width, or size.
Step 5:To crop to free size, deselect the fixed cropping option.
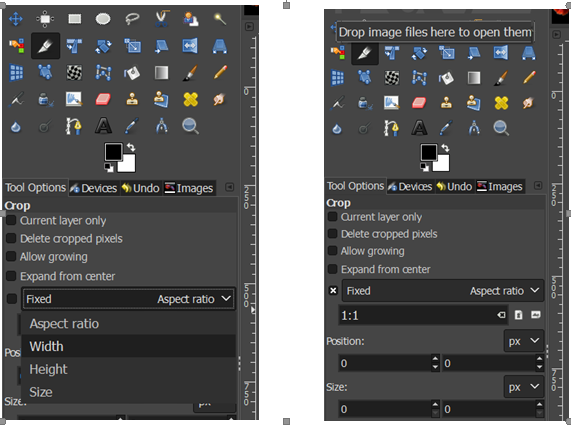
For this picture, I prefer to crop to a fixed ratio of 1:1, which will crop to a perfect square.
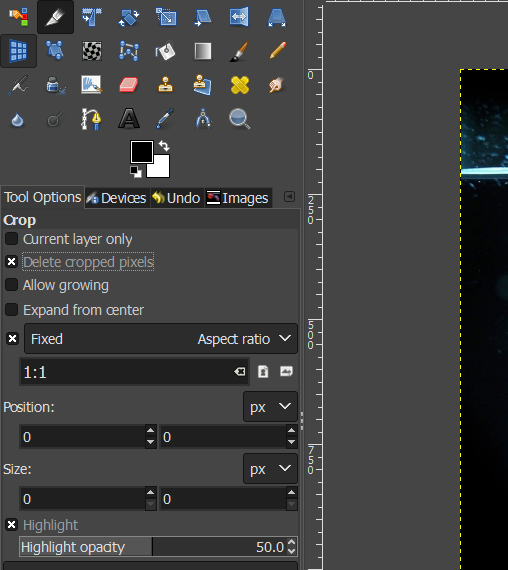
Step 6:Select ‘delete cropped pixels’ to ensure the picture is automatically resized after the picture is cropped.
Step 7:Click and move the cursor over the area of the picture you want to keep.

Step 8:You can increase or decrease the size of the crop area by shifting the edges of the bounding box highlighted orange.
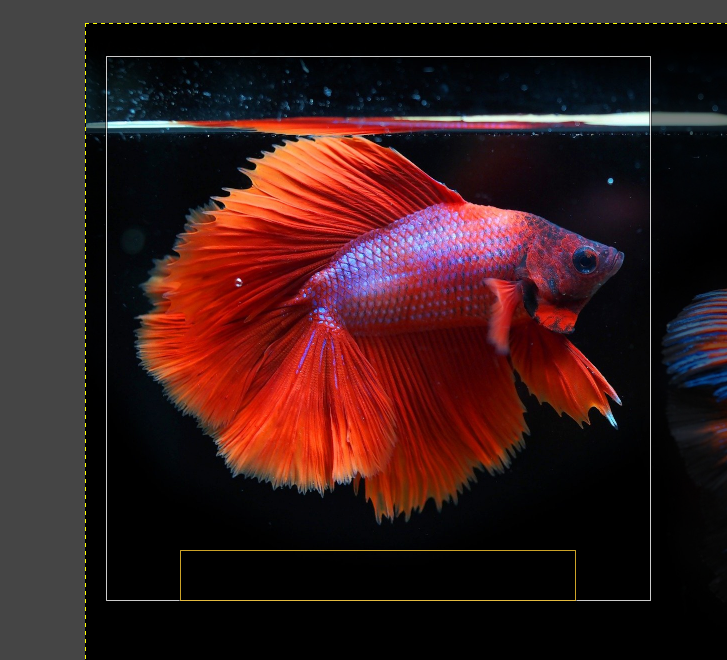
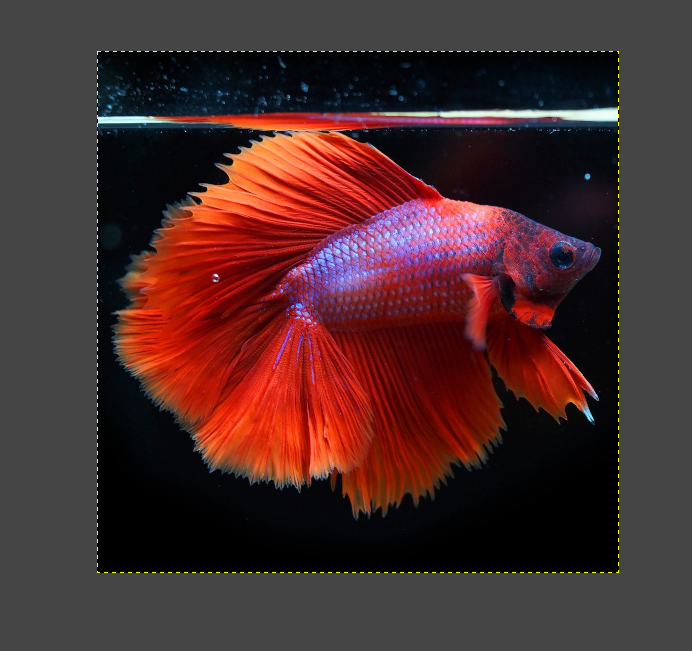
Step 9:When you have set the desired crop size, press enters to crop. See cropped picture below.
Step 10: To save the cropped picture, go to ‘File’, ‘Export as’. Then set the file name and select file format (PNG or JPEG).

(2) CROPPING WITH THE RECTANGLE SELECT TOOL
GIMP has 3 selection tools. They are the Rectangle Select Tool, the Ellipse Select Tool, and the freehand select tool. You can use any of them to crop images to a variety of shapes. In this part of the tutorial, I’ll show you how to crop with the rectangle tool
Step 1: Open the image you want to crop
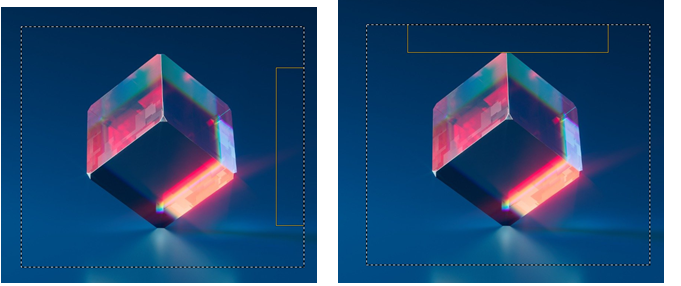
For this tutorial, I want to crop this picture of a blue crystal.

Step 2: Activate the ‘Rectangle Select Tool’. Notice that just like the crop tool, you can choose a fixed proportion for your selection. You can also select to a specific size. For this tutorial, I’ll select to free size.
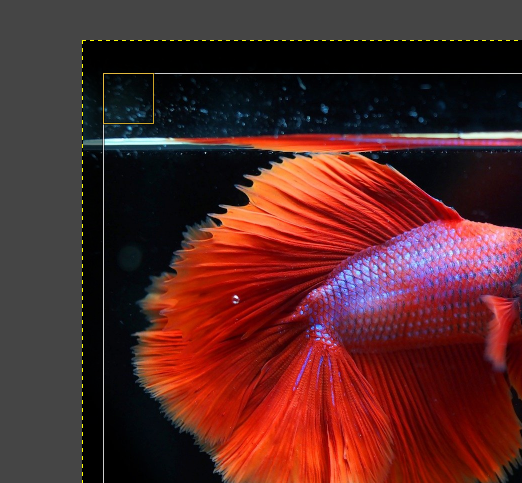
Step 3: Click and drag over the area you want to keep in your cropped photo. Moving dotted lines will appear around the selected area.

Step 4: Adjust shape accordingly using the edges of the selection box highlighted in orange.
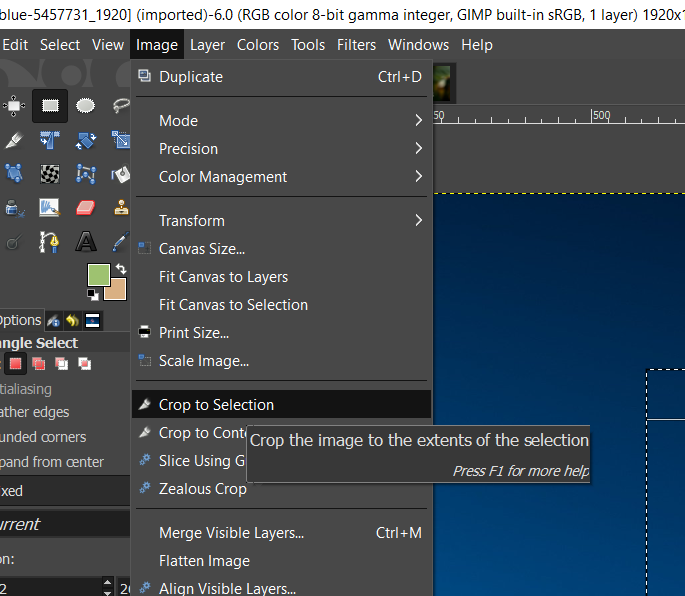
Step 5: Go to the ‘Image’ tab and click ‘Crop to Selection’ in the dropdown menu.
Step 6: Then, go to the ‘Select’ tab and click ‘None’

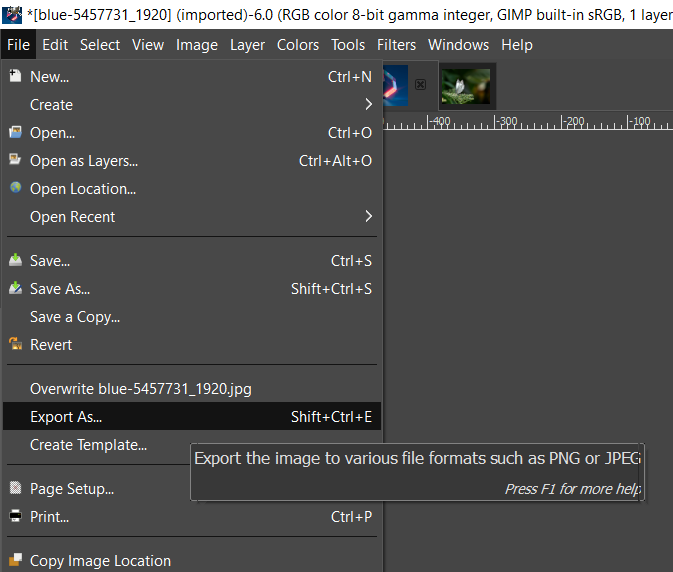
Step 7: Go to ‘File’ and ‘Export as’ to save your picture as JPEG or PNG
(3) CROPPING WITH THE ELLIPSE TOOL
Step 1: Open the image you want to crop.
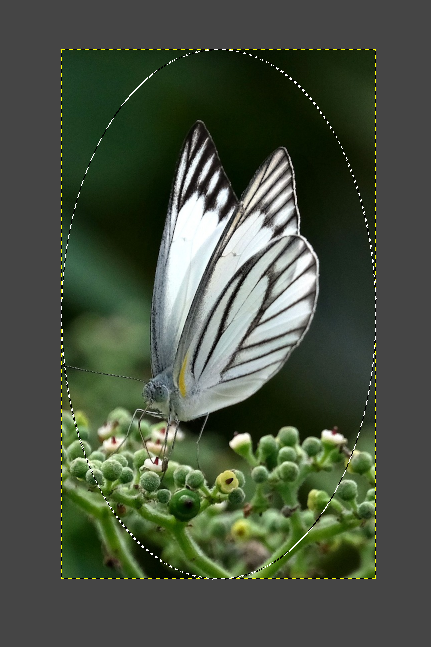
For this tutorial, I want to create a circular cropped image of the butterfly below.
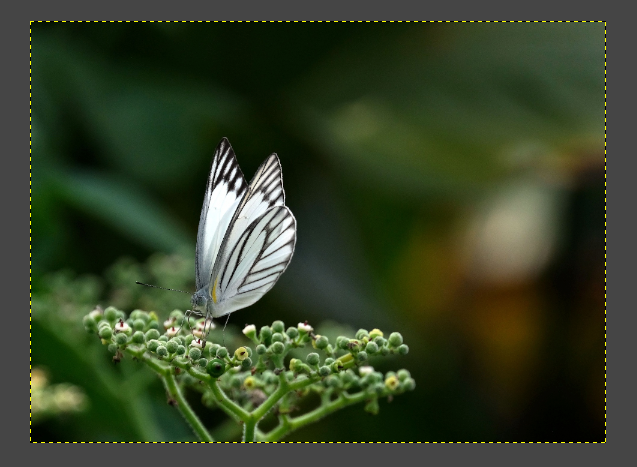
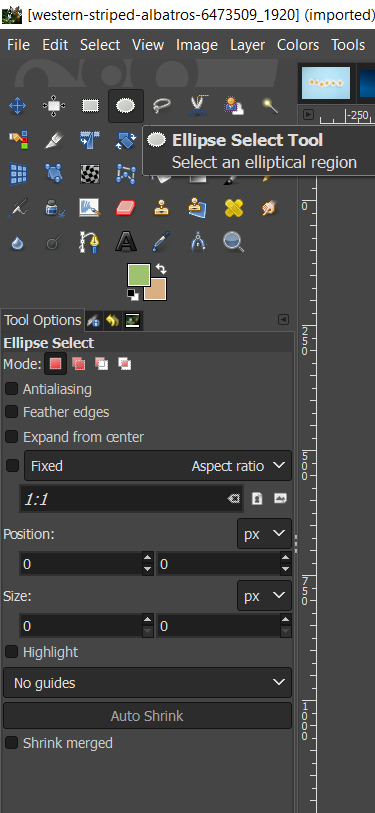
Step 2: Activate the ‘Ellipse Select Tool’
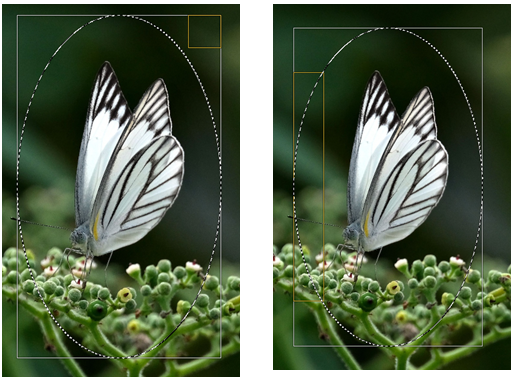
Step 3:Click and drag over the area you want to keep in your cropped photo. Moving dotted lines in a circular shape will appear around the selected area. However, this area has rectangular edges, which we can use to adjust the selected area.

Step 4: Adjust shape accordingly using the edges of the selection box highlighted in orange.
Step 5: Go to the ‘Image’ tab, and in the dropdown menu, click ‘Crop to Selection’
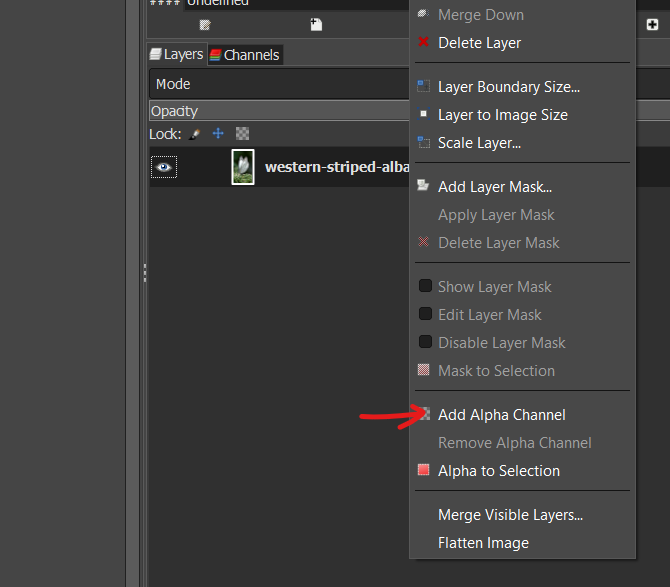
Step 6: Step 5 leaves us with a rectangular crop even while the circular selection is still active. To get rid of the rectangle, we need to delete the area outside the circular selection. Go to the ‘Layers’ tab, right-click the image layer and select ‘Add Alpha Channel’.
Step 7: Then, invert the selected area by pressing ‘Ctrl + I’.
Step 8: Press ‘Delete’, and you’ll be left with the circular selection only.
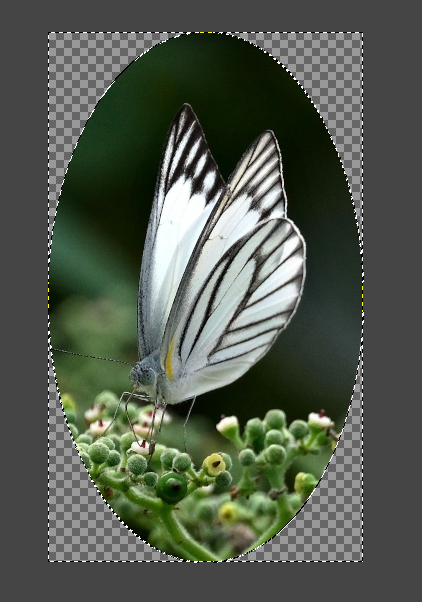
Step 9: Go to the ‘File’ tab, click ‘Export as’ and save as PNG to retain the transparent area around the ellipse.
(4) CROPPING WITH THE FREEHAND SELECT TOOL
Step 1: Open the image you want to crop.
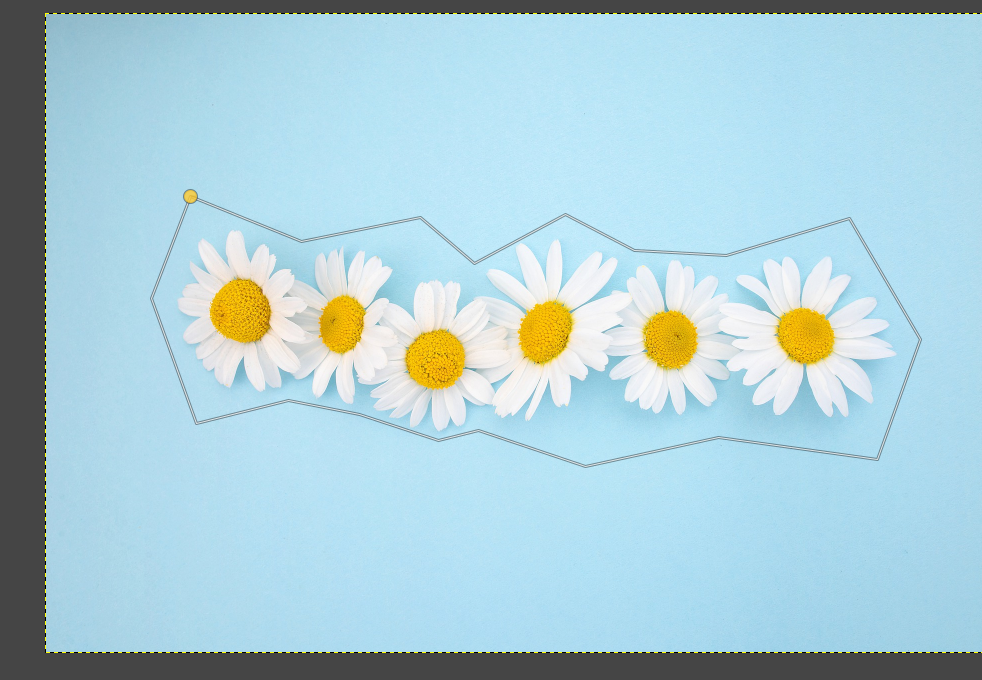
For this tutorial, I want to create a polygon crop around the row of daisies below.

Step 2: Activate the ‘Freehand Select Tool’

Step 3: Begin to place points around the object(s) you want to crop to create a unique shape.

Step 4: To close the shape, double click on the first point, which should be highlighted in orange. Moving dotted lines should appear around the selected area.
Step 5 :Go to the ‘Image’ tab, and in the dropdown menu, click ‘Crop to Selection’
Step 6:Step 5 leaves us with a polygon selection inside a rectangle. To get rid of the rectangle, we need to delete the area outside the polygon. Go to the ‘Layers’ tab, right-click the image layer and select ‘Add Alpha Channel’.

Step 7: Then, invert the selected area by pressing ‘Ctrl + I’.
Step 8: Press ‘Delete’, and you’ll be left with the polygon selection only.

Step 9: Go to the ‘File’ tab, click ‘Export as’ and save as PNG to retain transparent area around the polygon shape.
Conclusions:
We hope you can crop an image in gimp to follow our step-by-step tutorial. If you think it was very helpful, please feel free to drop a comment and share the post. Thanks for your time to read the article.