Buffer is the same as the JavaScript “array” but with one difference i.e. its size can not be changed once it has been set. Its common features are writing, reading, comparing, copying, converting, and many others. All of the specified operations can be performed using its predefined methods and properties.
This guide will explain how to create, write, and read a buffer in Node.js.
How to Create, Write, and Read a Buffer in Node.js?
To create, write, and read a buffer in Node.js, go through the listed methods:
- Create a Buffer Using “alloc()” and “from()” Methods
- Write Data into Buffer Using the “write()” Method
- Read Data of a Buffer Using the “to String()” method
Let’s start with the creation of a buffer.
How to Create a Buffer in Node.js?
The “Buffer” object provides two built-in “alloc()” and the “from()” methods for the creation of a buffer. This section shows the practical implementation of both methods and constructs a buffer. Let’s discuss both of them one by one.
Method 1: Create a Buffer Using “Buffer.alloc()” Method
The “alloc()” method creates a new buffer object of the particular size specified as its argument. The working of this method relies upon its basic syntax which is stated below:
According to the above syntax, the “alloc()” method works on three parameters:
- size: It specifies the memory of the buffer.
- fill: It is an optional parameter that specifies a value to fill the buffer.
- encoding: It represents the encoding type if the buffer values are strings. It is “utf8” by default.
The following code block applies the above-defined method practically to create a buffer:
console.log(buf);
In the above code snippet:
- The “Buffer.alloc()” method constructs a buffer object of the specified size.
- The “console.log()” method displays the constructed Buffer object.
Output
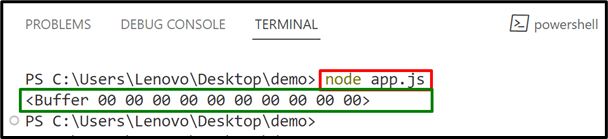
Now, execute the “.js” file using the given command:
It can be seen that an uninitiated buffer is created because no value is specified in it:
Let’s check out the “from()” method to create a buffer.
Method 2: Create a Buffer Using “Buffer.from()” Method
The “Buffer.from()” method constructs a new buffer with a specified array, string, buffer, or arrayBuffer. If no value is specified with it as its argument then it returns a “Buffer” object:
The above syntax shows that “from()” method works on the following two parameters:
- obj: It denotes the logical object types such as array, string, buffer, or arrayBuffer.
- encoding: It is the same as the “encoding” parameter of the “alloc()” method.
The following code block creates a new buffer using the defined “Buffer.from()” method:
console.log(buf);
In the above code lines:
- The “Buffer.from()” method creates a buffer object with the specified array.
- The “console.log()” method shows the constructed Buffer object.
Output
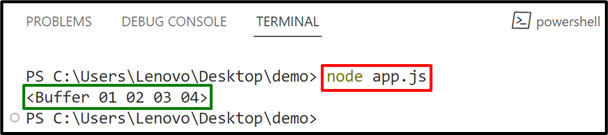
Initiate the “.js” file:
It can be observed that the terminal displays a newly created buffer with the specified content:
How to Write Data into Buffers in Node.js?
The “Buffer.write()” method writes the specified string into the buffer at the particular position. If the size of the buffer is not sufficient for the specified string then a limited part of the string will be written according to the space.
The syntax used for “buffer.write()” method is written below:
The “write()” method takes the following parameters to perform the defined task i.e. write a specified string into a buffer:
- value: It represents the string data that the user wants to write into a buffer.
- start: It denotes the index from where the string will start adding to the buffer. Its default value is “0”.
- bytes: It specifies the number of bytes to write in a buffer. Its default value is “buffer length – start position”.
- Encoding: It shows the encoding type that is “utf8” by default.
Now, use the above-defined method practically:
buf.write('ll',2);
console.log(buf.toString());
In the above code lines:
- The “from()” method constructs a buffer with a pre-existing string.
- The “write()” method writes a specified string into the created buffer at a particular index.
- The “console.log()” method displays the updated buffer in the console.
Output
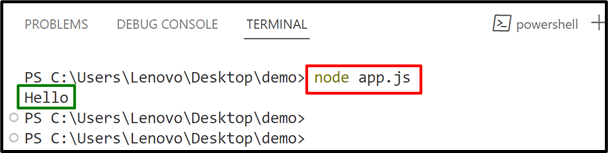
Run the below-stated command to see the output:
The above command is executed successfully and shows the updated buffer:
How to Read a Buffer in Node.js?
The “Buffer.toString()” method converts the buffer content into the string format according to the specified encoding type. If the buffer is created with the help of the “from()” method then the “toString()” method will display the original string without decoding it.
Syntax
The above syntax supports the following parameters:
- encoding: It specifies the encoding type whose default value is “utf8”.
- start: It denotes the starting position where the reading process will start.
- end: It specifies the ending position where the reading process will stop.
Here is its practical implementation:
console.log(buf.toString());
In the stated lines of code:
- The “from()” method constructs a buffer with a specified string.
- The “toString()” method returns the original string specified in the buffer without passing any encoding type.
Output
Execute the given command to run the “.js” file:
The terminal successfully shows the buffer data i.e. the original string specified in it:

That is all about creating, reading, and writing a buffer in Nodejs.
Conclusion
To create the buffer in Nodejs, use the “Buffer.alloc()” or the “Buffer.from()” method. To write the buffer data, utilize the “Buffer.write()” method. Moreover, for reading the data of a buffer, utilize the “Buffer.toString()” method. All these methods are pre-defined, simple, and easy to use. This guide has practically demonstrated all possible methods to create, write, and read a buffer in Node.js.