This blog post will demonstrate the process for creating a dynamic table in JavaScript.
How to Create a Table Dynamically in JavaScript?
Let’s see an example explaining how a dynamic table will be created in JavaScript.
Example
To begin, write the following lines in a new HTML document to create a form that takes data and then shows it in a table by adding it dynamically:
<h4>Fill the below form:</h4>
<label>Name:</label>
<input type="text" id="name"><br><br>
<label>Gender:</label>
<input type="text" id="gender"><br><br>
<label>Designation:</label>
<input type="text" id="designation"><br><br>
<label>Joining Date:</label>
<input type="date" id="date"><br><br>
<button id="add" value="Add">Add Data to Table</button>
</div>
In the above code snippet:
- First, create a heading “Fill the below form:”.
- Create input fields for “Name”, “Gender”, “Designation”, and “JoiningDate” with assigned id’s “name”, “gender”, “designation”, and “date” respectively, to take the input values from the user.
- These ids are used for getting the reference of the elements in JavaScript.
- Then, create a button with the “onclick” property that will call the “addTableRow()” function in a script file, to add and show the data in a table:
Here, in the HTML file, write these lines of code to create a table structure, where data will be dynamically added:
<h4>Employee Record</b></h4>
<center>
<table id="tableData" border="1" cellpadding="2">
<tr>
<td><b>Name</b></td>
<td><b>Gender</b></td>
<td><b>Designation</b></td>
<td><b>Joining Date</b></td>
</tr>
</table>
</center>
</div>
In the above code:
- Create a table with the id “tableData” that will be used in the script file to get the reference of this table and then add the data to it.
- The table contains four columns, “Name”, “Gender”, “Designation”, and “Joining Date” that will store data according to column names.
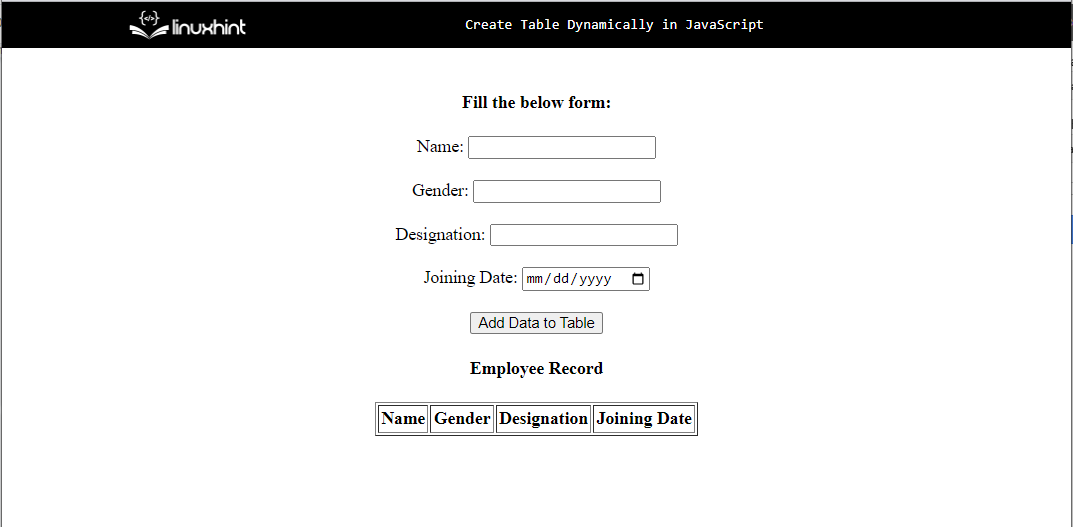
Running the HTML file will result in the following browser output:
Let’s add functionality for creating tables dynamically using JavaScript. In the script file or tag, use the below code that will create a table dynamically:
var name = document.getElementById("name");
var gender = document.getElementById("gender");
var designation = document.getElementById("designation");
var date = document.getElementById("date");
var table = document.getElementById("tableData");
var rowCount = table.rows.length;
var row = table.insertRow(rowCount);
row.insertCell(0).innerHTML= name.value;
row.insertCell(1).innerHTML= gender.value;
row.insertCell(2).innerHTML= designation.value;
row.insertCell(3).innerHTML= date.value;
}
In the above snippet:
- First, define a function “addTableRow()” that will trigger the click event of the HTML button.
- Then, get the reference of all input fields one by one using their respective assigned ids using the “getelementById()” method and store them in variables.
- These variables will be used to get the value of the input fields using the HTML “value” property and set them in the individual cells in the table using the “innerHTML” property.
- Add rows in a table utilizing the “table.rows.length” property and then store values in it.
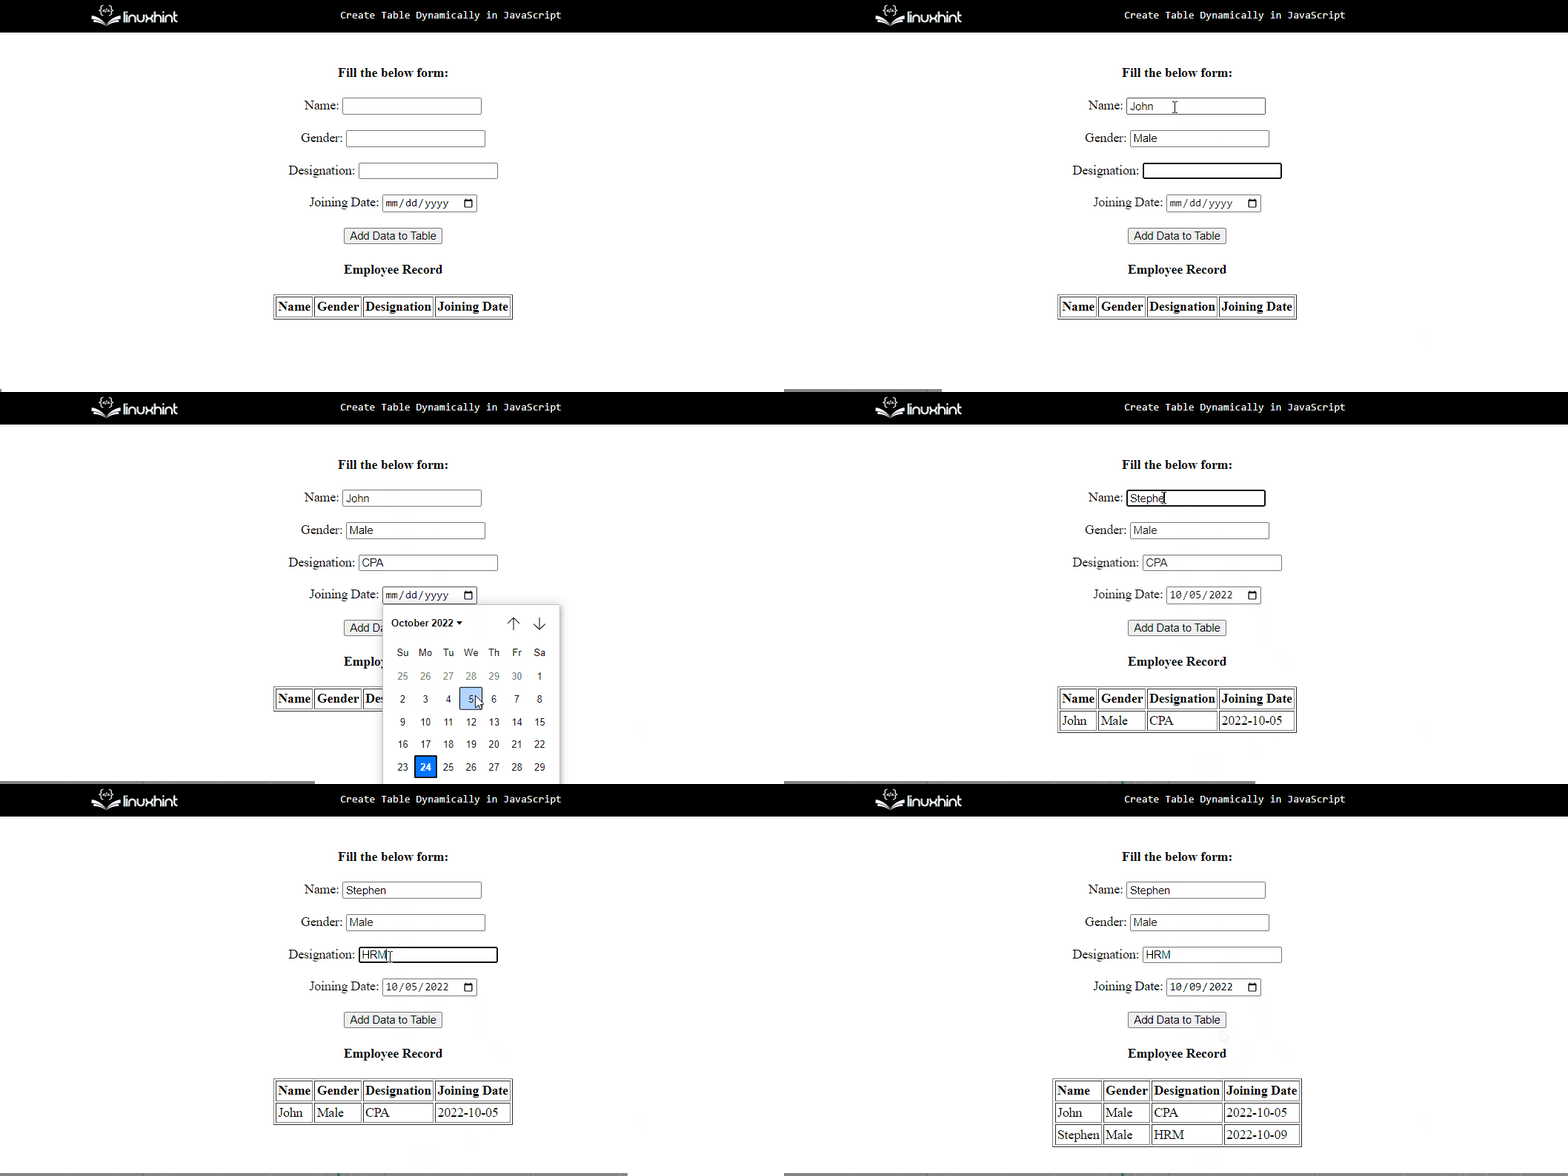
Output
The above output indicates that the dynamic table is successfully created by adding data in a form using JavaScript.
Conclusion
The dynamic table is created using the different HTML properties with JavaScript predefined methods. First, create a form in an HTML file and then get the reference of the fields using JavaScript predefined methods such as the “getElementById()” method and then retrieve their entered values using the “value” property. Set these values in a table’s respective columns using the “innerHTML” property. This blog post demonstrates the process for creating a dynamic table in JavaScript.


