Contents Overview
- What is the “node-canvas” Package?
- Prerequisites Before Creating and Saving Images with node-canvas
- Common Methods and Properties Used for Creating and Saving an Image with node-canvas
- How to Create and Save an Image with node-canvas?
- Example 1: Creating and Saving an Image with node-canvas
- Example 2: Adding a Post Title With the Image Using node-canvas
- Example 3: Creating a Logo Image Along with a Byline Using node-canvas
- Example 4: Adding a Text’s Background Image
- Conclusion
What is the “node-canvas” Package?
The “node-canvas” package corresponds to a node.js module that enables the programmer to create and save images programmatically in a dedicated file. This package utilizes the “Cairo 2D” graphics library in order to generate an image in various formats such as “png”, “jpg” etc.
Prerequisites Before Creating and Saving Images with node-canvas
Before proceeding to create and save images with the “node-canvas” package, consider the following steps:
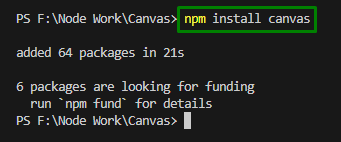
Step 1: Install the “canvas” Package
First, ensure to install this package via the below-given cmdlet:
Step 2: Create a “draw.js” File
Now, create the stated JavaScript file comprising the following code line to test the streamlined code execution:

Step 3: Modify the “package.json” File
After that, add a “scripts” section to this file(if not included before) and include the below-provided code line that executes “node draw.js”:
"draw": "node draw.js"
}
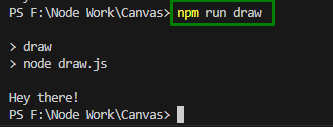
Step 4: Run the Code
Finally, execute the below-stated cmdlet to run the code that displays the “Hey there!” message in the target file:
Common Methods and Properties Used for Creating and Saving an Image with node-canvas
Below are the commonly used functionalities to create and save an image programmatically:
createCanvas(): This method creates a canvas element in the workspace and assigns its dimensions i.e., width, and height in pixels.
Syntax
In the given syntax:
- “wd” refers to the canvas’s width.
- “ht” corresponds to the canvas’s height.
- “[rend]” is a renderer that represents P2D or WEBGL constant values.
- “[cv]” indicates the canvas element.
getContext(): This method retrieves a drawing context on the canvas such that a 2-dimensional rendering context is represented.
Syntax
Here:
- “ct” refers to the type of context that is a string specifying the drawing context. Its value can be “2D”, “webgpu”, “webgl2”, “webgl”, etc.
- “ca” indicates multiple context attributes when creating the rendering context.
writeFileSync(): This method creates a new file if the target file is not there.
Syntax
In the given syntax:
- “fl” represents the file’s path as a string.
- “dt” refers to the string, Buffer to be written to the file.
- “opt” indicate the options that can be “encoding”, “mode” and “flag”.
fillStyle: This property allocates or retrieves the color, gradient, or pattern utilized to fill the drawing.
Syntax
Here, the property values can be “color”, “gradient” and “pattern” which represent the CSS color, the gradient, and pattern objects to fill the drawings, respectively.
fillRect(): This method draws a “filled” rectangle.
Syntax
According to this syntax:
- “a” and “b” refer to the “x” and “y” coordinates of the rectangle’s upper-left corner.
- “wd” and “ht” correspond to the rectangle’s width and height(in pixels).
How to Create and Save an Image with node-canvas?
The images can be created and saved with “node-canvas” by importing the “canvas” and “fs” modules and applying the “createCanvas()”, “getContext()” and “writeFileSync()” methods.
Example 1: Creating and Saving an Image with node-canvas
The following code demonstration creates and saves a sample image filled with color and is saved as “image.png” in the root of the project, as follows:
const fs = require("fs");
const wd = 900;
const ht = 500;
const canvas = createCanvas(wd, ht);
const dim = canvas.getContext("2d");
dim.fillStyle = "#8B0000";
dim.fillRect(0, 0, wd, ht);
const buffer = canvas.toBuffer("image/png");
fs.writeFileSync("./image.png", buffer);
In this code snippet:
- First, import the “canvas” module to enable creating and saving images programmatically.
- Also, include the “fs(file system module)” to store, invoke, and handle the data on the OS.
- After that, specify the width and height of the image, respectively.
- The “createCanvas()” method creates a canvas element in the workspace and assigns its dimensions by taking the defined width, and height in pixels as arguments. The “getContext()” method, however, retrieves a drawing context on the canvas such that a 2-dimensional rendering context is represented.
- Now, specify the color i.e., dark red to be filled in an image via the “fillStyle” property.
- Apply the “fillRect()” method that takes the specified width and height of the image as arguments and draws a filled rectangle.
- Lastly, apply the combined “toBuffer()” and “writeFileSync()” methods to return a promise with a buffer parameter and create a new file if the target file does not exist, respectively.
Output
Execute the below-given cmdlet to create the image:
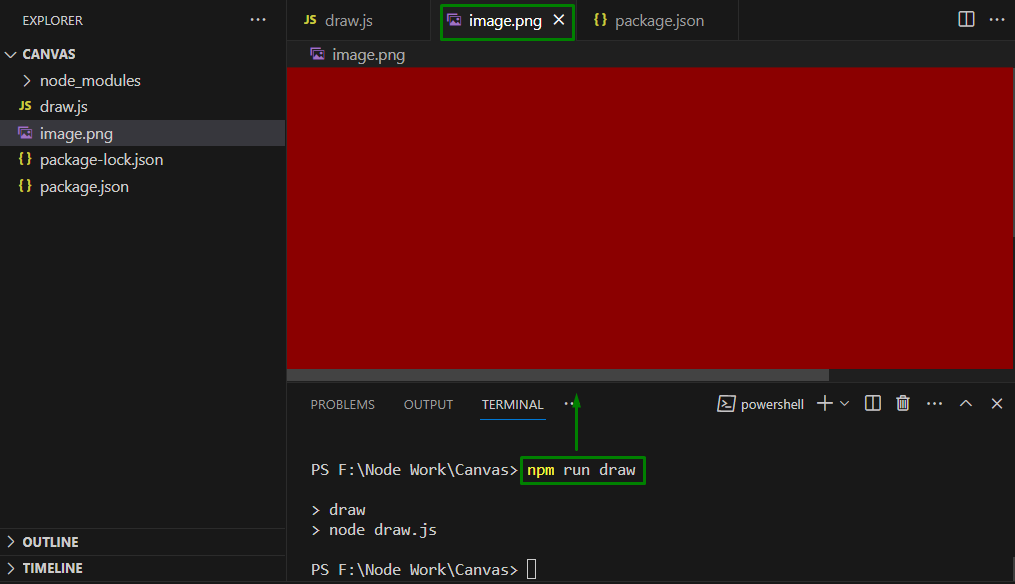
Here, it can be implied that the image is created successfully.
Example 2: Adding a Post Title With the Image Using node-canvas
This approach updates the “draw.js” file by making a few changes in the code such that a post title is included in the image, as follows:
const fs = require("fs");
const wd = 900;
const ht = 400;
const ptitle = {
title: "This image is created with canvas"
}
const canvas = createCanvas(wd, ht);
const dim = canvas.getContext("2d");
dim.fillStyle = "#8B0000";
dim.fillRect(0, 0, wd, ht);
dim.font = "bold 20pt 'Arial'";
dim.textAlign = "center";
dim.fillStyle = "#fff";
dim.fillText(ptitle.title, 450, 170);
const buffer = canvas.toBuffer("image/png");
fs.writeFileSync("./image.png", buffer);
According to this code, perform the below-given steps:
- Likewise, include the “canvas” and “fs” modules to work with the images and data handling on OS, respectively.
- After that, specify the width and height of the image followed by the given post title.
- Now, recall the steps for creating a canvas element, representing the 2D rendering context, and filling the image with color.
- Lastly, similarly, apply the “fillRect()”, “toBuffer()” and “writeFileSync()” methods, respectively.
Output
Execute the below-stated cmdlet to create an image with the post title:
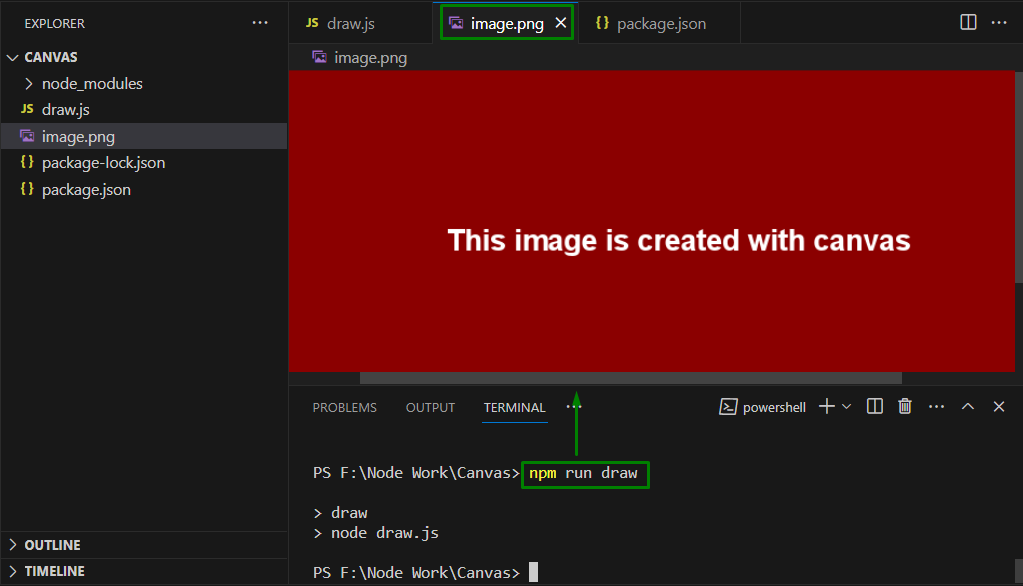
Here, it can be verified that an image is created and saved with the post title appropriately.
Example 3: Creating a Logo Image Along with a Byline Using node-canvas
The below code demonstration creates a logo image with the post title and byline(A line comprising the author’s information):
const fs = require("fs");
const post = {
title: "Adding a Logo Image with Canvas",
author: "Umar Hassan",
};
const wd = 1000;
const ht = 550;
const imagePosition = {
w: 400,
h: 88,
x: 400,
y: 75,
};
const authorYcoord = 450;
const canvas = createCanvas(wd, ht);
const context = canvas.getContext("2d");
context.fillStyle = "#8B0000";
context.fillRect(0, 0, wd, ht);
context.font = "bold 40pt 'Arial'";
context.textAlign = "center";
context.fillStyle = "#fff";
context.fillText(`by ${post.author}`, 600, authorYcoord);
loadImage("F:/JOB TECHNICAL ARTICLES/logo.png").then((image) => {
const { w, h, x, y } = imagePosition;
context.drawImage(image, x, y, w, h);
const buffer = canvas.toBuffer("image/png");
fs.writeFileSync("./image.png", buffer);
});
According to this block of code, consider the below-provided steps:
- Repeat the steps for including the “canvas” and “fs” modules.
- Note: The “loadImage” function is added to include an image to the canvas.
- Specify the post title and byline(comprising the author’s name), respectively.
- Include the image’s width and height and the coordinates for the image position(in the “imagePosition” variable).
- The “authorYcoord” variable sets the vertical position of the byline.
- Moving forward, similarly apply the “createCanvas()”, “getContext()”, “fillRect()”, and “fillText()” methods and the discussed “fillStyle”, “font”, and “fillStyle” properties, respectively.
- These applied methods and properties basically set the image’s dimensions, color, font size, and text alignment, and enable only the byline to be displayed as vertically aligned.
- Lastly, load the logo image and render it on the screen.
Output
Run the following cmdlet to execute the code:
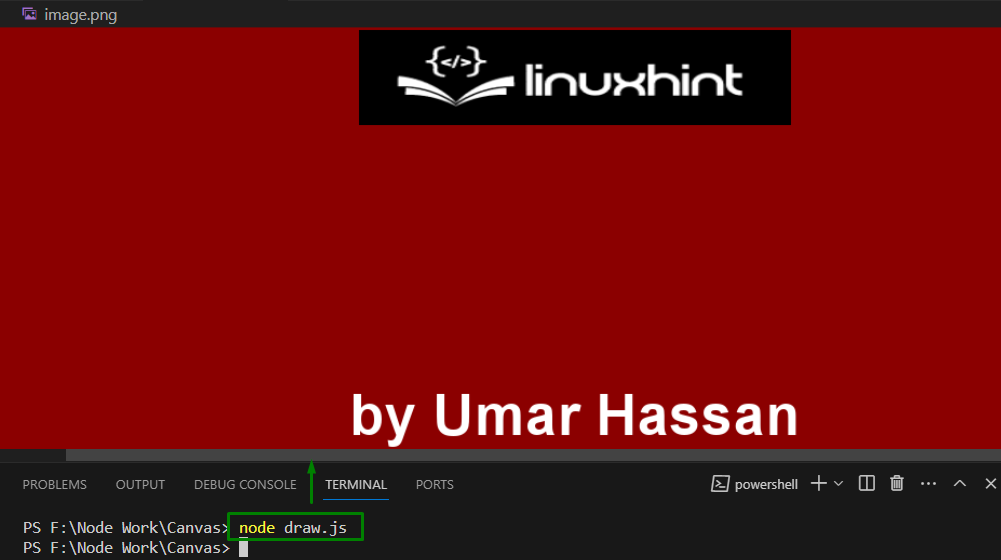
From this outcome, it is evident that the logo image is created along with a byline.
Example 4: Adding a Text’s Background Image
This example creates an image as a background to the text, demonstrated below:
const fs = require("fs");
const post = {
title: "Adding a Logo Image with Canvas",
author: "Umar Hassan",
};
const wd = 1000;
const ht = 550;
const imagePosition = {
w: 400,
h: 88,
x: 400,
y: 75,
};
const authorYcoord = 450;
const canvas = createCanvas(wd, ht);
const context = canvas.getContext("2d");
context.fillStyle = "#8B0000";
context.fillRect(0, 0, wd, ht);
context.font = "bold 40pt 'Arial'";
context.textAlign = "center";
context.fillStyle = "#fff";
context.fillText(`by ${post.author}`, 600, authorYcoord);
const text = 'This is Linuxhint'
context.textBaseline = 'top'
context.fillStyle = '#808080'
const textWidth = context.measureText(text).width
context.fillRect(600 - textWidth / 2 - 10, 170 - 5, textWidth + 20, 120)
context.fillStyle = '#fff'
context.fillText(text, 600, 200)
loadImage("F:/JOB TECHNICAL ARTICLES/logo.png").then((image) => {
const { w, h, x, y } = imagePosition;
context.drawImage(image, x, y, w, h);
const buffer = canvas.toBuffer("image/png");
fs.writeFileSync("./image.png", buffer);
});
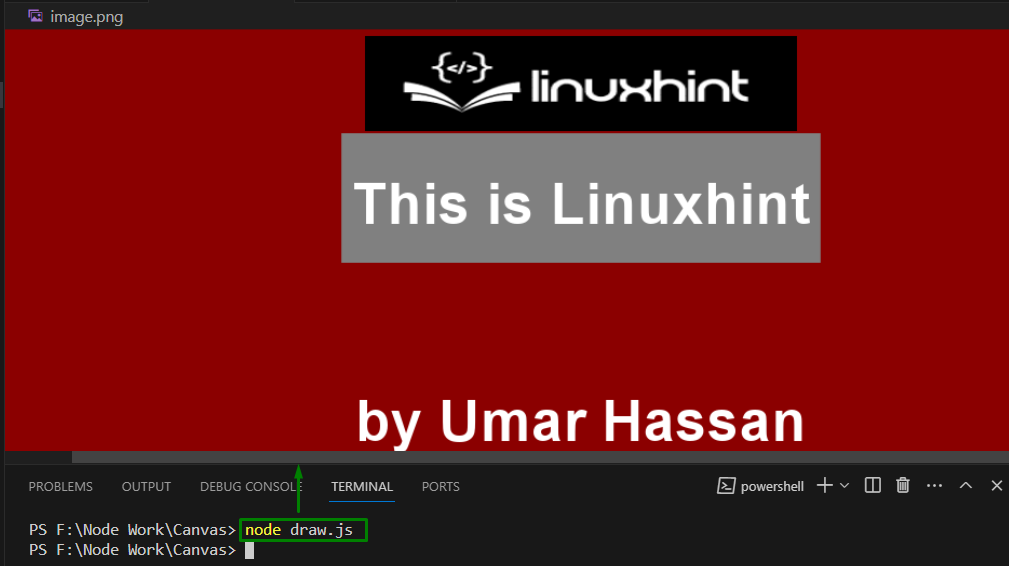
Here, the additional “textBaseline” property is set to the “top” to streamline the rectangle’s positioning. Also, apply the “measureText” property to get an object comprising the target text’s width. After that, the same coordinates are utilized to draw an image that was used to draw the text.
Output
Run the below cmdlet to retrieve the output:
Conclusion
Creating and saving images with “node-canvas” requires including the “canvas” and “fs” modules, specifying the image dimensions, and applying the “createCanvas()”, “getContext()” and “writeFileSync()” methods. Also, a post title, a logo image, and a byline can be appended to the created image.