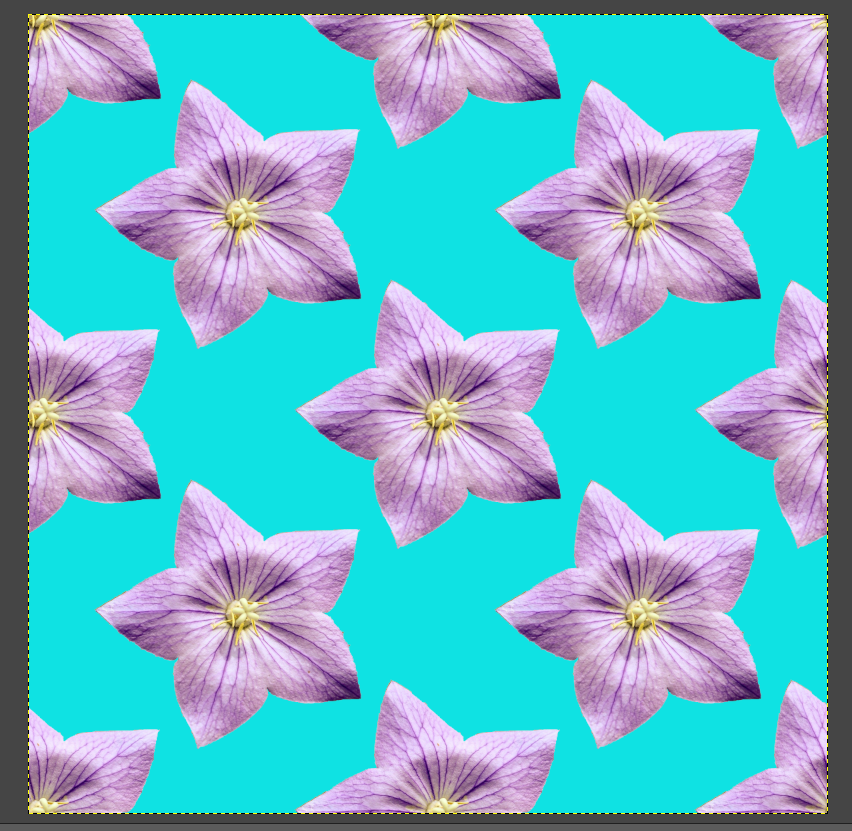
In this tutorial, I take you through the steps of creating a new seamless pattern using an object cut out from a picture.
A seamless pattern is a design that repeats both vertically and horizontally, from edge to edge. This means it can be printed on really large surfaces without needing to create a large file. All you need is a basic pattern tile, and you’re good to go.
For instance, with a 3 x 3-inch pattern tile, you create prints to any scale. What’s more, your prints will be perfect from edge to edge if they are in multiples of 3 (6 x 6, 12 x 12, 24 x 24, 24 x 36, 36 x 36, etc.). The same goes if you measure in pixels.
For this tutorial, I will use the bellflower I cut out during the scissor tool tutorial.
Here’s the step-by-step process for creating a unique pattern of your own and adding it to your pattern library.
Step 1: Open the object you would like to use in your pattern design.
For this tutorial, I am using a flower cutout. For best results, your design object should have a transparent background, which means it should be saved in PNG format.
Step 2: Next, scale the image to a small size. I resized my flower cutout from 1073 x 1085 pixels to 400 x 404 pixels.
Ensure the chain by the ‘Width’ and ‘Height’ boxes is linked for proportional scaling. Then click ‘Scale’.
Step 3: Then, set the size of the pattern tile, which should be larger than the object. Go to ‘Layer’ and ‘Layer boundary size’. Increase the size of the canvas to 600 x 600px, set offset to ‘Center’, ensure background fill is ‘Transparency’, and click ‘Resize’.
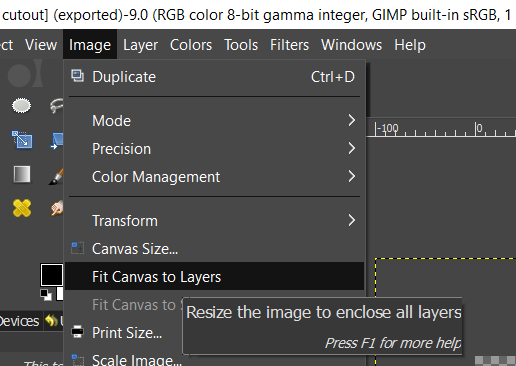
Step 4: Go to the ‘Image’ tab and click ‘Fit canvas to layers’. This will expand the canvas from 400x404px to 600 x 600px without resizing the object to be used in the pattern.
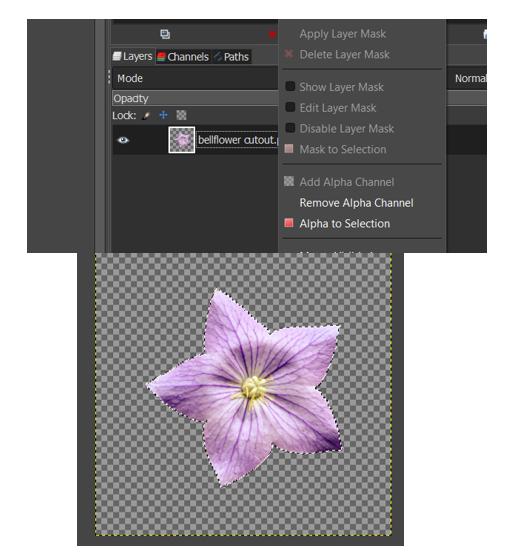
Step 5: Right-click the picture layer in the layers panel and click ‘Alpha to selection’ to select the object. The selected object should have moving dotted lines around it.
Step 6: Click ‘Ctrl + C’ to copy the object
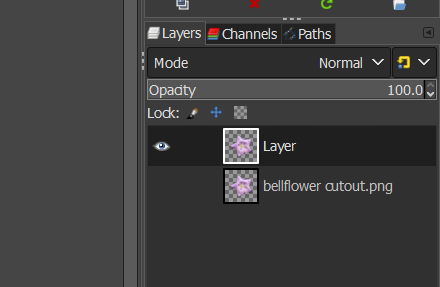
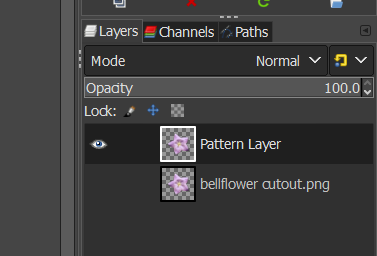
Step 7: Create a new layer from the layers panel.
Step 8: Paste the copied object into the new layer. A new ‘floating selection’ layer should appear. Right-click it and select ‘Anchor layer’ to paste into the new layer.
Step 9: Toggle the visibility icon of the original layer.
Step 10: Rename the new layer.
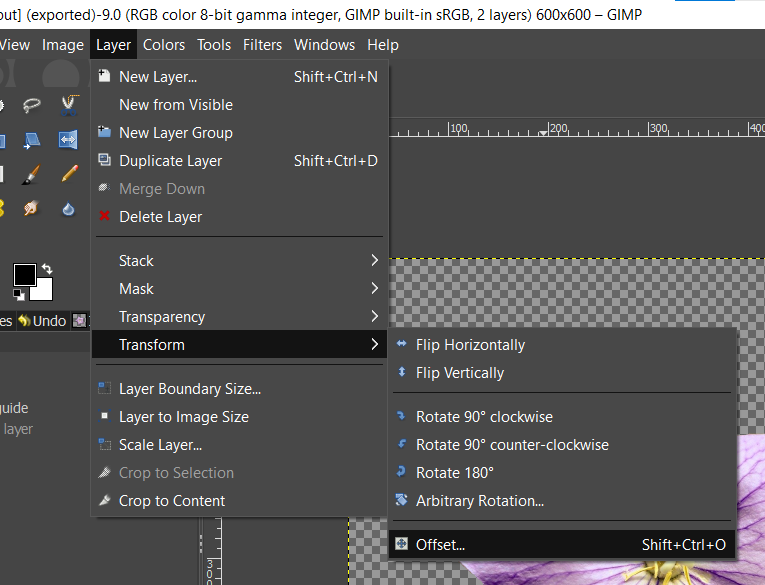
Step 11: With the new layer selected, go to the ‘Layer’ menu, ‘Transform’, and click ‘Offset’.
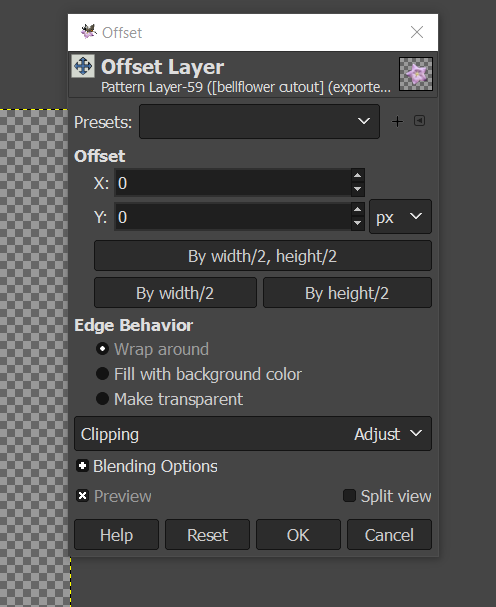
Step 12: Click ‘by width/2, height/2’ and with all other settings left at default, click ‘OK’
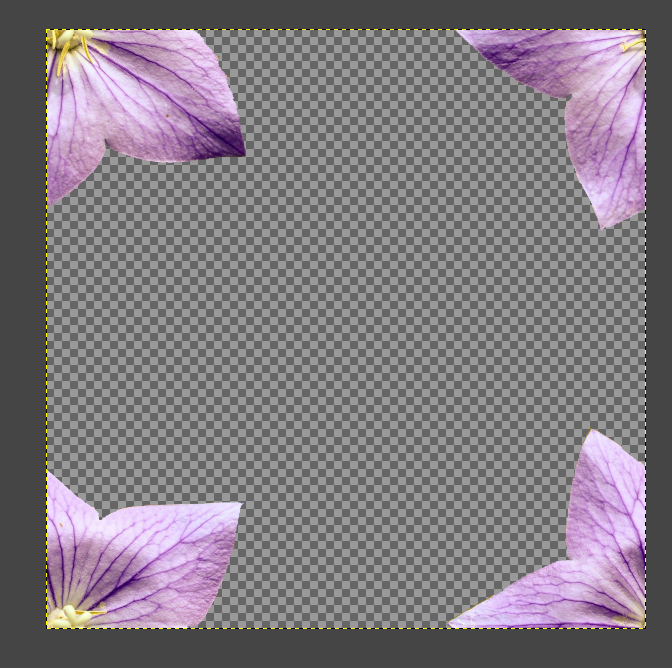
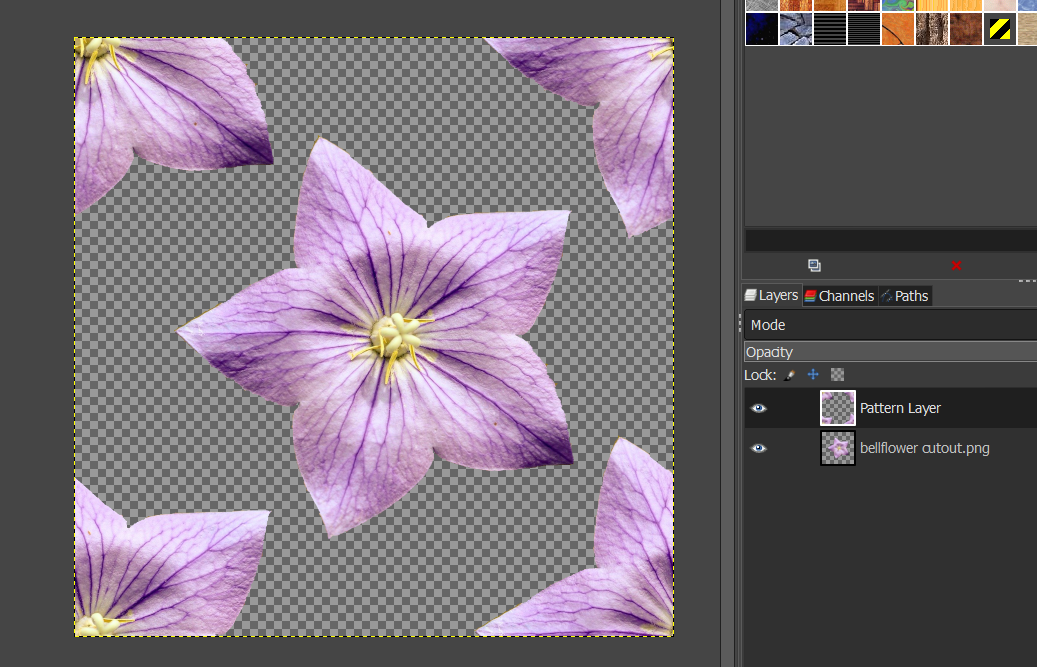
This will split and position the copied object at the 4 corners of the canvas.
Step 13: Toggle the visibility icon in the original layer to make it visible
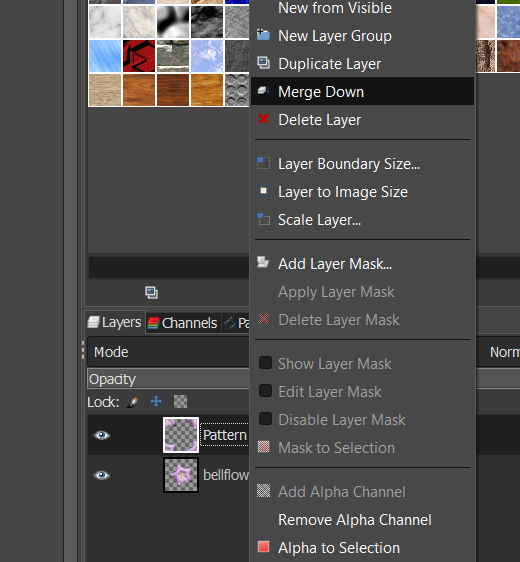
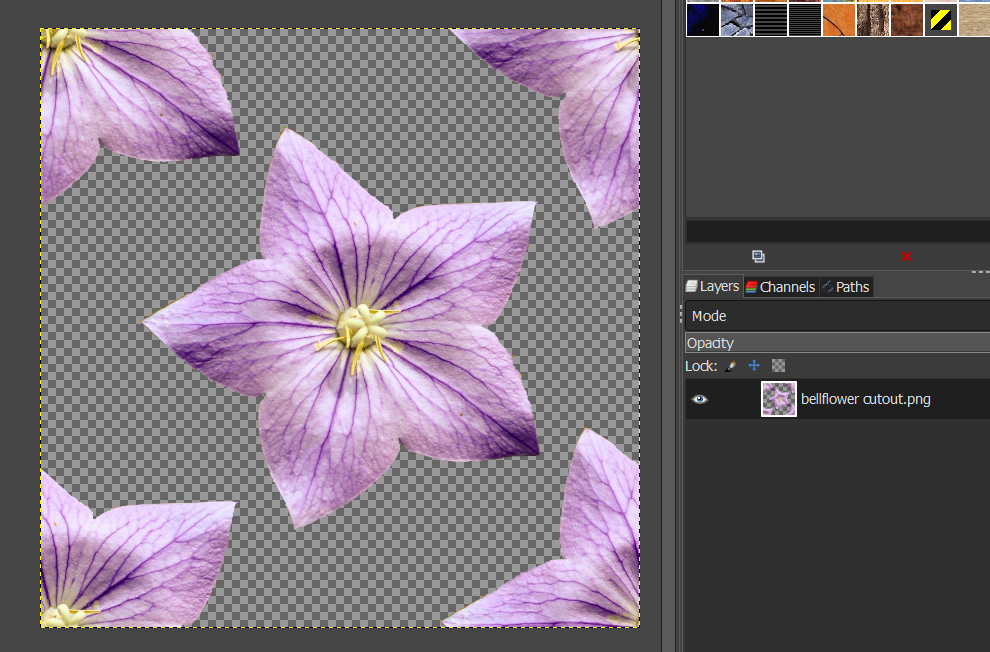
Step 14: Right-click the pattern layer and select ‘Merge down’ to create a complete pattern tile.
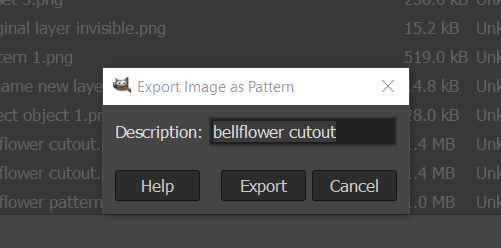
Step 15: Go to ‘File’, ‘Export as’, and save as a .pat file. This will bring up a special pattern export dialog box. Click ‘Export’.
TO ADD THE NEW PATTERN TO YOUR PATTERN LIBRARY
Step 1: Go to the folder where you saved the .pat file and copy it.
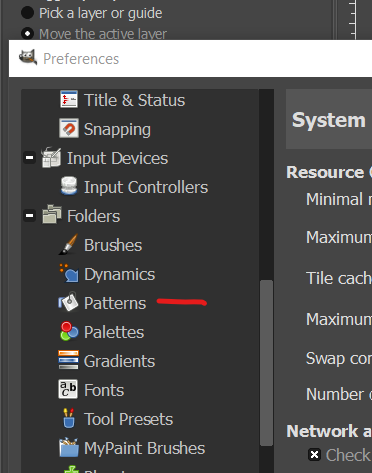
Step 2: Then go to GIMP, ‘Edit’, ‘Preferences’ and locate ‘folders’
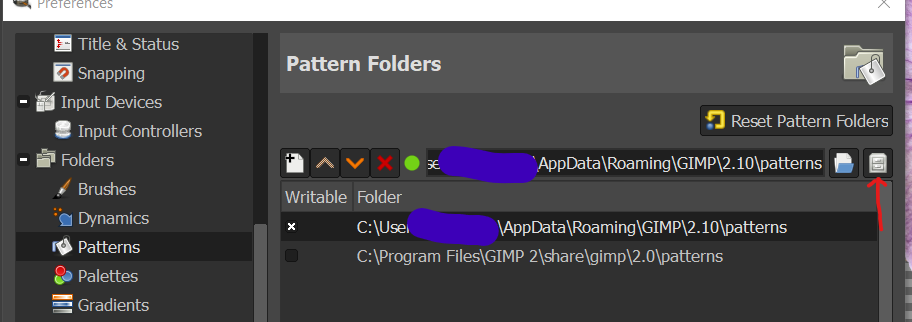
Step 3: Go to ‘Patterns’ within folders and click the cabinet icon to open the folder containing patterns
Step 4: Paste the copied pattern file in the patterns folder and close the folder.
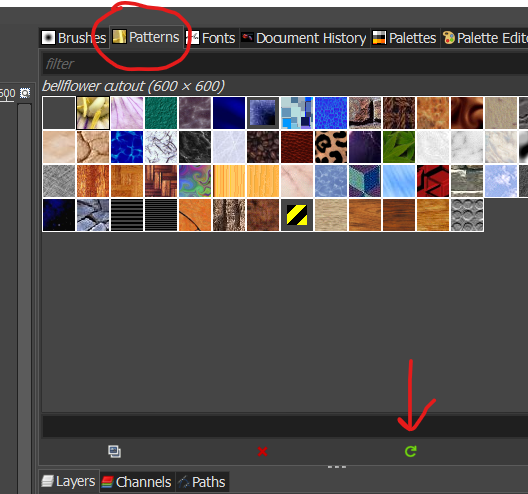
Step 5: Refresh pattern library from patterns tab. Your pattern has now been saved to your library and can be used as a fill for other creative projects.
CONCLUSION
If you’re interested in improving your graphic design or photo manipulation skills, then learning to create and use patterns in GIMP is important. GIMP has many powerful tools that are simple to use. With the ‘Offset’ transform dialog in the layers dropdown menu, you can create sophisticated, seamless pattern designs using different objects. I could have used several flower cutouts for my design. To create a pattern design with overlapping objects, I could also have made my pattern tile smaller (450 x 450px).
Experiment with different objects and tile sizes to come up with new and interesting designs of your own.


