The project of controlling LED with the button using the Raspberry Pi 4 is the basic level project to understand the interference of the LED and the button with Raspberry Pi 4. In this write-up, we have explained the project of controlling a LED with a button in Raspberry Pi 4 with its hardware configuration as well as with the demonstration of its Python code.
How to control LED with button in Raspberry Pi 4
For the circuit of controlling the LED with a button on the Raspberry Pi 4, we need the following electronic components:
- Raspberry Pi 4
- LED
- Resistor of 220 ohms
- Push-button
- Connecting wires
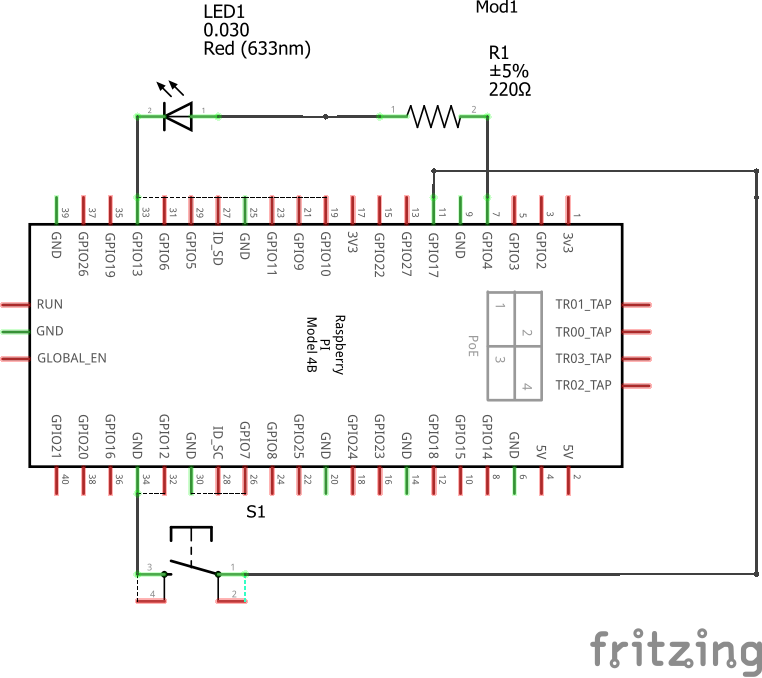
The circuit diagram for the circuit of controlling LED with a button will be:
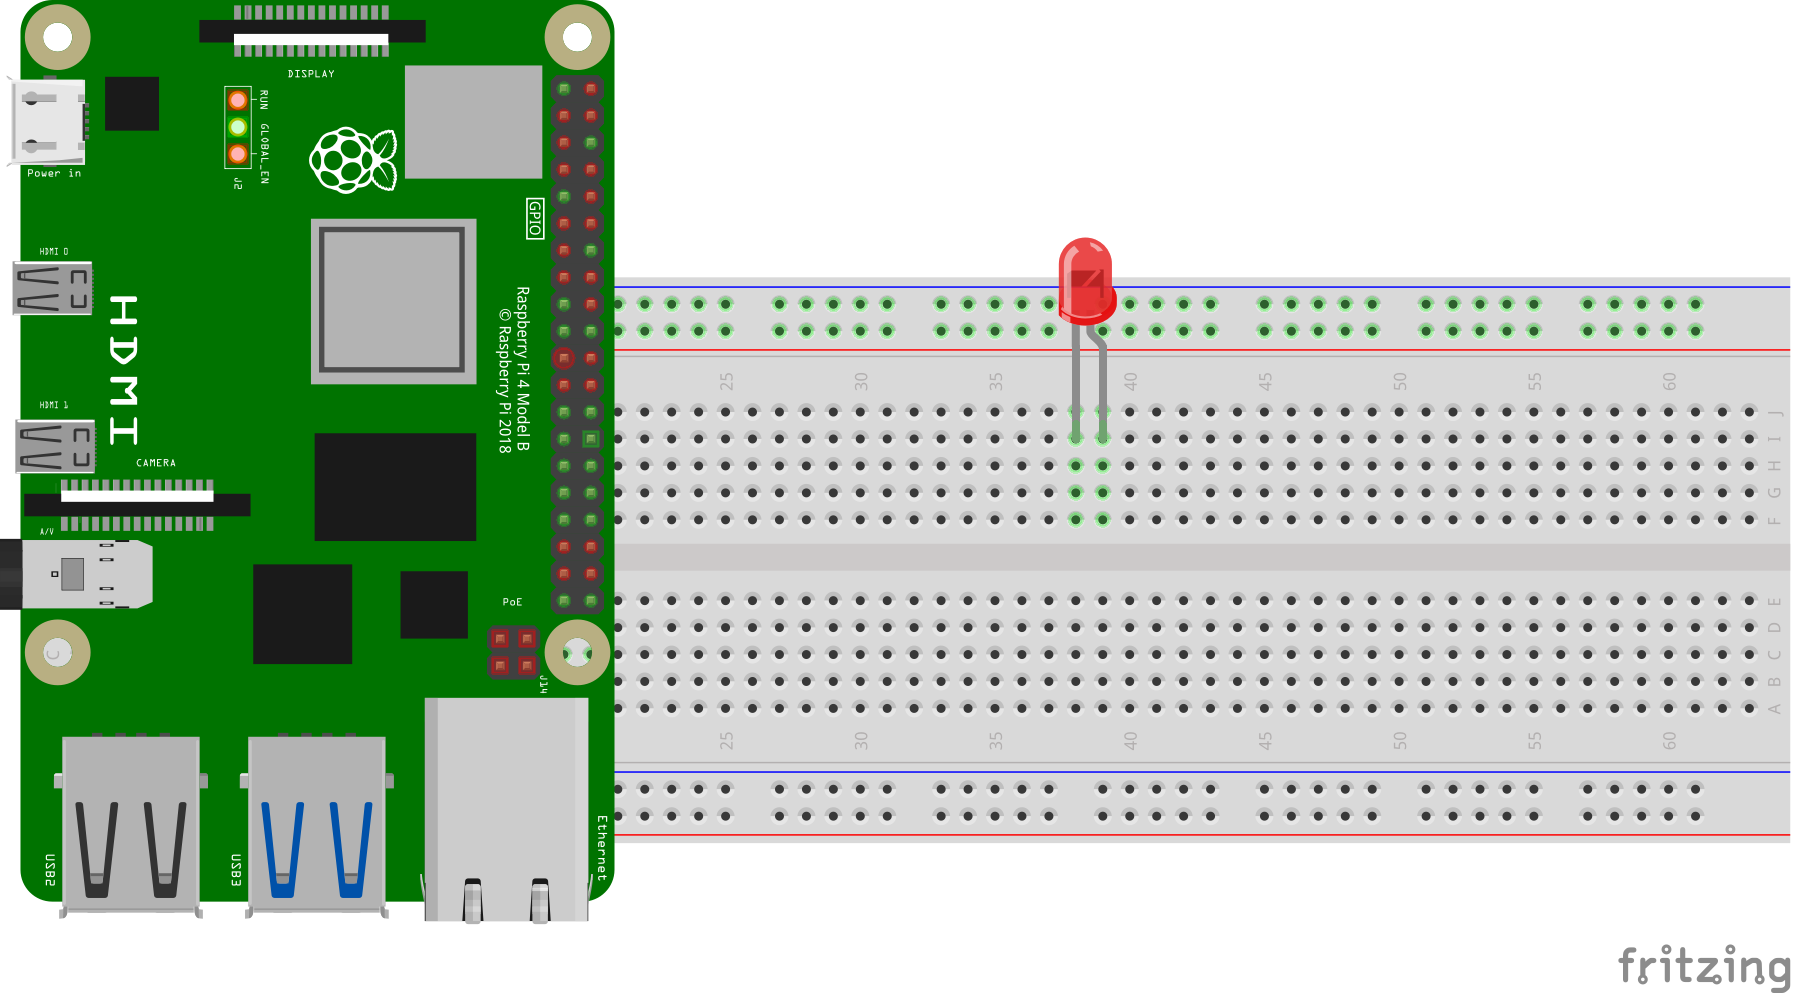
For hardware configuration of the above circuit diagram, we will first connect the Raspberry Pi 4 and a LED on the breadboard:
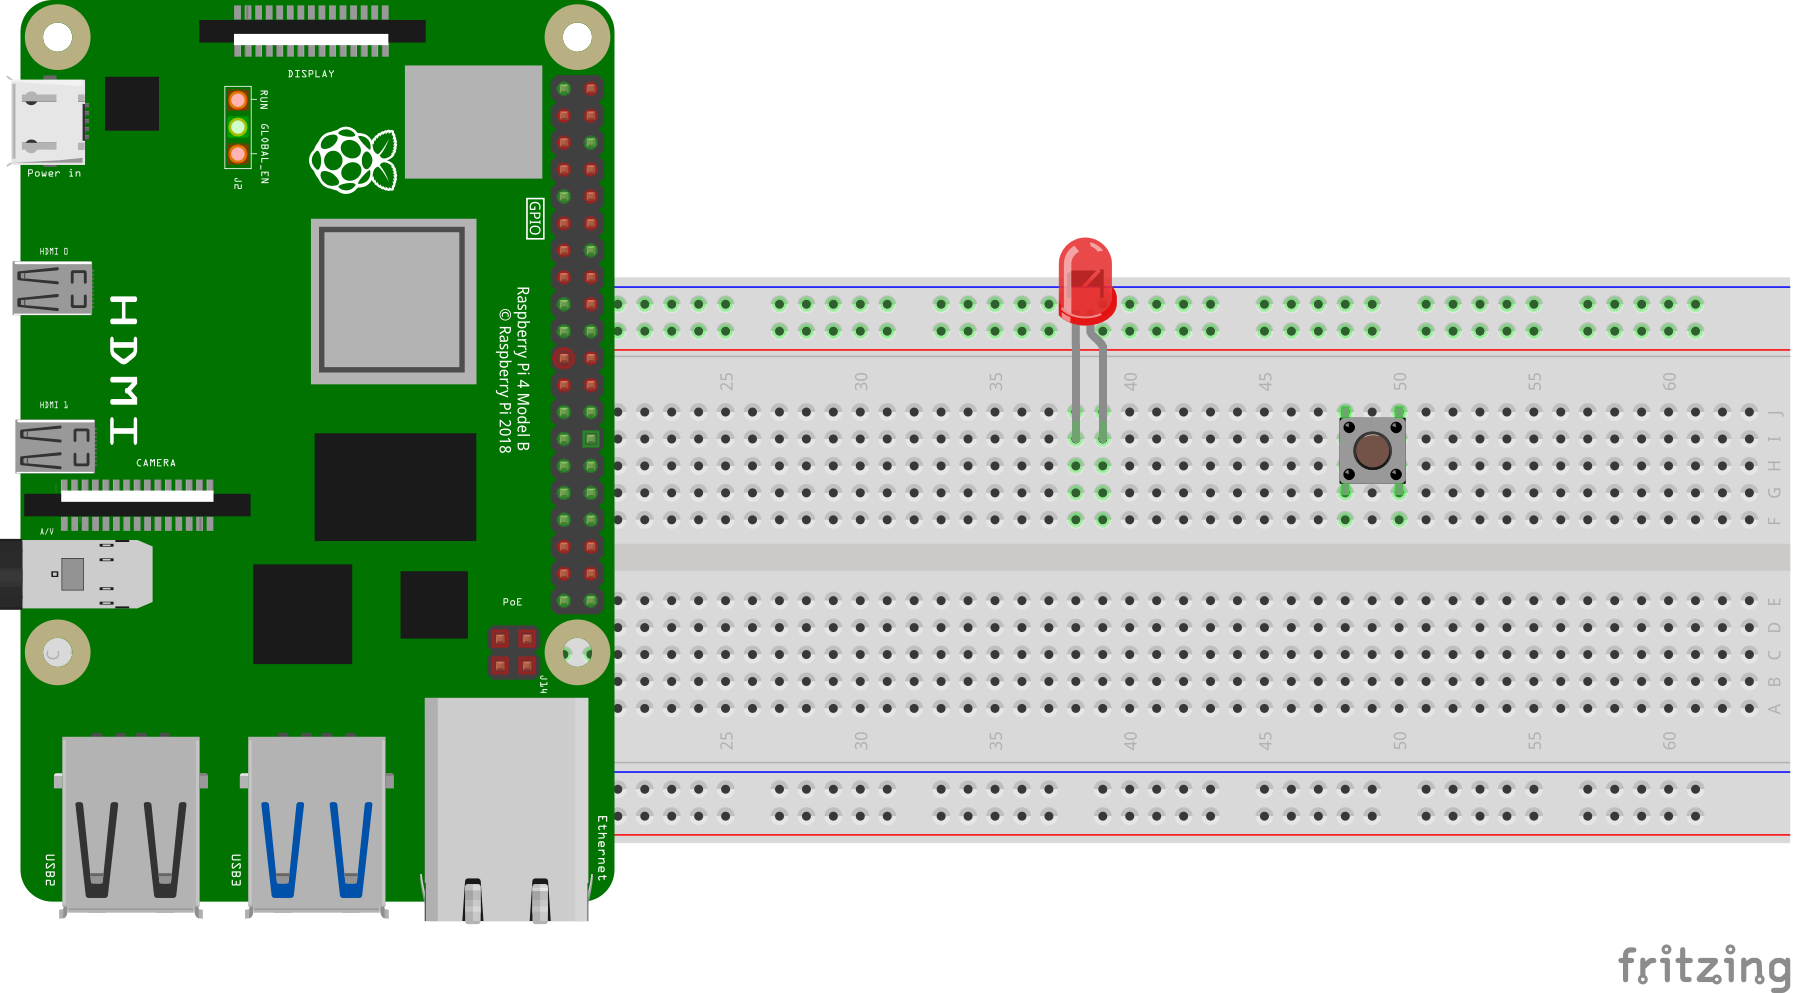
After this, we will connect the push-button(either of two legs or four legs) on the breadboard:
Then we will connect a cathode terminal of LED and any leg terminal of push-button to the series short terminal of the breadboard, and connect this short terminal of the breadboard with the ground pin of Raspberry Pi 4:
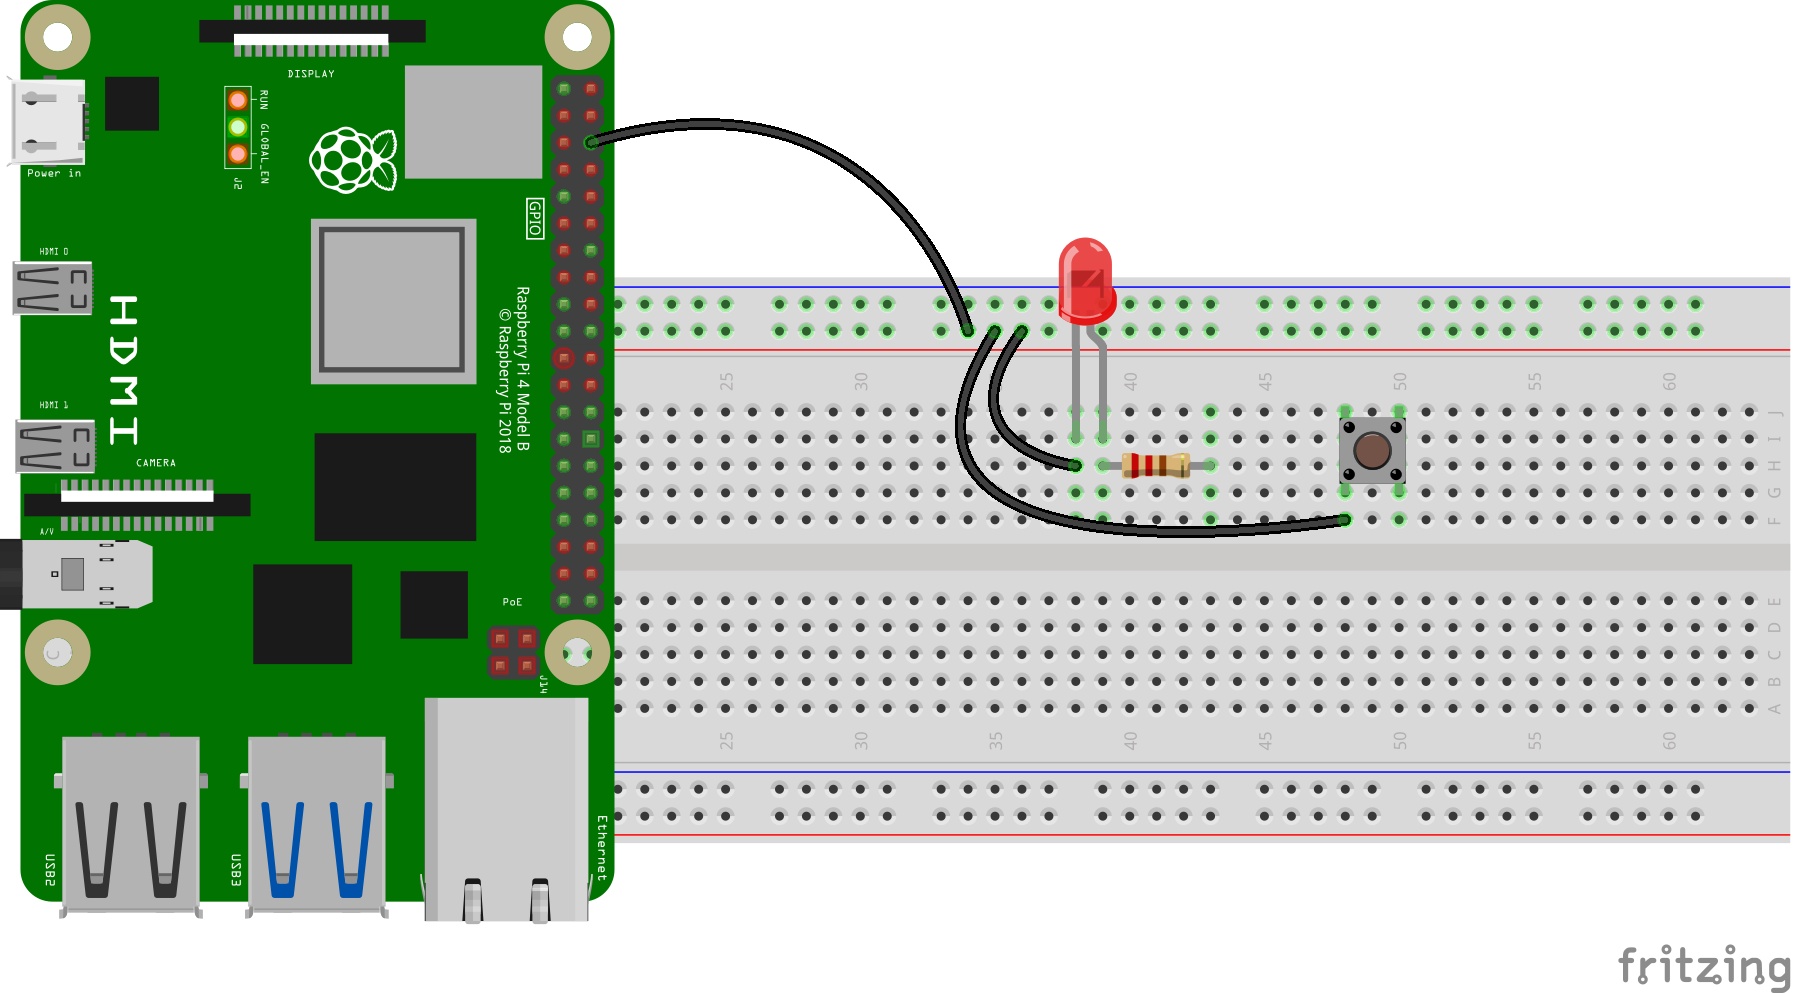
Connect the anode terminal of the LED with the GPIO pin 4 of Raspberry Pi 4:
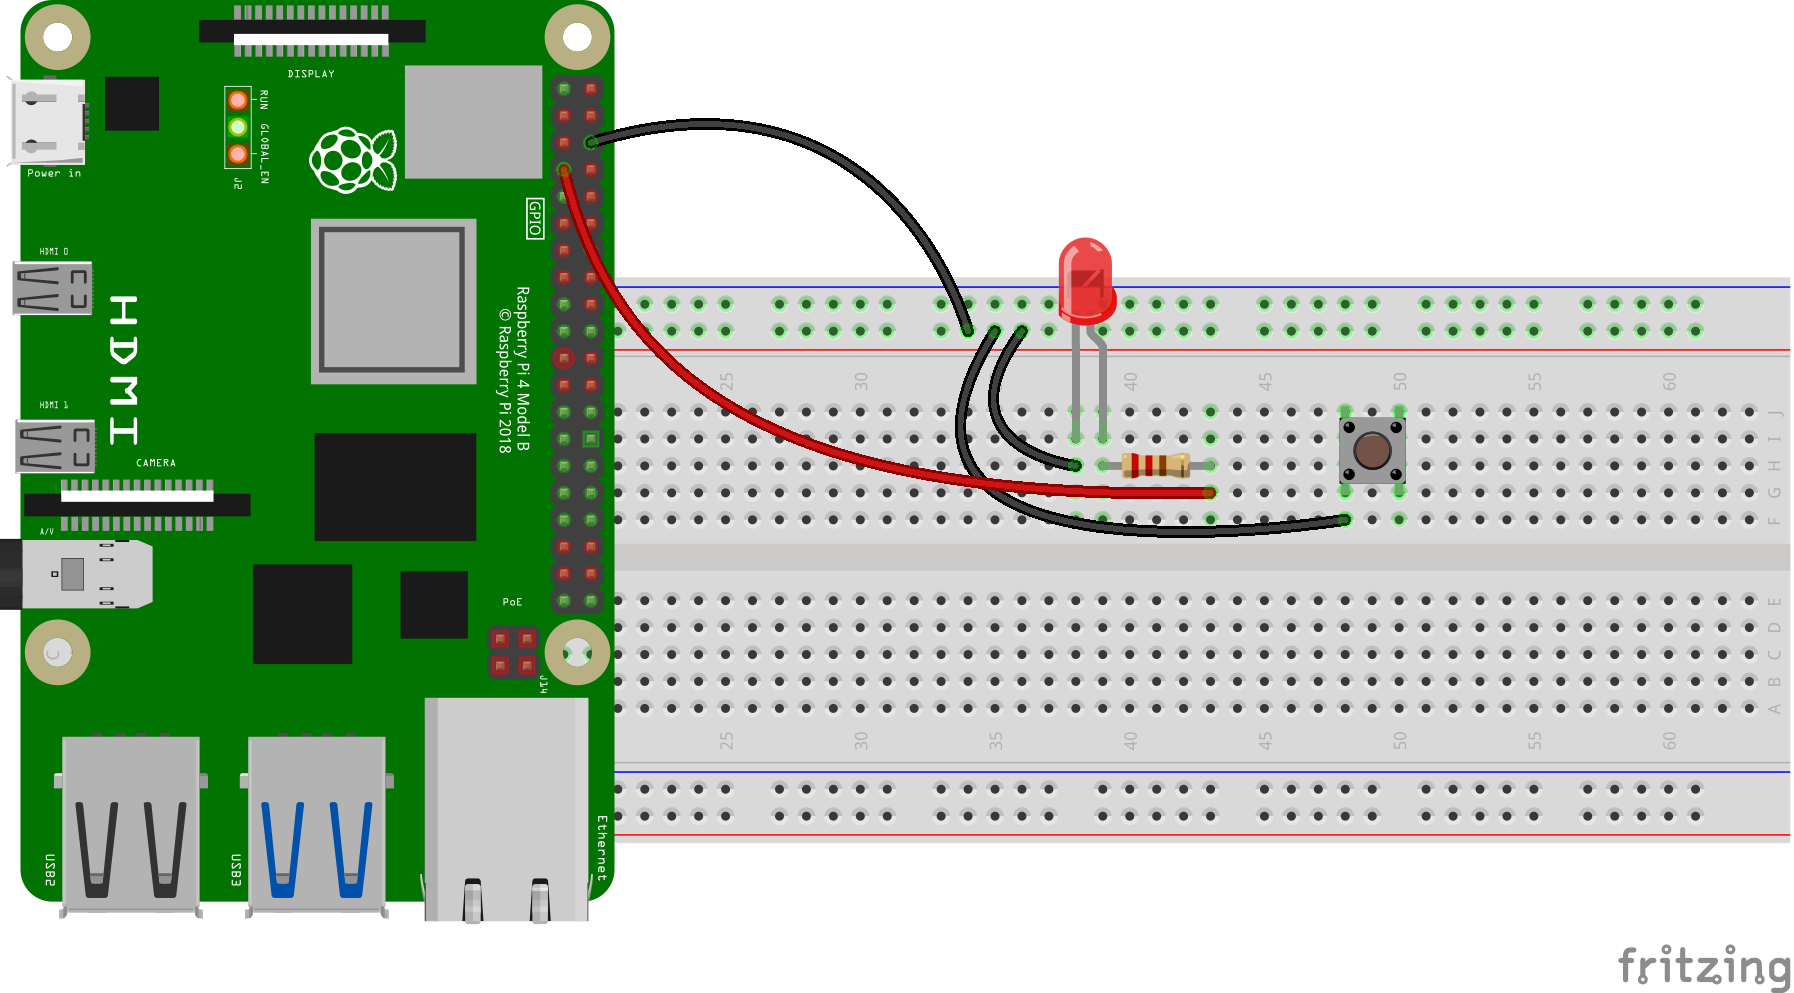
In the last, connect the remaining second terminal of the push-button with the GPIO 17 pin of the Raspberry Pi 4:
Python code for controlling LED with the button on Raspberry Pi 4
The Python code for controlling the LED with the button on Raspberry Pi 4 is simple, we will first make a file with the name of “LED_withButton.py” and open it with nano editor:
![]()
Type the following python code in the file to control the LED with Button:
#imports LED functions from gpiozero library
from gpiozero import Button
#imports Button functions from gpiozero library
led = LED(4)
#declare the GPIO pin 4 for LED output and store it in led variable
button = Button(17)
#declare the GPIO pin 17 for Button output and store it in button variable
while True:
#initiated an infinite while loop
button.wait_for_press()
#use the built-in function of the button to wait till press
led.on()
#turn on the led
button.wait_for_release()
#use the built-in function of button to wait till release
led.off()
#turn off the led
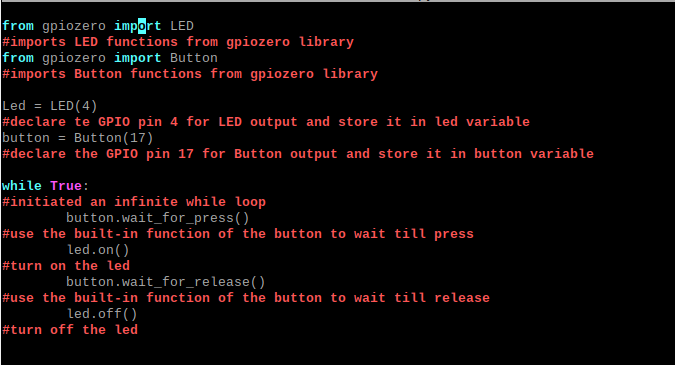
Explanation of the code: In the above code, we simply import the libraries of LED and Button from the gpiozero. Then we used the two variables led and button to which we assigned the GPIO pin 4 for the LED and GPIO pin 17 for the button. After declaring these variables, in an infinite while loop, we have turned on the LED on pressing the button, and on releasing the button, the LED is turned off.
Save the nano editor’s file by pressing CTRL+S and exit the editor by using the shortcut key CTRL+X. To execute the code file of LED_withButton.py, use the command:
![]()
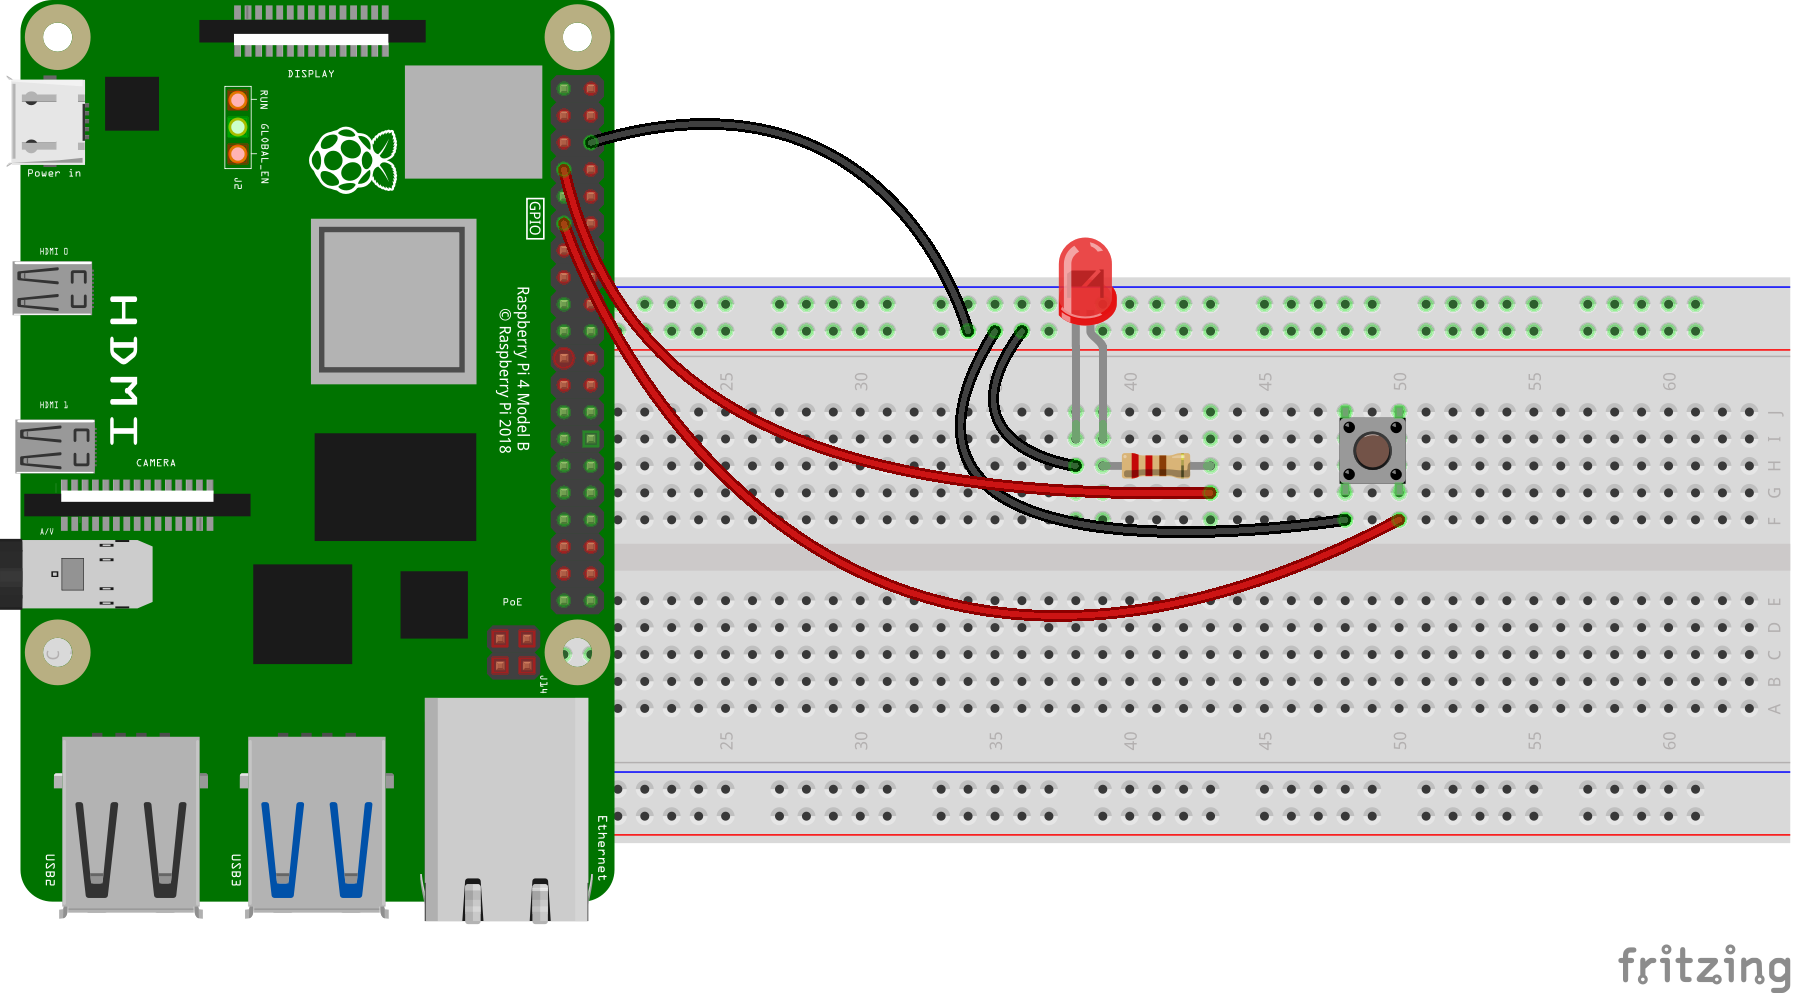
The hardware demonstration of the circuit is:
Conclusion
The controlling of LED with a button is a basic level electronic project to understand the interference of the LED and a button with the Raspberry Pi 4. These basic projects are essential for beginners as they help them to understand the usage of different components with the Raspberry Pi 4 and later on, help them to configure advanced level projects. In this write-up, we have explained the controlling of LED with the button on the Raspberry Pi 4 by demonstrating its python code and hardware configuration.