Radio buttons, an essential part of HTML forms, allow users to select one of the multiple options. They can be created by simply using the <input> tag of type “radio”. Radio buttons are used in a group of two or more buttons with a common name. This makes it easier to fetch them into a single object and check their status. The status of a radio button can be checked by using two different methods which will be discussed in this write-up.
The first step of both these methods is the same which is to create a form containing radio buttons:
Setting up an HTML Form
We’ll just create a simple HTML form with a few radio buttons:
<form>
<input type="radio" id="Red" name="colour" value="Red" />
<label for="Red">Red</label>
<input type="radio" id="Green" name="colour" value="Green" />
<label for="Green">Green</label>
<input type="radio" id="Blue" name="colour" value="Blue" />
<label for="Blue">Blue</label>
<br><br>
<button id="submit" onclick="checkValue()">Submit</button>
</form>
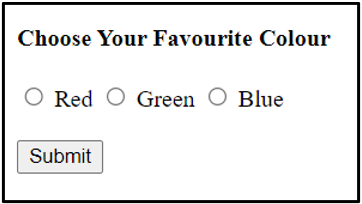
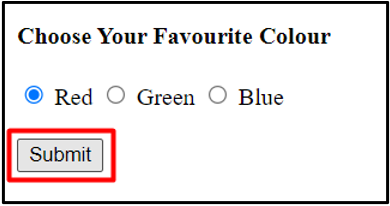
In the above code we first used a simple <h4> tag to give a heading so the user can easily understand the purpose of our form which is to choose a favourite colour. We then used the <form> tag to create a form, inside which we have used <input> tags to create three radio buttons which give different options to the users.
We have also used the <label> tags to label our radio buttons. We then used a couple of <br> tags to give ourselves a few line breaks so the whole form looks nice and evenly spaced. The form was ended with a <button> tag which can be used to submit our form. The <button> calls the checkValue() function when it is clicked.
Now we will write the JavaScript code to define the checkValue() function to check which radio button has been selected:
Method 1: Using the getElementsByName()
We can use the .checked() property to check whether a radio button has been selected or not:
var radios = document.getElementsByName("colour");
for (const radio of radios) {
if (radio.checked) {
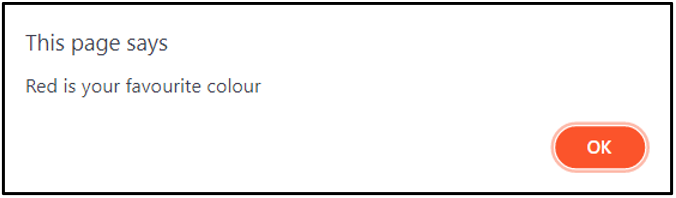
alert(radio.value + " is your favourite colour");
break;
}
}
}
Inside the checkValue() function we have first declared a variable named radios which receives a nodelist of all the radio buttons with the name colour. We then iterate over the nodelist and check the status of each radio button. If a radio button has been selected we use the alert() method to display which colour has been selected.
The code for the entire webpage:
<html>
<body>
<h4>Choose Your Favourite Colour</h4>
<form>
<input type="radio" id="Red" name="colour" value="Red" />
<label for="Red">Red</label>
<input type="radio" id="Green" name="colour" value="Green" />
<label for="Green">Green</label>
<input type="radio" id="Blue" name="colour" value="Blue" />
<label for="Blue">Blue</label>
<br><br>
<button id="submit" onclick="checkValue()">Submit</button>
</form>
</body>
<script>
function checkValue() {
var radios = document.getElementsByName("colour");
for (const radio of radios) {
if (radio.checked) {
alert(radio.value + " is your favourite colour");
break;
}
}
}
</script>
</html>
If we want to check for an individual radio button, we can give it a unique id and then use the getElementsById() method to store it in a variable. We can then use the checked() property to check if the button has been picked.
Method 2: Using the querySelectorAll() Method
The querySelectorAll() method takes a CSS selector as an argument and returns a nodelist of all the elements that match the given selector:
var radios = document.querySelectorAll('input[name="colour"]');
for (const radio of radios) {
if (radio.checked) {
alert(radio.value + " is your favourite colour");
break;
}
}
}
The definition of the checkValue() function is almost the same in both the methods. The difference is of the method which gets the nodelist of radio buttons. Method 2 uses the querySelectorAll() method to get the nodelist.
<html>
<body>
<h4>Choose Your Favourite Colour</h4>
<form>
<input type="radio" id="Red" name="colour" value="Red" />
<label for="Red">Red</label>
<input type="radio" id="Green" name="colour" value="Green" />
<label for="Green">Green</label>
<input type="radio" id="Blue" name="colour" value="Blue" />
<label for="Blue">Blue</label>
<br><br>
<button id="submit" onclick="checkValue()">Submit</button>
</form>
</body>
<script>
function checkValue() {
var radios = document.querySelectorAll('input[name="colour"]');
for (const radio of radios) {
if (radio.checked) {
alert(radio.value + " is your favourite colour");
break;
}
}
}
</script>
</html>
Conclusion
Radio buttons are used to get the user’s preference from a list of options. Groups of radio buttons can be formed by giving the same value to their name attributes. Only one radio button can be selected at a time. This post was about how we can use JavaScript to check whether a radio button is selected.