How much time you need to add a glow effect?
It depends on the object or the number of the objects to which you want to add the glow effect. Let’s say you want to add the shining effect to a person’s face. If it is your first time, it could take about five to ten minutes. The good news is that you can save the layer for afterwards usages also. Therefore, later on it will be easier to manipulate your images and objects from them.
It could possibly take longer if you wish to use all the steps from the solution shown below. This article is not just a simple tutorial on how to add a glow effect in GIMP but also it includes tips and tricks that maybe you cannot find somewhere else.
Why would you want to add a glow effect?
Persons showing strong feelings want to include their emotions in images and edit them by using glow effect, to create more shining objects in images, or sparkler, brighter, glitter, luster, incandescent, white-hot, red-hot, or use more lighting, glimmer, illumination, radiation, flame, fire, inflammation, rampancy, heat, shot, firing, brilliant, ardor, passion, or lighter colors but still with strong hues on images` objects.
Nowadays, there are professional cameras that can provide great clarity, or even effects while shooting. However, maybe the time of the day, the location, the situation, the position, are not really suitable for the pictures you want. Thus, GIMP and the glow effect could be handy.
Add a glow effect in GIMP by using the steps below with the help of objects and images that you have saved already in your Images Directory
- Go to File and click on Open.
- Select the Image to which you want to add the glow effect.
- Click on Convert.
- Use the feature Duplicate.
- Make sure you have already the images to be used for the layer with the light reflection and for the final effect.
- The image you want to add the glow effect, make it darker using the curves, so go to Color and select Curves. Drag down the point to make it darker and click OK.
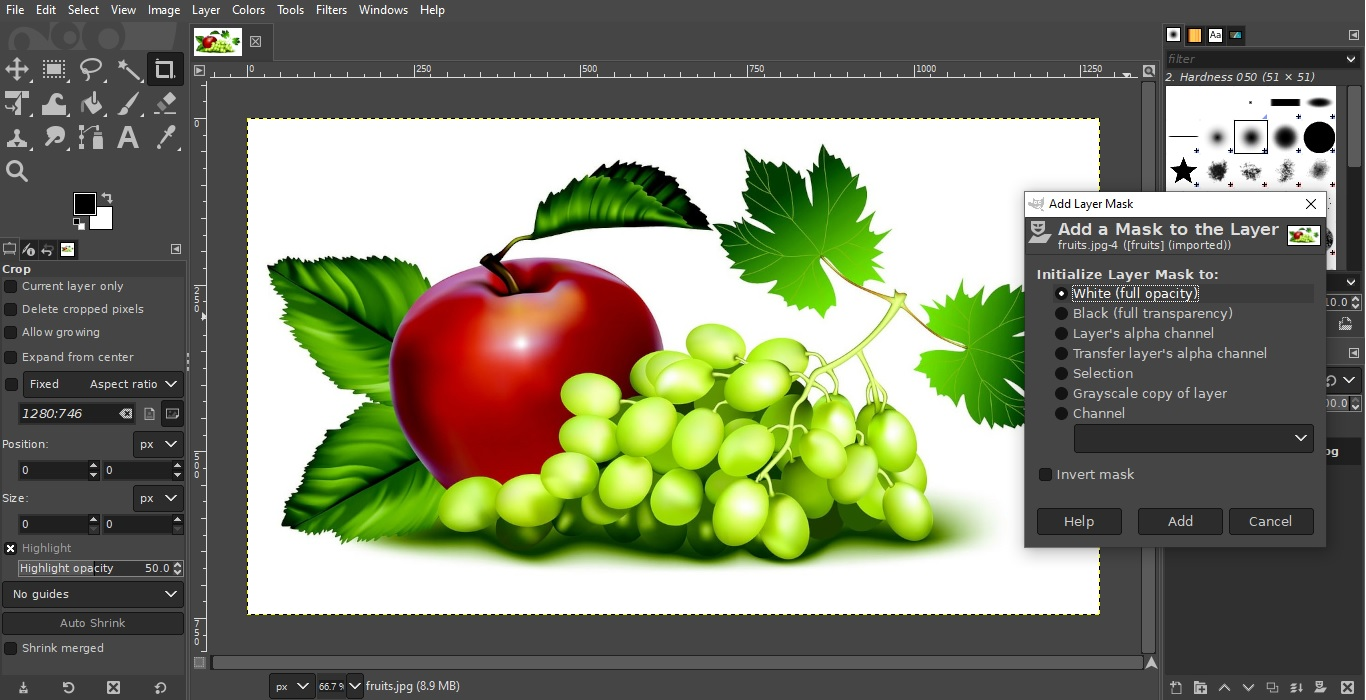
- Make a layer mask by right-click and Add Layer Mask, select the White (full opacity) and click on Add.
- Add a light source by going to File, Open as Layers and select an Object image such as a diamond or whatever object image you have saved to be used as a glow effect. Click on Open and after, on Convert. Place the image with the light source near the object to which you want to add the glow effect.
- You can do changes to the light source image to look more heat by turning down the opacity around this and make the glow effect to it. How? Create a new layer and name it “glow”. Modify the surrounding background color with a color closer to the chosen object (for example, green if you have a diamond or red if you have a flame). Go to your Paintbrush Tool and click on or press P, then brush around the light source. Change the layer mode to screen so you can turn down the opacity around this. If it is too much, you can reduce the glow intensity with the layer mask. Use right-click, click on Add a Mask to the Layer, and for Initialize Layer Mask to: select White (full opacity), make it by default, and brush the light source.
- Now, come back to the object from the image to which you like to add the glow effect. First thing to do is to highlight where the glow should apply in the object. So, with the black color and the brush paint over the object in the direction from where the light source is coming. Next, create a New Layer and name it Glow for the Object or with the color for the glow effect (green or red or whatever the color you have chosen, depending on your selected light source). Then modify the brush color to the color you want to apply for the glow effect. The final things you have to do here is to change the layer mode to overlay and to brush the part of the object for glowing. If you surpass the line for brightness, you can hide some with a layer mask. So, right-click and select Add Layer Mask, choose White (full opacity), then make it by default to the black color and brush it.
- Finally, add some particles to the image in order to look more natural. Click On File, Open as Layers, select the image for particles, press Shift+S to scale it down and hold ctrl while scaling to make it proportional. Change this layer mode to Dodge. Duplicate another one and rotate it with Shift+R.
Recommendation
From the very beginning, name your images based on the effect or color you want to apply. According to the solution shown above, you can name the images flame.jpg, diamond.jpg, particles.jpg, and so on.
Tip
Add the Vignette effect to make the focal point strong. How? Create a New Layer, name it Vignette, place it on the top, go to the filters, select Light and Shadow and after, choose Vignette. Play with its settings Radius, Softness, Gamma, Proportion, until you are satisfied with the final result.
This is one solution to add the glow effect by using an image as an object that gives glowing to another object in the image. When talking about image manipulation, there are always layers and creation of new layers, plus a lot of effects and filters I will talk about in the next articles.

