However, some issues, especially the solutions to uncommon issues are difficult to find. So, if you need to stop an Arduino program but are unable to do it then this guide will be helpful for you as I have explained different ways of stopping an Arduino program.
In what situations does the Arduino program need to be stopped?
The reason to stop Arduino program may vary, some of them are:
- The Arduino board can sometimes get stuck in a loop
- When the desire value or output is achieved
- To run the code again
Methods Stopping an Arduino program
There are multiple ways of stopping an Arduino program and it depends for what reason the execution of it needed to be stopped:
- Using loops or conditional statements
- Disconnecting the supply of Arduino
- Resetting the Arduino using the Reset button or Reset pin
- Using the sleep mode of Arduino
- Using delays in the Arduino code
Using loops or conditional statements
Loops and conditional statements are one of the ways to stop the Arduino code from running for an infinite period of time. If you want to stop the Arduino code once your desired result is achieved then using loops like for and while or conditional statements like if else and switch case are the most viable options.
Disconnecting the supply of Arduino
Another way to stop the Arduino program is by disconnecting the Arduino board from the supply, as soon as the supply is disconnected the board will turn off and thus the execution of the Arduino board will stop. However, if the code is already uploaded to the board, it will again start to execute once the board is connected with supply again. This method is only advised when the board becomes unresponsive while executing the code.
Resetting the Arduino using the Reset button or Reset pin
All the Arduino boards are provided with the reset button as well as with the reset pin, using the rest pin an external reset button can be made. So, to stop the execution of the Arduino program press the reset button that will halt the execution for seconds until the board is restarted again.
Using the sleep mode of Arduino
If the Arduino program is required to be executed for some time only then the sleep mode of Arduino can be used. And there are total 6 sleep modes available for the Arduino:
- Power-down Mode
- Standby Mode
- Idle Mode
- Extended Standby Mode
- ADC Noise Reduction Mode
- Power-save mode
Out the six there are three main modes that are mainly used that are:
- Idle mode
- Standby mode
- Power-down mode
How to use the sleep mode of Arduino?
For using the sleep mode there is a specific library which can be downloaded from here, or you can install it from the library manager of Arduino IDE by searching sleep mode in its search bar.
To illustrate how to use sleep mode for Arduino I have used the power down mode whose code is given below:
int sec = 0; /* declaring the variable for storing the count*/
Sleep sleep;
unsigned long sleepduration; /*duration for which the Arduino needs to be in sleep mode*/
void setup() {
Serial.begin(9600);
sleepduration = 5000; //setting the duration in milliseconds
}
void loop() {
delay(100);
Serial.print("waking for ");
Serial.print(sec); /*printing the seconds for which the Arduino will remain on */
Serial.println(" sec");
sec++; // adding the seconds
delay(1000);
if (sec >= 10) { // keeping the Arduino on for 10 seconds
sec = 0;
Serial.print("going to sleep for ");
Serial.print(sleepduration); // printing the given duration of sleep for Arduino
Serial.println(" milliseconds");
delay(100); /* giving delay to allow serial print the data before going to sleep*/
sleep.pwrDownMode(); //giving the sleep mode to Arduino
sleep.sleepDelay(sleepduration); //sleeping the Arduino for the given duration
}
}
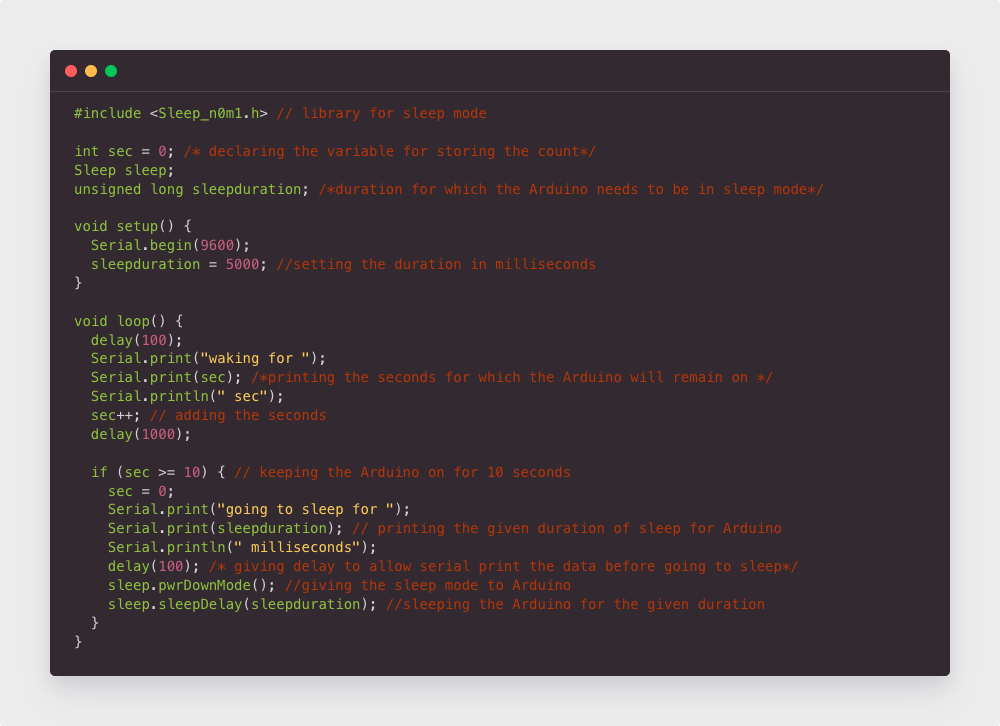
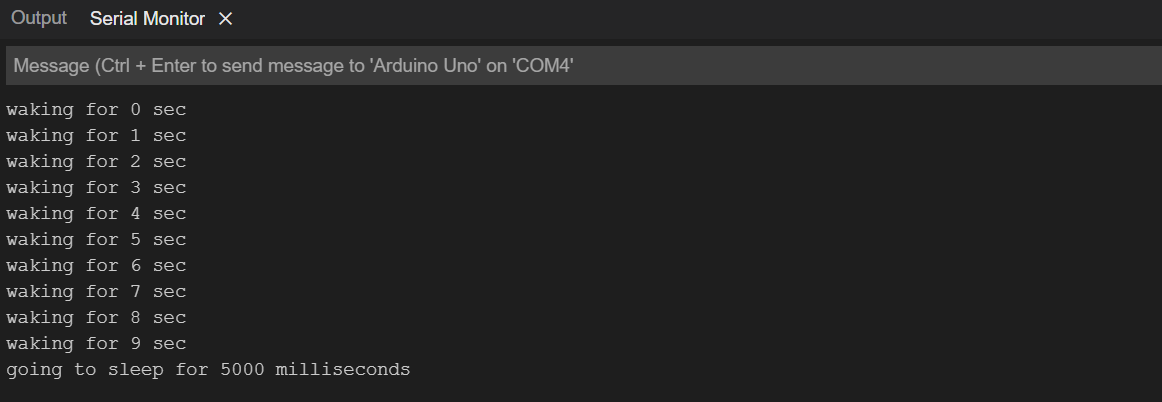
In the above code Arduino runs for ten seconds and then goes to the power down mode for 5000 milliseconds (5 secs) thus stopping the Arduino code. After 5000 milliseconds (5 secs) the loop function runs again, this is how you can stop the Arduino program. Below is the output of the Arduino code:
Note: Interrupts can also be used for Arduino to move it in and out of the sleep mode
What is the difference between delay and sleep mode?
Delay only halts the execution of the Arduino program for some time whereas the sleep mode not only halts the Arduino program execution but also conserves the power which is beneficial in case batteries are being used to power up the Arduino board.
Using delays in the Arduino code
Adding delays in the Arduino code can also be the one way to stop the Arduino code. Again, using this method will only stop the Arduino program execution for only some for some specified time. So, if you are looking to stop the Arduino code for a short time then this method can be used.
Important Note: All the above methods except using the loops, conditional statements, sleep mode and disconnecting Arduino from supply can stop the Arduino program on a temporary basis.
Conclusion
Sometimes you may need to stop an Arduino code and there are multiple ways of doing it. Arduino codes can be stopped using loops, conditional statements. You can also reset the Arduino but these methods temporarily stop the Arduino code. To stop the code while executing it you need a third party library called Sleep_n0m1.