if-else statement
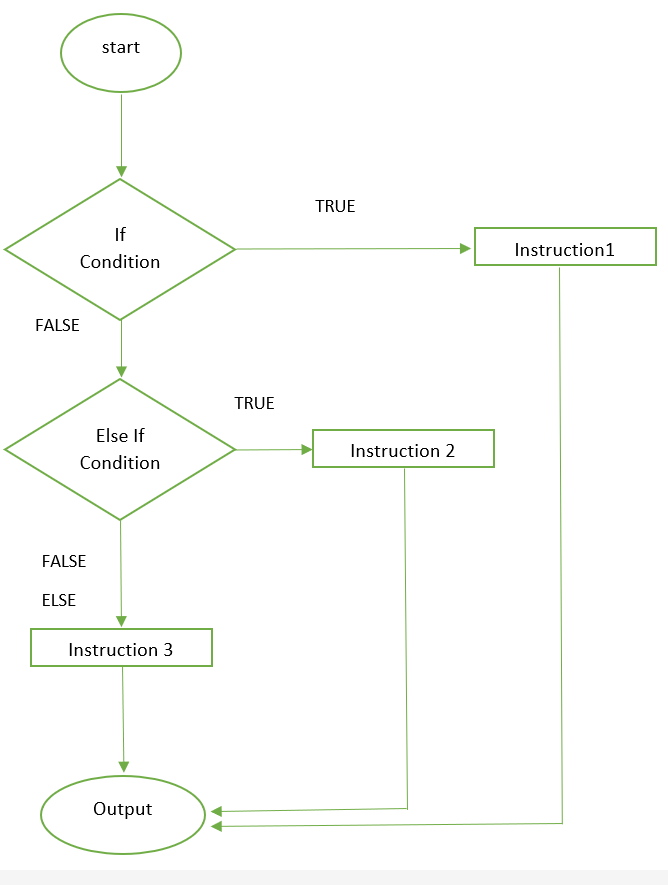
The if-else statements can be used for decision by selecting different instructions based on different conditions in an Arduino program. There are two statements in if-else one is if statement and other is else statement. The if-else statement can so be used as an else if statement to insert multiple conditions. These statements can be used with all the operators like mathematical, boolean, and logical operators. The working of these statements can be further explained by help of flow chart:

To use the if-else statement the following syntax of Arduino programing should be followed:
{
Instruction1
Instruction2
Instruction3
…..
}
else
{
Instruction1
Instruction2
Instruction3
…..
}
The if and else have their own blocks of instructions, if the defined condition is true the instructions inside if block will execute otherwise the instructions inside else will execute.
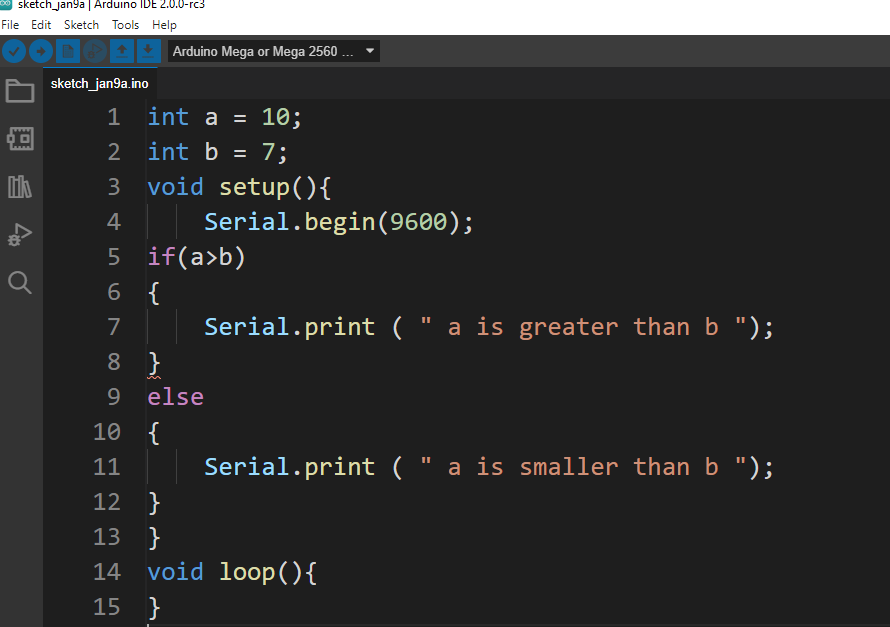
Example codes for if-else statements
To give a clear concept of the if-else statement in Arduino programming a simple code as an example is given. Two integers a and b are defined and given values 10 and 7 respectively.
int b = 7;
void setup()
{
Serial.begin(9600);
if(a>b)
{
Serial.println ( " a is greater than b ”);
}
else
{
Serial.println ( " a is smaller than b ”);
}
}
void loop()
{
}
Output
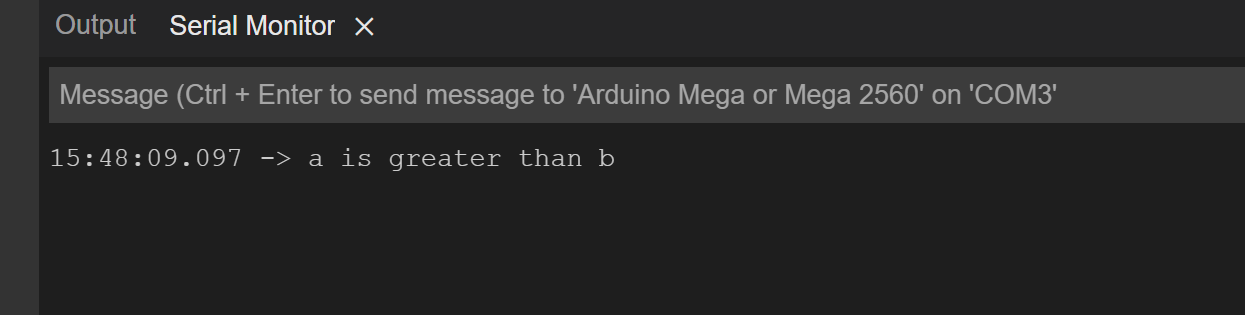
The if statement will check the condition whether a is greater than b or not, if the condition is true the instruction in the following block will be executed otherwise the instruction in the else block will be executed.
If else can also be used with logical operators. The following example is applying the conditional statement on four integers and with the help of logical operators checking the greater and smaller number:
int b= 8;
int c= 16;
int d= 18;
void setup ( )
{
Serial.begin ( 9600 );
if (( a > b )&&(d >c ))
{
Serial.println ( " a is greater than b and d is greater than c " );
}
else
{
Serial.println ( " a is smaller than b and d is smaller than c " );
}
}
void loop ( ) {
}

Output

Nested if-else statement
Furthermore, the nested if-else statement can also be used; this can increase the number of conditions. In the nested if-else statement there is an addition of else if statement only. The flow chart for the nest if-else is given as:
To explain further the use of nested if statements an example of Arduino program is taken and is explained with the help of outputs. Let’s suppose if the value assigned to variable a is 4 and variable b is assigned a value of 5 and to find out which value is greater the nested if-else statement will be used.
The first condition is to check if a is greater than b or not, then the second condition is checking whether the value of a is less than b. If the first condition is true the instructions of the respective block will be executed if not then the condition of else if will be checked if it is true then the instruction in the else if block will be executed and if else if statement is not true then the instruction in the else statement will be executed.
int b = 5;
void setup ( )
{
Serial.begin(9600);
if ( a > b )
{
Serial.println( " a is greater ");
}
else if ( a < b )
{
Serial.println( " b is greater " );
}
else
{
Serial.println( " Both are equal " );
}
}
void loop ( ) {
}
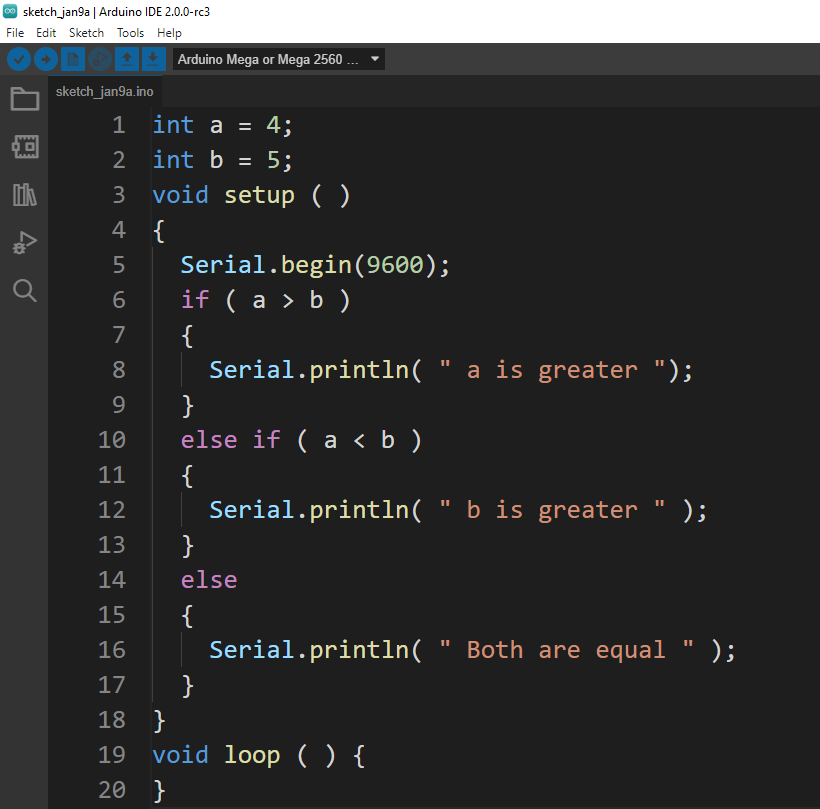
Output

Conclusion
In Arduino programming the if-else statement is used to check the conditions. The logic on which the code will run is also created using if-else statements. This write-up briefly discusses the if-else and else-if statements in detail and the explanation is supported by simple Arduino code examples.