How to install ESLInt in Visual Studio Code
We can use ESLint with many text editors and IDEs, but visual studio code is the one that developers use the most. In order to install ESLint in visual studio code, we have to follow the following steps:
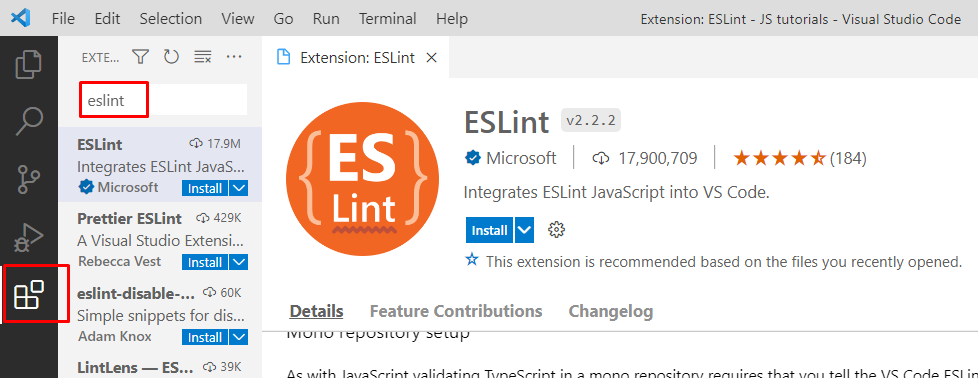
First, we have to press the “Extensions” button in the left corner, and search for the ESLint as we did in the below-given snippet:
Now press the “install” button to install the ESLint in Visual Studio Code:
As we are done with ESlint installation within the visual studio code. Now we need to have a project where we can test it. Let’s initialize a project first.
How to create a Node Project?
To create a project, use the command:
Now we will use the “cd” command to access our project:
Now it’s time to initialize our project, for this purpose we run the following command in our terminal:
Now we are going to install ESLint in our project and then we will initialize it:
To initialize the “ESLint” in our project, type the command:
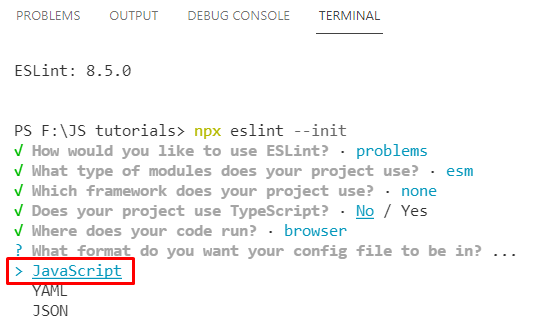
When we hit the “Enter” button then a sequence of questions appear one after the other:
Select the second option and press the “Enter” button:
Next, select the import/export and option and hit the “Enter” button:
Here, select the “none of these” options to select the framework:
Select the “no” option for the above-given question and hit the “Enter” button to move to the next question:
Select both options and press enter, next Select “JavaScript” for the final question,
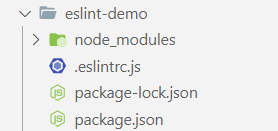
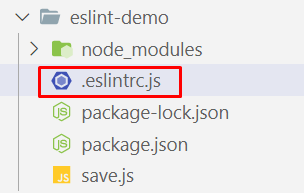
When we press enter we will get a message “successfully created”. Now inside our project, we have the following files:
Now we will consider an example and we will break some basic rules deliberately and we will observe how ESLint will respond when we break some rules.
let val= 20;
console.log(val);
What have we done in this example? We created two variables and didn’t utilize one of them in our project:
But as we enabled ESLint in our visual studio code, it underlines the variables “string” as shown in the above snippet and shows the following error in the “problems” section:
And this problem will disappear when we utilize this variable somewhere in our code:
let val= 20;
console.log(val, string);
Now have a look at the below given snipped:
You will see that this time there is no such issue appearing in the problem section:
For a better understanding of ESLint let’s consider another example in which we will break some rules like missing semicolons and extra spaces, and we will observe how ESLint responds to it:
let val= 20
console.log(val)
if (val == 20)
{
console.log(string)
}
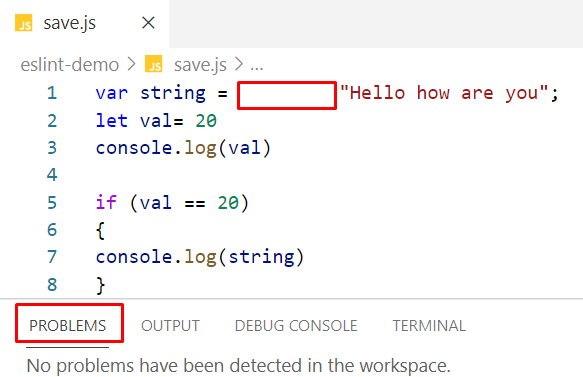
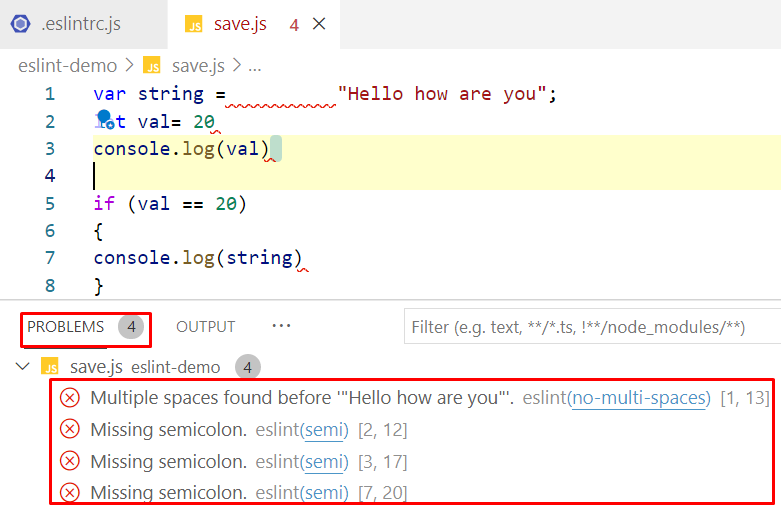
In this code, we add some extra white spaces and missed the semicolons intentionally:
So, technically nothing wrong with it, as shown in the problem section. However, this is not a good coding practice to put extra spaces or missing semicolons.
ESLint doesn’t show any issue because these rules are not added in ESLint. We can specify them in the following file:
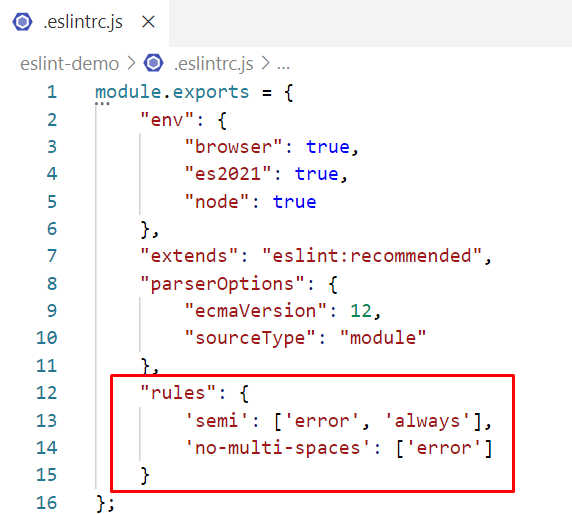
We will open the “.eslinrc.js” file from our project’s folder and we will add some rules:
We add the first rule to tackle with semicolons and the second rule to tackle with white spaces and save the changes. Now if we miss the semicolon or we put extra spaces in our code then ESLint will highlight them in the problem section:
How to Enable Linting on Save
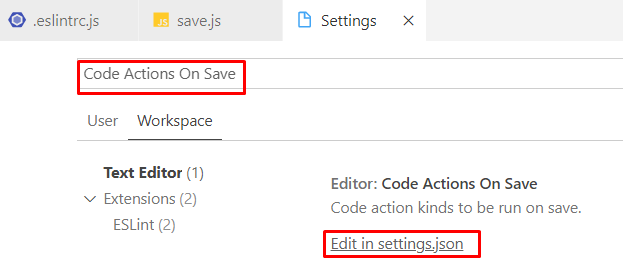
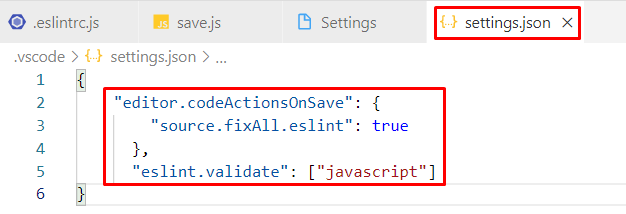
We can enable linting on every save, this means whenever we save our file these problems will be fixed automatically. For this purpose, first press “CTRL+,” and select the “Workspace” settings:
In the search box, search for the “Code Actions On Save” and select the “Edit in settings.json” option:
Add the following code in the Setting.json file:
These settings will enable the linting on save.
Conclusion
EsLint is a package that makes lint in your project really easy, and it enforces a style guide throughout our project so that we can maintain a consistent style throughout the whole project. In this article, we described how to install the ESLint extension, then we created a project and observed how linting works on visual studio code. Next, we determine how to add rules for linting, and finally, we learn how to enable ESLint on Save.

