Manjaro is the most user-specific, independently developed cutting-edge Arch-based distribution. Its distinguishing features make it stand out among all other Linux distributions. Manjaro provides an intuitive user interface for beginners to experience the essence of Arch Linux. Hence, it offers beginning Linux users Arch experience with a lot of stability, control, and excellent performance.
To begin the Manjaro learning experience, it is unnecessary to install it directly on the hard drive. Majaro, like all other Linux distributions, can work like a typical OS system without making any permanent changes to the system hardware. The concept is known as live booting.
In this article, we will learn to run a live Manjaro session from a USB flash drive. Moreover, we will also learn how persistent storage works and how to make a USB with persistent storage.
Introduction to Manjaro Live Boot
Live booting allows users to run Manjaro distribution from a USB or CD drive. It’s the quickest and easiest way for beginners to experiment with Manjaro Linux and learn how Manjaro works with the system hardware. It does not alter the computer’s configuration, and all it requires is to reboot the system with the USB or DVD removed to restore the system to its previous state.
Besides, Live Manjaro allows users to do almost everything that an installed Manjaro distribution can do. It also comes a lot in handy for various tasks like:
- Internet browsing without storing cookies or history data
- Access, edit, and back up files stored from the installed OS
- Create files in the office suite and save them remotely
- Boot rescue and recovery
- Computer forensics etc.
Getting Started
For a live Manjaro experience, download the Manjaro ISO image file from its official website. Manjaro offers three desktop environments: we download Manjaro 20.2.1 Nibia KDE desktop environment.
Live Boot Manjaro From USB
Live boot from the USB requires a third-party tool to create a Manjaro bootable USB. There are various Windows tools available. However, we’ll use MultibootISOs’s successor, known as Your Universal Multiboot Installer (YUMI) utility.
Even though YUMI works like Universal USB Installer, it can install more distributions. YUMI stores all files in a Multiboot folder that makes it an organized multiboot USB drive that is still usable for storage purposes.
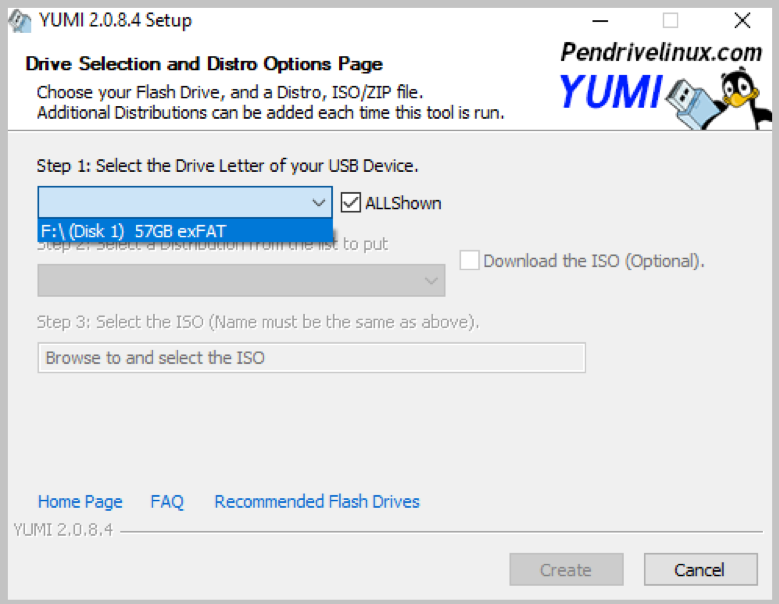
Download YUMI from its official website. Install the utility and plug the USB drive into the port.
It will automatically identify the connected flash drive.
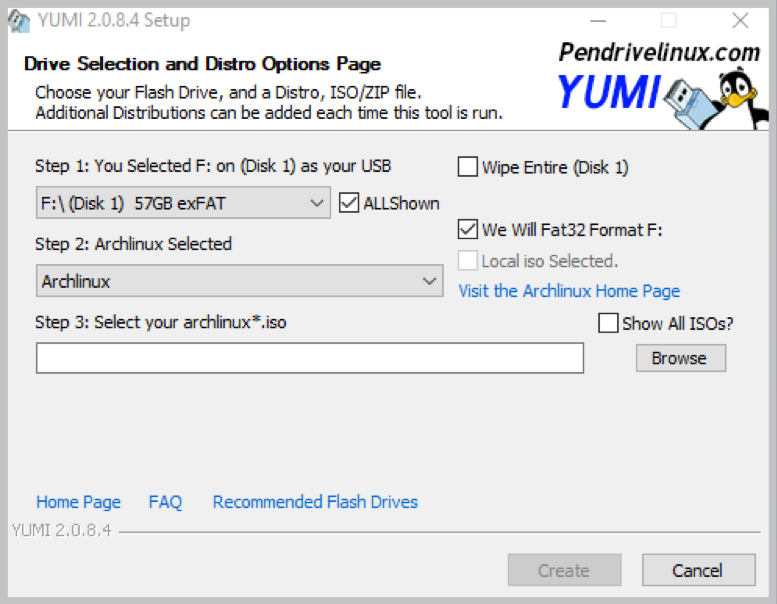
Select the Linux type.
Choose the downloaded Manjaro image file to install.
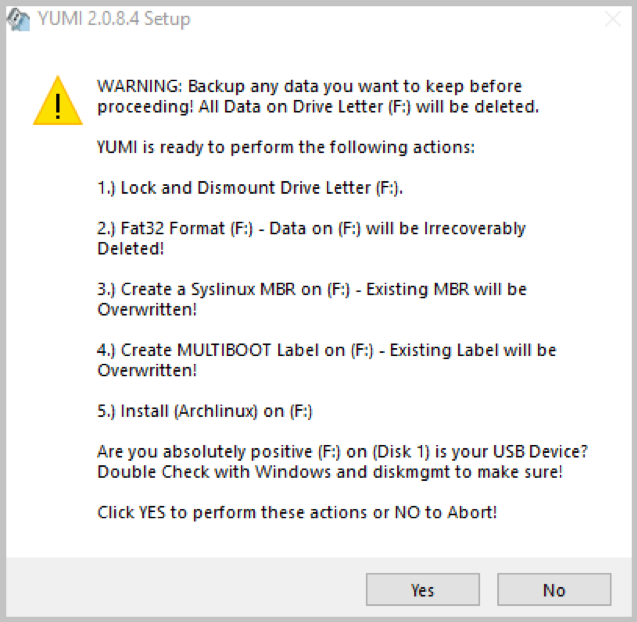
Choose the Erase content option if the drive isn’t already formatted.
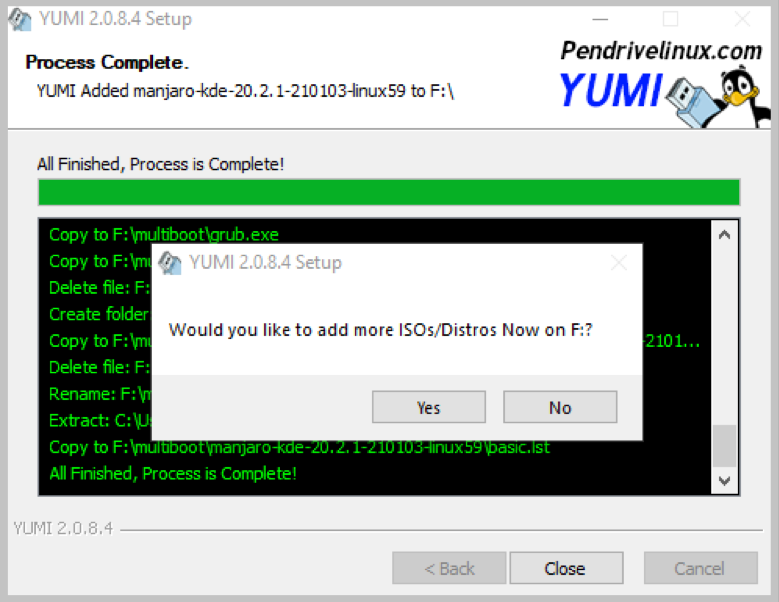
Click on ‘Create’ to continue writing the Manjaro image files on the USB.
Once done, make sure to configure the system to allow booting. That is, generally, the machine boots from the hard drive. But to live boot Manjaro from the USB requires changing in the BIOS settings. Go to the BIOS to ensure the USB drive is listed at the top of the boot order.
Finally, restart the machine and press boot keys to enter the BIOS menu. The boot keys are machine-specific; mostly, it’s F2, F11, F12, or Esc keys. Once the machine identifies installation media, the Manjaro welcome screen appears to choose the drivers.
Choose any of the boot with – drivers option as per your hardware requirement to boot into Manjaros live environment. A graphical interface Calamares will launch to continue the installation process. Close this window to begin experimenting in the live Manjaro environment.
While booting in the live Manjaro session, there are standard default user and root credentials. It may prompt the user to enter the username or root name and password:
root: manjaro
password: manjaro
Create Manjaro Persistent USB Storage
A bootable USB runs a live Manjaro session, but the data or the applications installed are not persistent. A live Manjaro session is only helpful to boot, change application settings, and add files, such that after reboot, it’s an all-new system.
However, a persistent USB drive creates an overlay file that saves all changes to the system. Hence, it is an ideal Linux feature that only requires the user to plug the persistent USB drive into any system and begin from where it was left. The only limitation is that the user can make system upgrades and modify the Manjaro kernel.
To begin the process, use the above method to create Manjaro live bootable USB. As per the Manjaro developer’s recommendation, the process requires a minimum of 32 GB of USB. Make sure boot order priority is set to USB Drive.
Connect both the bootable and empty USB drives to the ports. Now, follow all the steps mentioned above in the live Manjaro session via bootable USB until the Manjaro Installer Clamares step. Click ‘Launch Installer’ to begin the installation process.
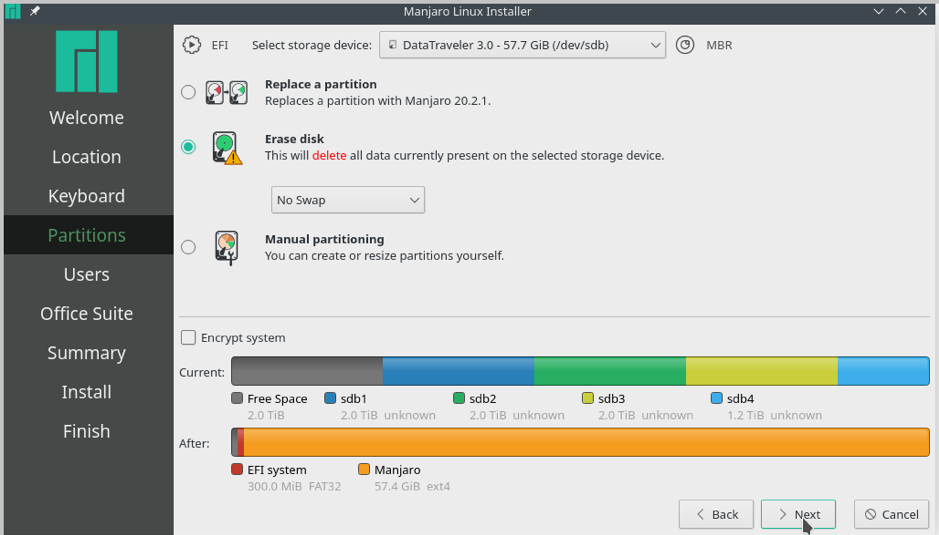
Select the language, region, and keyboard setting or choose the defaults. At the ‘Partitioning’ stage, choose ‘manual partitioning’. In the meantime, press Ctrl+Alt+T to run the following command in the terminal to find the USB device label assigned by the Manjaro Linux.
Disk /dev/sdb: 57.75 GiB, 62008590336 bytes, 121110528 sectors
Disk model: DataTraveler 3.0
Now click on the drop-down menu to ‘select storage device’. Choose the black USB device or identify it by the label name /dev/sdb. Next up, choose ‘Erase Disk’ to allocate the entire space to Manjaro installation as a single host system.
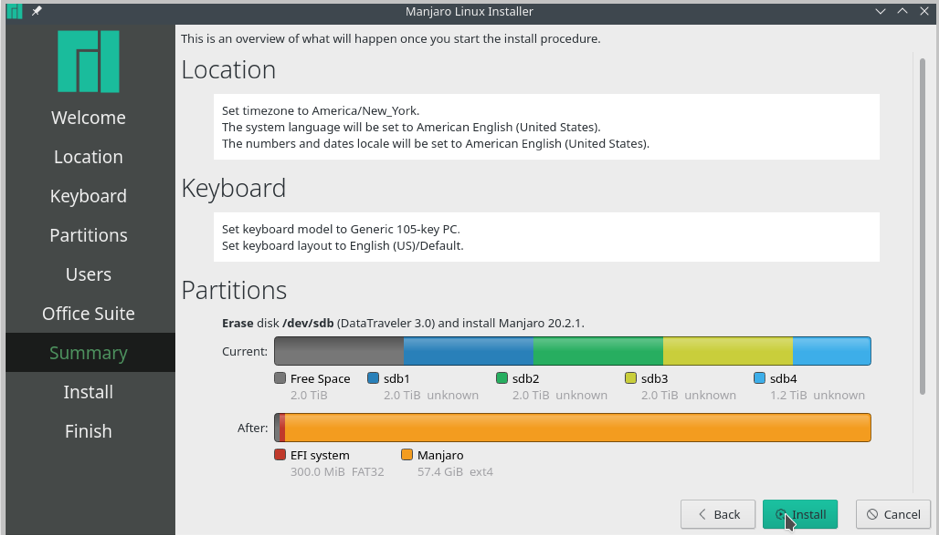
Click Next to create a username, hostname, user, and administrator credentials. Click ‘Next’ for the installer to display all the settings before the installation process.
Click ‘install’ after final verification. Reboot the system after complete installation.
Remove the bootable USB. Now boot the machine from the recently installed Manjaro flash drive. The installation process installs the boot loader on the USB that provides an option to boot into Manjaro or any other OS.
Choose Manjaro to experiment and make changes; however, save all the changes before shutdown to keep it in use. Finally, shut down the system, remove the flash drive and restart the machine to enter the default OS.
Conclusion
The article demonstrates the ways to use Manjaro distribution for Linux beginners. We learned how to create a live Manjaro session via bootable USB. We also detailed the process of creating a persistent USB storage device to keep all the changes to the files and system programs. A persistent Manjaro USB provides easy access to the system that avoids installing Manjaro on the hard drive or a Virtualbox.

