Raspberry Pi device comes with a lot of useful features that urges everyone to give this device a shot. For the true retro game lover, this device will offer a lot more than just playing ordinary games on the device. If you wish to play classic PlayStation video games like Final Fantasy VII, Crash Bandicoot and many more then instead of buying a PlayStation you can turn your Raspberry Pi into a PlayStation by yourself. However, doing this will require an emulator that will need to be installed on your Raspberry Pi device and finding the one which works best for Raspberry Pi device is generally a hard task for some individuals.
In this article, we will help you in turning your Raspberry Pi into PlayStation by installing a perfect emulator called Recalbox, which is a lightweight emulator designed especially for those gamers who wants to play PlayStation games on their Raspberry Pi and because of its easy setup process, you will learn to manage it in a few seconds.
How to turn your Raspberry Pi into PlayStation
To turn your Raspberry Pi into Playstation, you will require to install a Recalbox emulator on your device and the below steps will guide you to do it successfully within a few minutes.
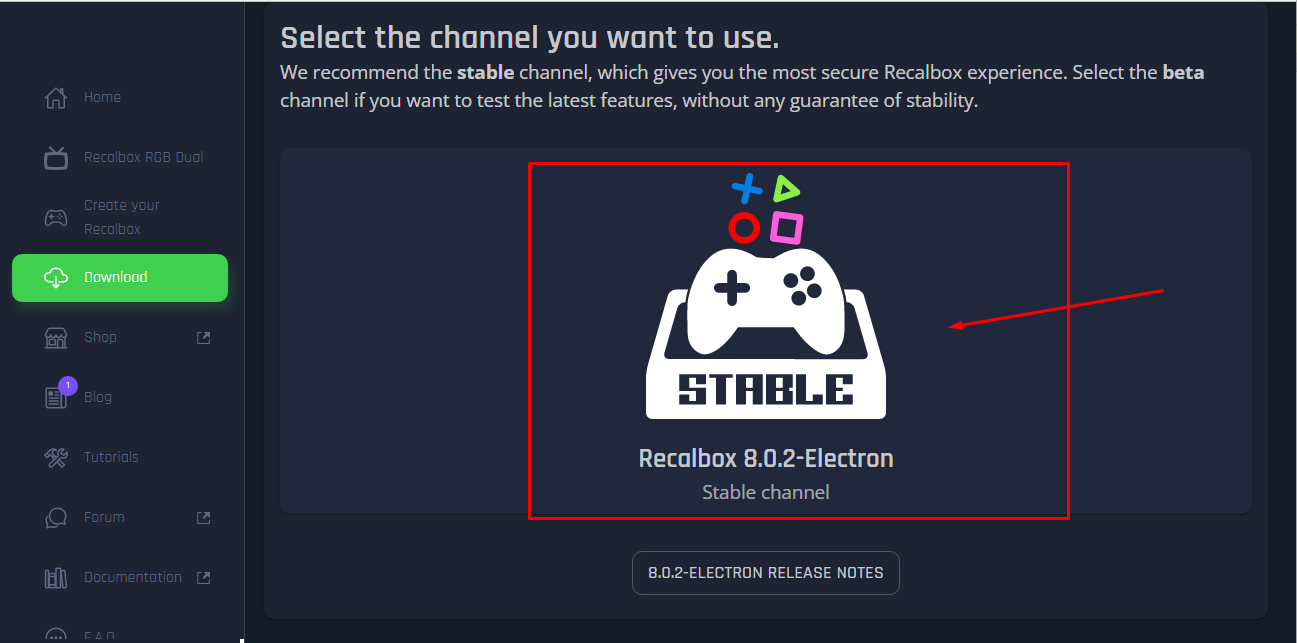
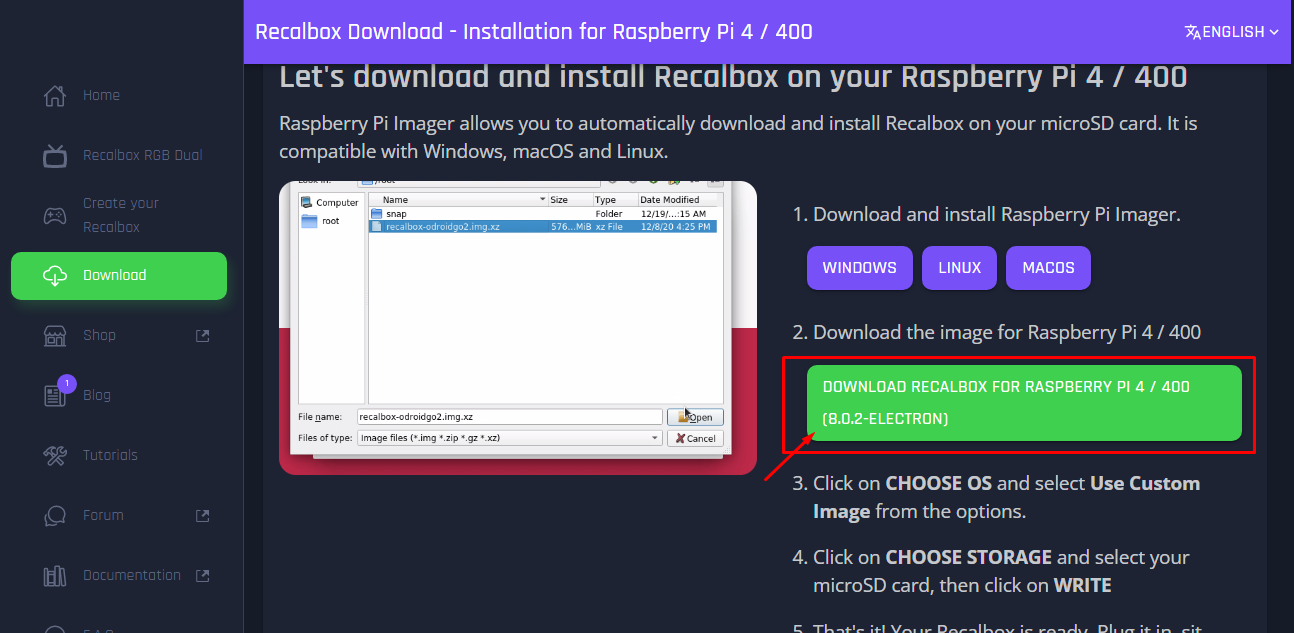
Step 1: To begin the installation, first you will need to download the Recalbox and to do that visit its official website. Click on the “Recalbox 8.0.2-Electron” option.
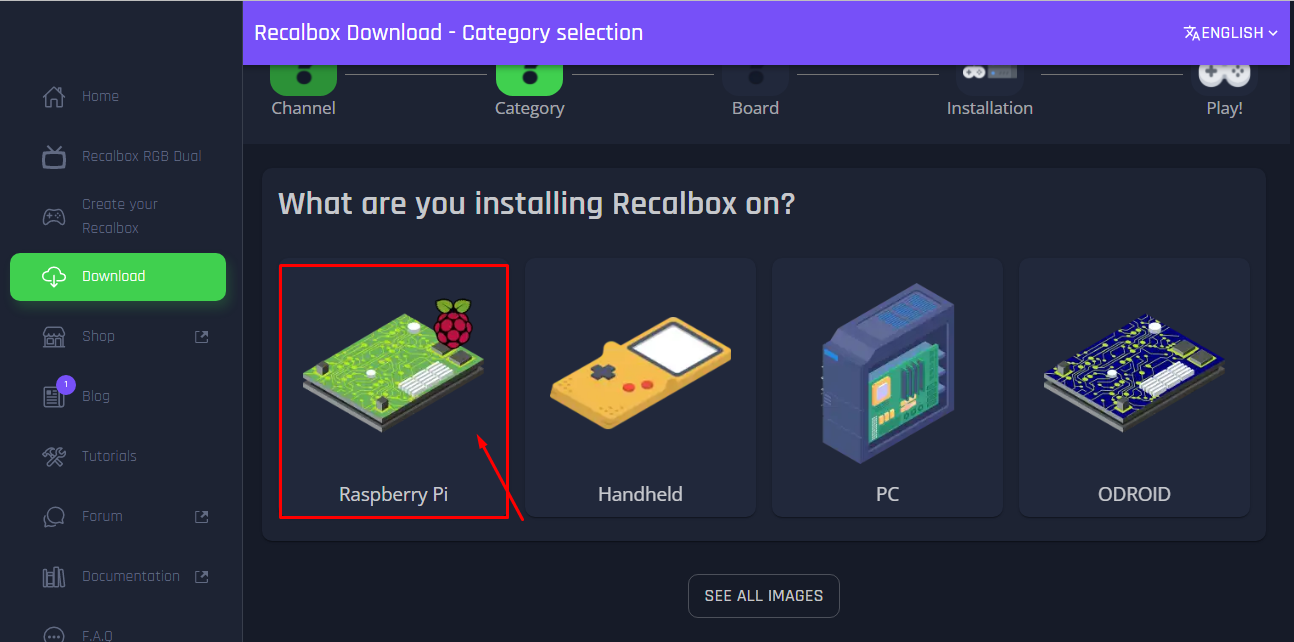
Step 2: Once you click on it, you will need to choose “Raspberry Pi device”.
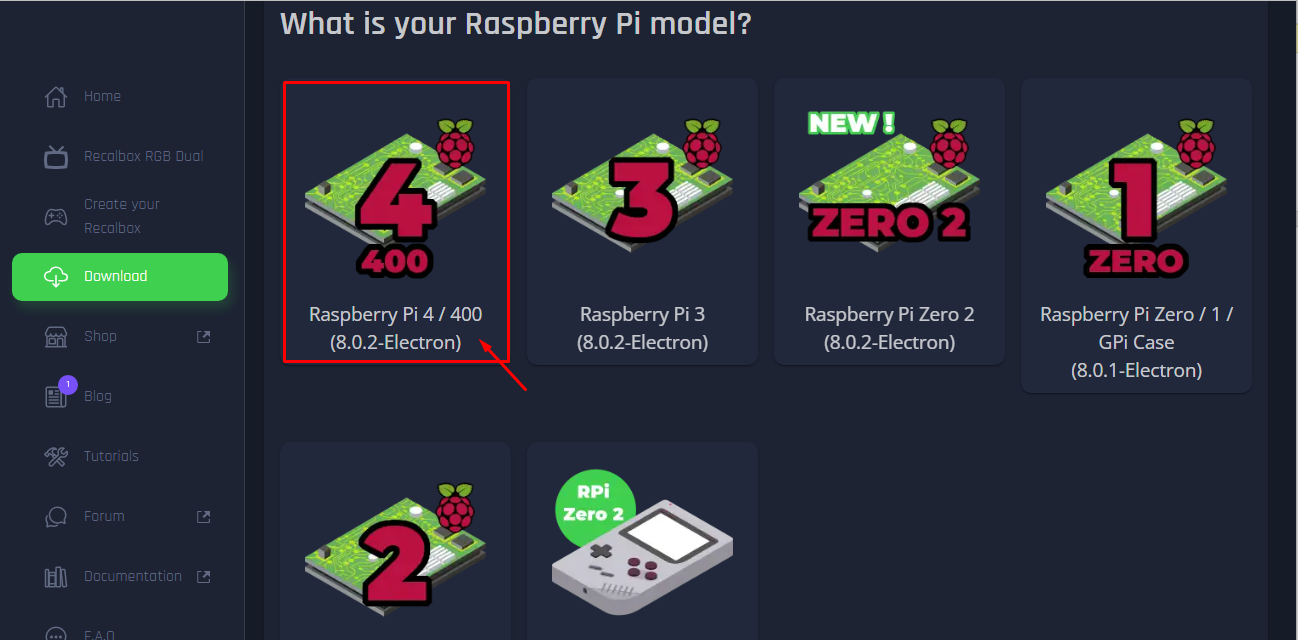
Step 3: After choosing the Raspberry Pi, you will be required to choose your device model and if you are using Raspberry Pi 4 then go on and select “Raspberry Pi 4”.
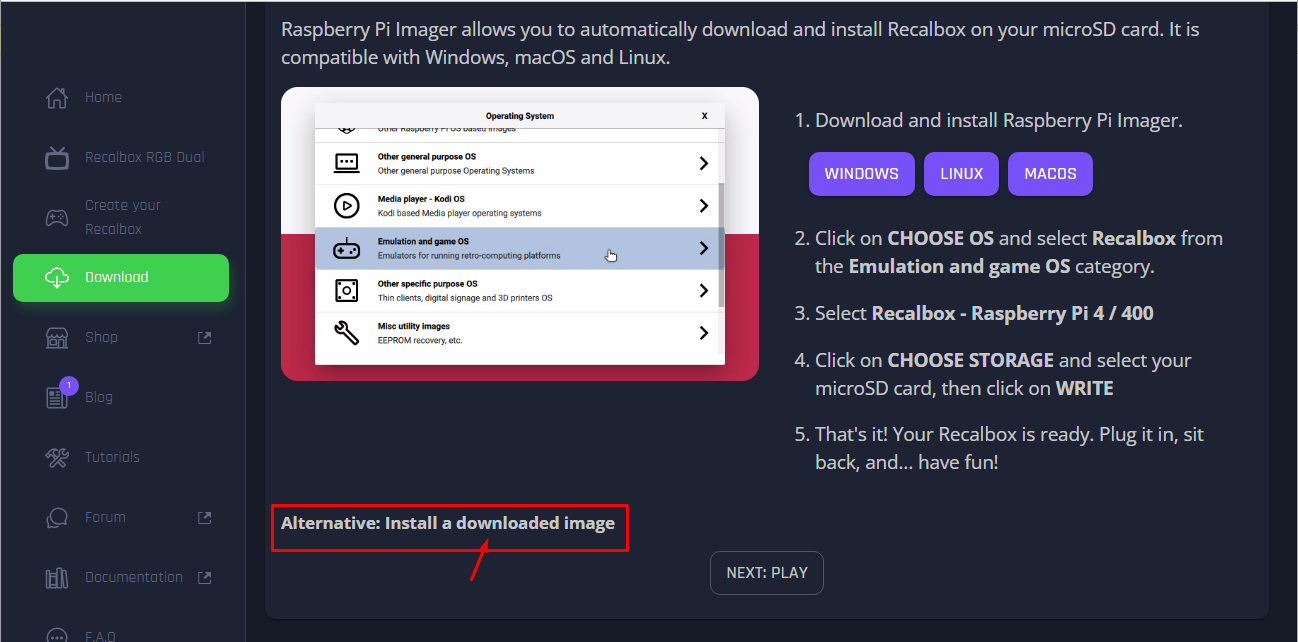
Step 4: Scroll down and click on the “Alternative: Install a download image” option.
Step 5: Click on the “DOWNLOAD RECALBOX FOR RASPBERRY PI 4/400 (8.0.2-ELECTRON)” option to begin downloading the image file.
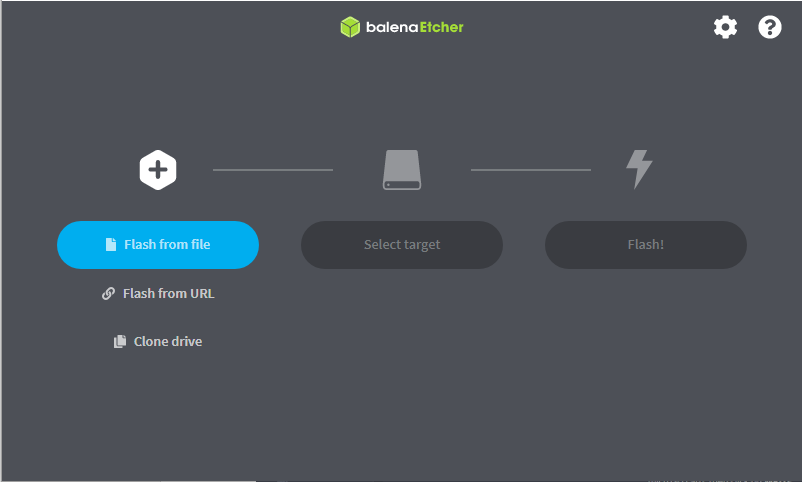
Step 6: Once the Recallbox image downloading is completed, you will need to create the image onto your SD card or USB device and for that you will need to download balenaEtcher app from its website.

When downloading is completed, install the app on your PC and open it on the desktop.
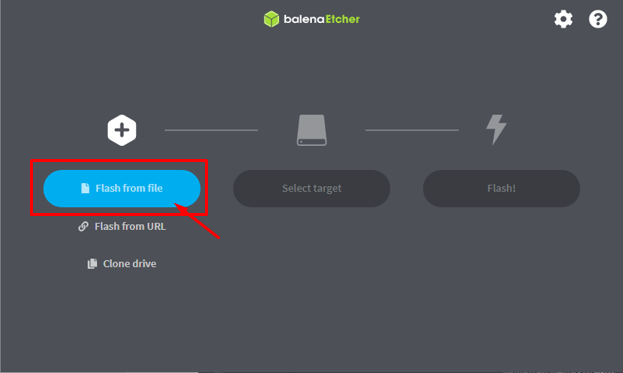
Step 7: Before beginning the operation, insert your SD card storage or USB device into your PC and format the device using the FAT32 or NTFS file system.

Step 8: Choose the option “Flash from file” and find the downloaded Recallbox image on your PC and load it in the app.
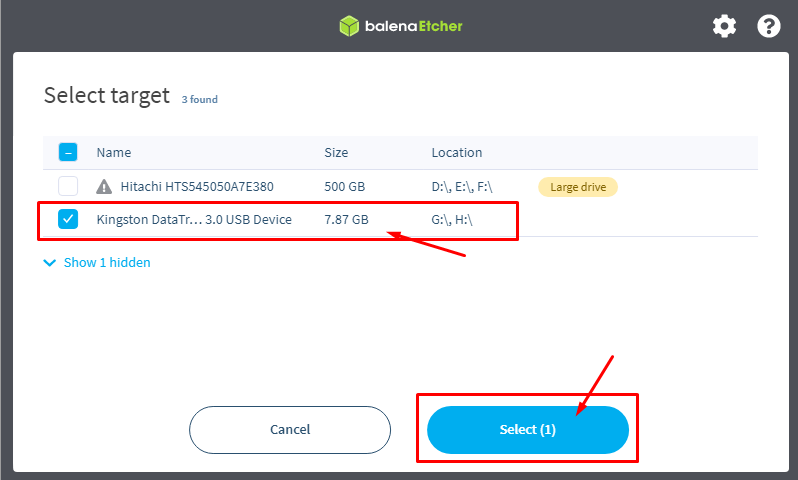
Step 9: Select your USB device or SD card storage by clicking on the option “Select target”.
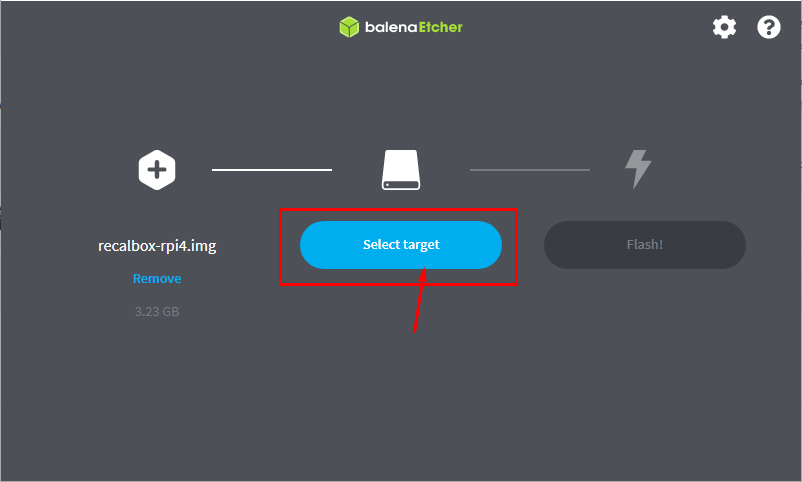
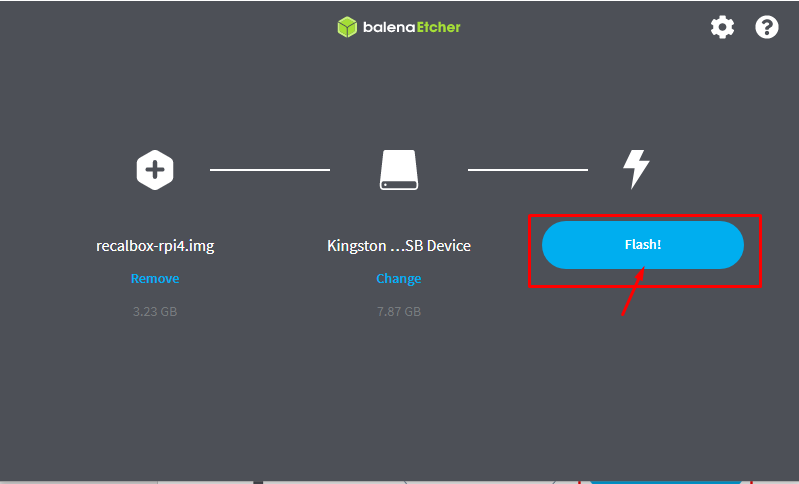
Step 10: Once done, now choose the option “Flash!” to begin the installation of the bootable files onto your SD card or USB storage.
The setup takes around 5-10 minutes so you will need to be patient during the setup process and don’t unplug the device until you will be allowed to do so.

Once it is completed, you can then safely remove the USB device.
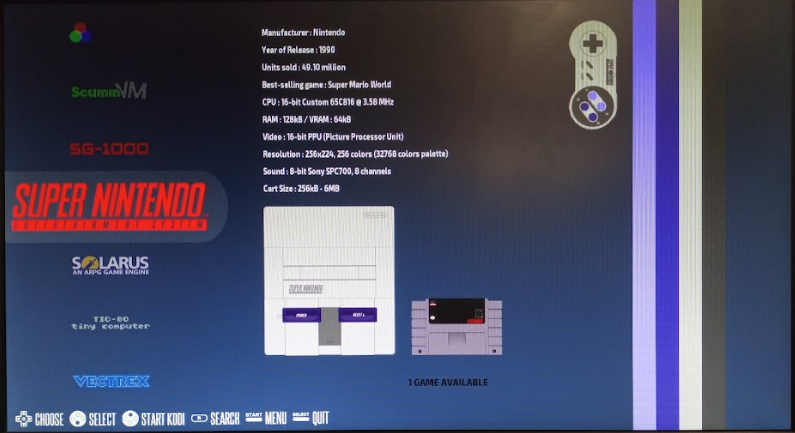
Step 11: Now, turn on your Raspberry Pi device and insert the USB device into it. After some time you will be able to see the Recallbox screen on your monitor screen.
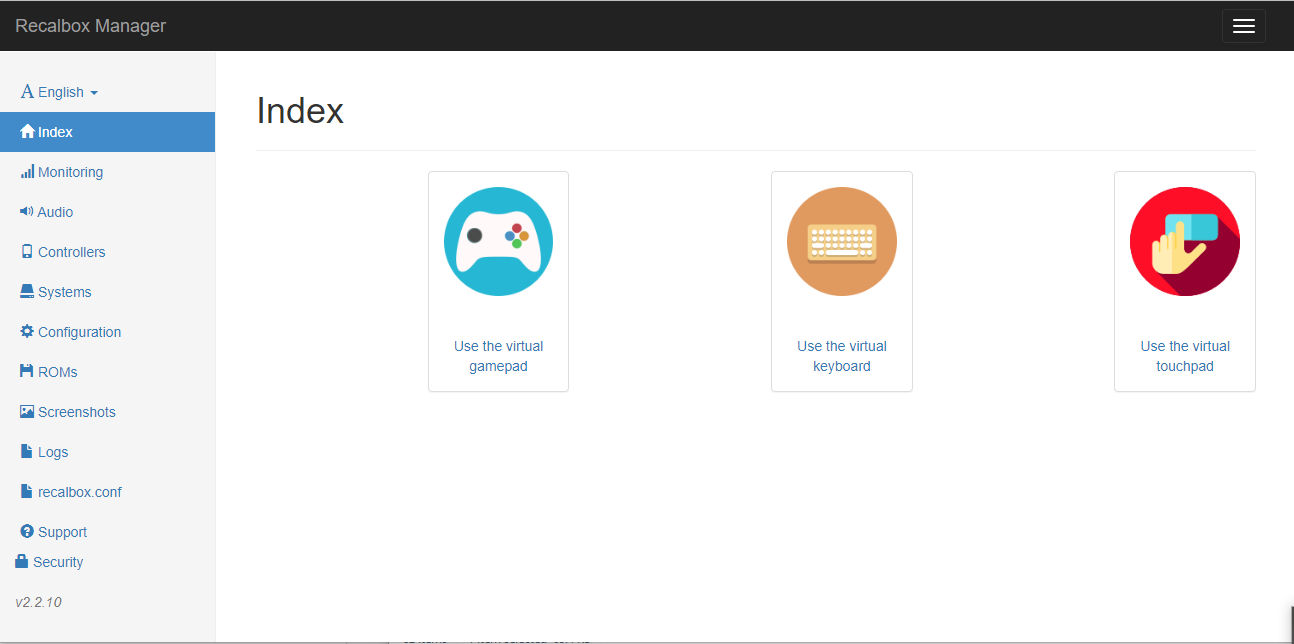
Step 12: Now, it’s time to play games on it and you will need game ROMs that will be able to play on Recalbox and the to have one, you can open the Recalbox web interface by using the address “http://Recalbox_IP_Address” in your browser
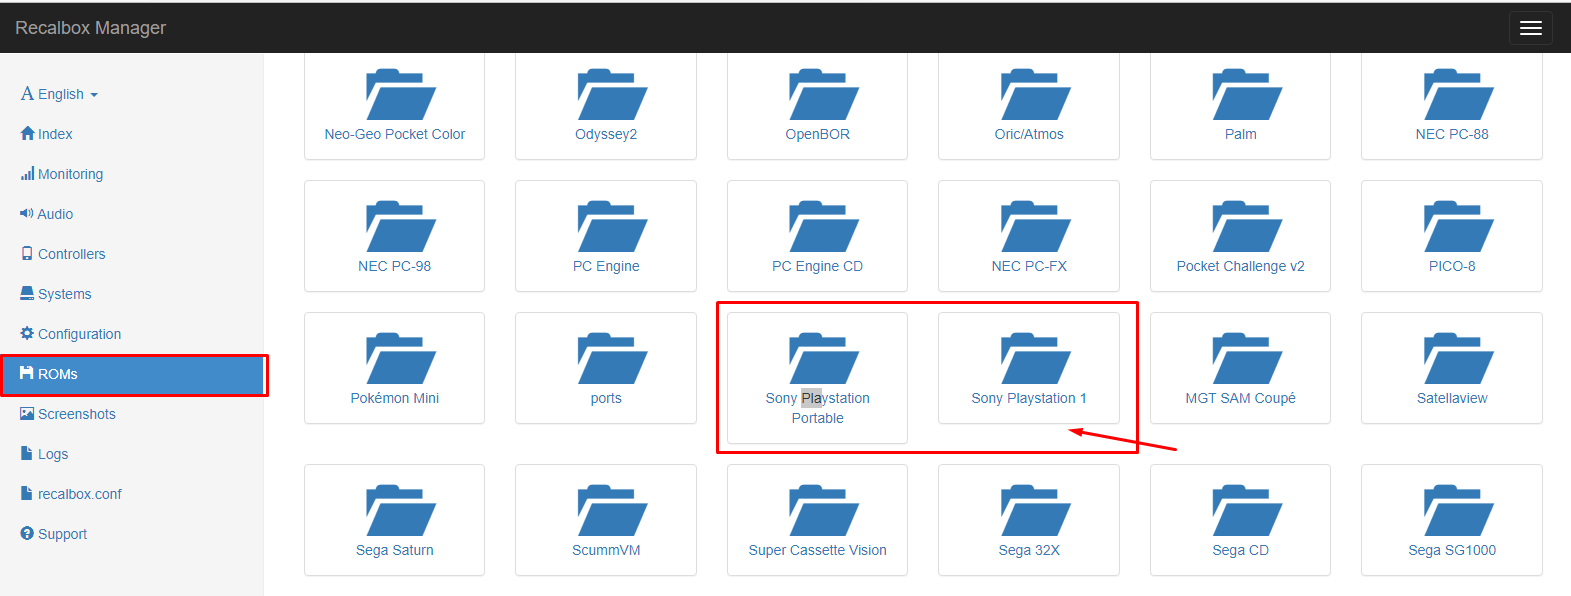
Step 13: Click on the “ROMs” option and there you will see Sony Playstation options on the screen.
Step 14: Download any PlayStation 1 game on your PC.
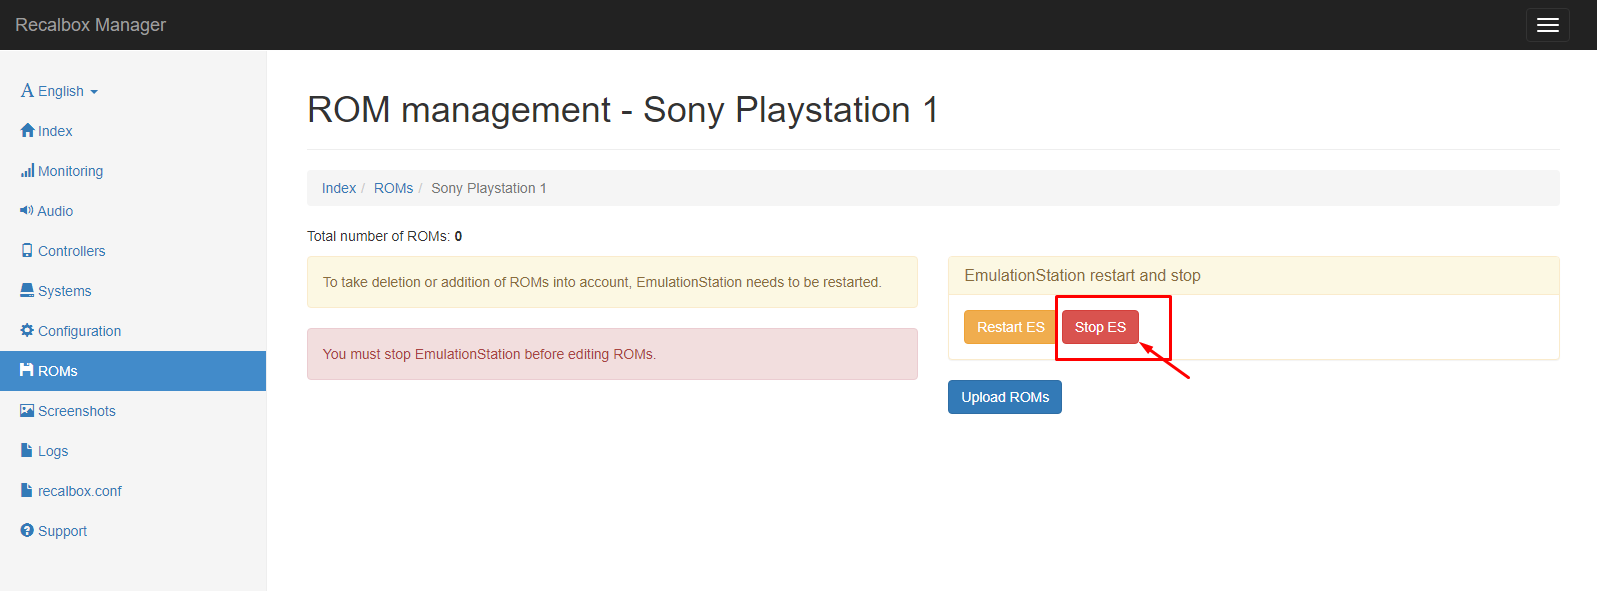
Step 15: Stop the emulation first and then upload Sony Playstation 1 ROM to Recallbox.
Step 16: Upload game ROM.
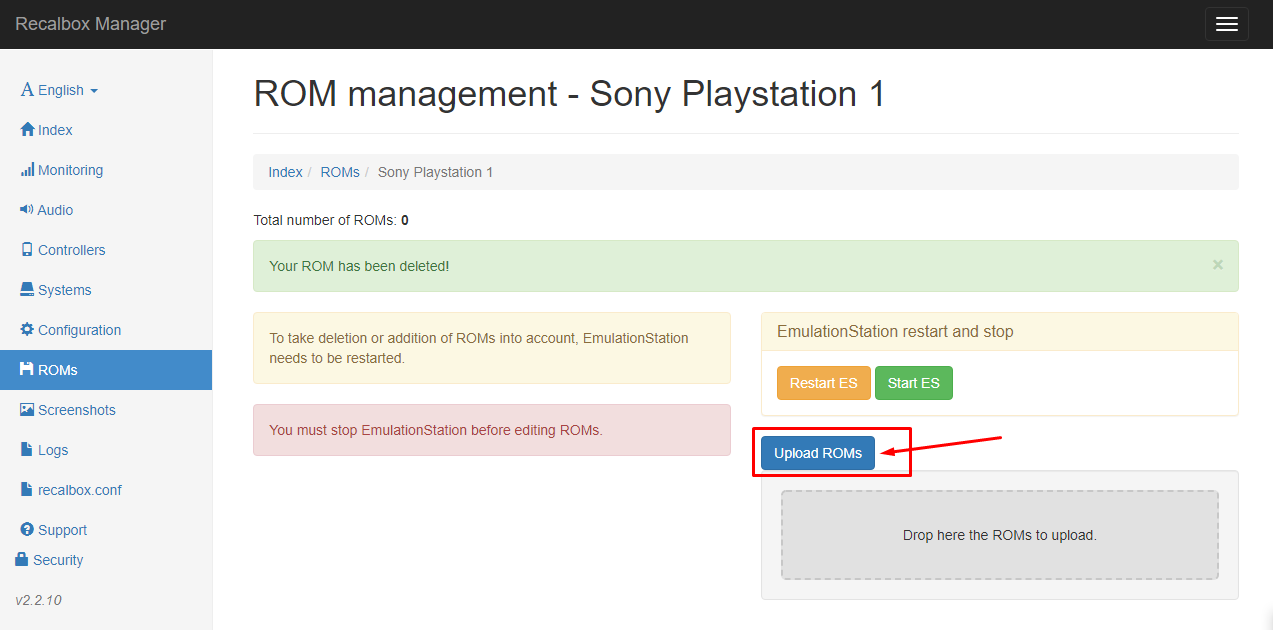
Step 17: Once ROM uploaded, Start ES again. However, there is another better way through which you can upload ROMs of greater size as the previous option won’t allow uploading a size greater than 500MB. In this case, you should need to perform the below steps.
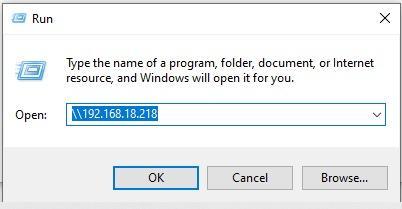
Step 18: Go to your PC and press “Ctrl+R” in order to open the run terminal and type “\\[RecalboxIPAddress]” and press “Enter”.
Step 19: In the next window, you will be required to provide your Recalbox credential and if you haven’t changed them you can simply write your username as “pi” and password as “raspberry”.

Once done, you will enter into the Recalbox network.
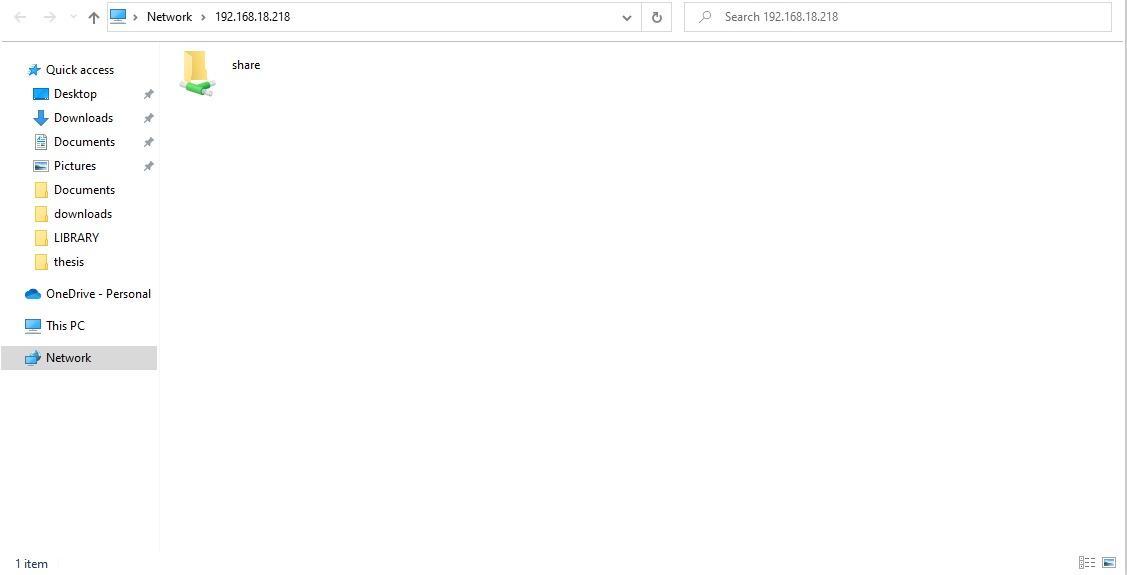
Step 20: Click on the “share” folder and there you will see different folders are already created and here you will need two folders bios and roms. In bios, you will need to put all the required bios files for PlayStation which can be downloaded from the internet. Once you download all the bio files, you will need to put these files into the folder.

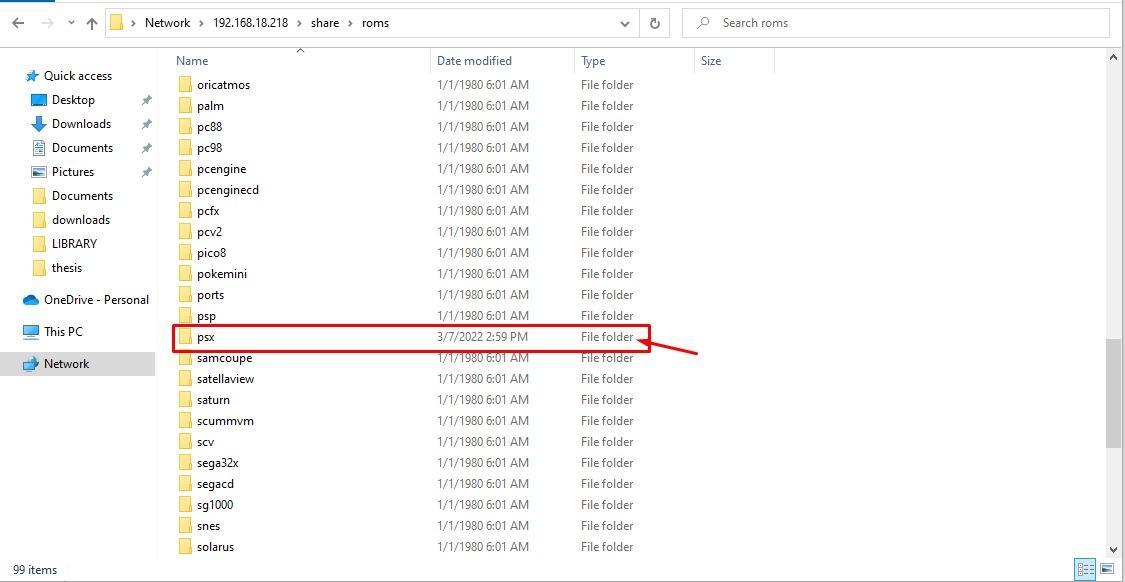
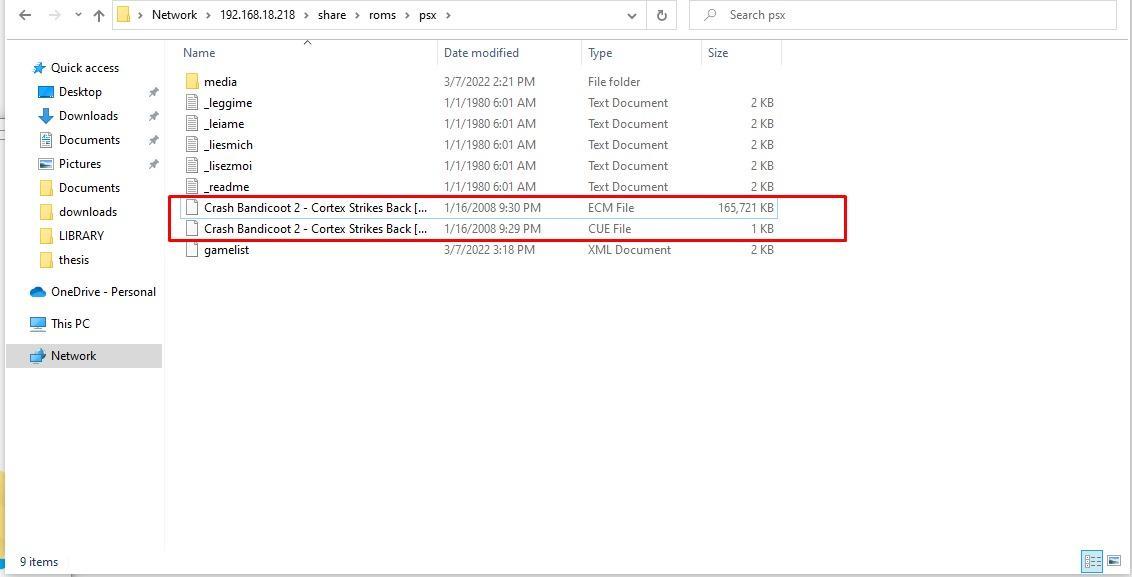
Step 21: In the ROM folder, you will need to put the games ROMs which you want to play. In our case, we have downloaded “CRASH BANDICOOT 2” ROM and placed it into the “psx” folder available in the ROMs folder.
Step 22: Once the above steps are done, restart the emulator and once it loads again, you will see the PlayStation option appear on your screen.

Step 23: Click on the PlayStation option from your controller or keyboard and there you will find your game.
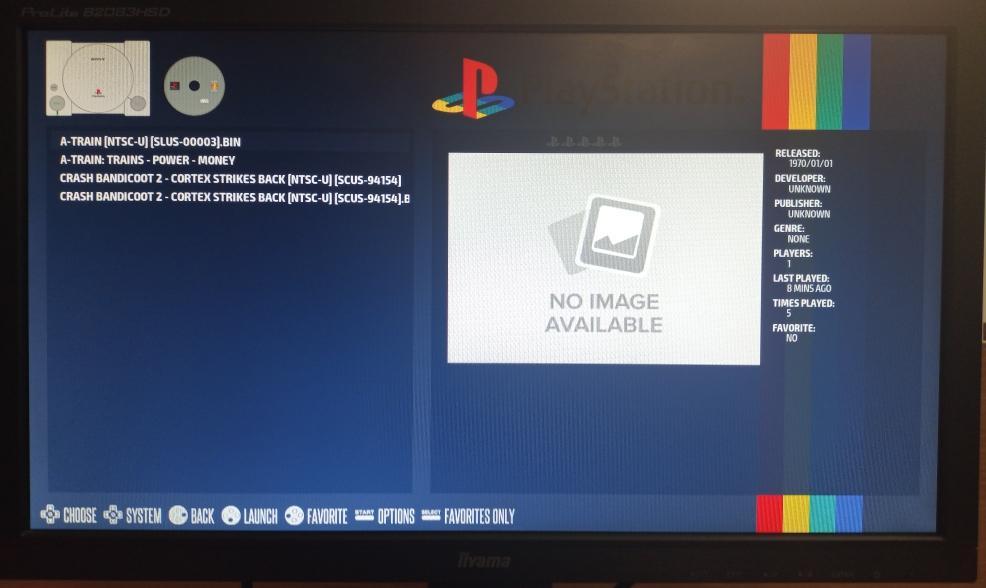
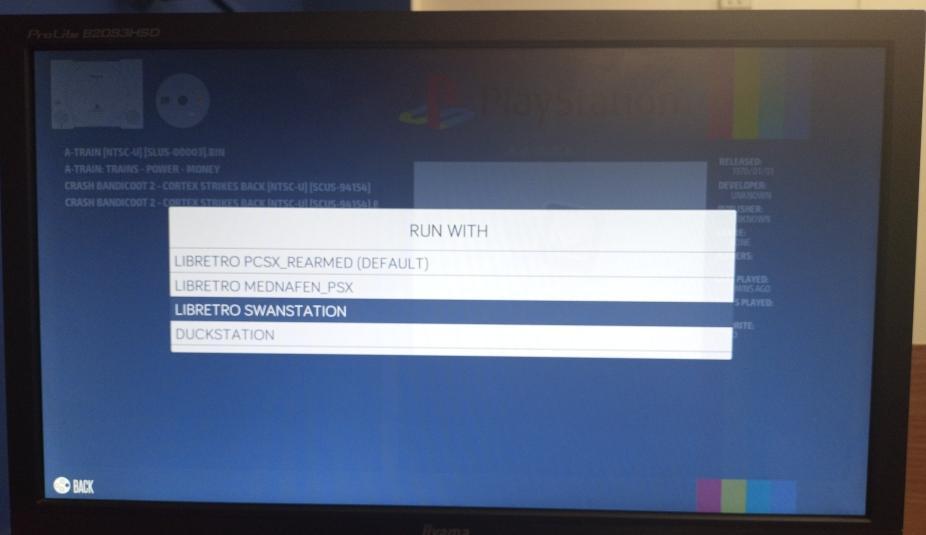
Step 24: Run the CRASH BANDICOOT 2 file with the ‘.bin’ extension. If you experience an error, you can change the emulator for the game from the menu option. In our case, it’s running on “LIBRETRO SWANSTATION.
Once you pick the right emulator, your game will begin and you can play it freely as now your Raspberry Pi device is turned into a playstation.

In this way, you can play multiple PlayStation games following the above steps.
Conclusion
Raspberry Pi is an awesome device for the game lovers who wish to utilize the device solely to play different video games. With the above steps, you will turn your Raspberry Pi into a classic PlayStation and with a good gaming controller in hands the experience of playing these games would reach its peak. The only thing you will need to ensure that all your bios files are put into the bios folder so that when you install other games, you won’t find any difficulty in running them.