If you are finding such an opportunity, you should try Citadel. It’s an open-source, powerful, versatile email server that lets you turn your Raspberry Pi into a personal email server.
In this guide, you will find the process to create and set up your own Raspberry Pi email server using Citadel.
Turn Raspberry Pi into an Email Server
If you want to set up an email server on your Raspberry Pi system, follow the below-mentioned steps that let you create your own email server.
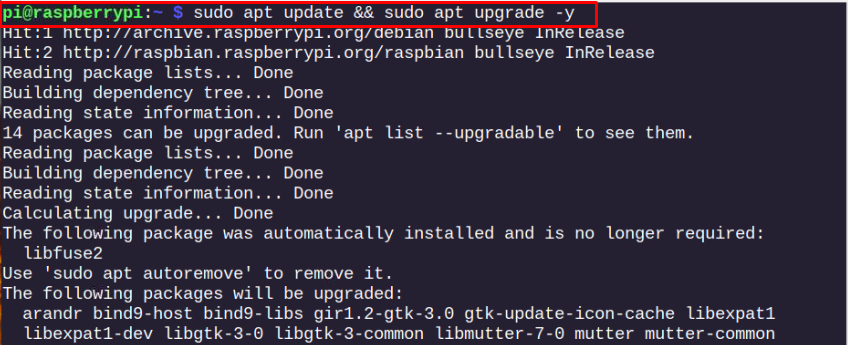
Step 1: Updating the Raspberry Pi Packages List
Before setting up the Citadel email server on Raspberry Pi, make sure your system is updated and if it’s not, try to update it through the following command:
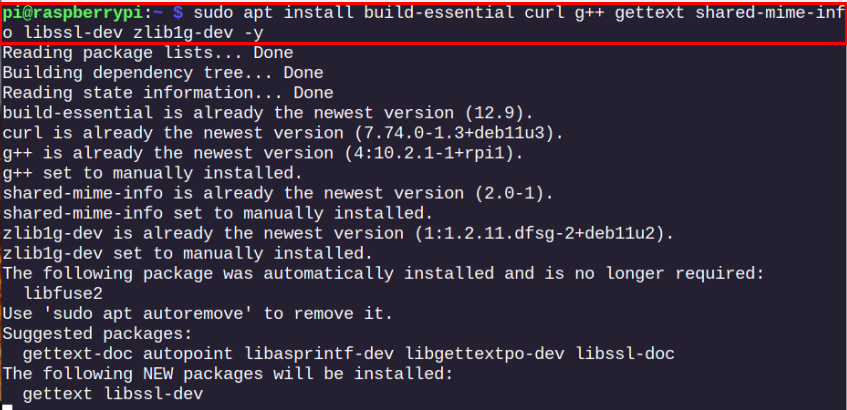
Step 2: Install Basic Tools Required for Running Citadel on Raspberry Pi
After the update, you must install some tools, which are required to operate Citadel on Raspberry Pi successfully.
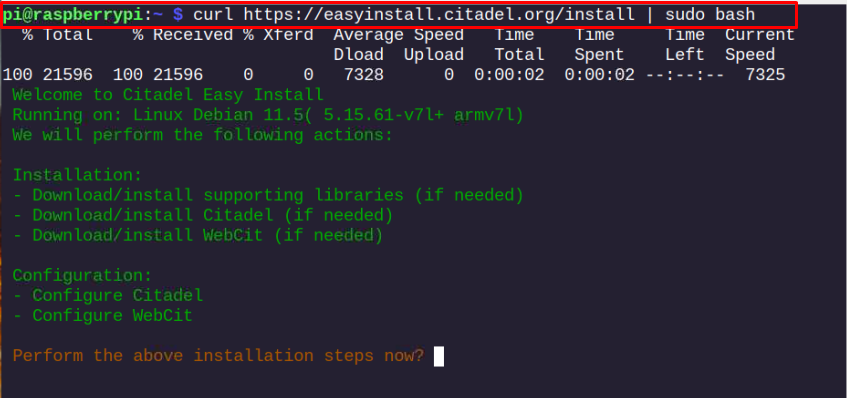
Step 3: Install Citadel on Raspberry Pi from Bash Script
Once you successfully install the required tools, you can now begin the Citadel installation on the Raspberry Pi system from the following script:
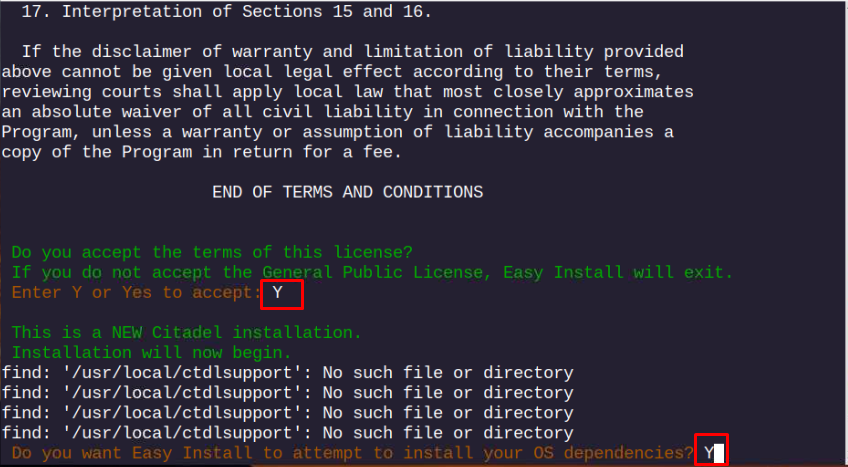
While running the above script, you will be asked several questions related to terms agreement and some dependencies installation. You must confirm with “Y” to allow the installer to continue installing Citadel on your Raspberry Pi system.
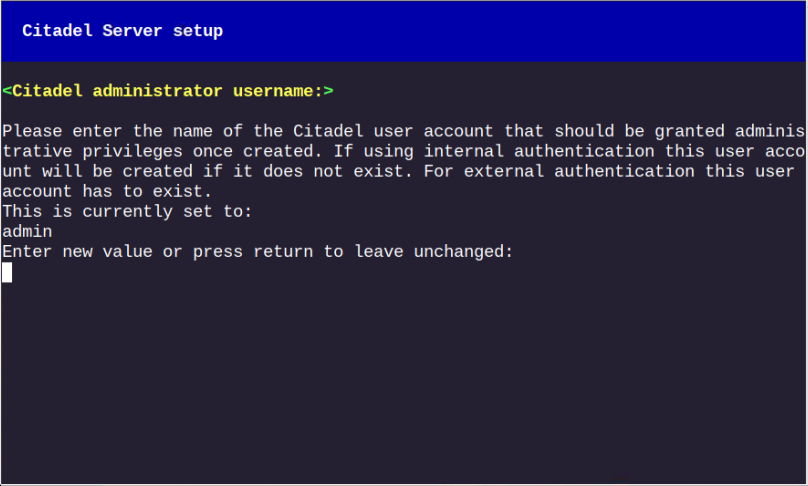
Step 4: Setting Up Citadel on Raspberry Pi
These steps should be done carefully and you must remember the username and password you set in this step.
When the Citadel Server setup window appears, you must set a username for your Citadel account. You can do this with the default option “admin”, or change it according to your choice.
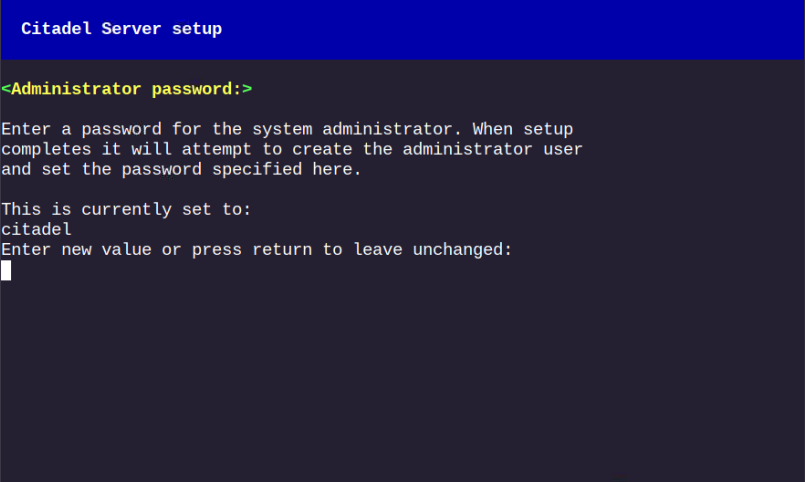
You may also need to provide a password for the Citadel account and you have to set the password by yourself or leave the password unchanged.
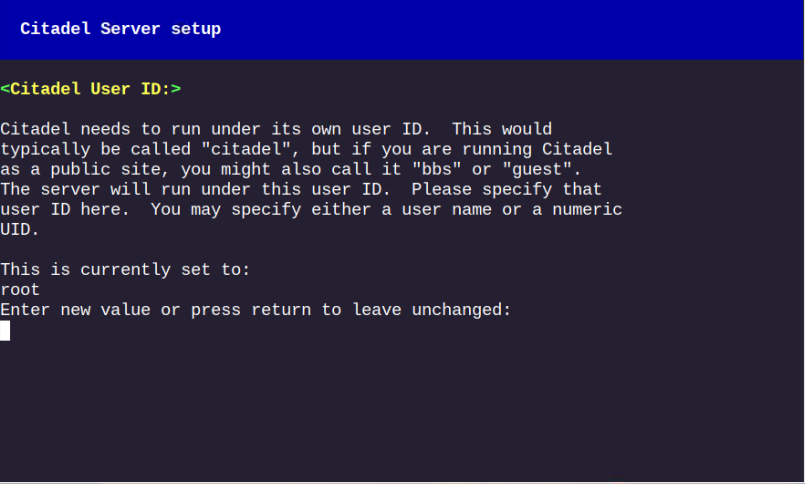
You can also leave the next option unchanged as well by pressing the enter button.
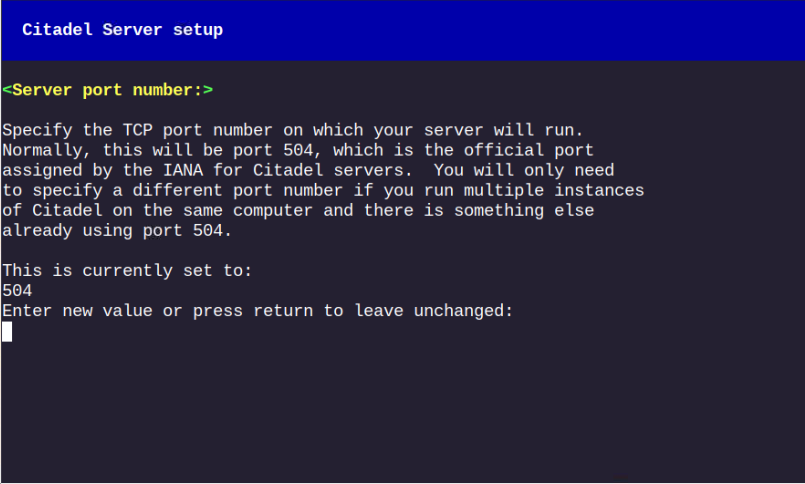
Go with the default port number “504”, which is the official port assigned to the Citadel server.
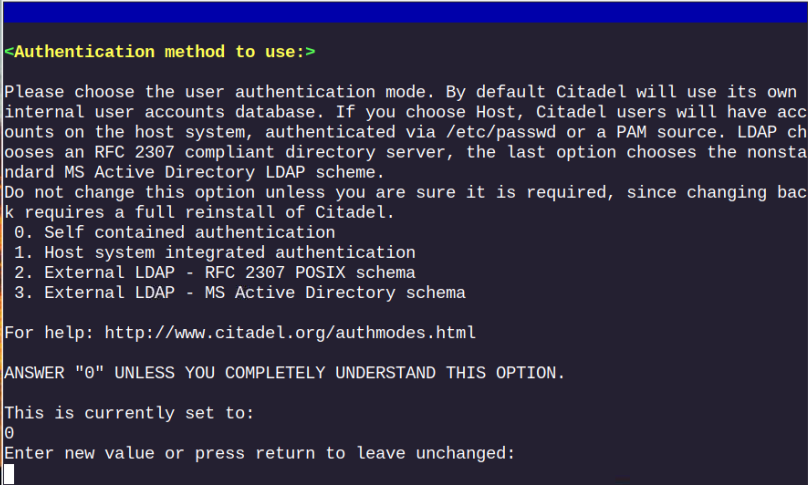
Further, you should go with the default option in this step, as mentioned in the guidelines that appears on the terminal.
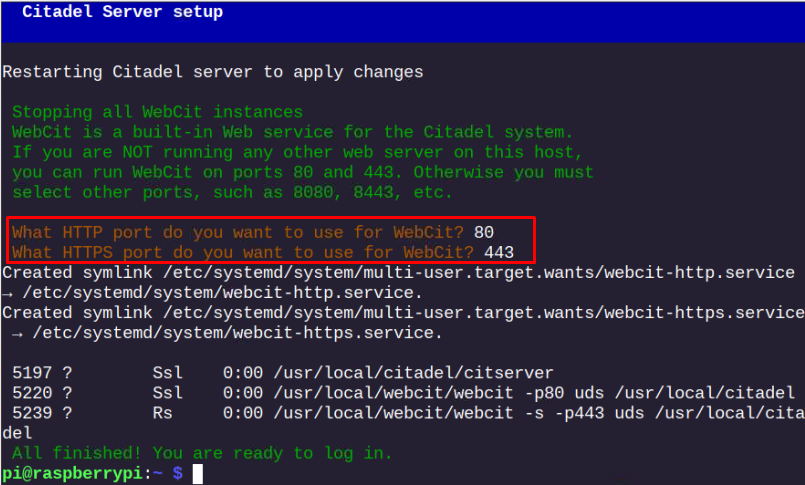
At the final setup phase, you should provide the default port numbers for using the HTTP and HTTPS connections for Citadel. However, you can select the default option unless you don’t have any other server running on your system because in that case, you must go with other options.
Step 5: Accessing Citadel Server on Raspberry Pi
After successfully completing the Citadel setup process, it’s now time to access the email server using the IP address of the Raspberry Pi device, which can be identified using the “hostname -I” command.
When the page loads, you will see the Citadel login screen and you must enter the username and password that you set during the setup phase.

Once you provide the required information, click on the “Login” button to open the Citadel dashboard on your browser.
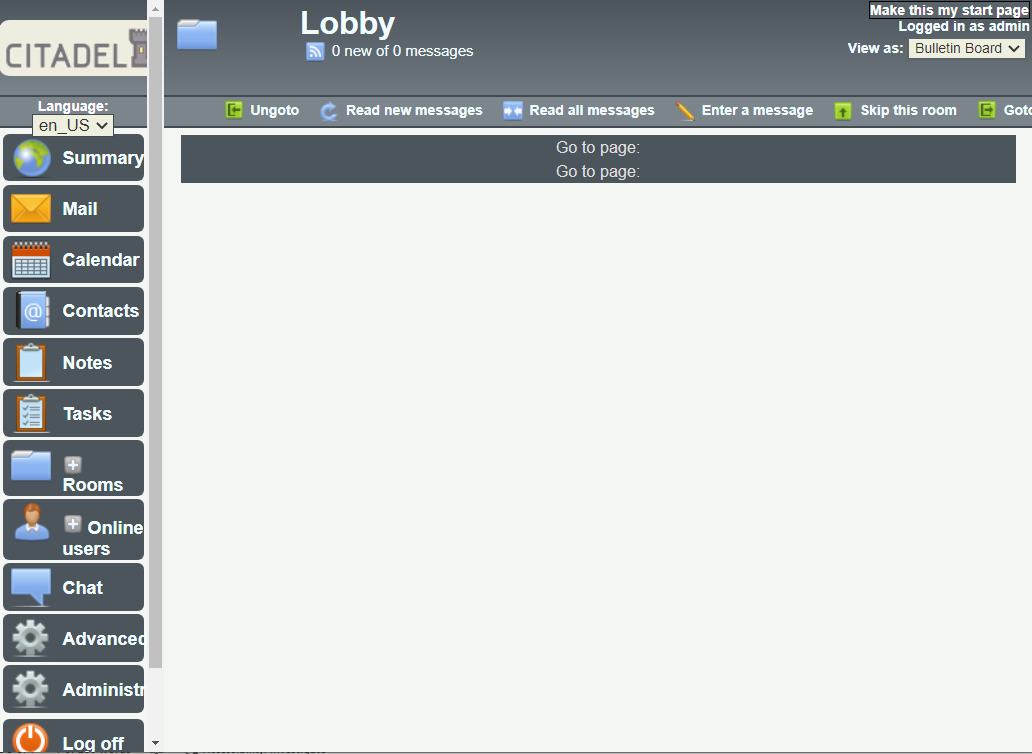
This moment confirms the successful setup of the Citadel email server on your Raspberry Pi system. For a detailed guide on how to prepare Citadel for sending emails, you can follow the official documentation provided here.
Conclusion
Citadel is a robust and lightweight email server that can easily be set up on your Raspberry Pi system. Before the installation, you should update packages and execute the script mentioned above to install Citadel on a Raspberry Pi system. The setup process involves a few configuration steps you must do carefully before accessing the web server on your system browser using the Raspberry Pi IP address. After the successful setup, you should need some basic understanding of how to set up the email server for sending emails. You can get this help from the documentation section of the above guidelines.