Electrum is an easy-to-use lightweight Bitcoin wallet that allows the users to share and receive bitcoins through external servers with a high level security feature to protect your crypto money. Its servers are decentralized and redundant, thus its wallet will never go down and will be an ideal choice for crypto lovers.
If you are looking for the right guidance to turn your Raspberry Pi into a Cryptocurrency wallet, then you should follow this article which will guide you in installing Electrum Wallet onto your Raspberry Pi device.
How to turn Raspberry Pi into Cryptocurrency Wallet
Turning your Raspberry Pi into a Cryptocurrency Wallet with Electrum will become a pretty simple task when you follow the step-by-step guidelines which are provided below.
Step 1: In the first step, you will be required to ensure that you have the Raspberry Pi OS on your device.
Step 2: Next, you will need a wallet software that will be installed on your Raspberry Pi device and for that we are using the Electrum Wallet.
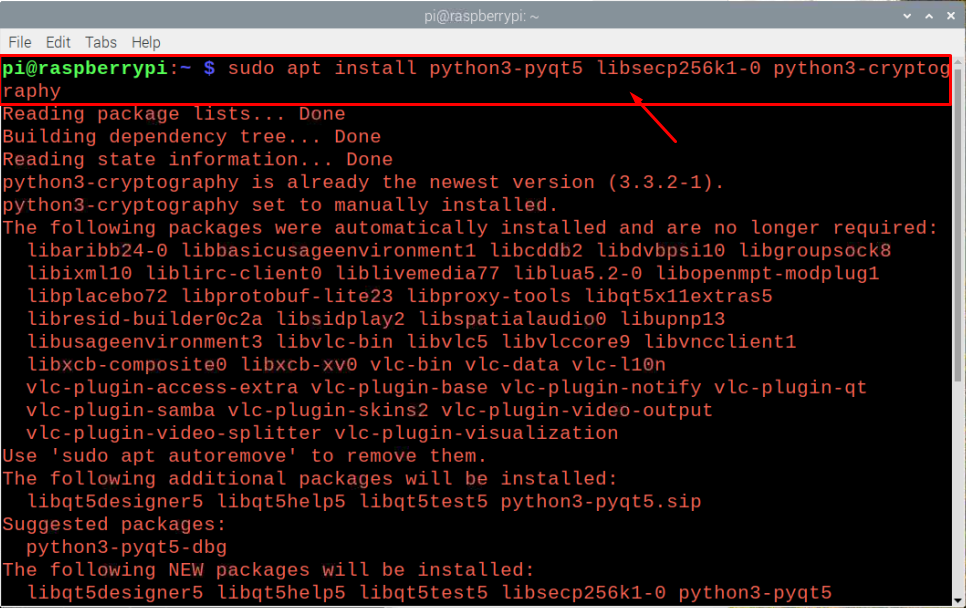
In order to install it, you will first install the required packages for your device using the following command.
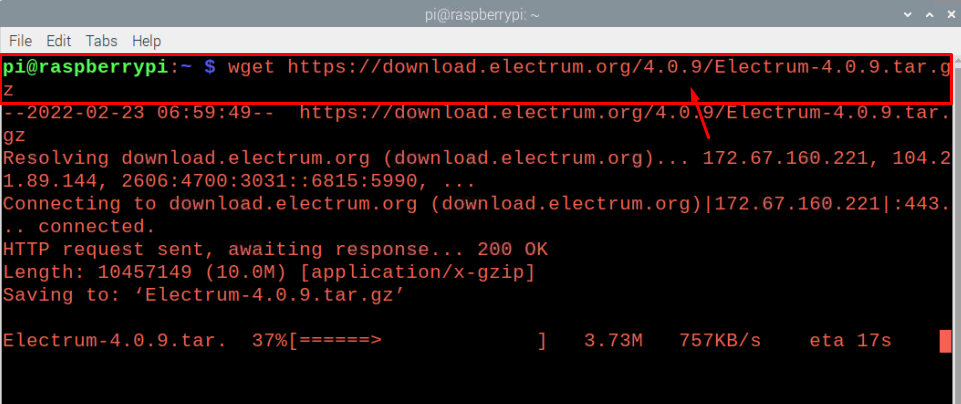
After a successful installation, it is now time to execute the following command in the terminal that will download the latest version of Electrum on your Raspberry Pi device.
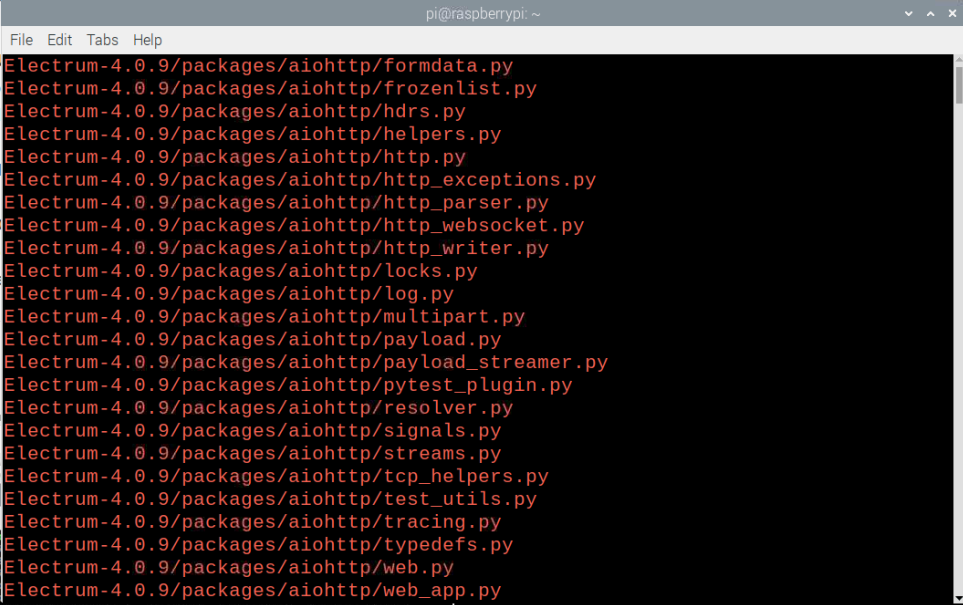
The above command will download the compressed file of Electrum and you will need to extract the file using the following command.
Step 3: Next, open the Electrum user interface through python by executing the below mentioned command in the terminal.
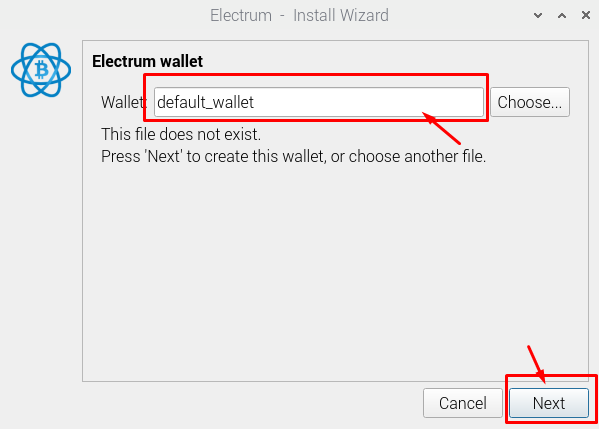
Step 4: Provide a suitable wallet name of your choice and then click on the “Next” option.
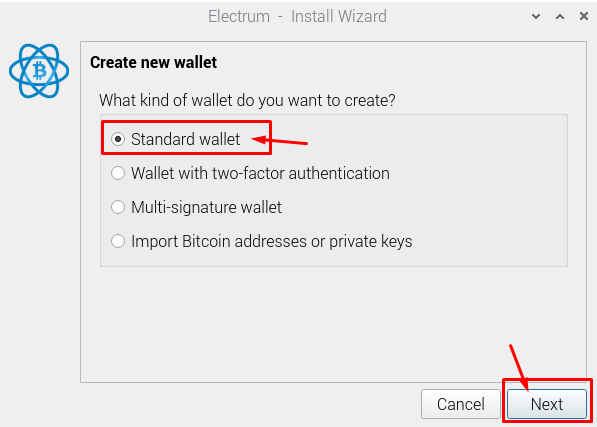
Step 5: Choose the option “Standard Wallet” since this is your first time on Electrum and move to the next step by clicking on the “Next” option.
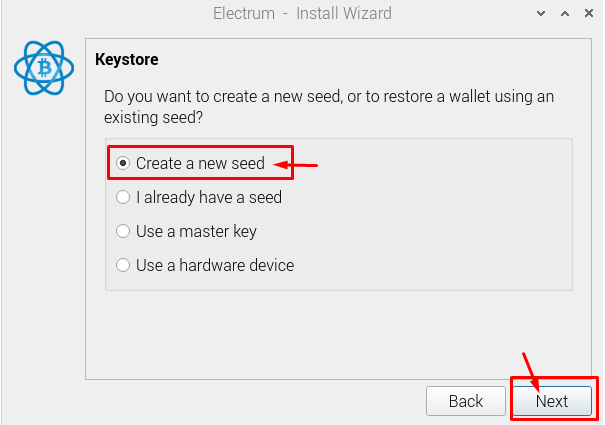
Step 6: Next, you will need to create a seed which is a list of words that will help you to recover your wallet. Choose the “Create a new seed” option and follow the next step with clicking on the “Next” option.
Step 7: Choose your seed type as “Legacy” as recommended by the Electrum and click on the “Next” option to move towards the next step.
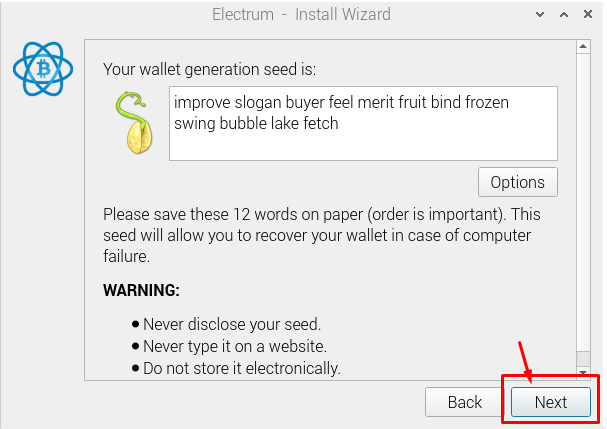
Step 8: Save the wallet seeds that appear next on the Electrum window and then move forward by clicking on the “Next” option.
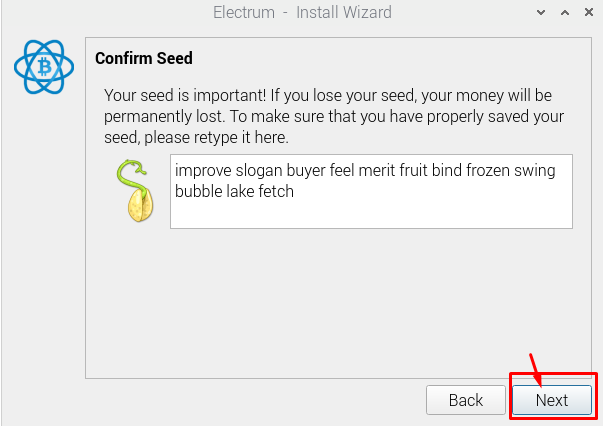
Step 9: Confirm it by typing the seed that appeared previously on your screen and then move on by clicking on the “Next” option.
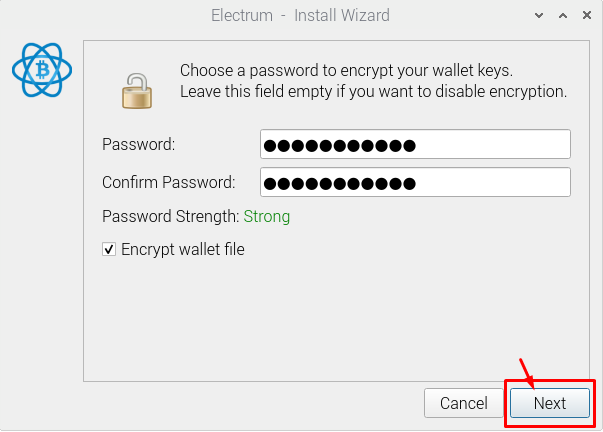
Step 10: Choose a strong password for your wallet.
As soon as your click on the “Next” option, your Electrum Wallet will be created on your Raspberry Pi device.
There you go, now you can easily send and receive amounts on your Electrum Wallet on your Raspberry Pi device as from now on your Raspberry Pi has turned into a Cryptocurrency Wallet.
Conclusion
Raspberry Pi is an incredible tool to be utilized as your hardware wallet and you can secure your cryptocurrency assets with this device without seeking for costly alternatives available in the market. The above steps will provide you enough guidance to start your Crypto journey and secure your wallet from the theft or malicious attacks by installing a lightweight and user friendly hardware wallet Electrum .

