Using the Arduino board, we can connect various input and output devices with the microcontroller. Buttons are mostly used as an input device with Arduino. Buttons can be interfaced with Arduino for performing different functions like changing the state of a device or entering any input for the Arduino program. In this guide, using the button as a toggle switch with Arduino we have changed the state of LED.
How to toggle LED using button
The toggle button is the button used to change the state of a device every time the button is pressed. To demonstrate the functionality of the toggle button we have created a circuit in which we have used LED as a device whose state is being changed whenever we press the button. The components that are required to toggle the LED using push button are:
- Breadboard
- Connecting wires
- LED
- Push button
- One 220-ohm resistor
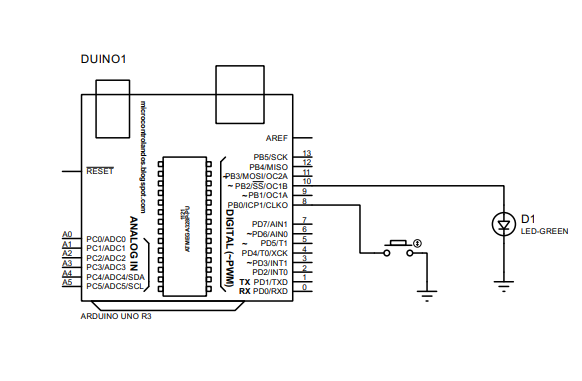
The image for the schematic of the circuit is posted below:
Hardware Assembly for toggling the LED using push button with Arduino
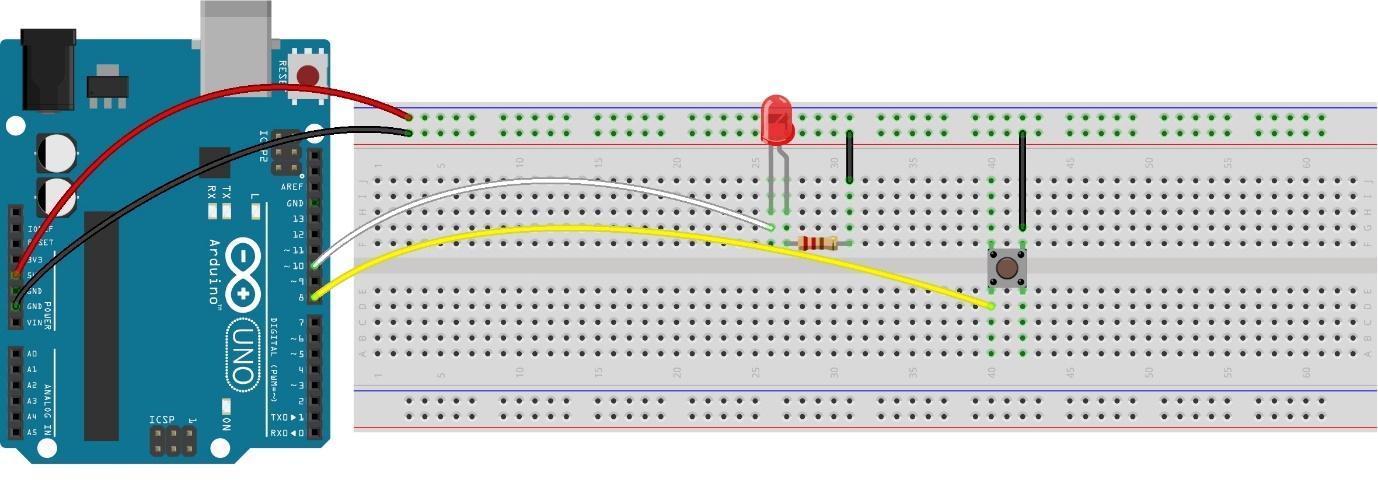
We have posted an image below for the hardware assembly of the circuit made for toggling the LED using the push button with Arduino. To assemble the circuit, we first placed an LED and push button on the breadboard and a resistor of 220 ohms is connected with the negative pin of the LED. Next the white and yellow wire connects the LED and push button to the Arduino Uno. Moreover, to ground the LED and push button we have used the ground of the Arduino Uno.
Arduino code for toggling the LED by push button
The Arduino code compiled for toggling the LED using push button is given below:
1 2 3 4 5 6 7 8 9 10 11 12 13 14 15 16 17 18 19 20 21 22 23 24 25 26 27 28 29 30 31 32 33 34 35 36 37 38 39 40 41 42 43 44 45 46 47 48 49 50 51 52 | int BUTTON = 8; /* Arduino pin assigned to button*/ int LED = 10; /*Arduino pin assigned to LED*/ int ledState = LOW; /* defining the current state of LED*/ int previousButtonState; /* variable for strong the previous state of button*/ int presentButtonState; /* variable for strong the current state of button*/ void setup() { Serial.begin(9600); /* initializing the serial communication*/ pinMode(BUTTON, INPUT_PULLUP); /* assigning PULL_UP mode to push button as an INPUT*/ pinMode(LED, OUTPUT); /* assigning the LED as an output device */ presentButtonState = digitalRead(BUTTON);/*reading the present state of the button */ } void loop() { previousButtonState = presentButtonState; /* Storing the last state of the button in the present state of button */ presentButtonState = digitalRead(BUTTON); /* reading the present state of the button*/ if(previousButtonState == HIGH && presentButtonState == LOW) {/* if the previous state is the HIGH and present state is LOW then */ Serial.println("The button is pressed"); ledState = !ledState; // change the state of the LED digitalWrite(LED, ledState); /* write that changed state to the LED */ digitalRead(ledState); if (ledState == HIGH){ Serial.println("LED is on "); } else{ Serial.println("LED is off"); } } } |
We have compiled the Arduino code in such a way that first we have declared the pins for the push buttons and LED. Next, we have declared some necessary variables for storing the states of the button and LED.
Coming to the loop function we have used the if condition to toggle the LED by reading the button state. The condition will check the present state and the previous state of the button and then invert the state of the LED using the not operation.
We have used the INPUT_PULLUP mode for the push button to stabilize its input and this mode inverts the output of the button by changing HIGH to LOW and LOW to HIGH.
Similarly, the if condition validates that if previously the button was in HIGH state and at present the button is in LOW state then change the state of the LED. This condition gets true as the button is pressed for the forest time because of the INPUT_PULLUP mode.
We have also displayed the output of the Arduino program on the serial monitor as well.
Hardware implementation for toggling the LED using push button with Arduino Uno
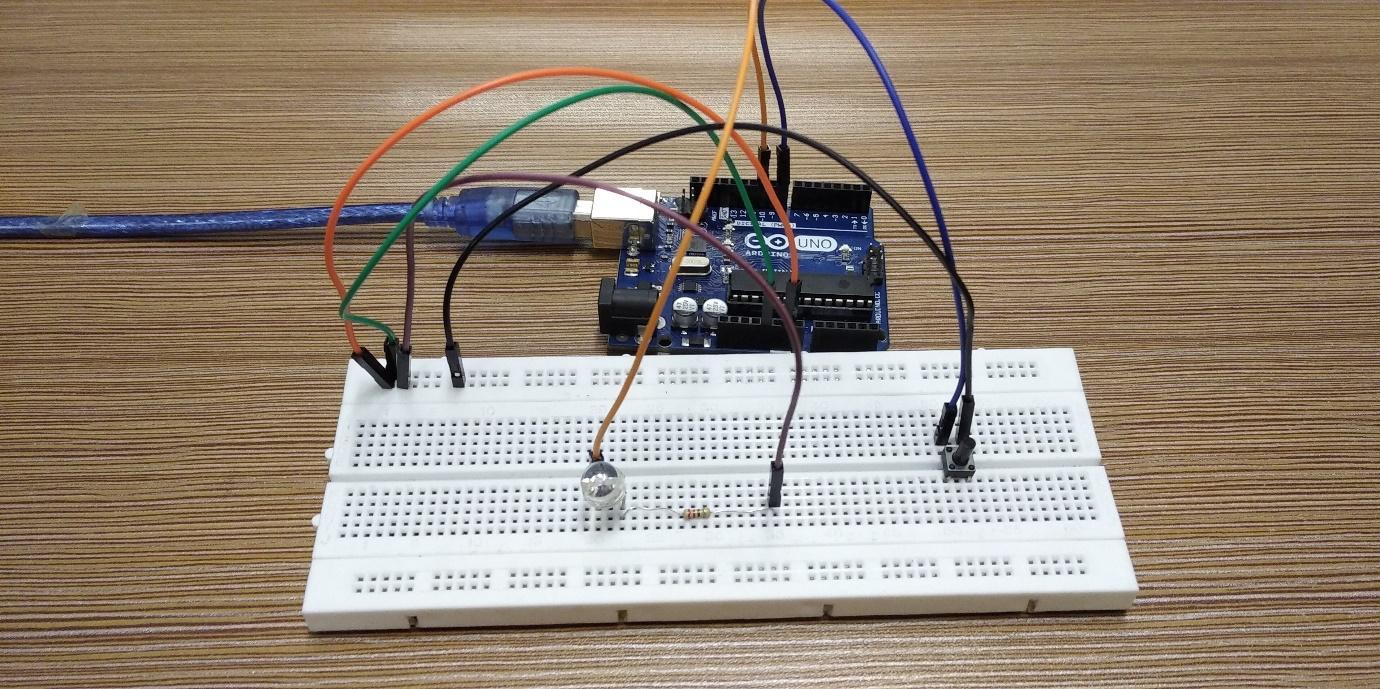
The image posted below is the hardware we made for creating a toggle switch for the LED and as we can see from the image below that right now the LED is off, and the push button is in HIGH state:

Now when we press the button the LED will turn ON and it can be seen in the image posted below:

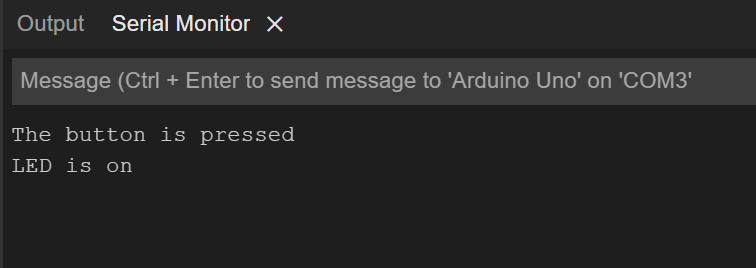
The image below shows the output on the serial monitor:
When we again press the button, the LED will turn off:
The output on the Serial monitor will be

Furthermore, we have provided an image which shows how to toggle the LED with a push button using Arduino.
Conclusion
There are a variety of projects that can be created using Arduino and since Arduino boards have made it easy to interface multiple input and output devices with microcontrollers. This has increased the number of projects that can be done using microcontrollers and we created a simple toggle switch for LED using the push button with Arduino Uno. Toggle switching assists in controlling or changing the state of the other device with one push button.